Pollo al Limone

IMG_5243sm

One of my go-to books for Neapolitan cooking is Naples at Tableby New York based food maven, Arthur Schwartz. The book is a veritable tome of authentic recipes gathered by the author during his travels in Campania, a region in southern Italy, the capital of which is Naples.

The “Introduction” provides a wealth of background information on the history and culture of the region and the prefaces to each of the book’s sections, as well as the many sidebars, are chockablock with culinary advice and guidance. Arthur’s encounters with home cooks personalize many of the recipes, like the one I chose for dinner last night: Pollo al Limone di Agata Lima (Agata Lima’s Lemon Chicken).

This dish does require some babysitting to ensure that the chicken pieces do not stick to the pan, but with good company in the kitchen and a glass of wine, the time passes quickly. I should also point out that since the recipe does not call for any browning of the chicken and all the cooking is done over a low flame, the chicken takes on only a pale-gold color. Nevertheless, the dish’s intense lemon and herb flavors compensate for any chromatic deficiency. In fact, the finished dish reminded me of many chicken or rabbit offerings on Italian trattoria menus labeled “in bianco.”

As you will see from my italicized parenthetical comments, I made very few departures from the original recipe. I substituted well-trimmed, skin-on, bone-in thighs for the cut up chicken because we prefer dark meat. I also added the zest of one of the lemons to intensify the citrus flavor.

I served the dish with some string beans which I had on hand, but I think a side of rosemary and garlic oven roasted potatoes would have been a welcome addition.

Pollo al Limone di Agata Lima
From Naples at Table by Arthur Schwartz
Serves 4 (at least)

1 3½- to 4-pound chicken, cut into 10 pieces (I opted for 10 well trimmed bone-in skin-on thighs.)
Salt
Freshly ground black pepper
4 or 5 large cloves garlic, lightly smashed
12 or more large sage leaves
2 or 3 6-inch sprigs rosemary, leaves stripped off the stem
½ cup dry white wine
2/3 cup freshly-squeezed lemon juice (I added the zest of one lemon.)
1 rounded tablespoon finely cut flat-leaf parsley

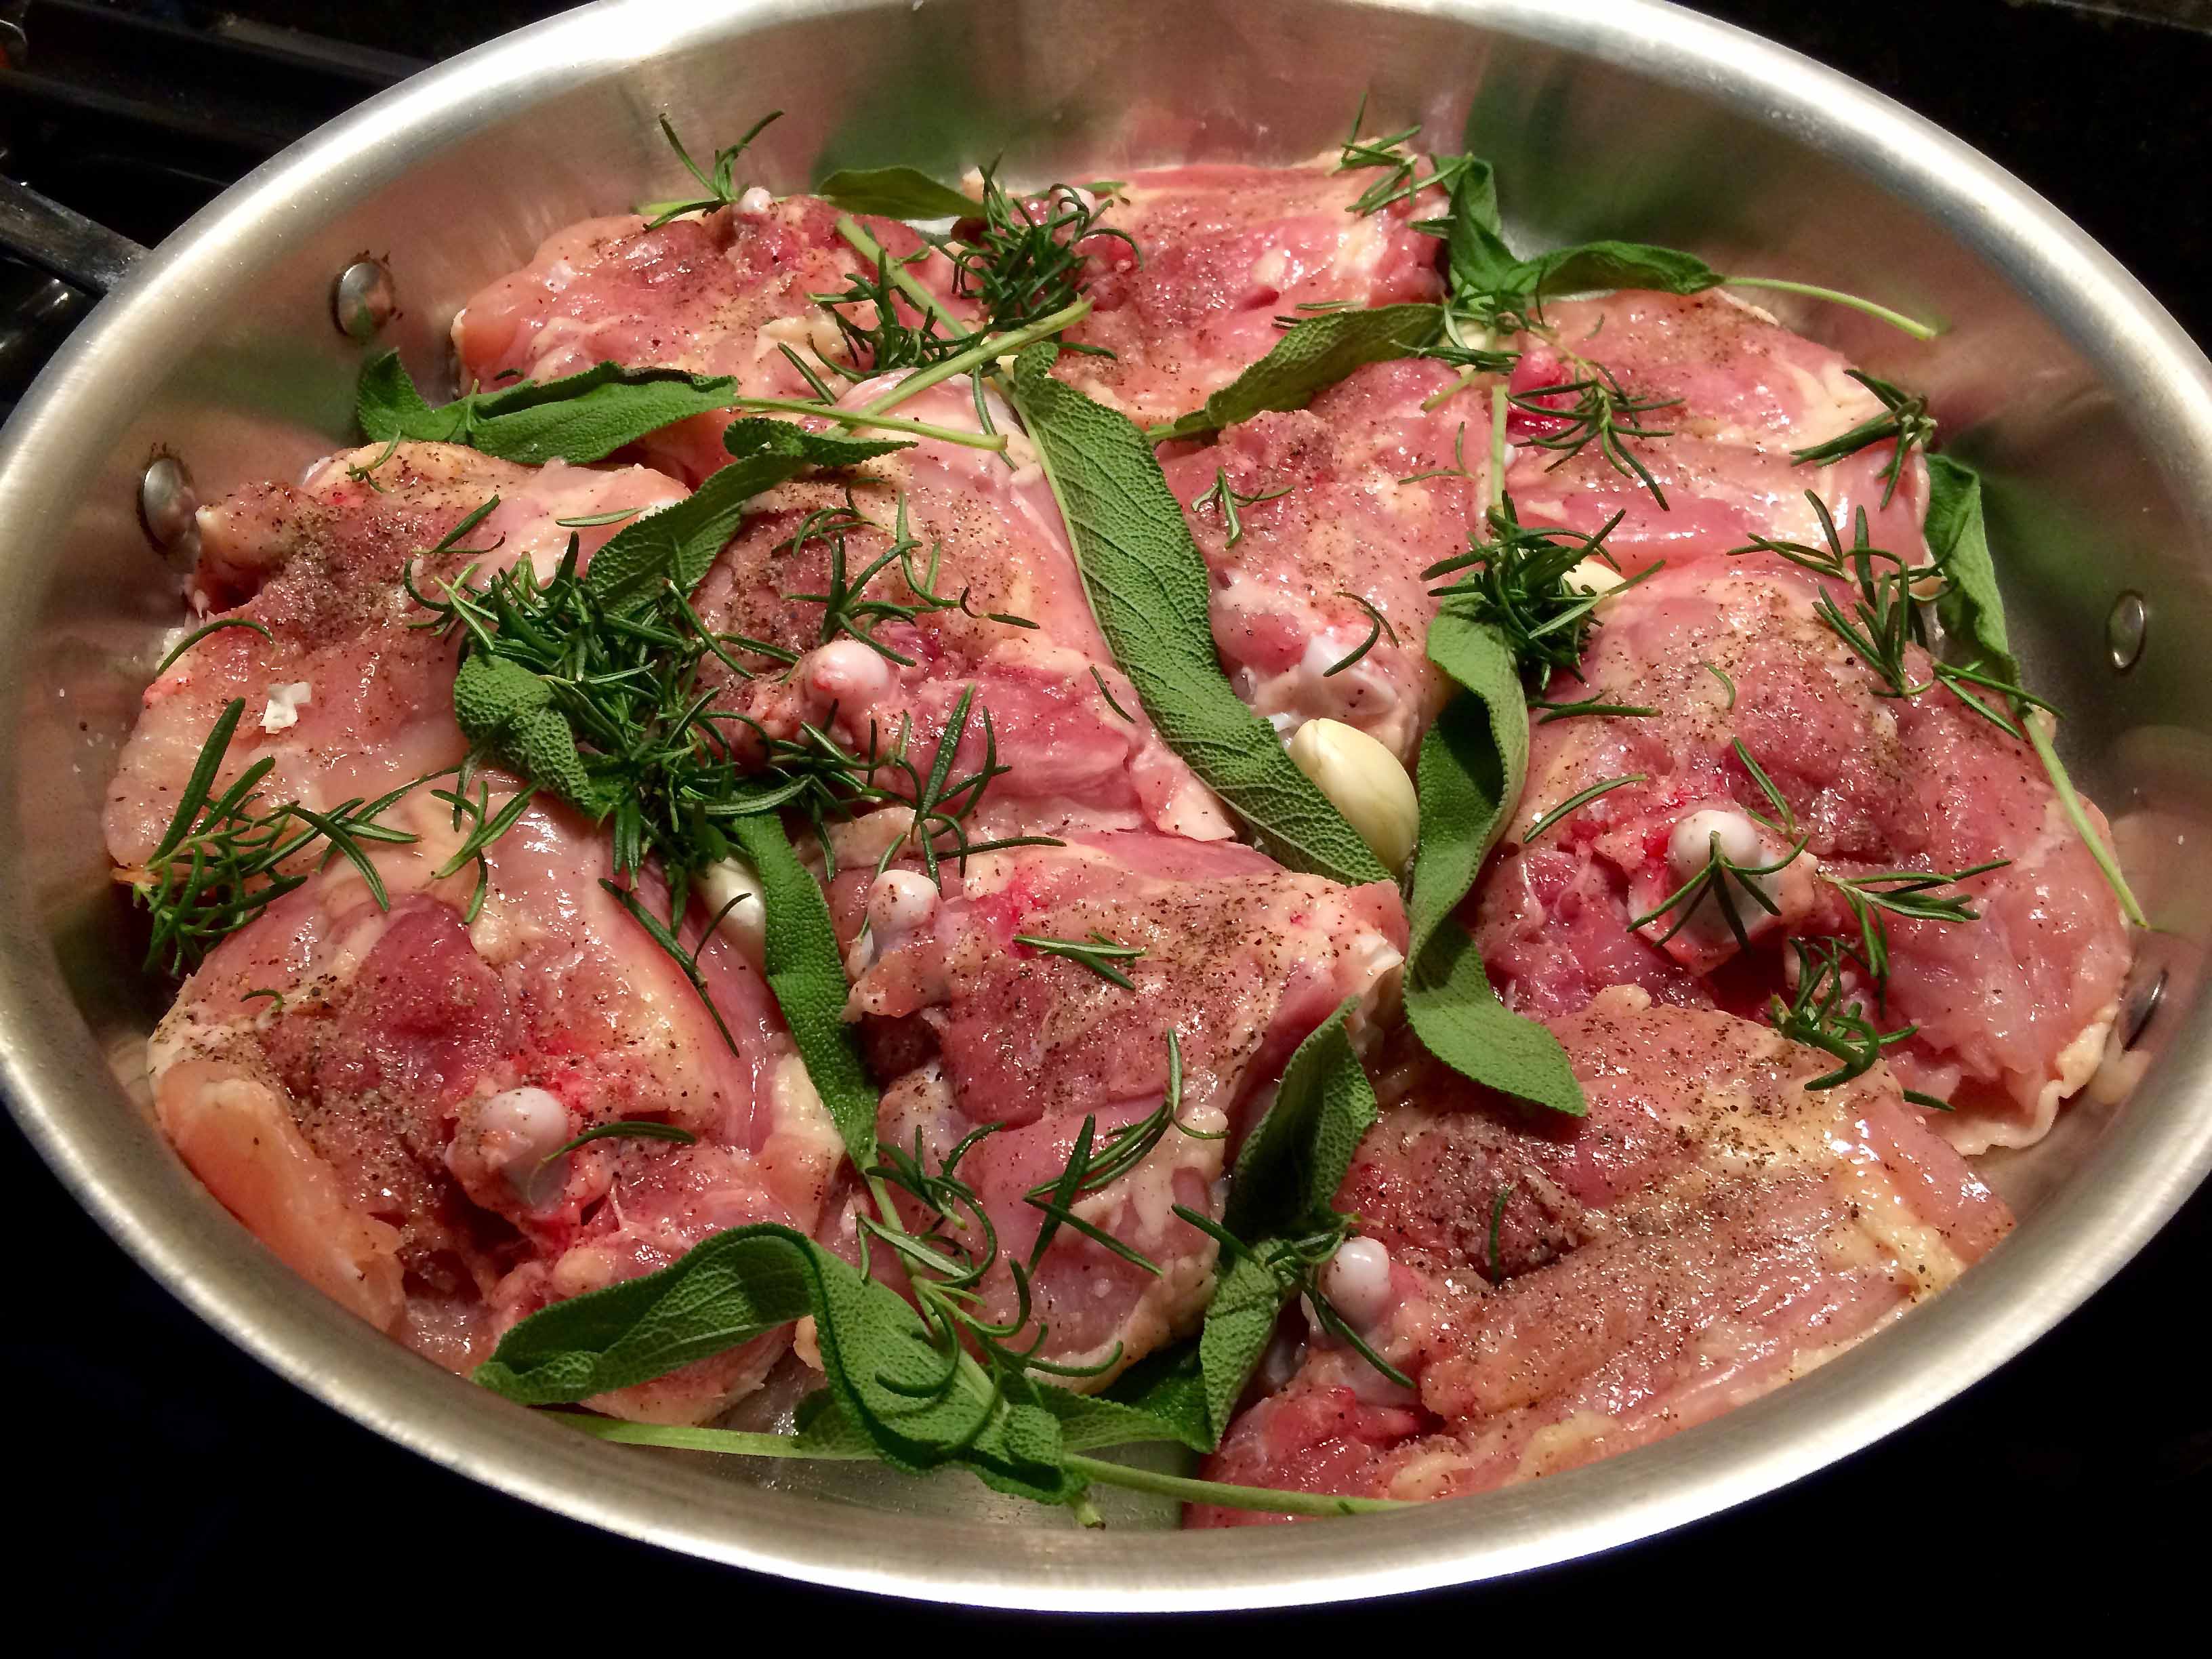
1. Season the chicken all over with salt and pepper.

2. Arrange the chicken (skin-side down) in a skillet or sauté pan that can hold it all in 1 layer – a 10- to 12-inch pan. The chicken may crowd the pan. Tuck in the garlic, the sage, and the rosemary. Do not add any oil or fat. (I cheated here and lightly misted my pan with some olive oil.)

Chicken with herbs and garlic

3. Set over low heat and continually shake the pan or jiggle the pieces of chicken so they don’t stick to the pan. After a few minutes, the chicken’s fat and juices will start running, and this will become less of a problem.

(Note: This first stage of cooking took approximately 10 minutes, which is the amount of time I waited between each of the subsequent turns of the meat.)

4. Turn the chicken pieces. Continue to cook over low heat, turning the chicken frequently. It will not brown, but will take on color. If the chicken juices accumulate in the pan, more than just skimming the bottom of the pan (because the chicken is particularly moist), increase the heat slightly.

Chicken after first turn

5. After about 15 minutes, when the chicken has taken on some color, add ½ the white wine. When the first addition of wine has nearly evaporated, in about 10 minutes, add the remaining wine. There should never be more than a skimming of liquid at the bottom of the pan. Keep turning the chicken frequently.

Chicken after second turn

6. When the second additional of wine has evaporated, add ½ the lemon juice (and, if using, the lemon zest). When the first addition of lemon juice has reduced, add the remaining juice. Altogether, the chicken will cook about 50 minutes. In the end there should be very little sauce – just a few spoons of reduced juices and fat.

Chicken with reduced wine and lemon juice

7. Arrange the chicken on a platter. Scrape whatever is left in the pan – herbs, garlic juices – into a strainer. With a spoon or spatula, Press the juices out of the solids and let them drip over the chicken.

Chicken on the platter

8. Serve hot, sprinkled with parsley. (As you can see from my photos, I forgot the parsley.)

Wine Pairing: Frascati, Fiano di Avellino

Pesto

IMG_5202sm

Pesto.  I vividly remember my introduction to this unctuous blend of basil, garlic, pine-nuts and cheese. It was in the fall of 1959 and my aunt had returned home from a two-month vacation in Italy. Among the many things she brought back with her were two small green-and-gold cans of something called “pesto.” They looked so plain compared to the cases of wine, boxes of candy, and a plethora of colorful souvenirs.

When I asked her about the cans, she told me that they contained “pesto,” a sauce for pasta. Now mind you, in our home, any sauce for pasta was made from scratch. And my aunt, a talented cook, had quite a repertoire of them. “Sauce from a can?” I said. “Yes,” she replied, “you’ll be surprised how good it is.”

Back in the late ’50s and even through the ‘60s, pesto did not enjoy the popularity it has today. As a result, I had no idea what to expect when a few days later she decided to prepare the dish for our family. When she opened the can and I saw the dark green gunk, all I could say was “Yuck!” She emptied it into a bowl, tasted it, and said it needed some help. She pureed some fresh garlic, grated some pecorino cheese, and stirred them into the sauce with a little olive oil. She re-tasted the sauce and judged it acceptable. “Aren’t you going to cook it?” “No, she said, pesto is never cooked.”

I went back to my homework and when called to the dinner table, I saw this platter of spaghetti laced with a vibrant green sauce.The other members of my family shared my skepticism about this pasta. My aunt, refusing to acknowledge any of us, proceeded to portion out the pasta and distribute the plates.

I watched my family slowly twirling the green strands of pasta onto their forks. No one wanted to be the first to taste it. “Mmmm, delizioso,” said my aunt. I had to admit the aroma of basil, garlic, and cheese made it easier for me to take my first mouthful. “Delizioso!” I said and my aunt just smiled. Most of my family agreed, except for my father, who insisted it would be better with some tomato. Thereafter, whenever we had pesto, my father’s was dressed with a few thin slices of a peeled San Marzano tomato.

After her two cans of pesto were gone, my aunt decided to turn to her copy of Ada Boni’s Talismano della Felicita for the traditional recipe. Back then, before the pesto craze in the ‘70s, it was the only way we could enjoy it.

Over the weekend, I had purchased some basil and forgot about until the other night. It was too hot to cook, so I thought it would be perfect night for pesto. For years, I’ve been following my own recipe based on my aunt’s, but wanting to try something new, I turned to Mario Batali’s Italian Grill. His recipe uses a food processor as opposed to the traditional mortar and pestle, and I have to admit that I prefer the texture I was able to achieve with it. But when using a food processor, you must be careful not to over process. Stirring in the cheeses after processing the basil also makes for an optimal texture.

Pesto Adapted from Mario Batali’s Italian Grill (makes about 1 cup)

3 garlic cloves
2 cups lightly packed fresh basil leaves, washed and dried
3 tablespoons pine nuts
Generous pinch of Kosher salt
1/2 cup extra-virgin olive oil
1/4 cup freshly grated Parmigiano-Reggiano
4 tablespoons freshly grated Percorino Romano

With the motor running, drop garlic into a food processor to chop it.  Pulse until the garlic is finely chopped. Add the basil, pine nuts, and salt and pulse until the the basil and nuts are coarsely chopped and then process until finely chopped. Be careful not to over process.

With motor running, drizzle in the oil. If the mixture is too thick, you may need to add a little more olive oil.

Transfer to a small bowl and stir in both Parmigiano and pecorino.

The finished pesto
The finished pesto

(The pesto can be stored in a tightly sealed jar, topped with a thin layer of extra-virgin olive oil, for several weeks in the refrigerator.)

This recipe makes enough sauce for a pound of pasta.

Wine Pairing: Vermentino

Mussels with Cream and Pernod

IMG_5159sm

Growing up, the only mussels I ate were served southern-Italian style, sauced with a hot marinara and accompanied by a thick bread biscotto to sop up the condiment. Today, it’s a dish I make quite often at home.

In the summer of my junior year in high school, however, I spent 14 weeks in France with a group of classmates, studying the language and serendipitously broadening my culinary horizons.

During that time, we were forbidden to speak English or to consume anything that wasn’t French. In fact, near the beginning of our stay, on a day trip through the Loire valley, our teacher and guide, a true Francophile Jesuit, went apoplectic at lunch when the restaurant, seeing us as tourists, brought out bottles of ketchup with our steak frites. “Enlever le ketchup!” (Remove the ketchup!) he demanded. The ketchup disappeared—alas.

We were studying at the University of Grenoble and took most of our meals in the school’s cafeteria. But when we were on our own, a few friends and I would venture into local bistros. It was on one of these days that I discovered a dish that would become one of my French favorites: moules au Pernod, mussels napped in a light sauce of cream, onions, and Pernod. The smooth anise-scented sauce provided the perfect counterpart to briny mussels.

It’s the perfect summer’s night entree, especially paired with a crisp Sauvignon Blanc, preferably a Sancerre, and a crusty baguette to get the last bit of sauce.

MUSSELS WITH PERNOD AND CREAM Adapted from Epicurious.com

Ingredients
Ingredients

1 1/4 cups leeks sliced 1/4-inch thick using only the white and pale green portion
1 1/2 cups Sauvignon Blanc or other dry white wine
1/4 cup finely diced red bell pepper
2 pounds mussels, scrubbed, debearded
1/2 cup heavy cream
Kosher salt
Fresh ground black pepper
4 tablespoons Pernod or other anise liqueur
3 tablespoons finely chopped fresh parsley

Combine the sliced leeks, wine, and bell pepper in large heavy-bottomed non-reactive pot. Bring to boil over high heat.

Leeks, peppers, wine

Add the mussels. Cover the pot and cook until mussels open, about 5 minutes, shaking the past once or twice.

With a slotted spoon, transfer the mussels to a bowl (discard any mussels that do not open).

The opened mussels
The opened mussels

To the pot, add the cream, salt and pepper to taste, and Pernod. Boil until liquid is slightly reduced, about 4 minutes. Mix in chopped parsley.

Making the sauce
Making the sauce

Return the mussels and any accumulated juices to pot. Simmer until mussels are warmed through, about 1 minute; adjust the seasoning. Serve mussels with the sauce.

The finished dish
The finished dish

Wine Pairing: Sauvignon Blanc, Sancerre

Italian Grilled Chicken

IMG_1141sm

Growing up Italian in the 1950s wasn’t too difficult in Brooklyn. After all about 50% of my neighborhood shared my ethnic heritage. But when my parents purchased a summer home in a private lake community in northern New Jersey, I began to understand the struggles that my family had when they first arrived in the United States.

The community where we spent most of our summers was predominantly WASP. My uncle Al had bought home there and was approved to join the community club largely because he was a physician. A few years later my father’s application was accepted for a similar reason, he was an attorney. Over time, more Italian families gained entrance, but somehow we were always regarded with some skepticism.

I recall sitting on our patio one afternoon as our neighbor, a long time member with staunch German heritage once commented to my mother and aunt how we were different from other Italians she knew. “You’re not what we expected,” she said. “No babushkas, not loud, not…”

When she left, I asked my mother how she could tolerate such talk. “That’s what prejudice is all about,” she said. “You’ll never change her. But don’t give her a chance to find fault with you.”

A few days later, my feisty aunt, however, decided to address our neighbor’s comments not so much with words, but with food. On our outdoor grill, she cooked a chicken that was marinated in olive oil, lemon, and plenty of garlic. As the chicken cooked, she basted it with the marinade using a parsley brush. Twenty minutes into the cooking, our neighbor came by asking what that lovely aroma was. My aunt escorted her to the grill and said “grilled chicken; it’s the aroma of garlic that you’re probably picking up. A recipe we brought over with us from the old country.”

After our neighbor left, my aunt said, with a subtle smile, “I think she got the message.”

The other evening I decided to recreate this recipe on our small outdoor electric grill.

Italian Grilled Chicken

2 lemons, zested and juiced

1 bunch parsley, coarsely chopped

2 garlic cloves, finely chopped or rasped

1/2 teaspoon crushed red pepper flakes

1 teaspoon Kosher salt

1 teaspoon freshly ground black pepper

1/2 cup extra virgin olive oil

3 to 4 pound chicken, spatchcocked and pressed flat, wing tips removed (Here’s a link to instructions for spatchcocking a chicken.)

  1. In a large bowl combine all the ingredients except the chicken and whisk until well combined. Set aside 1/4 of the marinade to used as a dipping sauce.
  2. Place the spatchcocked chicken in a gallon-size zip-lock bag and add the remaining marinade. Seal the bag and make sure the marinade is well distributed over the chicken. Allow to marinate in the refrigerator for 3 hours or so.
  3. Place the chicken in a two-sided hinged grilling basket to keep the chicken flat. Place on the grill skin side down, baste well with the marinade, and allow to cook for about 25 minutes. Turn the chicken, baste with remaining marinade, and cook for another 20 to 25 minutes.*
  4. Remove from the grill and let the chicken rest covered for 5 to 10 minutes. Cut into quarters and serve with the reserved marinade.

IMG_1159sm

*My cooking times are based on my small electric grill with the lid closed as much as possible. I’m not a grill master and you may need to adjust the cooking times based on your own experience with your grill.

Wine Pairing: Sauvignon Blanc

Slow-Cooked Beef with Juniper Berries

IMG_4998sm

As a child, I often accompanied my mother or my aunt when they went food shopping, which they did on an almost daily basis. Much to my chagrin, however, these excursions took considerable time since they opted to shop at small mom-and-pop stores rather than at the supermarket. Typically, we’d start at the salumeria for cold cuts and cheese, move on to the greengrocer for vegetables, and then end up at either the butcher or fishmonger. At each stop, they seemed to have a warm relationship with the proprietors, asking after their children, listening to their stories, offering them advice, or lending a sympathetic ear.

On one of these trips, it seemed to me that my mother was having a rather long talk with the butcher. She kept smiling and laughing, just a little too much I thought. After we left, I told her that I was going to tell dad that she was flirting with Tony. She grinned at me and said winking, “Maybe I do, just a little, but that’s how I get the best cuts.”

It’s then that I realized one of the reasons why my mother and aunt were always so pleasant with all the shop owners: they were sure to get the best ingredients for our family.

In Italian cooking, it’s essential that the basic ingredients, the prima materia, be of the highest quality because the cuisine is so minimalist. This was a continuing theme of Marcella Hazan’s cookbooks and it seems to have influenced her son, Giuliano. An example is his recipe from Every Night Italianfor beef slowly simmered with onions and juniper berries, which I prepared recently for a weekday supper and served with garlic-roasted potatoes and peas.

Slow-Cooked Beef with Juniper Berries adapted from Every Night Italian by Giuliano Hazan

2 tablespoons extra-virgin olive oil
1 1/2 cups onions, thinly sliced crosswise
2 pounds beef chuck, cut in 2 or 3 pieces so as to comfortably fit in the pot
1 teaspoon juniper berries, lightly crushed
2 tablespoons red wine vinegar
Salt
Freshly ground black pepper

Ingredients
Ingredients
  1. Choose a heavy-bottomed braising pot with a tight-fitting lid, preferably enameled cast iron, just large enough to accommodate the meat.
  2. Put the olive oil and the onions in the pot and place the meat on top. Add the crushed juniper berries, the vinegar, and season with salt and pepper.
  3. When you hear the contents of the pot bubbling, remove the lid and adjust the heat so that meat cooks at a very gentle simmer. Replace the lid and simmer until the meat is extremely tender when prodded with a fork, about 2 hours. You can begin checking it after 1 hour. If all the liquid evaporates before the meat is tender, add a little water.

    The seasoned beef
    The seasoned beef
  4. When the meat is done the sauce should be thick enough to cling to a spoon. If it is too thin, remove the meat and raise the heat until it has reduced.

    Beef after cooking
    Beef after cooking
  5. Slice the meat, return it to the pot to coat with the sauce, and serve.

Note: This dish may be prepared up to 3 days ahead of time and reheated over gentle heat with a 2 tablespoons of water.

Wine Pairing: Nebbiolo, Cabernet Sauvignon

Pressure Cooker Lamb & White Bean Stew

IMG_5082sm

Even in summer, I occasionally enjoy a hearty dish like stew—especially on a dark and stormy night or when life’s been unfair and only comfort food can make it better. On one of those days, an easy and relatively quick lamb and white-bean stew from Jacques Pépin’s Fast Food My Wayseemed to fit the bill.

What especially appealed to me about the dish is that it’s made in a pressure cooker and did not require browning the meat. Using the pressure cooker not only kept the kitchen cool but also made it possible to use dried beans without any overnight soaking.

Pressure Cooker Lamb and White-Bean Stew from Jacques Pépin Fast Food My Way
4 shoulder lamb chops (about 2 pounds total), trimmed of fat
1 1/2 cups (about 1/2 pound) dried white beans, such as navy or great northern, picked over and washed under cold running water (I opted for great northern.)
2 cups canned diced tomatoes
1 cup diced (1-inch) onion
1 cup diced (1-inch) trimmed and washed leek
2 tablespoons coarsely chopped garlic
1 sprig fresh thyme and 1 sprig fresh sage, or 1 teaspoon herbes de Provence (I used the thyme and sage.)
1 1/2 teaspoons salt
1 teaspoon freshly ground black pepper
2 teaspoon Worcestershire sauce
3 cups cold water

The lamb chops
The lamb chops

Put all the ingredients in a pressure cooker, cover tightly with the pressure-cooker lid, and cook over high heat until the gauge indicates that the stew is cooking on high pressure. Reduce the heat to low and cook the stew for 40 minutes. (I used an electric pressure cooker set on high and set the timer for 40 minutes.)

Beans, herbs, aromatics, and seasoning

Decompress the pressure cooker according to manufacturer’s instructions. I do mine in the sink so the steam is contained somewhat as it is emitted. Open the pressure cooker and let the stew rest for a few minutes until the fat rises to the surface. Spoon off and discard as much fat as possible and taste the stew for seasonings, adding more salt and pepper as needed. Serve hot. (After the 40 minutes cooking time, I let stew rest a few minutes and then used my pressure cooker’s quick release valve.)

In his introduction to the recipe, Pepin advises to use the full 3 cups of water so that the beans will cook properly. Consequently, this makes for a rather thin sauce that is perfect for sopping up with crusty bread or, as I did, with couscous.

Wine Pairing: Pinot Noir

Ricotta Gnocchi

ricotgn3sm

Whenever I approach my pasta board to make gnocchi, the Apollo 13 quote “Failure is not an option” comes to mind. But all too often, when faced with a dough that just won’t come together or with gnocchi as heavy as rocks, I tell myself “If at first you don’t succeed…” In my quest for perfect gnocchi, I’ve read endless recipes, watched numerous videos, and most recently attended a cooking class (a recent Valentine’s gift—was my better half hinting?)

I must admit that I have had some successful attempts, a few with potato gnocchi and some with those made with flour and water. And perhaps these successes were what motivated me to attempt ricotta gnocchi once again last night.

From my failures, I’ve learned that the key to pillow light gnocchi of any variety is using the minimum amount of flour. Too much flour will weigh down the gnocchi. For this reason, any recipe you use must yield to how the dough feels to your hand as you add the flour to the wet or moist ingredients. In the case of ricotta gnocchi, these are ricotta and egg.

The recipe I used called for 1 1/4 cups of flour for two cups of whole-milk ricotta and 2 large eggs.  The instructions suggested using a rubber spatula to blend in the flour in three parts. After adding the first third of the flour, however, I started to use my hands and bench scraper to work in the flour.

After the second third of the flour, the dough started to come together, so I went slowly with the last third, being careful to use a light touch and not overwork the dough. When i added the final third the dough was still a little moist. But rather than adding any more flour directly to the dough, I dusted my board with some bench flour and lightly rolled my ball of dough over it until the dough no longer felt sticky but was still soft and light.

Next comes cutting the ball of dough into quarters and rolling each quarter into a dowel or log that’s 5/8 inch in diameter. Here it’s important that your board  is scraped clean and dusted only  lightly with bench flour. Your hands also need to be clean—free of any dough. Also use the palms of your hands as opposed to your fingertips to roll out even logs of dough.

Cut raw gnocchi
Cut raw gnocchi

I like my gnocchi on the smaller side so I cut each log into 1/2 to 5/8-inch pieces.

I line a sheet pan with parchment paper and dust it with semolina flour to hold the cut gnocchi. The semolina keeps the cut pieces from sticking to each other.

Cooking is fast and simple. I use a squat 8-quart pot with heavily salted boiling water. Gently slide the gnocchi into the boiling water and cook for about 2 minutes, by which time they should have risen to the top. Using a spider or slotted spoon, I transfer the cooked gnocchi to a skillet with the heated sauce and gently toss.

ricotgn2sm
Cooked gnocchi waiting to be tossed

For the sauce, I used a variation on that included with the recipe, substituting a passata for the whole plum tomatoes and omitting the garlic.

To sum up, when it comes to making gnocchi, you need to rely on your hands to feel the dough to judge the optimum ratio of dry to wet, when you’ve used no more flour than is necessary to form the perfect dough. I guess ending on one more adage won’t hurt: practice makes perfect.

Meatballs

meatballssm

One of my fondest childhood memories is how my Neapolitan aunt Carlotta used to sneak me a meatball before I went to Sunday mass. She would start her sauce early in the day and the aroma would always wake me up—always earlier than I wanted. I would go downstairs to the kitchen, where she would be enjoying her morning espresso while her sauce simmered away. While I had breakfast, she’d let me taste the sauce on a crust of Italian bread and I would start longing for our Sunday afternoon dinner, which wouldn’t be served for at least another 7 hours.

After breakfast, I’d watch some television or read the Sunday comics and then return upstairs to get dressed for church. During this time, my aunt would still be in the kitchen cooking, often joined by mother, and they would work on the dinner until they would leave for a later mass than mine. Children’s mass was always at 9.

When I got back downstairs with only minutes to spare before I had to go—no run—to church, my aunt would whisper: “Roland, have a meatball.”

“But I can’t, I’m taking communion this morning.” (Church law had us fasting for at least an hour before the sacrament.)

“Nonsense,” she would say. “How could God mind just a taste? It’s our secret.”

And so I tasted and enjoyed. (Eve’s apple couldn’t have been more tempting.) And with my aunt’s wink of absolution, I’d run off to mass.

It was this remembrance that inspired me to make my aunt’s meatballs for supper yesterday. As she never used or wrote a recipe for them, I have to rely on my memory of watching her make them. There were just a few ingredients, but they were always so flavorful and so unlike those “spicy meatballs” made famous by the Alka-Seltzer commercial.

Zia Carlotta’s Meatballs
Ingredients
2 slices high-quality white bread, crusts removed
1/2 cup milk
1 pound ground chuck beef (20% fat)
1 large egg, lightly beaten
1/2 cup Pecorino Romano cheese
1/4 cup raisins
1/2 clove garlic, minced fine
1/4 cup Italian parsley, chopped fine
1/4 tsp fresh ground nutmeg
Salt and ground black pepper to taste
Olive oil for frying
Homemade tomato sauce (I use Marcella Hazan’s Tomato Sauce with Onion and Butter)

Directions
Soak the bread in milk for 10 to 15 minutes.

Using you hands, thoroughly squeeze the milk out of the bread. Discard the milk and reserve the bread.

In a large bowl, gently combine the beef, egg, cheese, raisins, garlic, parsley, nutmeg, salt and pepper. Add the bread and, using your hands, combine with the other ingredients until evenly distributed. Be gentle and do not overwork the mixture. Overworking the mixture will make your meatballs heavy.

Using wet hands, shape the mixture using your palms to create balls that are approximately 1.5 inches in size. You should have about 12 meatballs from this recipe.

In a skillet large enough to accommodate all of the meatballs in a single layer, add olive oil to approximately a 1/4 inch depth. Heat over medium heat. Carefully add the meatballs and fry turning occasionally until browned all over. About 10 to 15 minutes.

Using a slotted spoon, transfer the meatballs to a platter layered with paper towels to drain excess fat.

In a pot large enough to accommodate the meatballs, bring your sauce to a gentle simmer. Transfer the drained meatballs to the sauce and cook over low heat for another 10 minutes or so until cooked through.

Serve with spaghetti tossed with the sauce from the meatballs and sprinkled with grated Romano.

Wine Pairing: Chianti Classico

Pork Chops with Potatoes

valplatedsm

While pork chops may not live up to everyone’s idea of a Valentine’s Day dinner, for us they made the perfect late-night supper, especially when prepared as they were last night. We had seen them prepared a few weeks ago on the Cooking Chanel’s “French Food at Home” by Canadian chef Laura Calder and were eager to prepare them at home.

When we found the recipe on line, however, we were surprised by how many discrepancies there were between the television and website versions. For example, the online recipe calls for 4 fatty pork chops rather tan the 4 fat, thick chops used on the show. Similarly, the online version listed 1.5 pounds potatoes thinly sliced, while on television Calder specifically specified waxy potatoes sliced thick.

Consequently, I modified the recipe to follow the dish prepared on the show and was extremely pleased with the result. Although I had some reservations about cooking the chops for close to two hours, they came out perfectly succulent and tasty.

The next time I prepare this dish, I’ll probably use chops a little thicker than an inch and extend the cooking time a tad. But even if you only have inch-thick chops, you’ll enjoy this French country dish.

Pork Chops with Potatoes adapted from Cooking Channel Chef Laura Calder
INGREDIENTS
4 thick bone-in rib pork chops (a least 1-inch thick)
2 cloves garlic, sliced (try to have 3 slices per chop)
Kosher salt and freshly ground black pepper
1 tablespoon extra virgin olive oil
1 tablespoon butter
1 1/2 pounds waxy potatoes, peeled and sliced thick, about 1/2 inch
1 large sweet onion, sliced 1/4 inch
2 to 3 thick slices bacon, cut into 1/4 inch lardons
1/2 teaspoon juniper berries
1/2 cup dry white wine
1/2 cup chicken stock
Chopped fresh parsley, for garnish

The chops and other ingredients

DIRECTIONS
Pre-heat the oven to 325 degrees.
Cut 2 to 3 slivers along the fatty edge of each pork chop and slide in the slices of garlic.

Heat the oil and the butter in skillet large enough to accommodate the 4 chops on high heat. Season the chops with salt and pepper and brown them well, about 3 minutes per side.

Browning the chops
Browning the chops

Transfer the chops to a plate and deglaze the pan with a splash of white wine. Transfer the pan juices to a large enamel-cast iron Dutch oven.

Arrange half the potatoes and onions over the pan juices in the Dutch oven. Season with salt and pepper lay two chops on top of the potatoes and onions.

First layer of potatoes and onions

Then stack the remaining two chops on top of the chops in the pot. Scatter the bacon and juniper berries over the stacked chops.

Stacked chops
Stacked chops

Cover with the remaining potatoes and onions. Season this layer with additional salt and pepper. Pour over the wine.

Cut a piece of parchment to fit over the potatoes and pork chops and lay it in on top.

Bake the dish for about 1 hour and 45 minutes (longer if using thicker chops), pouring in the chicken stock halfway through baking. Sprinkle with parsley to serve.

After cooking
After cooking

Wine Pairing: Brunello di Montalcino

Stewed Sausages with Fennel and Tomato

fensausageplatedsm

Owing to our work schedules, Saturdays are typically filled with running errands and housekeeping. As a result on these days, I often look for dishes that are relatively easy to prepare and that can cook on their own while we catch our breath and linger over an aperitivo.

I came across this recipe on the Food and Wine website and thought it would be perfect for a wintry Saturday evening. Including prep, it only requires about an hour and a half and as the sausages cook, the aromas tantalize the appetite.

I’ve modified the original recipe slightly, reducing the number of sausages to 6 from 12 and the number of fennel bulbs from 3 to 2. The recipe recommends serving with creamy polenta and here, I opted for a quick-cooking 5 minute version.

The prep
The prep

Stewed Sweet Sausages in Fennel-Tomato Sauce adapted from Food and Wine.com

1/4 cup extra-virgin olive oil
6 sweet Italian sausages (about 2 pounds)
2 large fennel bulbs—trimmed, each bulb cut into 8 wedges, fronds chopped
1 medium onion, chopped
4 garlic cloves, minced
1/2 teaspoon fennel seeds, crushed
Kosher salt
One 28-ounce can San Marzano whole tomatoes, crushed, juices reserved
1 cup dry white wine
2 whole chiles de árbol

In a large enameled cast-iron casserole, heat the olive oil. Add the sausages and cook over medium heat, turning, until nicely browned all over, 5 minutes. (Don’t rush this step, but also be careful not to overcook the sausages at this point.)

Transfer to a plate.

fensausagebrownsm
Browned sausages

Add the fennel wedges to the casserole and cook over moderate heat, stirring, until golden, about 5 minutes.

Browning the fennel
Browning the fennel

Add the onion, garlic, fennel seeds and 1 teaspoon of salt and cook, stirring, until the fennel is lightly browned, about 3 minutes.

fensausagefenonionsm
After adding the onion and garlic

Add the tomatoes and their juices, the wine, and chiles.

With the tomatoes, wine, and chili
With the tomatoes, wine, and chiles

Tuck the sausages into the sauce.

fensausagefinsm
During the last 45 minutes of cooking

Cover and cook over low heat for 15 minutes. Uncover and simmer until the sausages are cooked through and the sauce is thickened, about 45 minutes longer.

Garnish the stew with fennel fronds and serve over polenta.

Wine Pairing: Dolcetto d’Alba, Merlot