During this pandemic and while sheltering in place, my husband and I have been struggling to make room in our over packed freezer. One by-product of this effort has been the “mystery meal,” something frozen so long ago that we don’t know what it is. Sometimes even after opening the container, we’re not able to identify it.
This Saint Patrick’s Day was the first time I ever made corned beef and cabbage. Its debut at our table can only be attributed to our supermarket’s almost giving it away at a ridiculously low price and my better-half’s sneaking it into our grocery cart.
Being Italian and having attended a predominantly Irish parochial school in the 50s, I remember that Saint Patrick’s Day typically led to some kind of minor altercation between the Irish majority and the Italian minority, with the latter opting to celebrate their saint’s day, Saint Joseph, two days later on the 19th.
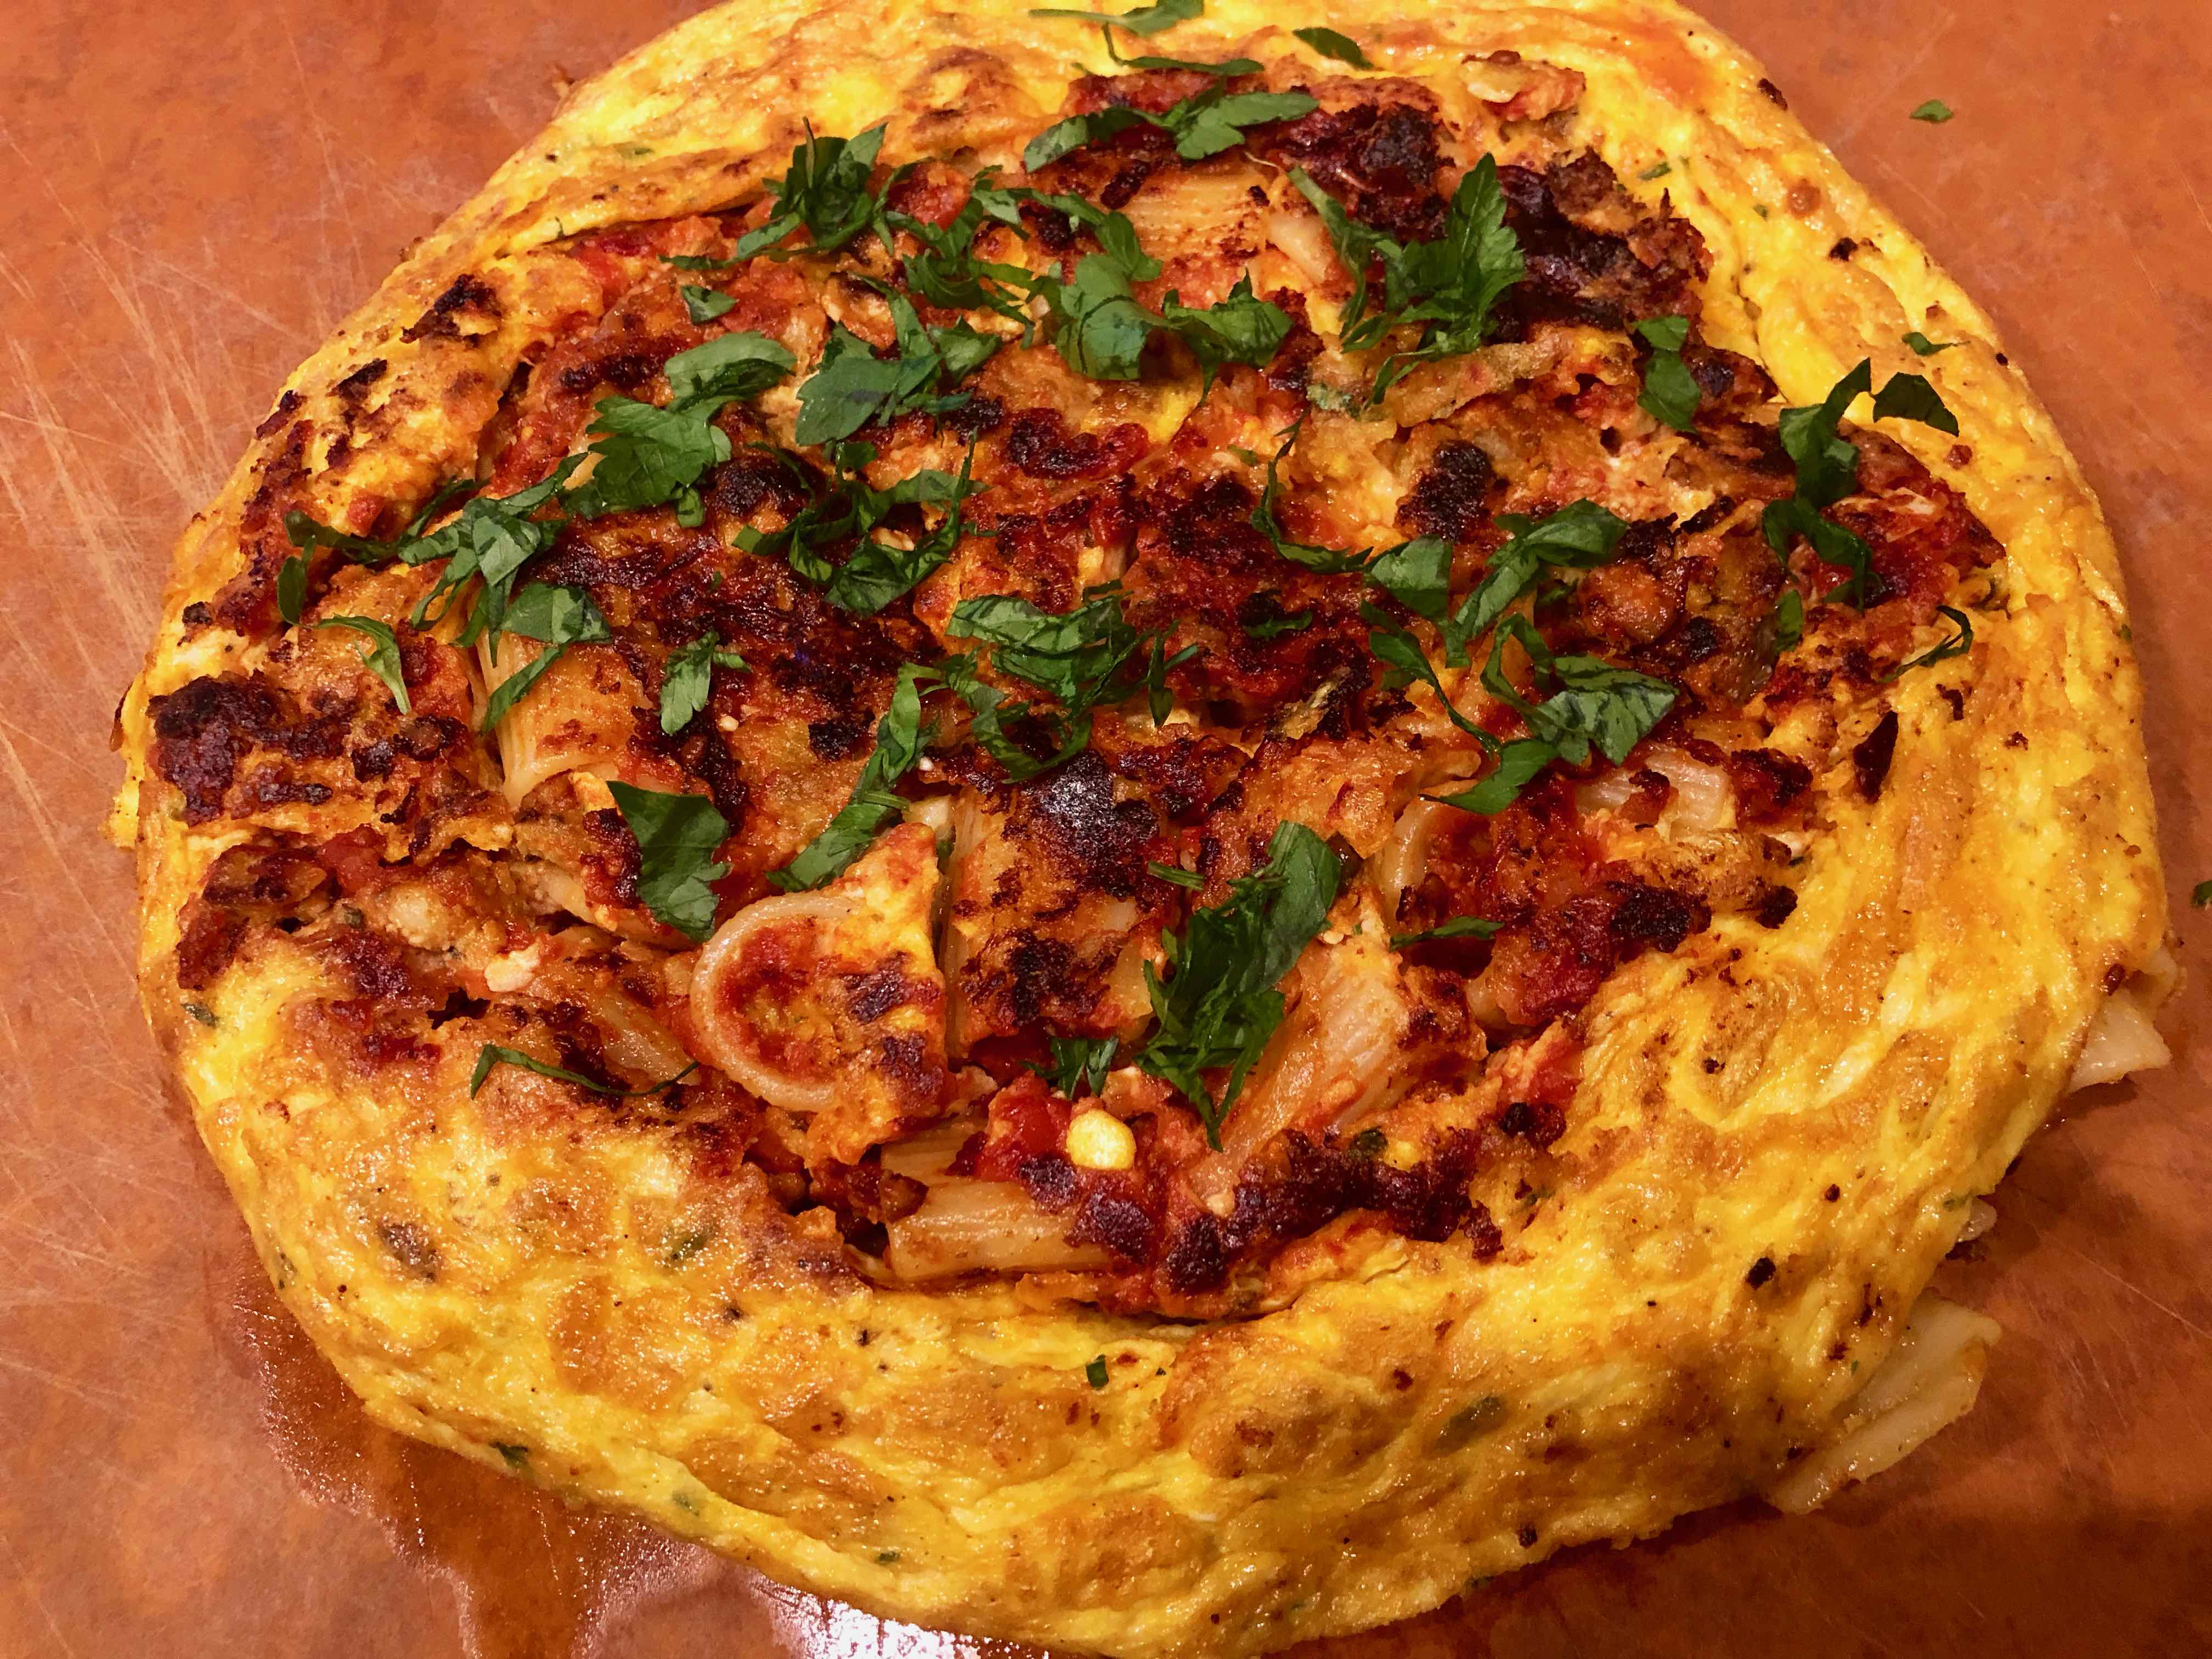
Last night, throwing caution to the wind, I finally made a frittata from left-over rigatoni and meatballs and even a hard-boiled egg. The egg found its way into this omelet when I mistook one of my husband’s hard-boiled eggs, stored in an egg carton, for a fresh one and tried to crack it open. Well, I thought, as long as I was taking a chance with the pasta, what harm could adding the egg do? Now, I’ve made plenty of pasta frittatas before, some of them chronicled on this blog. None, however, featured something like pasta with meatballs.
Leftovers. It’s a word that really doesn’t sound too appealing. All too often, it conjures up images of dry, dull tasting food, whose sole reason for being on the table is to avoid wasting it. I believe the reason for their bad rap can be attributed to the way leftovers are all too often re-heated in modern kitchens: the microwave. Another explanation might be a rushed home cook using too high a flame or temperature.
As a food blogger in a family of two, I often have a lot of food left over, especially after having prepared a stew or braised dish for a post. And having been brought up by family who lived through the Great Depression, it was imbued in me that wasting food is a sin. As a result, I’ve come to take pride in what I do with leftovers, or what my Neapolitan aunt called “i resti,” which, by the way, sounds far better than the English equivalent.
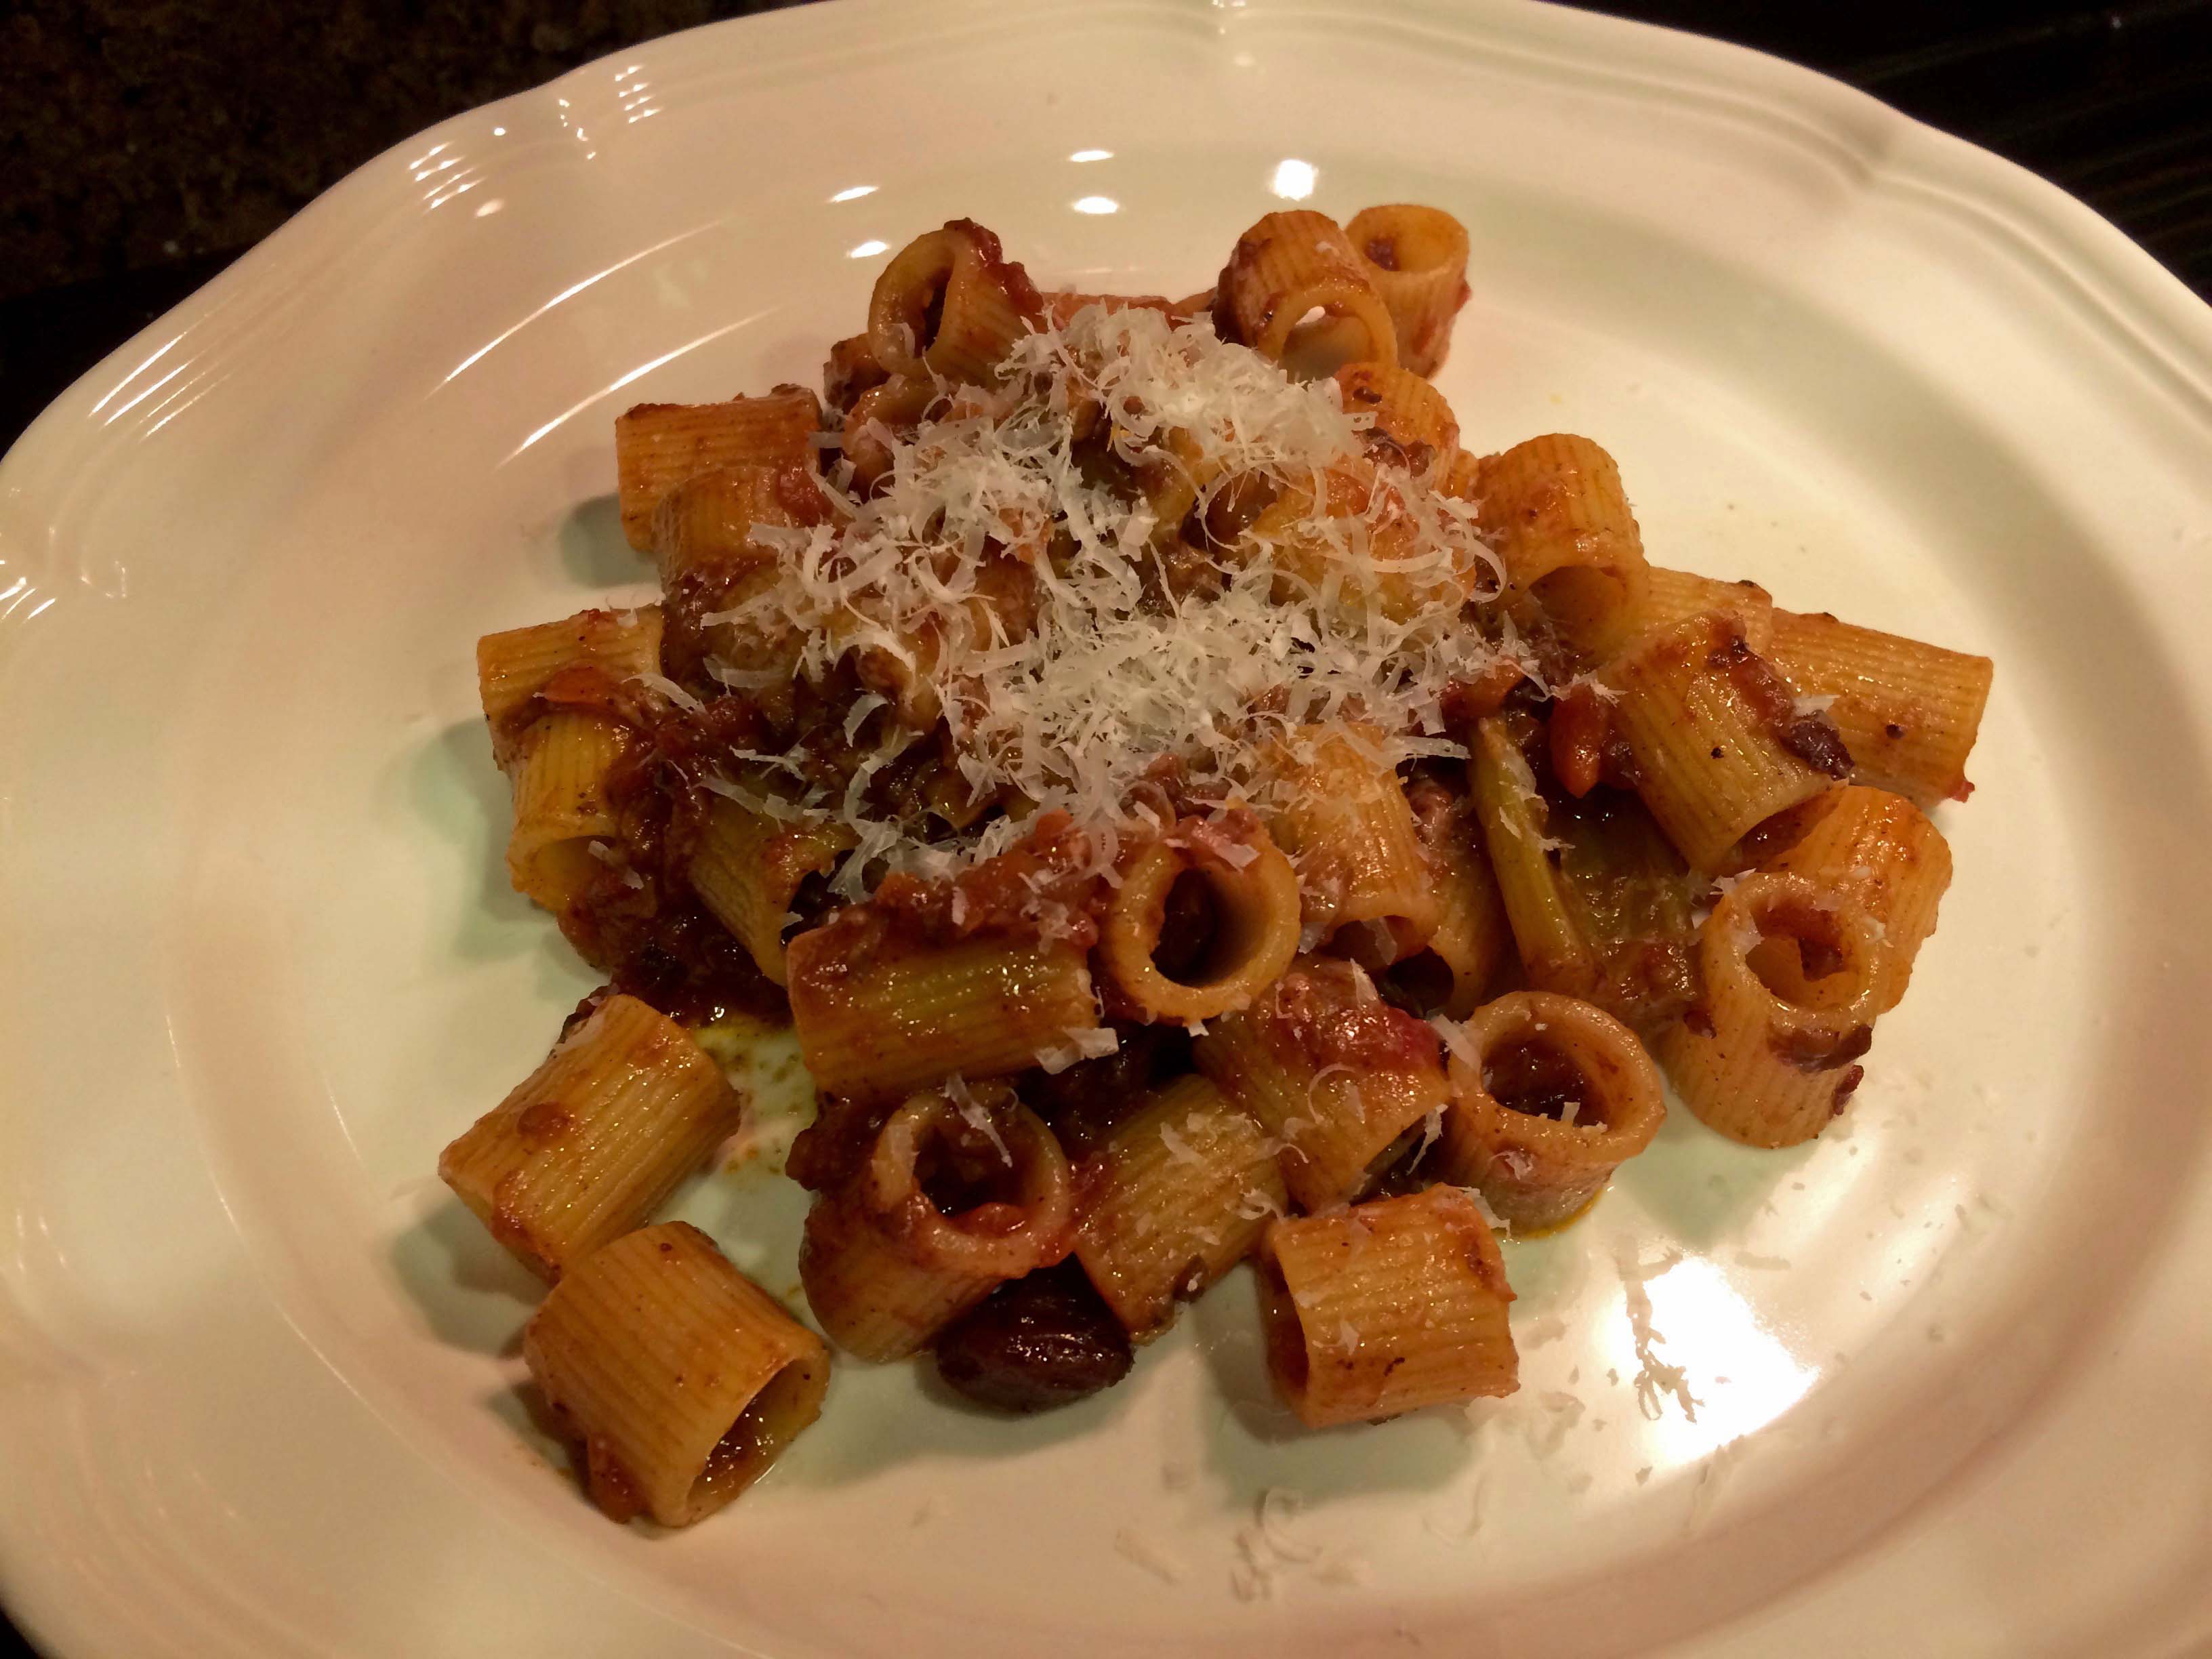
A case in point is last night’s supper, mezzirigatoni sauced with the abundant remains of Sunday’s braised oxtails. There wasn’t much meat left in the tomato-based sauce, but there was plenty of minced onion and carrot as well as tender pieces of celery.
I took half of the remaining sauce (the other half is in the freezer) from the refrigerator and let it come to room temperature. I then placed it in a heavy bottomed casserole and reheated it covered on a low simmer for at least 30 minutes, adding a spoonful of water when it became too thick.
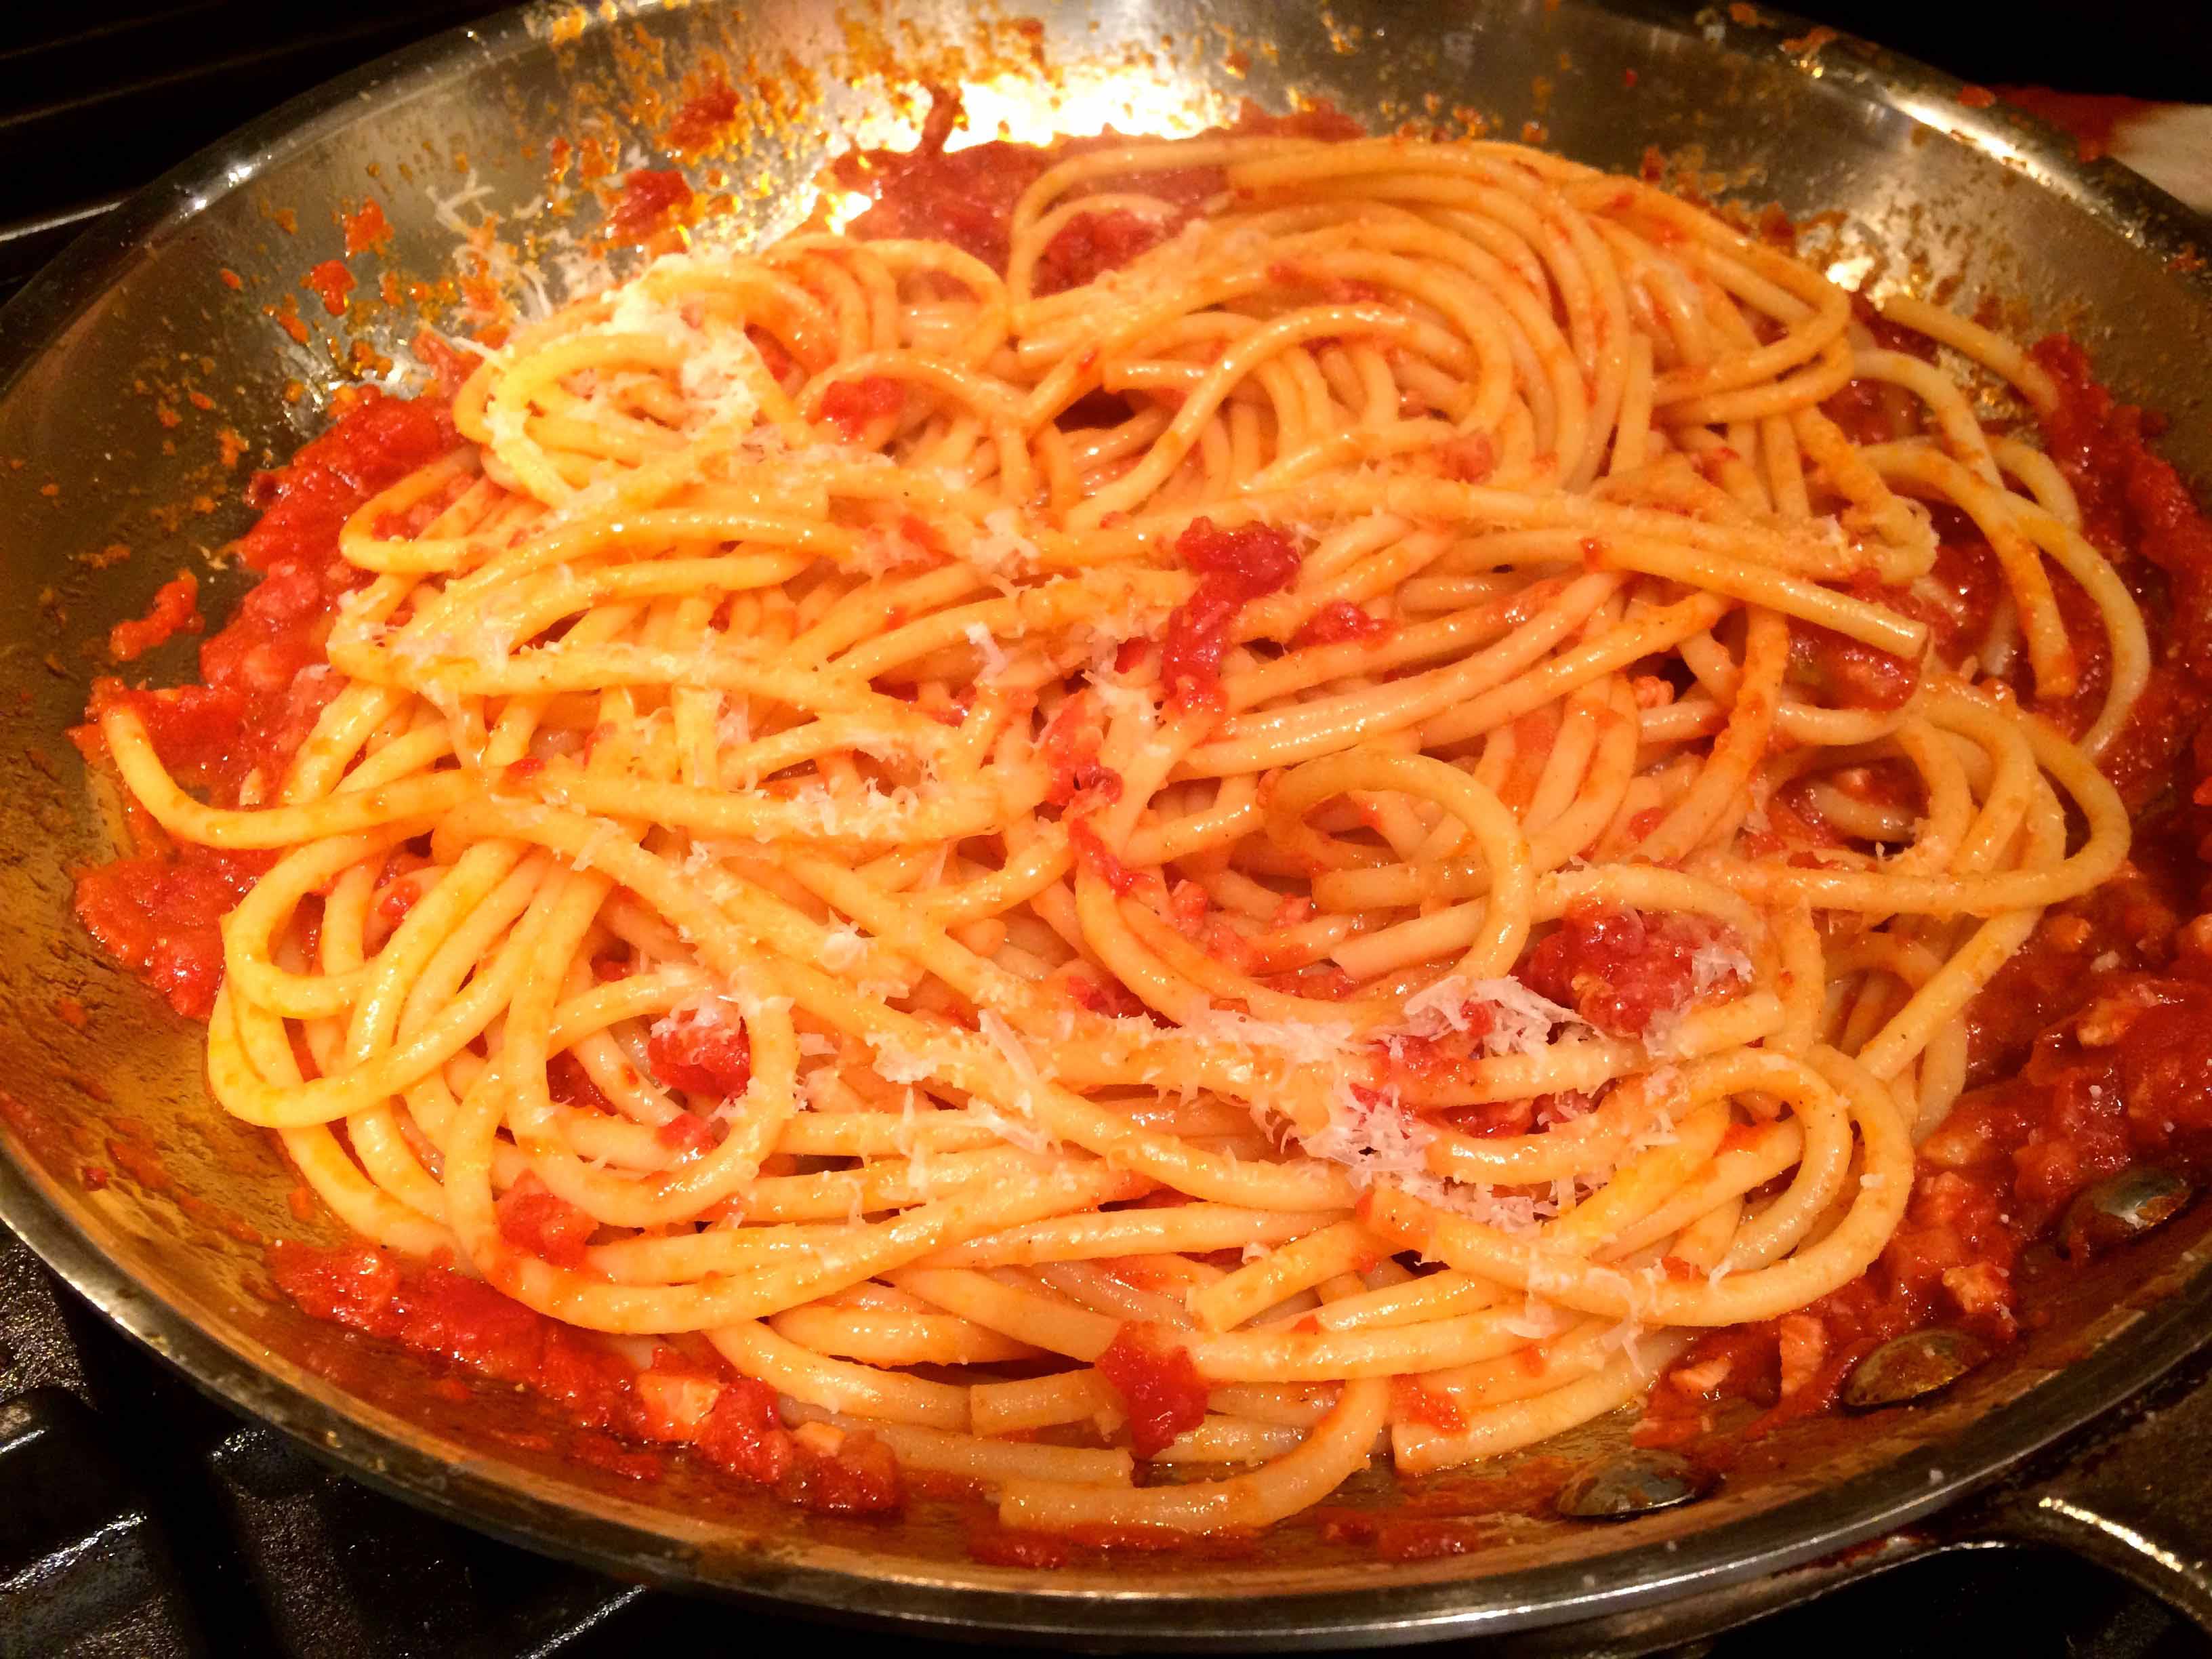
Meanwhile, I put up the pasta to cook and later transferred the sauce from the casserole to a large skillet over a low flame. To thin out the sauce, I added about a ladleful of the pasta water. When the pasta was just shy of al dente, I drained it, transferred it to the skillet, sprinkled it with a handful of cheese and tossed it until the pasta was well coated in the sauce.
About to be tossed
The result was delicious and had it been served to guests at a dinner as a primo, or first course, none would have guessed it was a leftover but rather thought it to be a rich ragu.
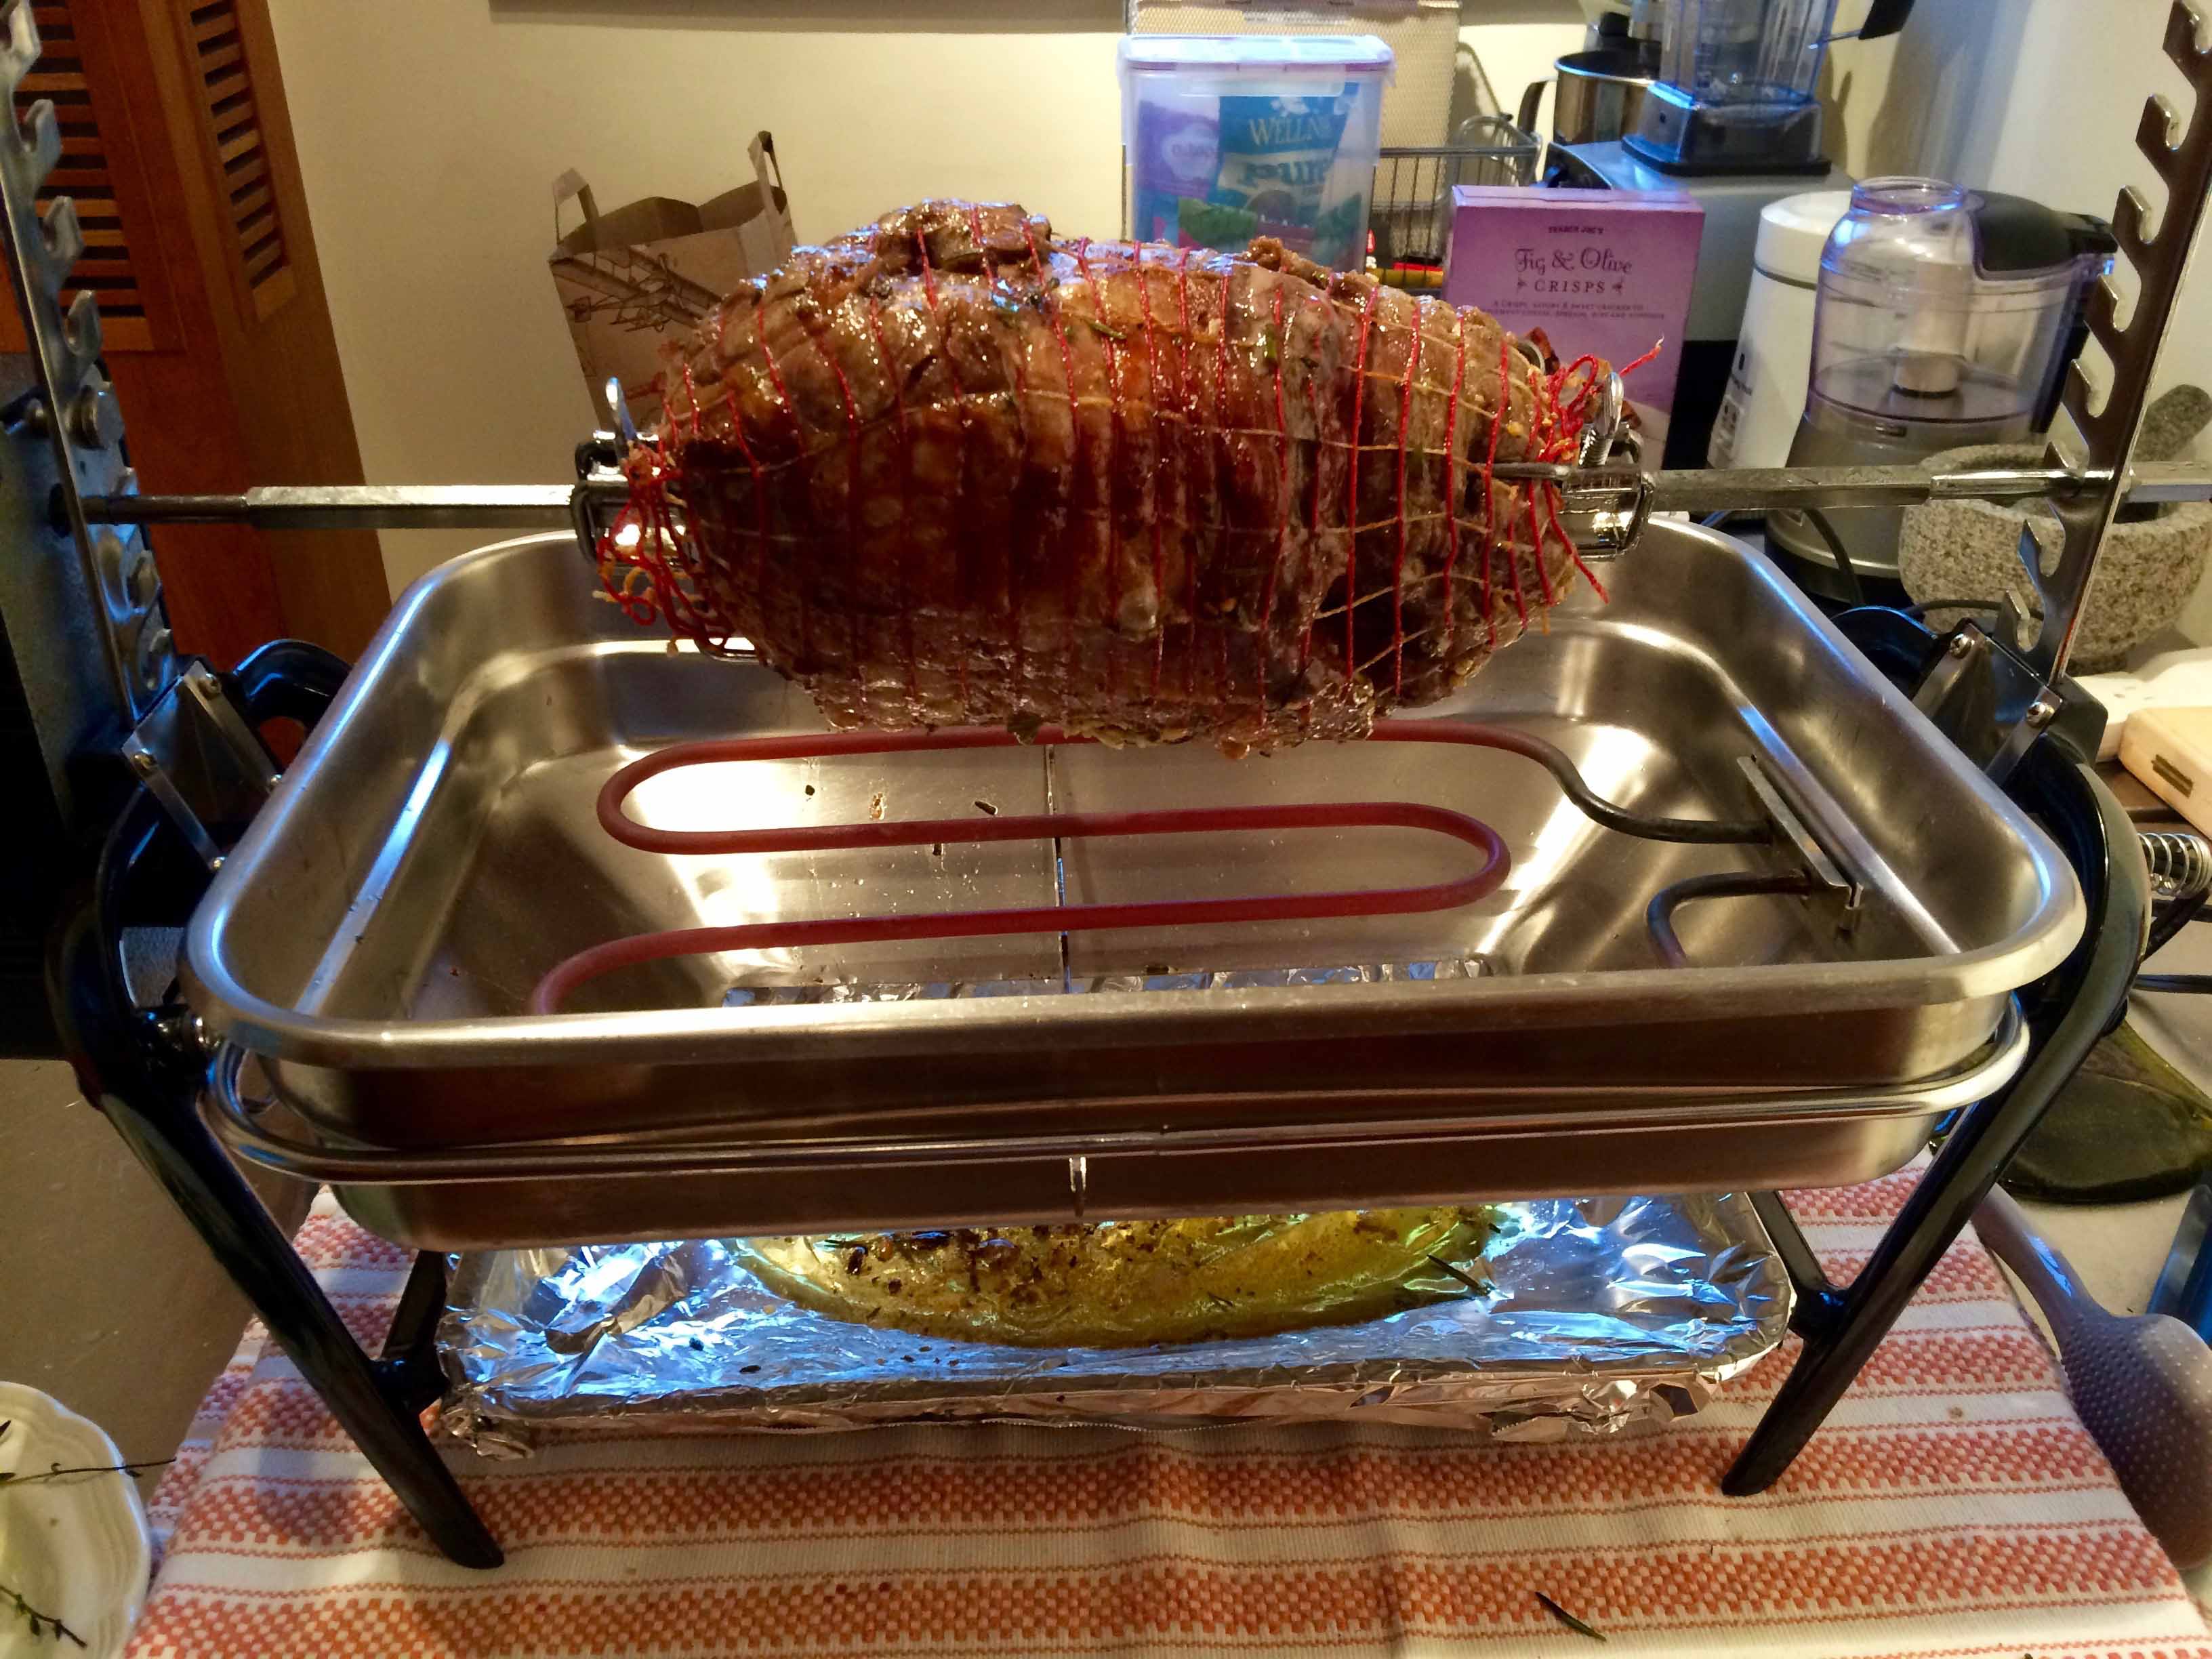
Last week, we acquired a new (“used” would be more accurate) kitchen appliance, a vintage Farberware open-hearth grill and rotisserie. Actually it is a replacement for the one I had in storage, which hurricane Sandy “washed” away a while back. I came across this one on e-bay while I was searching for something totally unrelated to cooking, which made me feel that fate brought us together.
The fact that this rotisserie cooks a hefty roast or whole chicken without any smoke and a minimum amount of heat and is easy to clean and store makes it perfect for a NYC-apartment kitchen, where smoke alarms are overly sensitive and space is at a premium.
The first food I cooked on this one is the same that I made on my last one: a roast boneless leg of lamb. Because I wasn’t sure if this used appliance would work, we didn’t take any photos of the lamb and its preparation until its final minutes of cooking. But after a little more than an hour of steadily turning over the glowing cooking element, the roast was a thing of beauty.
Lamb on the rotisserie
The recipe I used is by Joshua Bousel on Seriouseats.com and is relatively simple. That it uses only a marinade to flavor and baste the meat, as opposed to making holes in the meat for stuffing it with herbs and garlic, keeps the leg juicer during cooking on the spit. Basting it every fifteen minutes with some reserved marinade and a brush made from fresh herbs also helps. While the original recipe is for an outdoor gas grill/rotisserie, I adapted it for my indoor one.
Because we had plenty of meat left over from this 4.5-pound roast, I turned to one of my older cookbooks for a recipe. Published in 1967, a time when America seemed to rediscover serious cooking, Michael Field’s Culinary Classics and Improvisations is a collection of classic recipes for meats, poultry, fish, and vegetables, each of which is followed by a variety of improvisations for the leftovers from the classic dish. Many of these improvisations, like the one I chose for my leftover lamb, reflect America’s fascination at that time with international cuisine. Today, however, many may question these recipes’ authenticity or their ethnic accuracy. Yet one must remember that when Field wrote his book, a lot of the imported ingredients and spices we readily find today, not only in gourmet shops but even in supermarkets, were not widely available.
Field titled this improvisation for leftover roasted lamb, “Lamb in a Skillet with Fresh Tomatoes, Scallions, and Parsley in the Turkish Style.” I must confess that I cannot explain what is Turkish about this dish. Nonetheless, it has long been one of my favorites for repurposing a leftover roast.
In his recipe, Field calls for peeled, seeded, and cut tomatoes and provides instructions for peeling. However, while I cut and seeded the tomatoes as directed, I opted to skip the peeling.
Lamb in a Skillet with Fresh Tomatoes, Scallions, and Parsley in the Turkish Style (from Michael Field’s Culinary Classics and Improvisations)
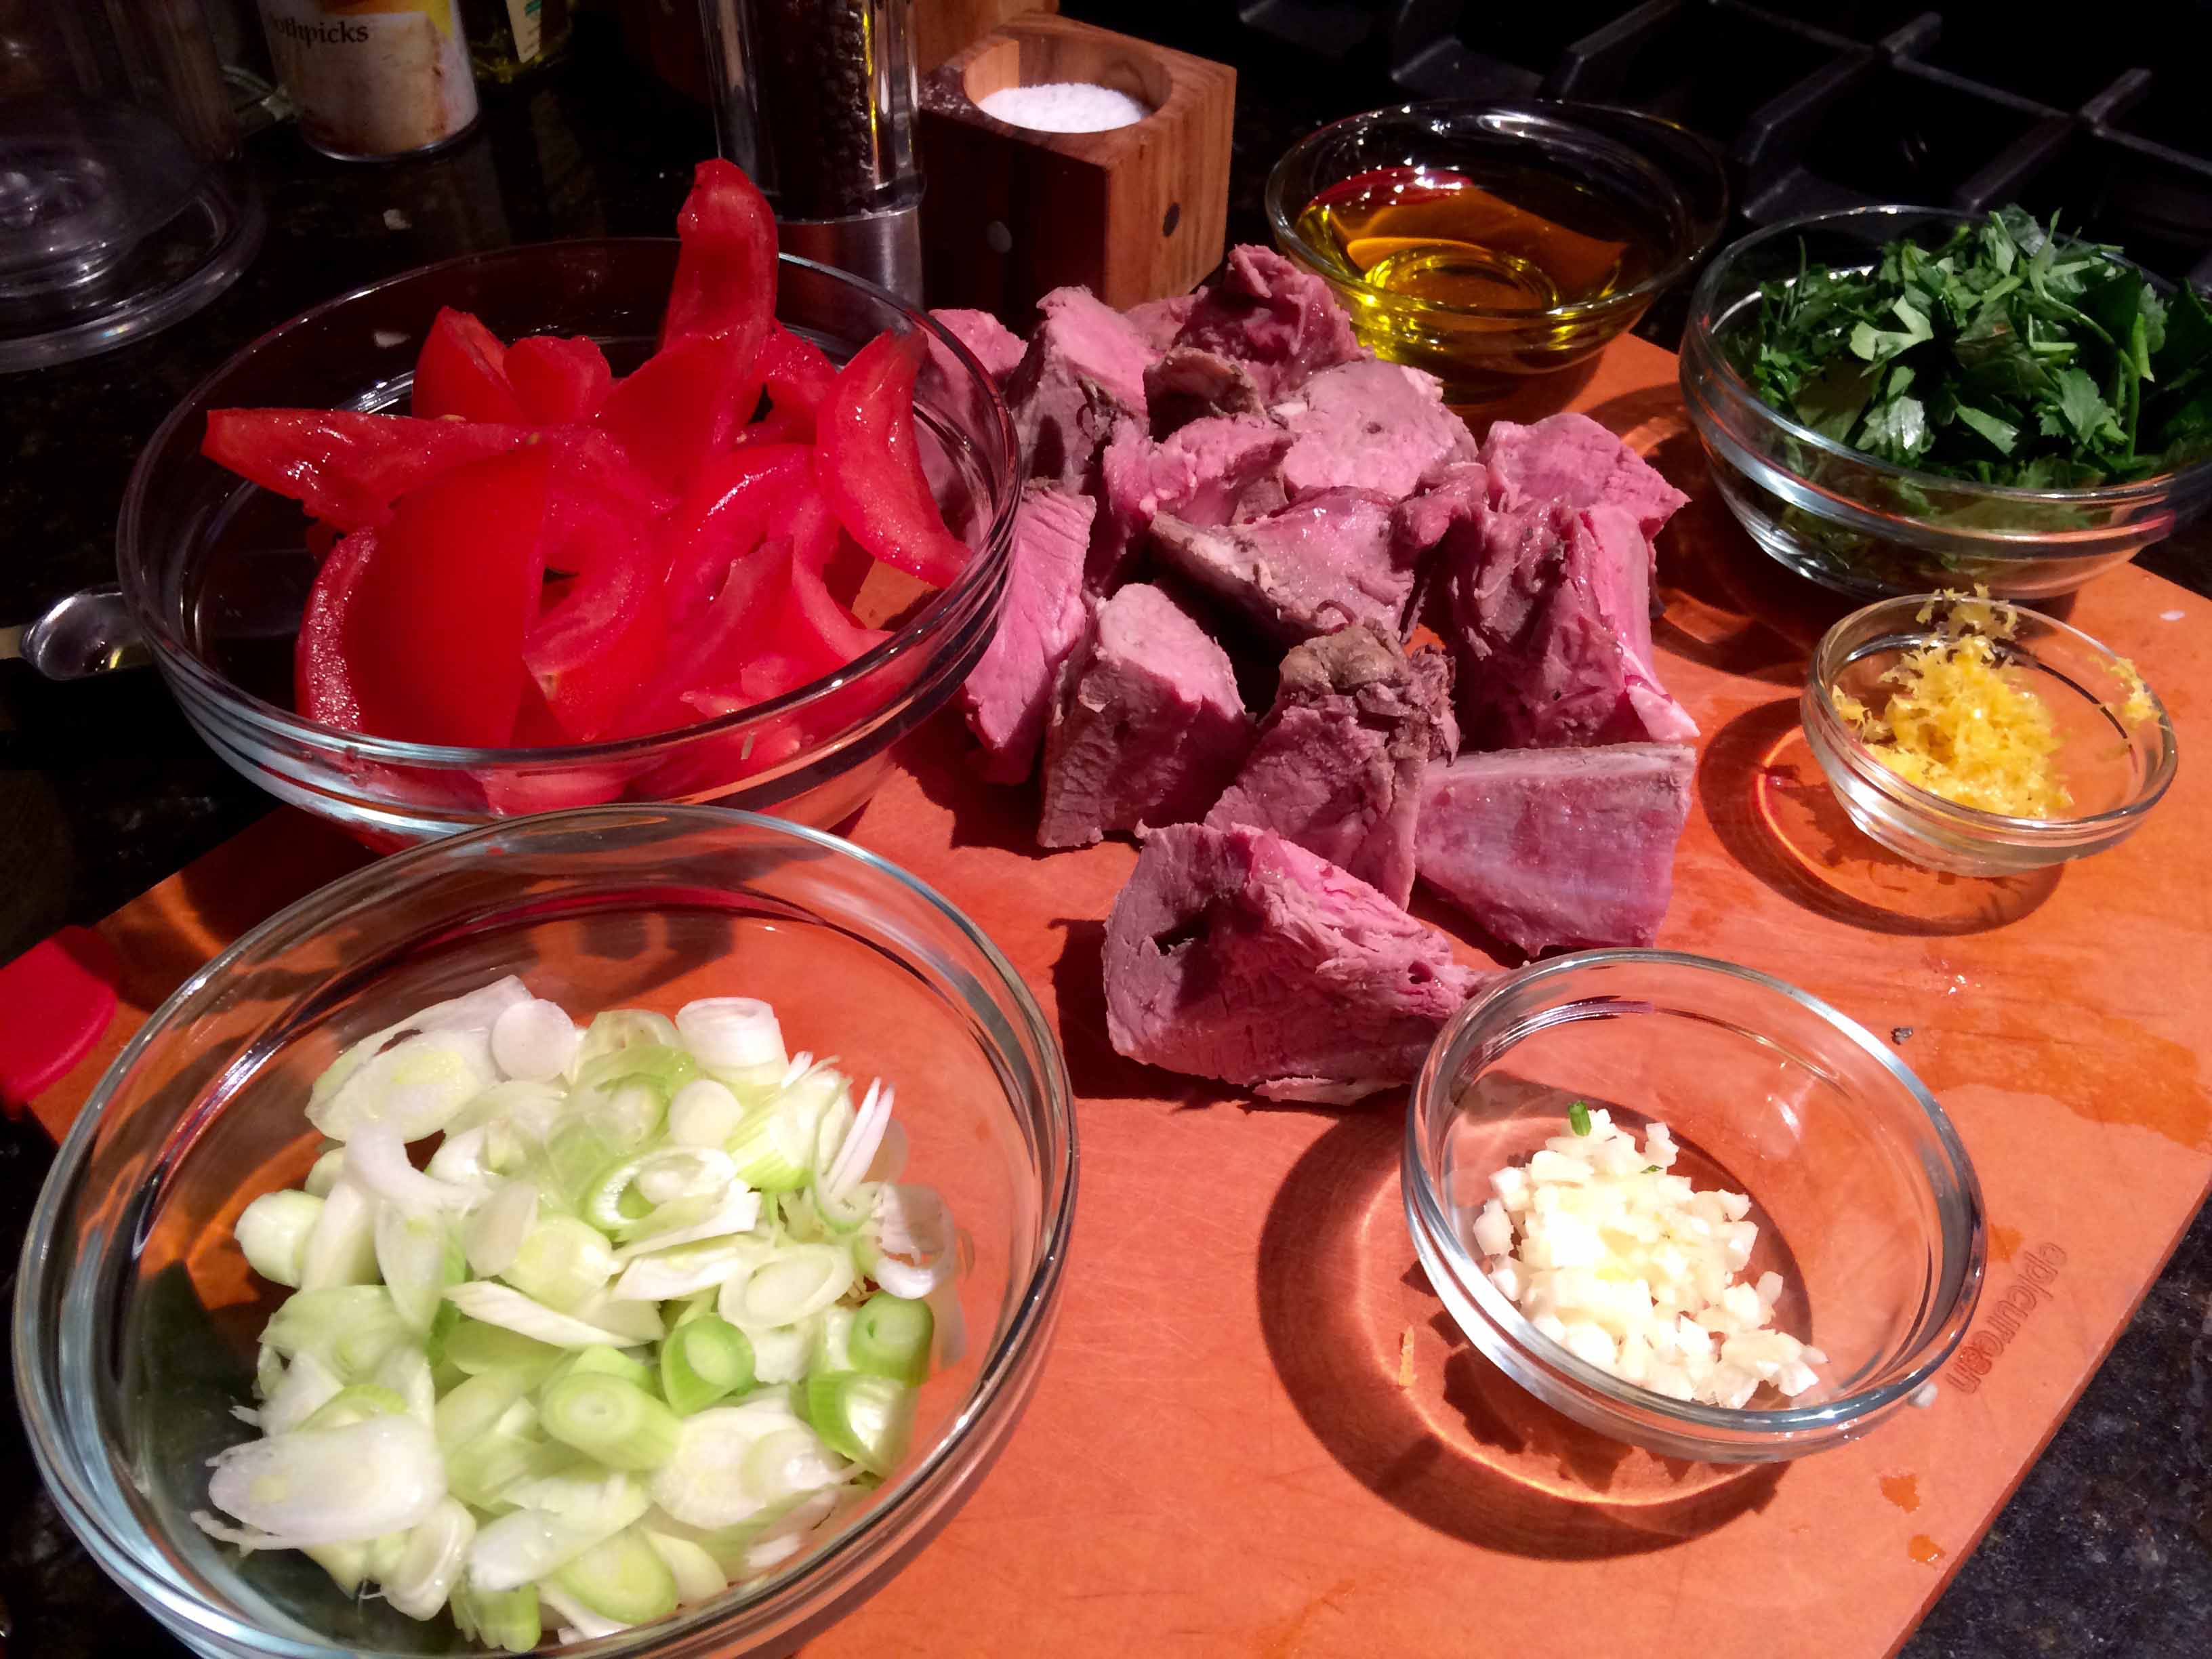
2 cups roast leg of lamb cut into ¾- to 1-inch pieces
1 teaspoon garlic, finely chopped
Salt
½ teaspoon freshly ground black pepper
4 tablespoons olive oil
½ cup fresh tomatoes, peeled, seeded and cut into julienne strips 1 inch by ½ inch
½ cup scallions, cut into paper-thin rounds (include some of the green stem also)
½ cup parsley (flat-leaf is possible), coarsely chopped
1 teaspoon lemon peel, grated
Lemon quarters
Prepped ingredients
Combine in a small bowl the pieces of lamb, the chopped garlic, salt to taste, and the freshly ground pepper. Mix together thoroughly.
The seasoned lamb
Choose a 10-inch traditional sauté pan or any deep heavy frying pan attractive enough to bring to the table.
Heat 4 tablespoons of olive oil in the pan until it almost begins to smoke. Add the seasoned lamb and, over high heat, brown the pieces quickly, turning them with a large spoon or spatula for about 8 minutes, taking care not to let them burn.
The browned lamb
Toss in the tomato strips* and, stirring continuously, cook them for about 3 minutes with the lamb; they should be barely cooked through and should retain more than a hint of their original texture and freshness.
Lamb with tomatoes
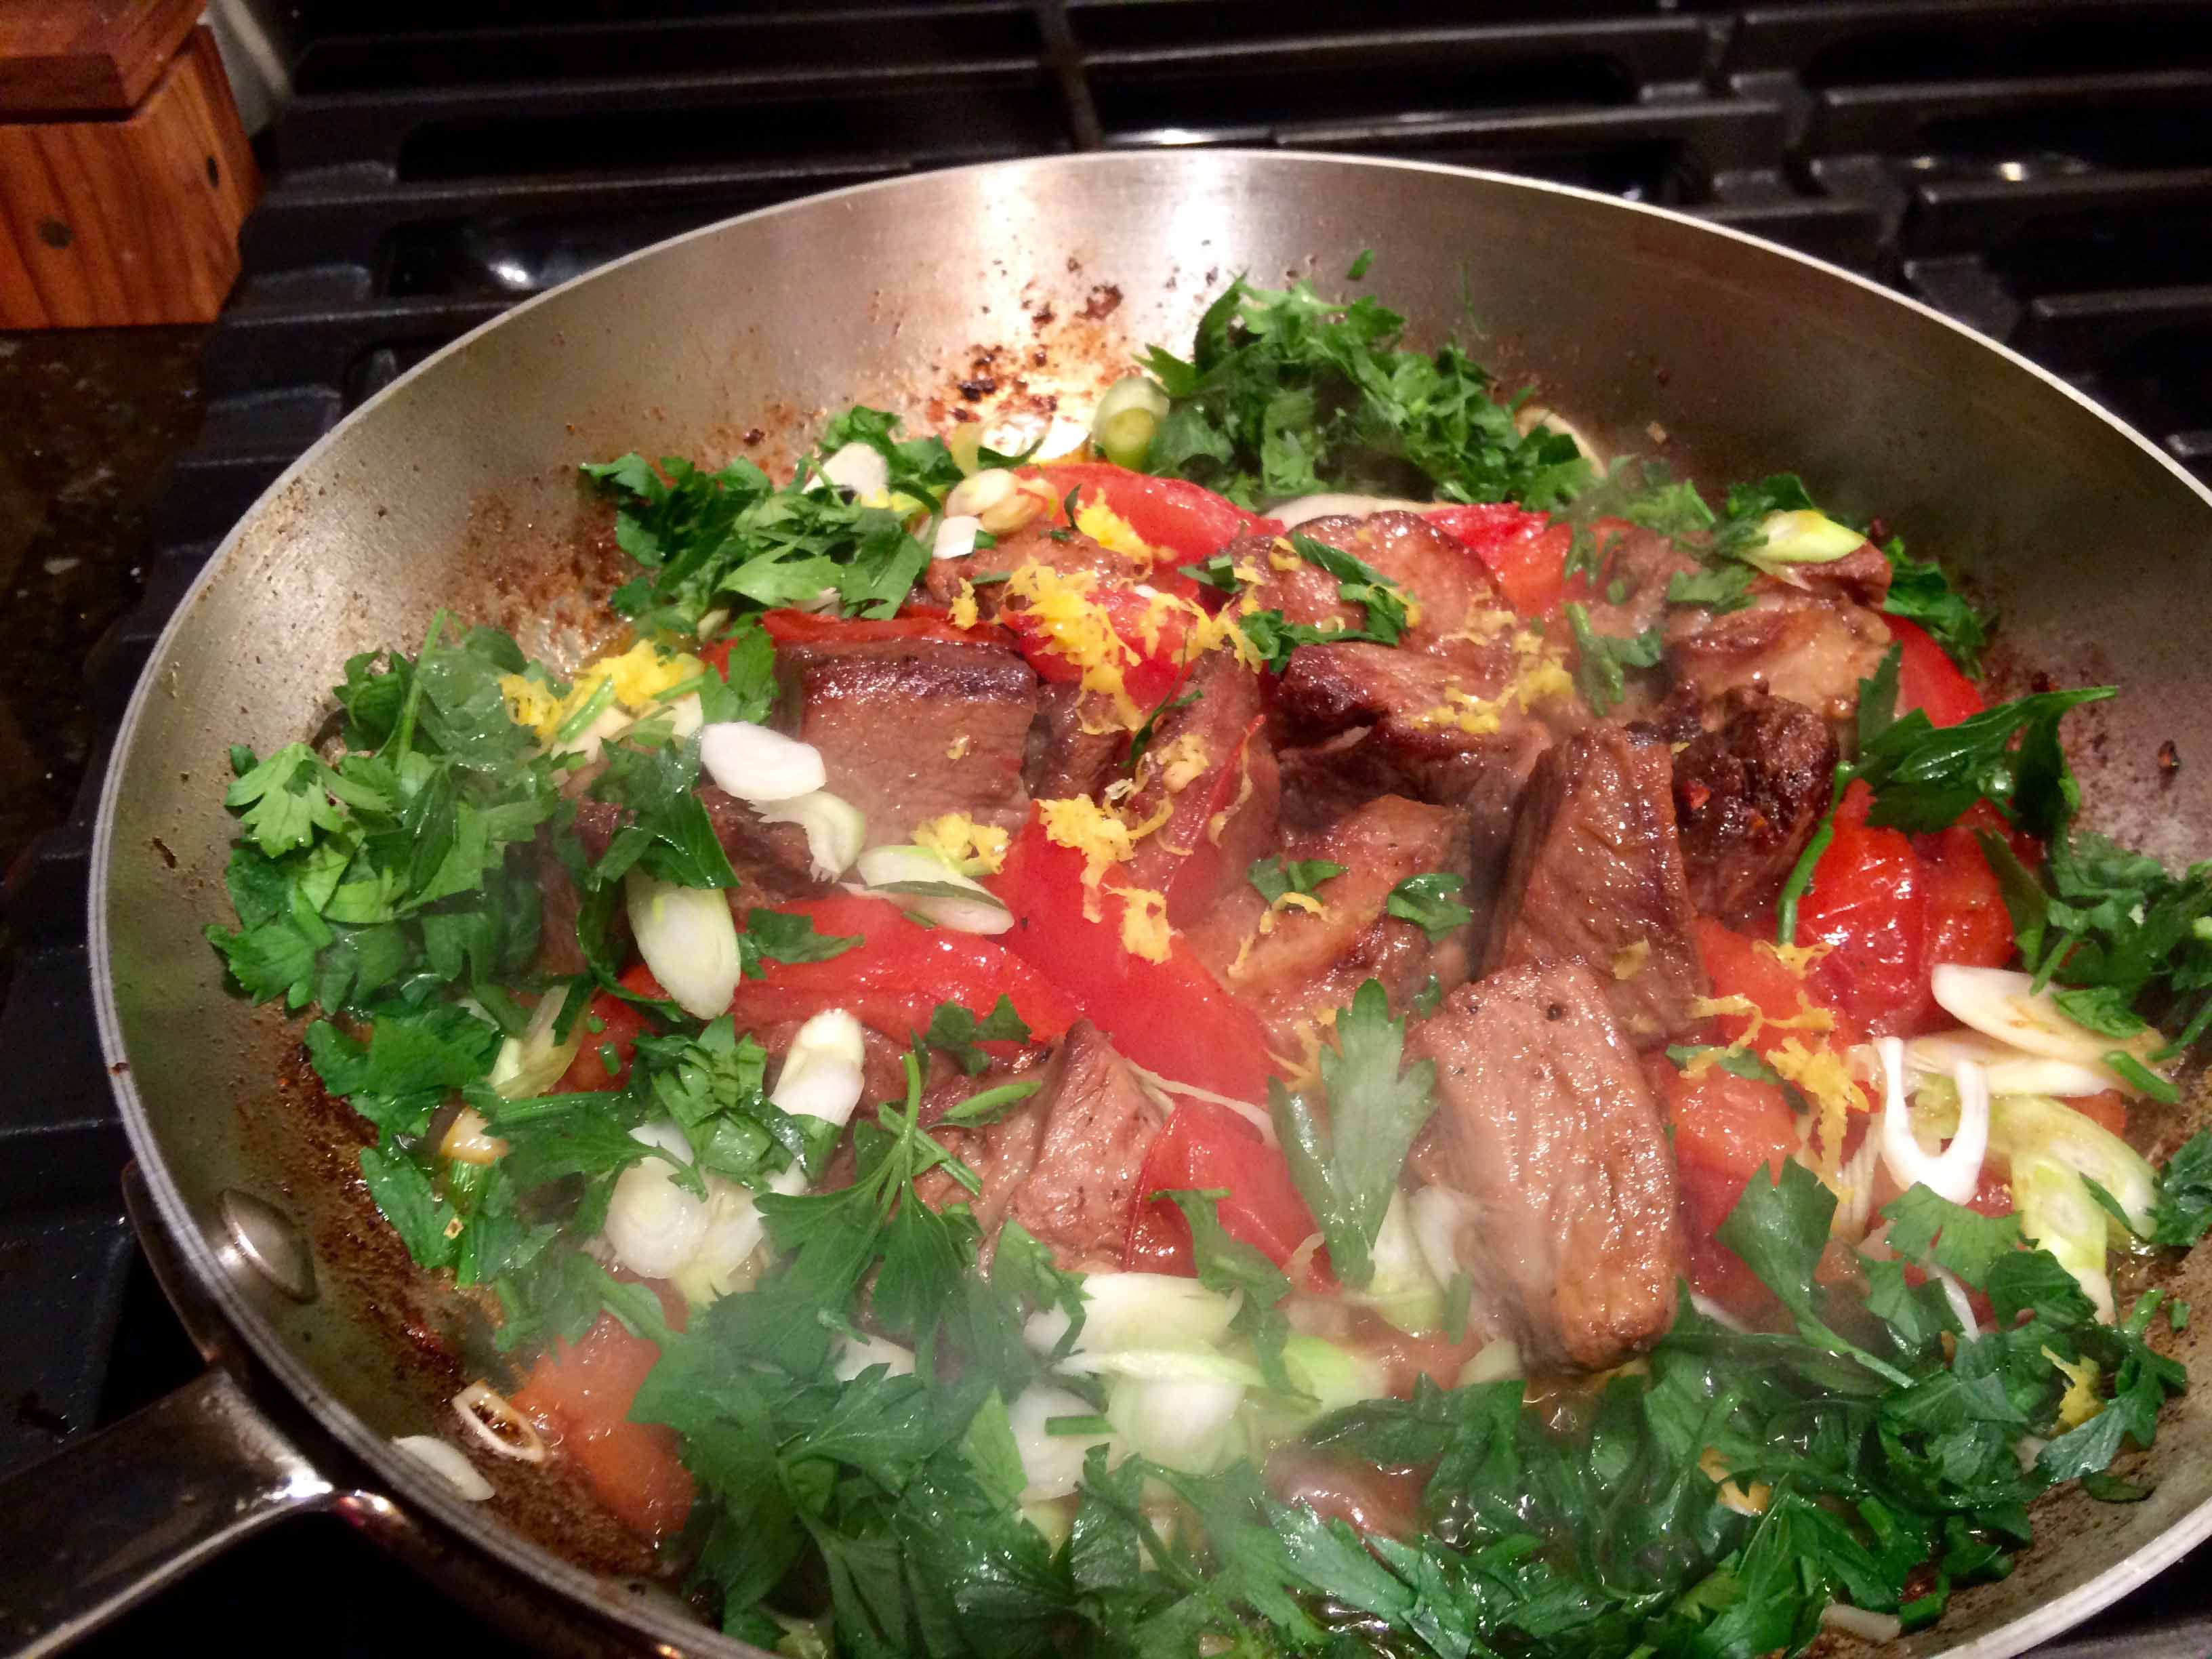
With a spatula, push the meat and tomatoes toward the center of pan and surround them with the scallions and parsley, arranged in a ring. Sprinkle meat with the lemon peel and cover the pan tightly.
After adding the parsley, scallions, and lemon zest
Turn off the heat and let the residual heat in the pan warm the herbs through. Serve directly from the pan after about 5 minutes.
The finished dish
Lemon quarters are the perfect accompaniment to the lamb and French or Italian bread should be served to sop up the tomato and herb-flavored olive oil.
*Note: To prepare the tomatoes, drop them into boiling water for about ten minutes. Peel them at once and cut them into quarters. Run a small sharp knife under the pulp of each quarter and cut it away, leaving the thin outer shell of the tomato. Cut the shells into julienne strips and use the tomato pulp for other purposes.
As I said earlier, I skipped the blanching and peeling of the tomatoes to preserve their texture. I also added a bit of cumin to the initial seasoning of the lamb and, as may be seen in the photos, took some liberties with measuring the ingredients. Finally, rather than serving bread, I opted for basmati rice to sop up the delicious sauce.
I’ve always enjoyed meatloaf. Even as a kid, I looked forward to my aunt’s polpettone, with its caramelized onions, raisins, and parsley gently mixed in with the more traditional meatloaf ingredients. When I asked why we never served meatloaf to company, I was told it was a family dish.
Well, the other night, I made a dark-meat-turkey version of this family fare with feta and raisins. As is often the case with preparing dinner for two, we had almost half of it leftover. But rather than making sandwiches from it or serving it at room temperature topped with a fried egg as I usually do, I thought I’d try something different.
I searched the internet and found plenty of ideas ranging from meatloaf hash to meatloaf lasagna. However, the one that appealed to me most was stuffed peppers. Almost all of the recipes for them involved adding bread or rice along with eggs to the meat as a binder and additional seasonings, but I thought my meatloaf already had plenty of these. So I decided simply to crumble it up and add just a few tablespoons of tomato passata to moisten the meat. I also used the passata mixed with some olive oil and fresh basil for the cooking sauce in the bottom of the baking dish.
As for the peppers, I sliced off their tops, seeded them, and par cooked them for 3 to 4 minutes in lightly slated boiling water along with their tops. I left them to drain and cool while I prepared the stuffing and preheated the oven to 350°F.
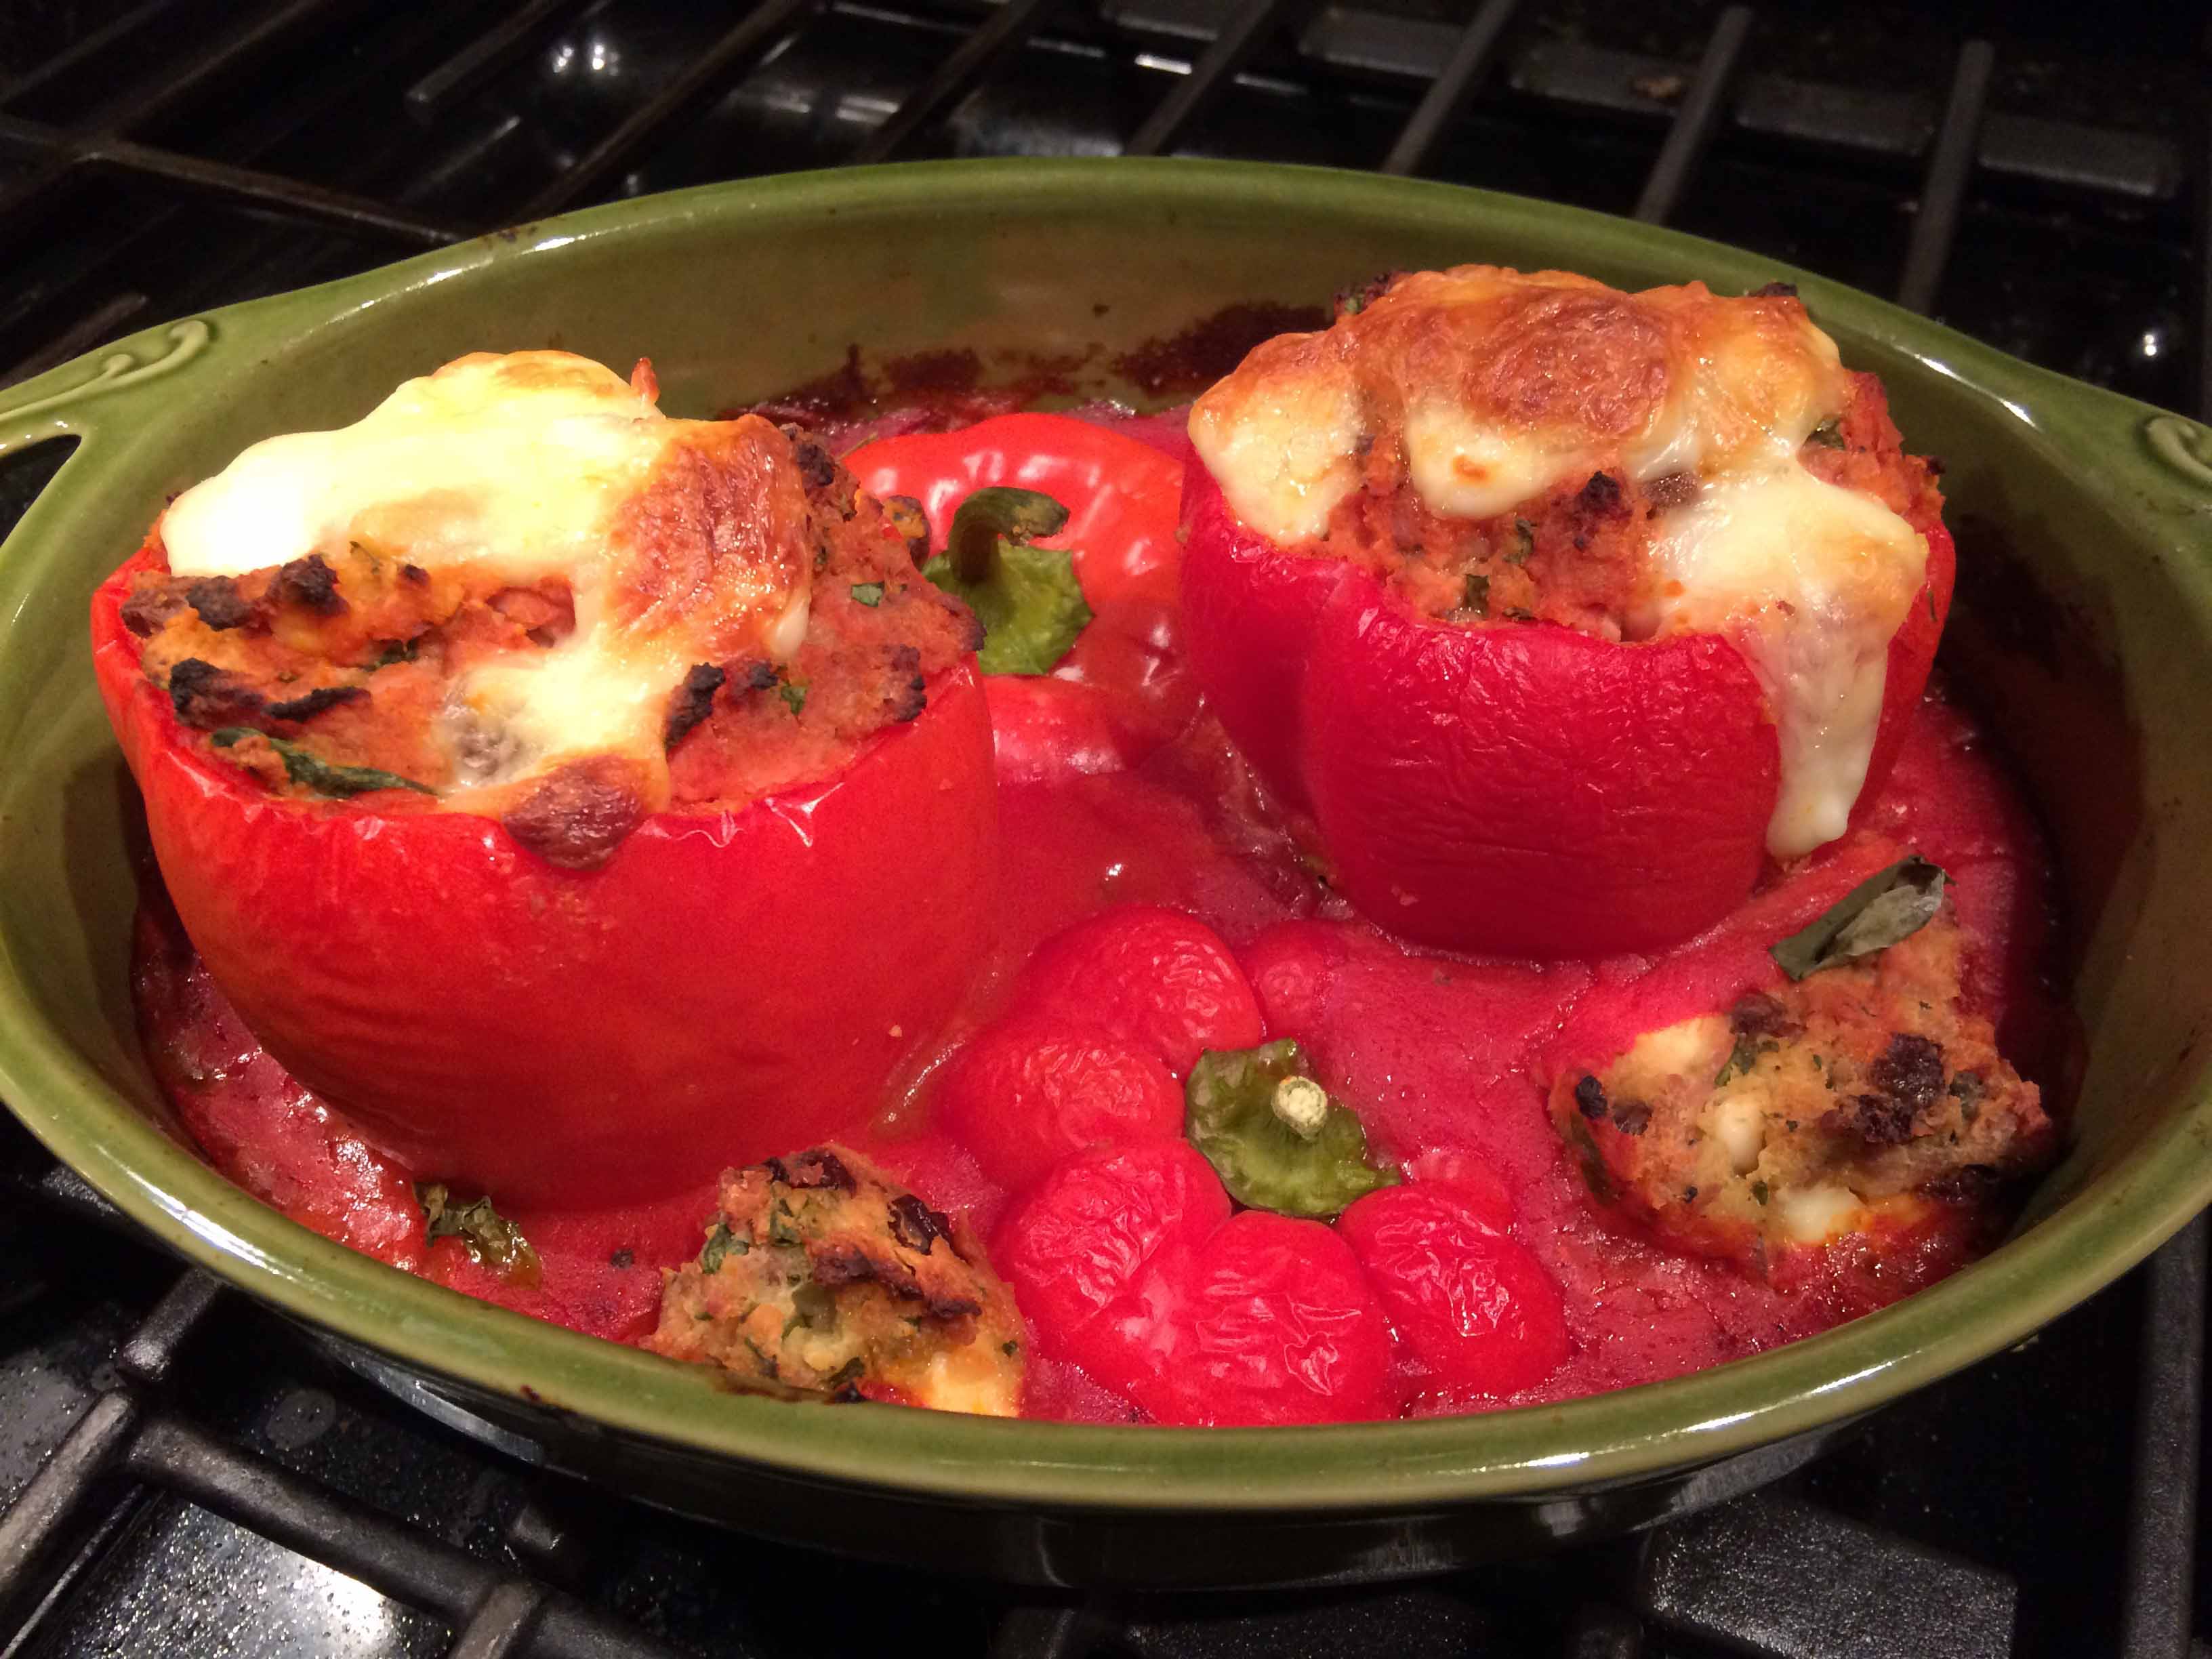
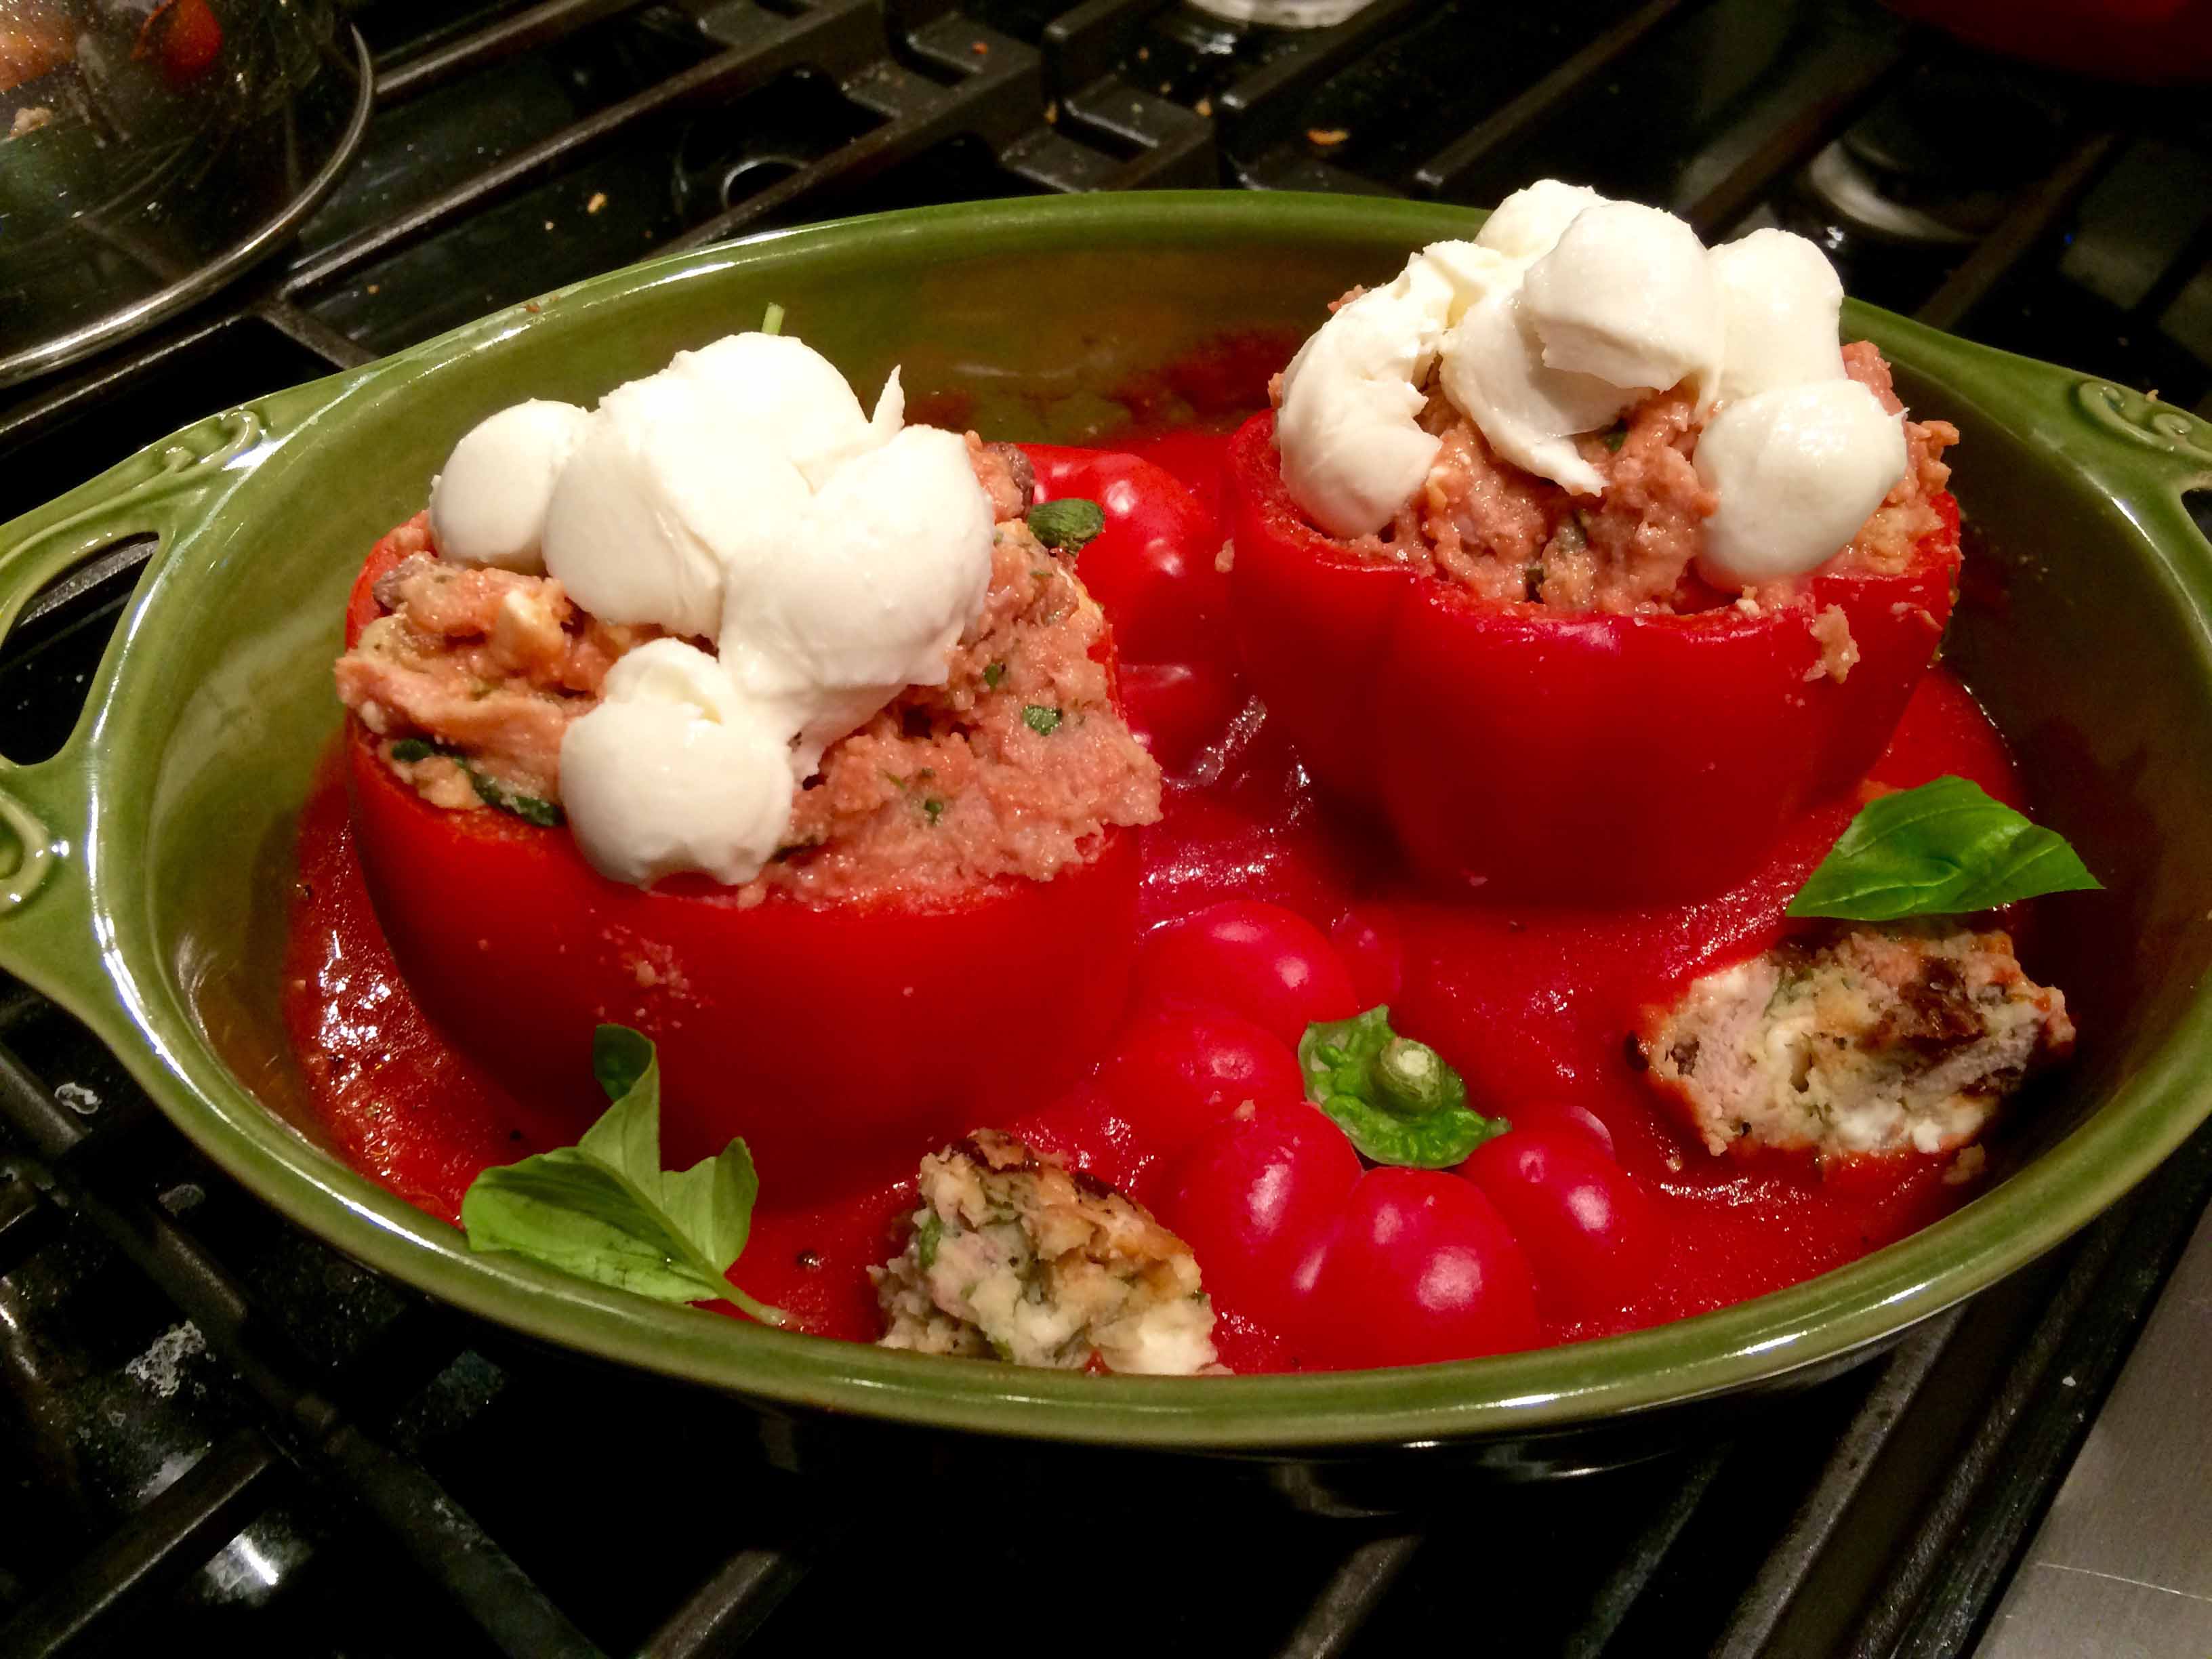
After lightly drizzling the cooled peppers with some olive oil, I generously stuffed them and topped them with some fresh mozzarella. I then placed them in a baking dish to which I added about a half cup of the passata sauce together with some chunks of the meatloaf, the pepper tops, and some fresh basil. They cooked in the oven for about 50 minutes until the peppers were cooked through and the cheese was nicely browned.
Before cooking
The results exceeded my expectations. The peppers were perfectly cooked, the stuffing moist and flavorful, and the sauce succulent. It was a dish that may even be fit for company.
Because I cook at home almost every night, our refrigerator is often at its max capacity. As I triage the remainders of meals gone by, tossing out wilted parsley, a shriveled zucchini, and sundry unidentifiable objects, I often find some salvageable items. Such was the case yesterday, when I discovered a couple of chicken thighs from Thursday’s cacciatore, a half a bottle of tomato passata from a pasta dish, a half of a smoked mozzarella along with some basil from Friday’s pizza night, and a small chunk of ricotta salata.
After I put these discoveries aside, I rummaged through my pantry to see if there was anything there I could use with them. When I saw a box of orzo and a canister of bread crumbs , I thought why not make a small timballo, in other words, bake the orzo along with the other ingredients.
I removed the skin and bones from the two leftover chicken thighs, pulled the meat apart, and placed it together with the sauce from the cacciatore into a 2.5 quart saucepan. To supplement the scant sauce, I added the half bottle of passata and some chopped basil to the pan, which I covered and placed on a low flame for about 20 minutes.
While the chicken and sauce were reheating, I cooked 8 ounces of the orzo until just a few minutes before it would reach al dente and then drained it well. Meanwhile, I cut the smoked mozzarella into chunks, grated the ricotta and some Parmigiano-Reggiano, and finally buttered an 8” x 8” baking dish, which I dusted with a couple of tablespoons of dried breadcrumbs.
After the chicken and sauce were fully reheated, I stirred in the orzo and let it cook for a few minutes so that it would be infused with the sauce. I then tasted it and adjusted for seasoning, with some salt and freshly ground black pepper.
I transferred half the chicken and orzo mixture to the baking dish and spread it into an even layer, which I then covered with half of the mozzarella, ricotta salata, and Parmigiano. I subsequently made a second layer with the remaining chicken and orzo, which I then topped with the remainder of the three cheeses.
I placed the baking dish into a preheated 375° F oven and baked it for about twenty minutes. When it was finished cooking, I removed the dish, tented it with some foil, and let it rest for about 10 minutes so that it would firm up a bit.
Finished timballo
I must admit this dish was delicious and turned out far better than I had thought it would. (In fact, that’s one of the reasons I have no photos, as I usually do, of its preparation.) The pasta was richly flavored, the chicken succulent, and the melted cheese, creamy and piquant, tied everything together. Yet what was even more satisfying was being able to create this dish from what could have easily found its way into the trash. My frugal mother would have been proud.
Cold snowy nights and long-delayed trains after a challenging work day may provide a sufficient excuse to forego food shopping and go directly home. As for dinner, however, this choice leaves one to rely solely on what’s on hand in the pantry and fridge.
Such was the case earlier this week when I prepared what I’ve chosen to call “pasta dal frigorifero.” After looking through our fridge, I came up with a cup and half of Marcella Hazan’s tomato, onion, and butter sauce, a package of diced pancetta that was about to expire, and a close-to-empty tube of tomato paste. Our pantry serendipitously provided box of bucatini, along with staples like olive oil and crushed red-pepper flakes, for which I decided to prepare a sauce from what I had found in the fridge.
While purists may frown on my likening this dish to the classic Roman all’ Amatriciana, I have to say it at least made me think of it.
Pasta dal Frigorifero
2 tablespoons extra-virgin olive oil
4 ounces diced pancetta
crushed red-pepper flakes to taste
freshly ground black pepper
1 tablespoon concentrated tomato paste
1.5 cups leftover tomato sauce (a plain sauce with good onion flavor like Hazan’s is perfect)
8 ounces bucatini or spaghetti
Pecorino Romano
In a large heavy-bottomed skillet, heat the oil. Add the pancetta, red-pepper flakes, and black pepper. Cook over medium-low heat until the pancetta has rendered most of its fat. About 10 minutes.
Rendering the pancetta
Add the tomato paste and cook stirring for about 2 minutes, stirring to lightly toast the paste.
“Toasting” the tomato paste
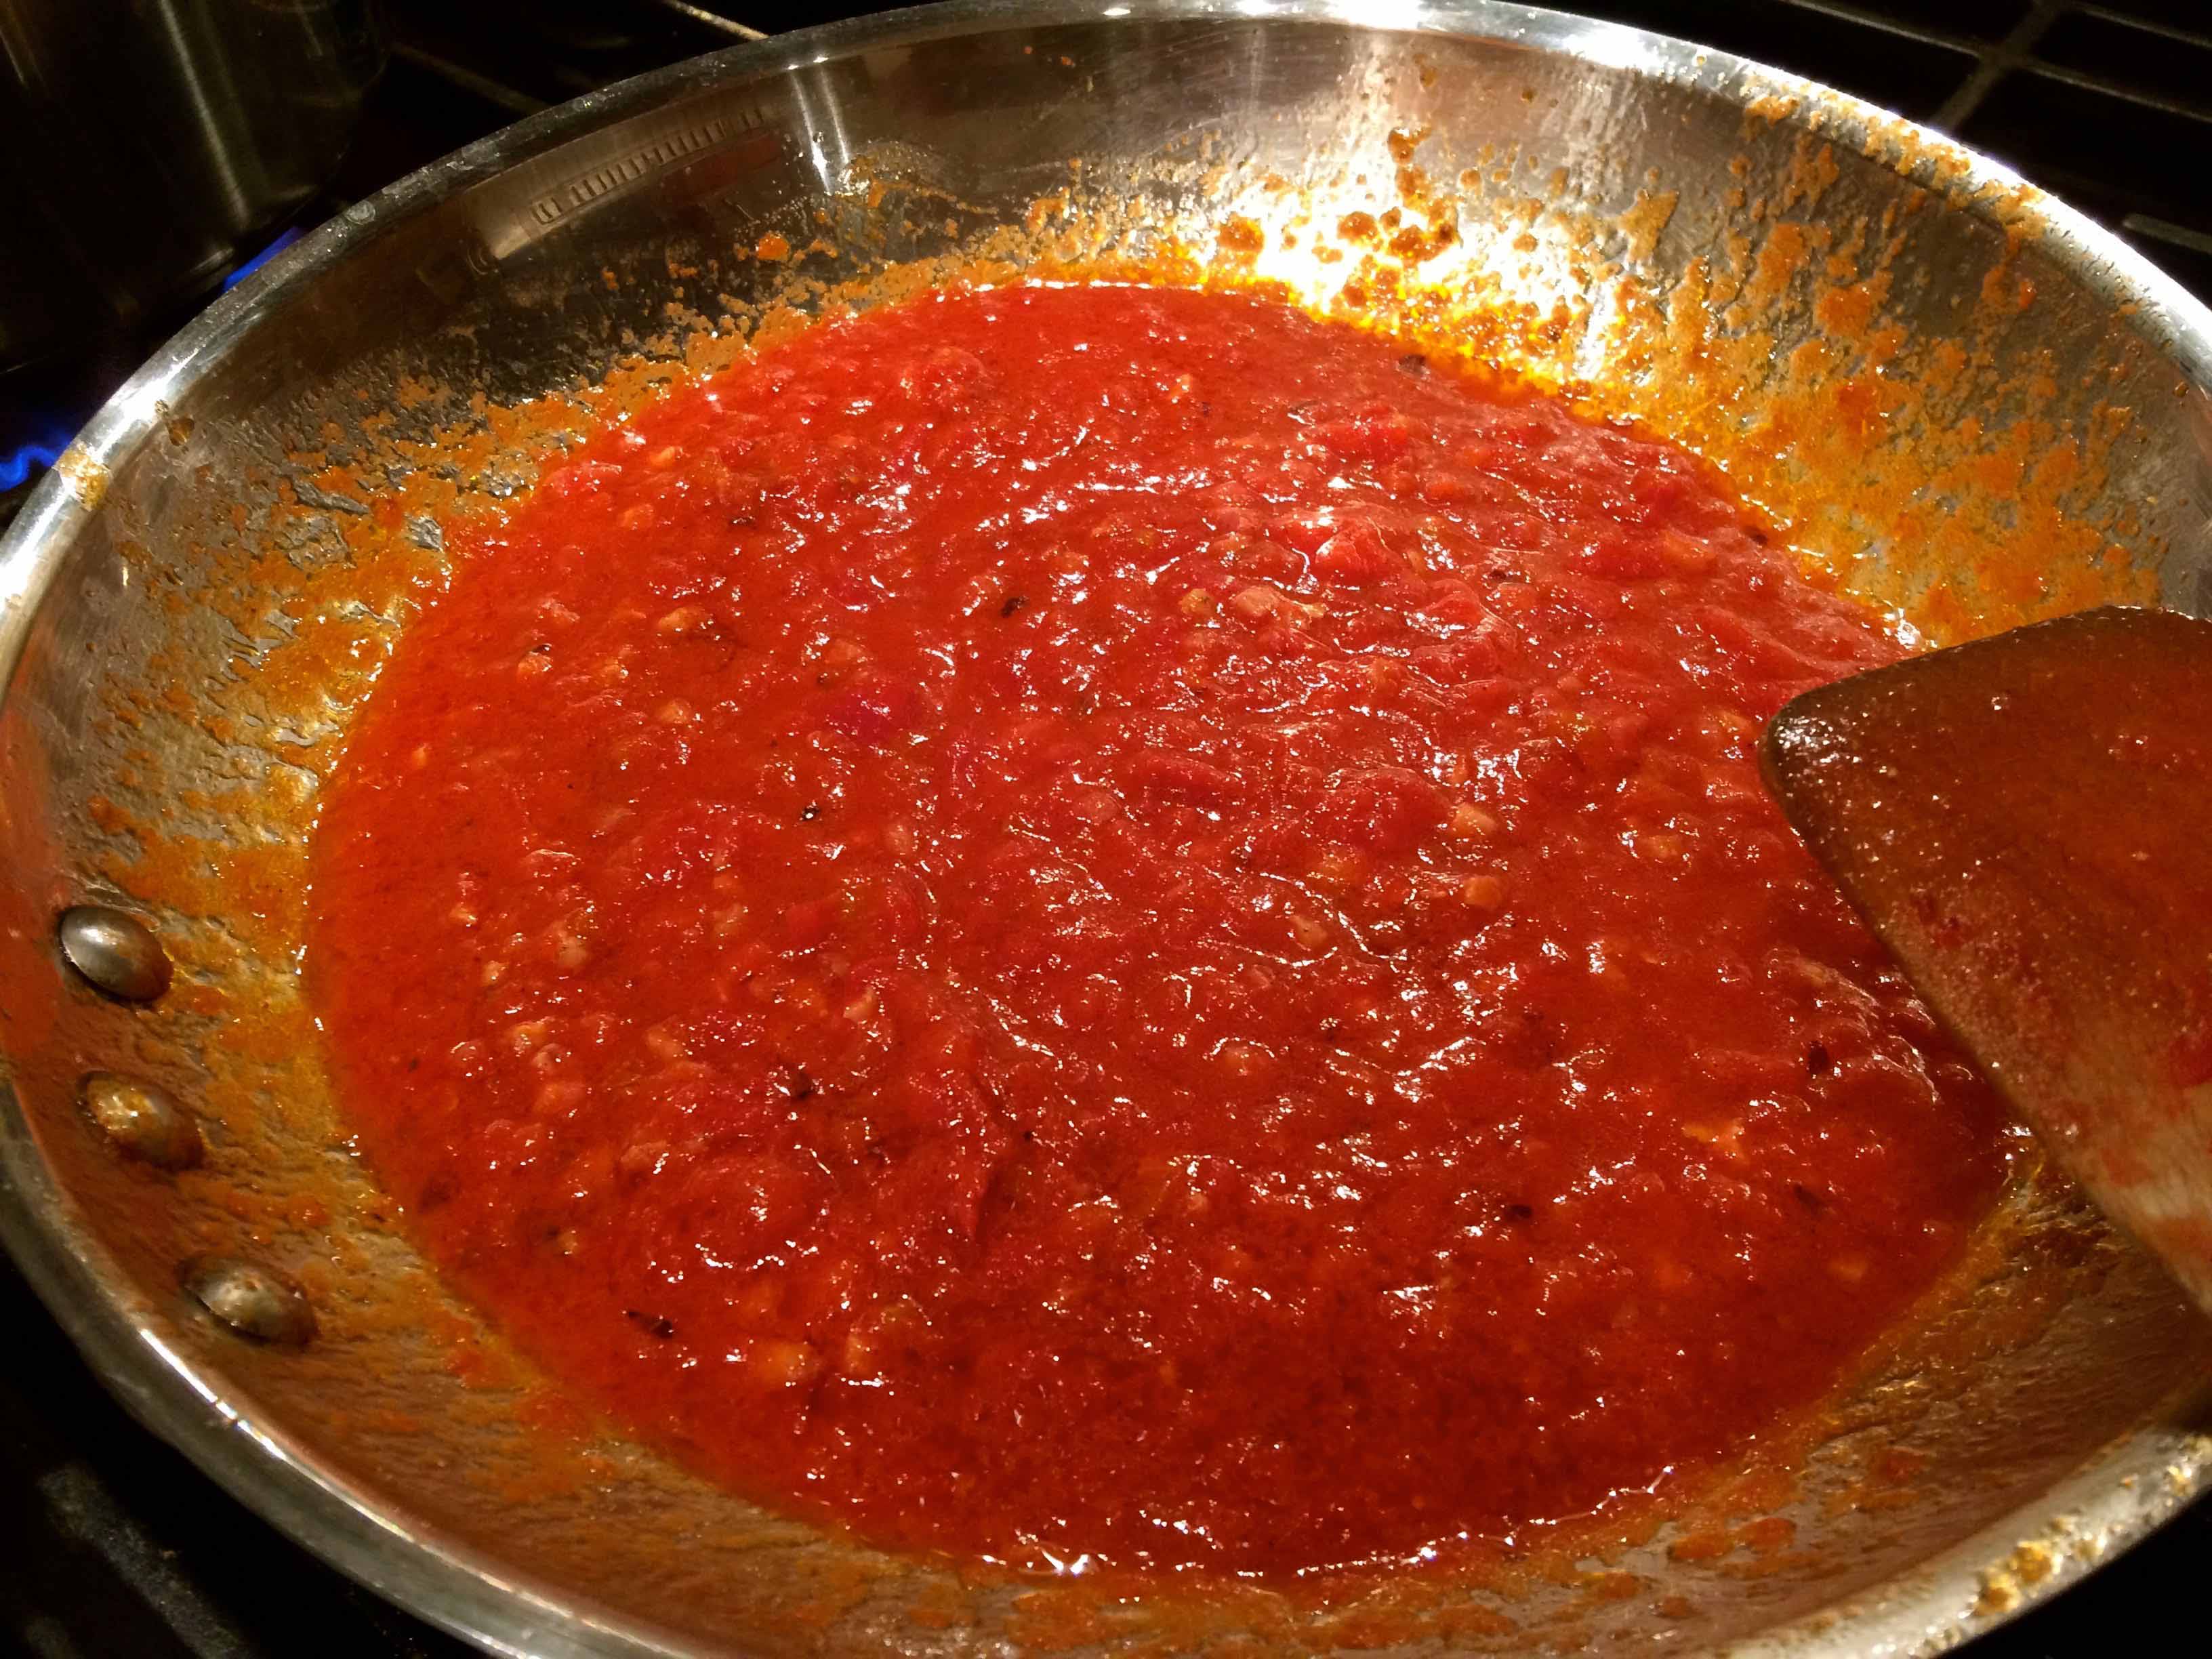
Add the leftover tomato sauce, reduce the heat to low, and cook for 5 to 10 minutes, until the sauce comes to steady simmer.
Simmering the tomato sauce
Meanwhile cook the pasta in well salted water.About a minute before the pasta reaches the al dente stage, transfer it with tongs to the skillet with the sauce. Still over low heat, toss the pasta in the sauce until it is nicely coated for about a minute more, letting the pasta reach al dente. If the sauce is too thick you can use a tablespoon or two of the pasta water to thin it.
Tossing the pasta with the sauce
Off the heat, sprinkle with grated Pecorino Romano.
One of my favorite kitchen memories from growing up is of my aunt Carlotta making frittatas. They would vary in size from small to large, depending on how many of us they were meant to serve. What they were made with, other than eggs, was determined, more often than not, by what needed to be used up in the fridge. Sometimes it would be pasta; other times, potatoes or peppers that were about to turn; still others, by an overabundance of produce like zucchini or tomatoes. The amount of these items also played a role in determining the frittata’s size.
Way before the age of non-stick, my aunt used black-and-white speckled enamelware fry pans, heated with sufficient oil to sauté or sometimes even fry, as with potatoes, the frittata’s filling. As the ingredients cooked, she would beat-up the eggs with a little milk or even water, grated cheese, almost always pecorino-Romano, parsley, salt and pepper.
When the filling was ready, she lowered the flame and slowly poured the beaten eggs into the pan. Then she would watch until the eggs started to set around the edge. With her wooden spoon, she gently pushed the set portion toward the center and let the unset eggs run into the sides of the pan. She continued this process until the top of the frittata was no longer runny yet still moist.
Eggs almost set, just before flipping
Then the tricky moment. She would go to the cupboard and get out a plate large enough to cover the fry pan. If I tried to talk at that moment, she would shush me. She placed the plate on top of the pan, and then holding the plate in place with one hand and the pan with other, she would swiftly invert the pan to release the frittata. With a confident smile (and maybe a sigh of relief), she would slide the frittata back into the pan to finish cooking.
After inverting, cooked side up
The top of the frittata was always golden brown, with bits of the filling peeking out, intimating its flavors. My favorite, however, was her spaghetti frittata with its crusty fried pasta coating each side.
Memories like these always come back to me vividly whenever I make a frittata. I feel aunt Carlotta by my side and even seem to hear her “Shush” when I flip mine. Recalling the past is one of the reasons I cook today; as the food does my body, these memories sustain my soul.
On the cutting board, ready to be served.
For last night’s frittata, I used the leftover pasta alla checca from Sunday night and a leftover sausage from Monday’s cannellini bean and sausages. I roughly chopped the sausage and fried it with the pasta just until the ditali started to crust. I then added ten eggs beaten with about a cup of pecorino Romano and a tablespoon of milk, and seasoned with salt and pepper. And then I cooked it as described above.
Looking the pictures in this post, I think my aunt would have been proud of me and happy to know that she’s still a part of my life.
Having grown up when microwave ovens looked more at home in the Jetsons’ kitchen than in those of most Americans, I still remember when at least one of our weekday meals comprised leftovers, carefully and even lovingly heated up either on the stove or in the oven. Sometimes the remains of a meal were metamorphosed into an entirely new dish, a pasta, a frittata, even a hash. Other times, especially with stews and casseroles, they were simply brought back up to serving temperature over a low flame or in a warm oven.
The few times I’ve knowingly had microwaved food (I can’t account for every restaurant meal I’ve had), it’s had a strange characterless flavor and even more unnatural texture. The extreme heat of the first bite was quickly followed by cooler and sometimes even frosted morsels. I haven’t even mentioned that weird smell that comes as the food is reheated in one of these modern wonders. When I worked in an office, I recall going into the lunchroom when co-workers were “cooking” their microwave gourmet meals in plastic plates. I wasn’t sure which was responsible for the aroma, the food or the plastic.
Today our microwave is used to soften a stick of butter that we may need for a recipe or to jumpstart the baking of a potato. I can’t think of anything else.
For leftovers, I go back to my roots and, like my mother and aunt, use either my stove or my oven to do the restoration work.The food is always as good and sometimes even better than it was on its debut. Such was the case last night, when I reheated our roasted chicken thighs from Monday night with our ratatouille from Tuesday. I placed both in a heavy bottomed pan, added a small amount of water, and cooked them covered for about 20 minutes starting with a medium flame followed by a low one. As they reheated, I prepared some fresh Basmati rice as a side. When finished, the chicken thighs were infused with the flavors of the ratatouille and the ratatouille was even more delicious than on the first night.
The old way of reheating may indeed take longer than the modern, but the 20 or 30 minutes difference is, in my opinion, well worth it.