One of my favorite kitchen memories from growing up is of my aunt Carlotta making frittatas. They would vary in size from small to large, depending on how many of us they were meant to serve. What they were made with, other than eggs, was determined, more often than not, by what needed to be used up in the fridge. Sometimes it would be pasta; other times, potatoes or peppers that were about to turn; still others, by an overabundance of produce like zucchini or tomatoes. The amount of these items also played a role in determining the frittata’s size.
Way before the age of non-stick, my aunt used black-and-white speckled enamelware fry pans, heated with sufficient oil to sauté or sometimes even fry, as with potatoes, the frittata’s filling. As the ingredients cooked, she would beat-up the eggs with a little milk or even water, grated cheese, almost always pecorino-Romano, parsley, salt and pepper.
When the filling was ready, she lowered the flame and slowly poured the beaten eggs into the pan. Then she would watch until the eggs started to set around the edge. With her wooden spoon, she gently pushed the set portion toward the center and let the unset eggs run into the sides of the pan. She continued this process until the top of the frittata was no longer runny yet still moist.
Eggs almost set, just before flipping
Then the tricky moment. She would go to the cupboard and get out a plate large enough to cover the fry pan. If I tried to talk at that moment, she would shush me. She placed the plate on top of the pan, and then holding the plate in place with one hand and the pan with other, she would swiftly invert the pan to release the frittata. With a confident smile (and maybe a sigh of relief), she would slide the frittata back into the pan to finish cooking.
After inverting, cooked side up
The top of the frittata was always golden brown, with bits of the filling peeking out, intimating its flavors. My favorite, however, was her spaghetti frittata with its crusty fried pasta coating each side.
Memories like these always come back to me vividly whenever I make a frittata. I feel aunt Carlotta by my side and even seem to hear her “Shush” when I flip mine. Recalling the past is one of the reasons I cook today; as the food does my body, these memories sustain my soul.
On the cutting board, ready to be served.
For last night’s frittata, I used the leftover pasta alla checca from Sunday night and a leftover sausage from Monday’s cannellini bean and sausages. I roughly chopped the sausage and fried it with the pasta just until the ditali started to crust. I then added ten eggs beaten with about a cup of pecorino Romano and a tablespoon of milk, and seasoned with salt and pepper. And then I cooked it as described above.
Looking the pictures in this post, I think my aunt would have been proud of me and happy to know that she’s still a part of my life.
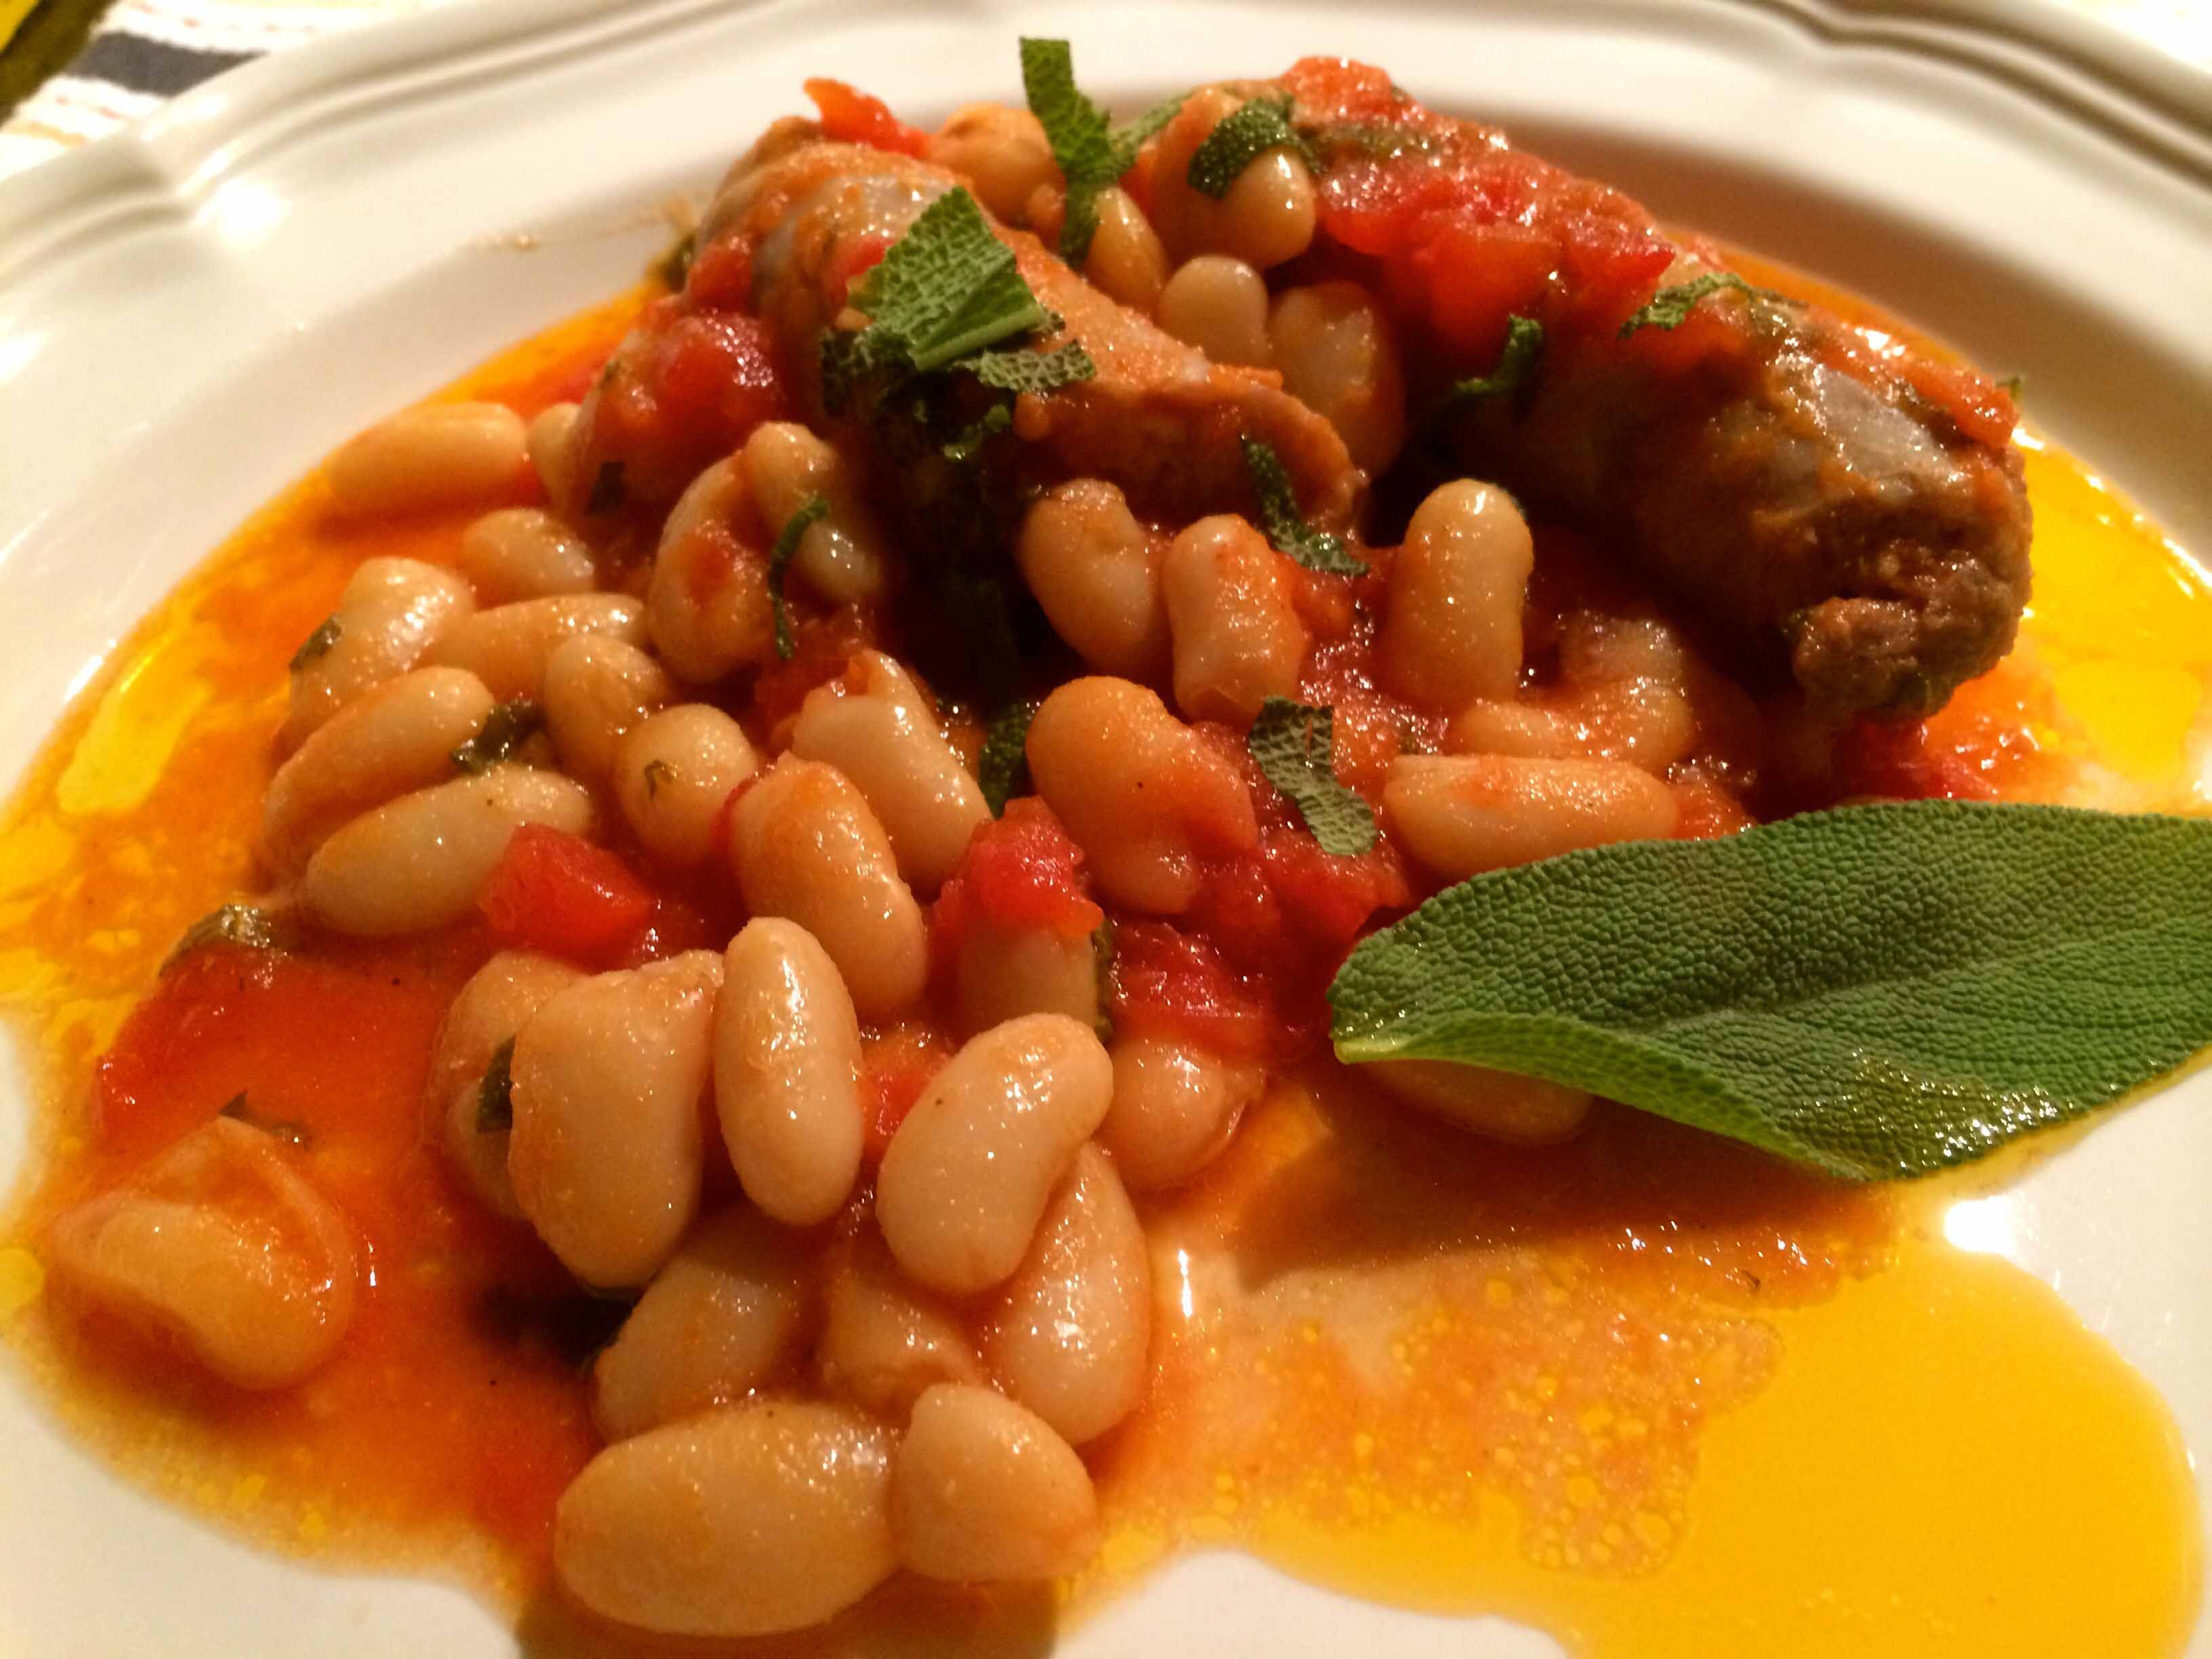
Earlier this month, I posted a Tuscan recipe from the Food Network for sausages and cannellini all’uccelletta that has always been one of our favorite weeknight dishes. However, I recently came across a variation on this recipe in Giuliano Hazan’s Every Night Italian.
The ingredients are almost identical, except for fresh sage leaves replacing fresh bay; however, in preparing this dish, Hazan skips the browning of the sausages and opts to braise them slowly along with the beans and tomatoes. (This also makes for a less messy stove top.)
This small variation makes for a big difference in taste. I found that both the sauce and the beans take on more flavor from the sausage and the sausages themselves are moister and richer in texture.
Of course, the southern Italian in me added just a pinch of Calabrian red-pepper flakes to spice things up a bit.
Beans and Sausage (Salsicce e Fagioli) adapted from Giuliano Hazan’s Every Night Italian.
2 tablespoons extra-virgin olive oil, plus more for serving
3 large garlic cloves, lightly crushed and peeled
1 tablespoon fresh sage leaves, coarsely chopped
1 can (15 oz) cannellini beans drained and rinsed
1 can (16 ounce) crushed Italian tomatoes
Salt
Freshly ground black pepper
1 pinch dried red-pepper flakes
1 pound sweet Italian pork sausages (without fennel seeds)
Put the olive oil and garlic in a heavy bottomed sauté pan large enough to hold the sausages in a single layer. Place it over medium-high heat and sauté the garlic cloves until lightly browned on all sides.
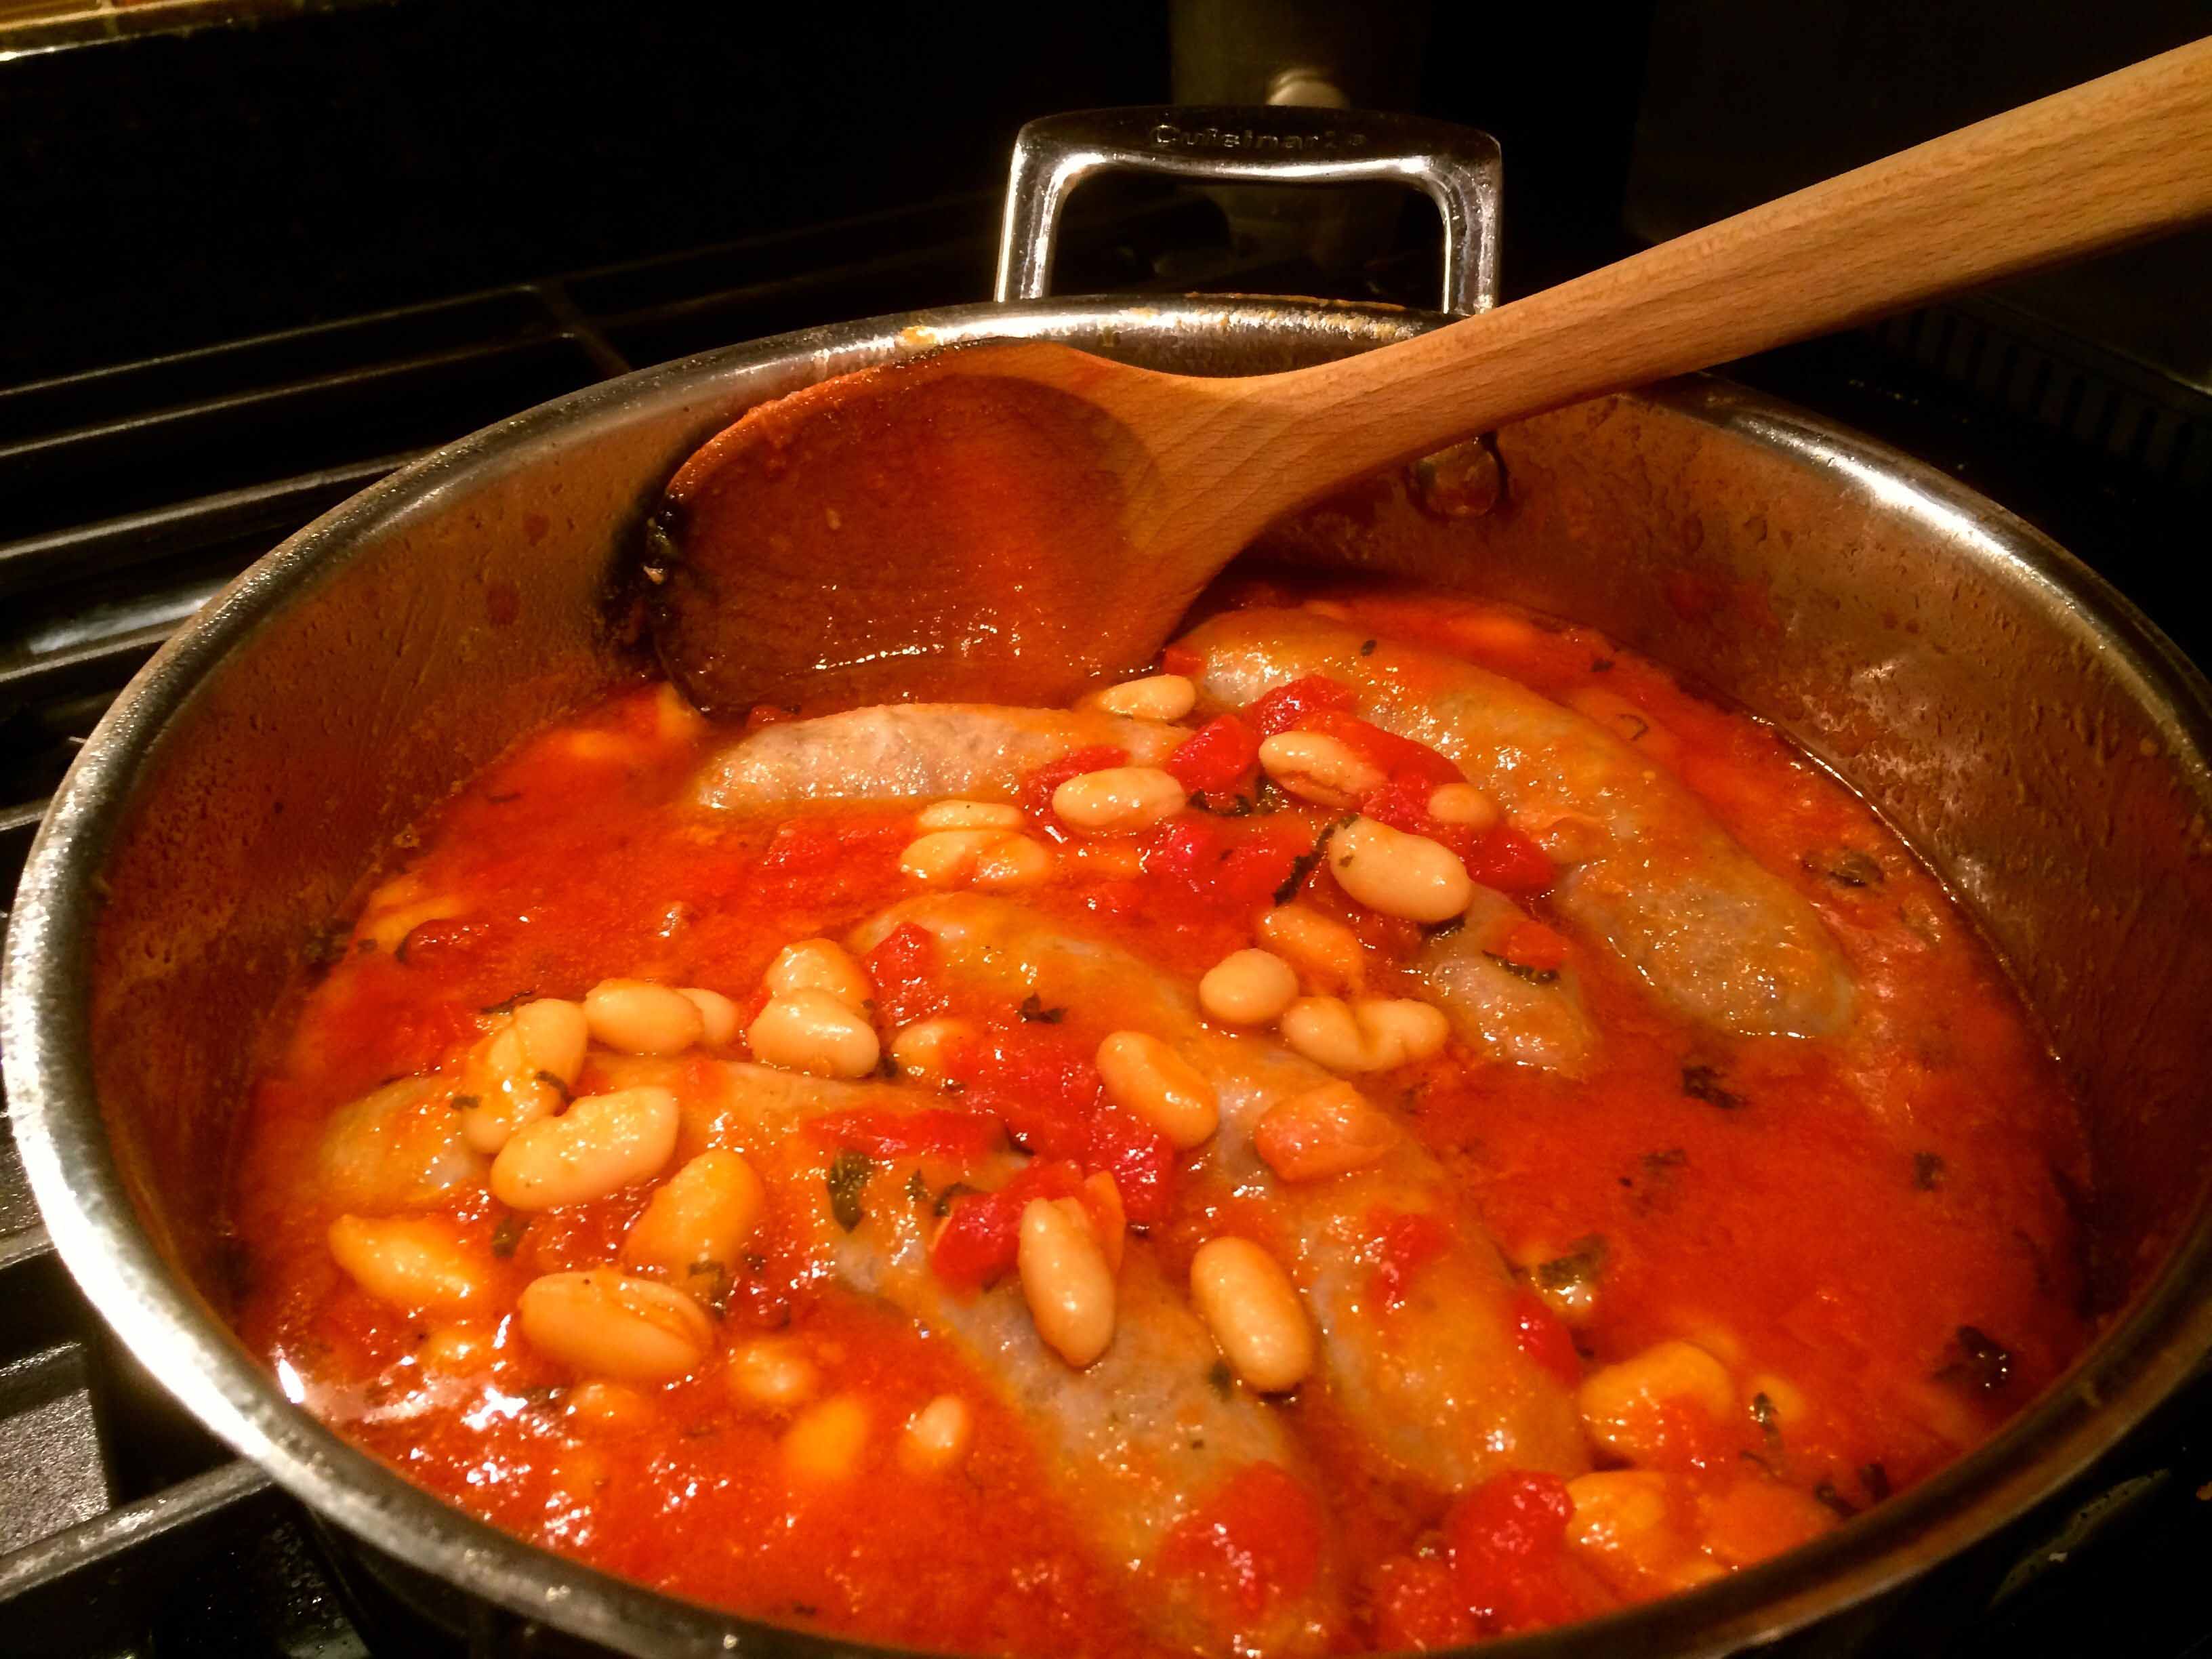
When the garlic has browned, discard it and add the chopped sage to the pan and cook stirring for about 1 minute. Add the tomatoes and beans. Season with salt and black pepper, keeping in mind that the sausages are already fairly salty. Add a pinch of dried red pepper flakes.
After adding the sausage to the pan
Add the sausage. When the tomatoes begin to bubble, turn the heat down to medium-low. Cover the pan and cook at a gentle simmer until the sausages feel tender when pricked with a fork, about 20 minutes. Check the pan occasionally and add a little water if all the liquid in the pan evaporates before the sausages are done. Also turn the sausages once with tongs, being careful not to pierce them.
Serve hot, drizzled with additional extra virgin olive oil and accompanied by crusty bread.
Returning from a weekend of wedding revelry and, needless to say, over indulgence, we chose to make one of our favorite summertime pastas for dinner last night. It is also one of the simplest to prepare, Pasta alla Checca. It requires a minimum of preparation and, except for the pasta itself, no cooking. It’s also quintessentially seasonal, using summer tomatoes and fresh basil.
If you decide to make this dish, I suggest that you only do so when you can find the best tomatoes of the season and that they are perfectly ripe as they constitute the soul of this pasta. The extra-virgin olive oil should also be the finest and the mozzarella the creamiest you can find.
There are many variations on this dish. My recipe is for the Roman version of Pasta alla Checca from 1,000 Italian Recipesby Italian-food authority Michelle Scicolone. Her recipes are always authentic and, I might add, never-fail.
Pasta alla Checca Adapted from 1,000 Italian Recipes
3 medium size ripe tomatoes
1/3 cup extra-virgin olive oil
1 small garlic clove, minced (I used a large clove, grated on a Microplane rasp.)
Salt and freshly ground pepper
20 basil leaves
1 pound tubetti or ditalini (I used the slightly larger ditali pasta.)
8 ounces fresh mozzarella, cut into small dice (Be sure to us “fresh” as opposed to “low-moisture” mozzarella.)
1. Cut the tomatoes in half and remove the cores, Squeeze out the tomato seeds. Chop the tomatoes and place them in a bowl large enough to hold all of the ingredients. (Rather than squeezing our the seeds, I used a small spoon to remove most of them to avoid loosing too much of the juice.)
2. Stir in the oil, garlic, and salt and pepper to taste. Stack the basil leaves and cut them crosswise into thin ribbons. Stir the basil into the tomatoes. Cover and leave at room temperature up to 1 hour. (Be sure to taste carefully for adequate salt.)
The chopped tomatoes, basil, and olive oil
3. Bring at least 4 quarts of salted water to a boil in a large pot. Add the pasta and stir well. Cook over high heat, stirring frequently, until the pasta is al dente, tender yet still firm to the bite. Drain the pasta and add it to the bowl with the pasta. Add the mozzarella and toss again. Serve immediately. (Be sure to toss the pasta until the mozzarella just begins to melt.)
Having grown up when microwave ovens looked more at home in the Jetsons’ kitchen than in those of most Americans, I still remember when at least one of our weekday meals comprised leftovers, carefully and even lovingly heated up either on the stove or in the oven. Sometimes the remains of a meal were metamorphosed into an entirely new dish, a pasta, a frittata, even a hash. Other times, especially with stews and casseroles, they were simply brought back up to serving temperature over a low flame or in a warm oven.
The few times I’ve knowingly had microwaved food (I can’t account for every restaurant meal I’ve had), it’s had a strange characterless flavor and even more unnatural texture. The extreme heat of the first bite was quickly followed by cooler and sometimes even frosted morsels. I haven’t even mentioned that weird smell that comes as the food is reheated in one of these modern wonders. When I worked in an office, I recall going into the lunchroom when co-workers were “cooking” their microwave gourmet meals in plastic plates. I wasn’t sure which was responsible for the aroma, the food or the plastic.
Today our microwave is used to soften a stick of butter that we may need for a recipe or to jumpstart the baking of a potato. I can’t think of anything else.
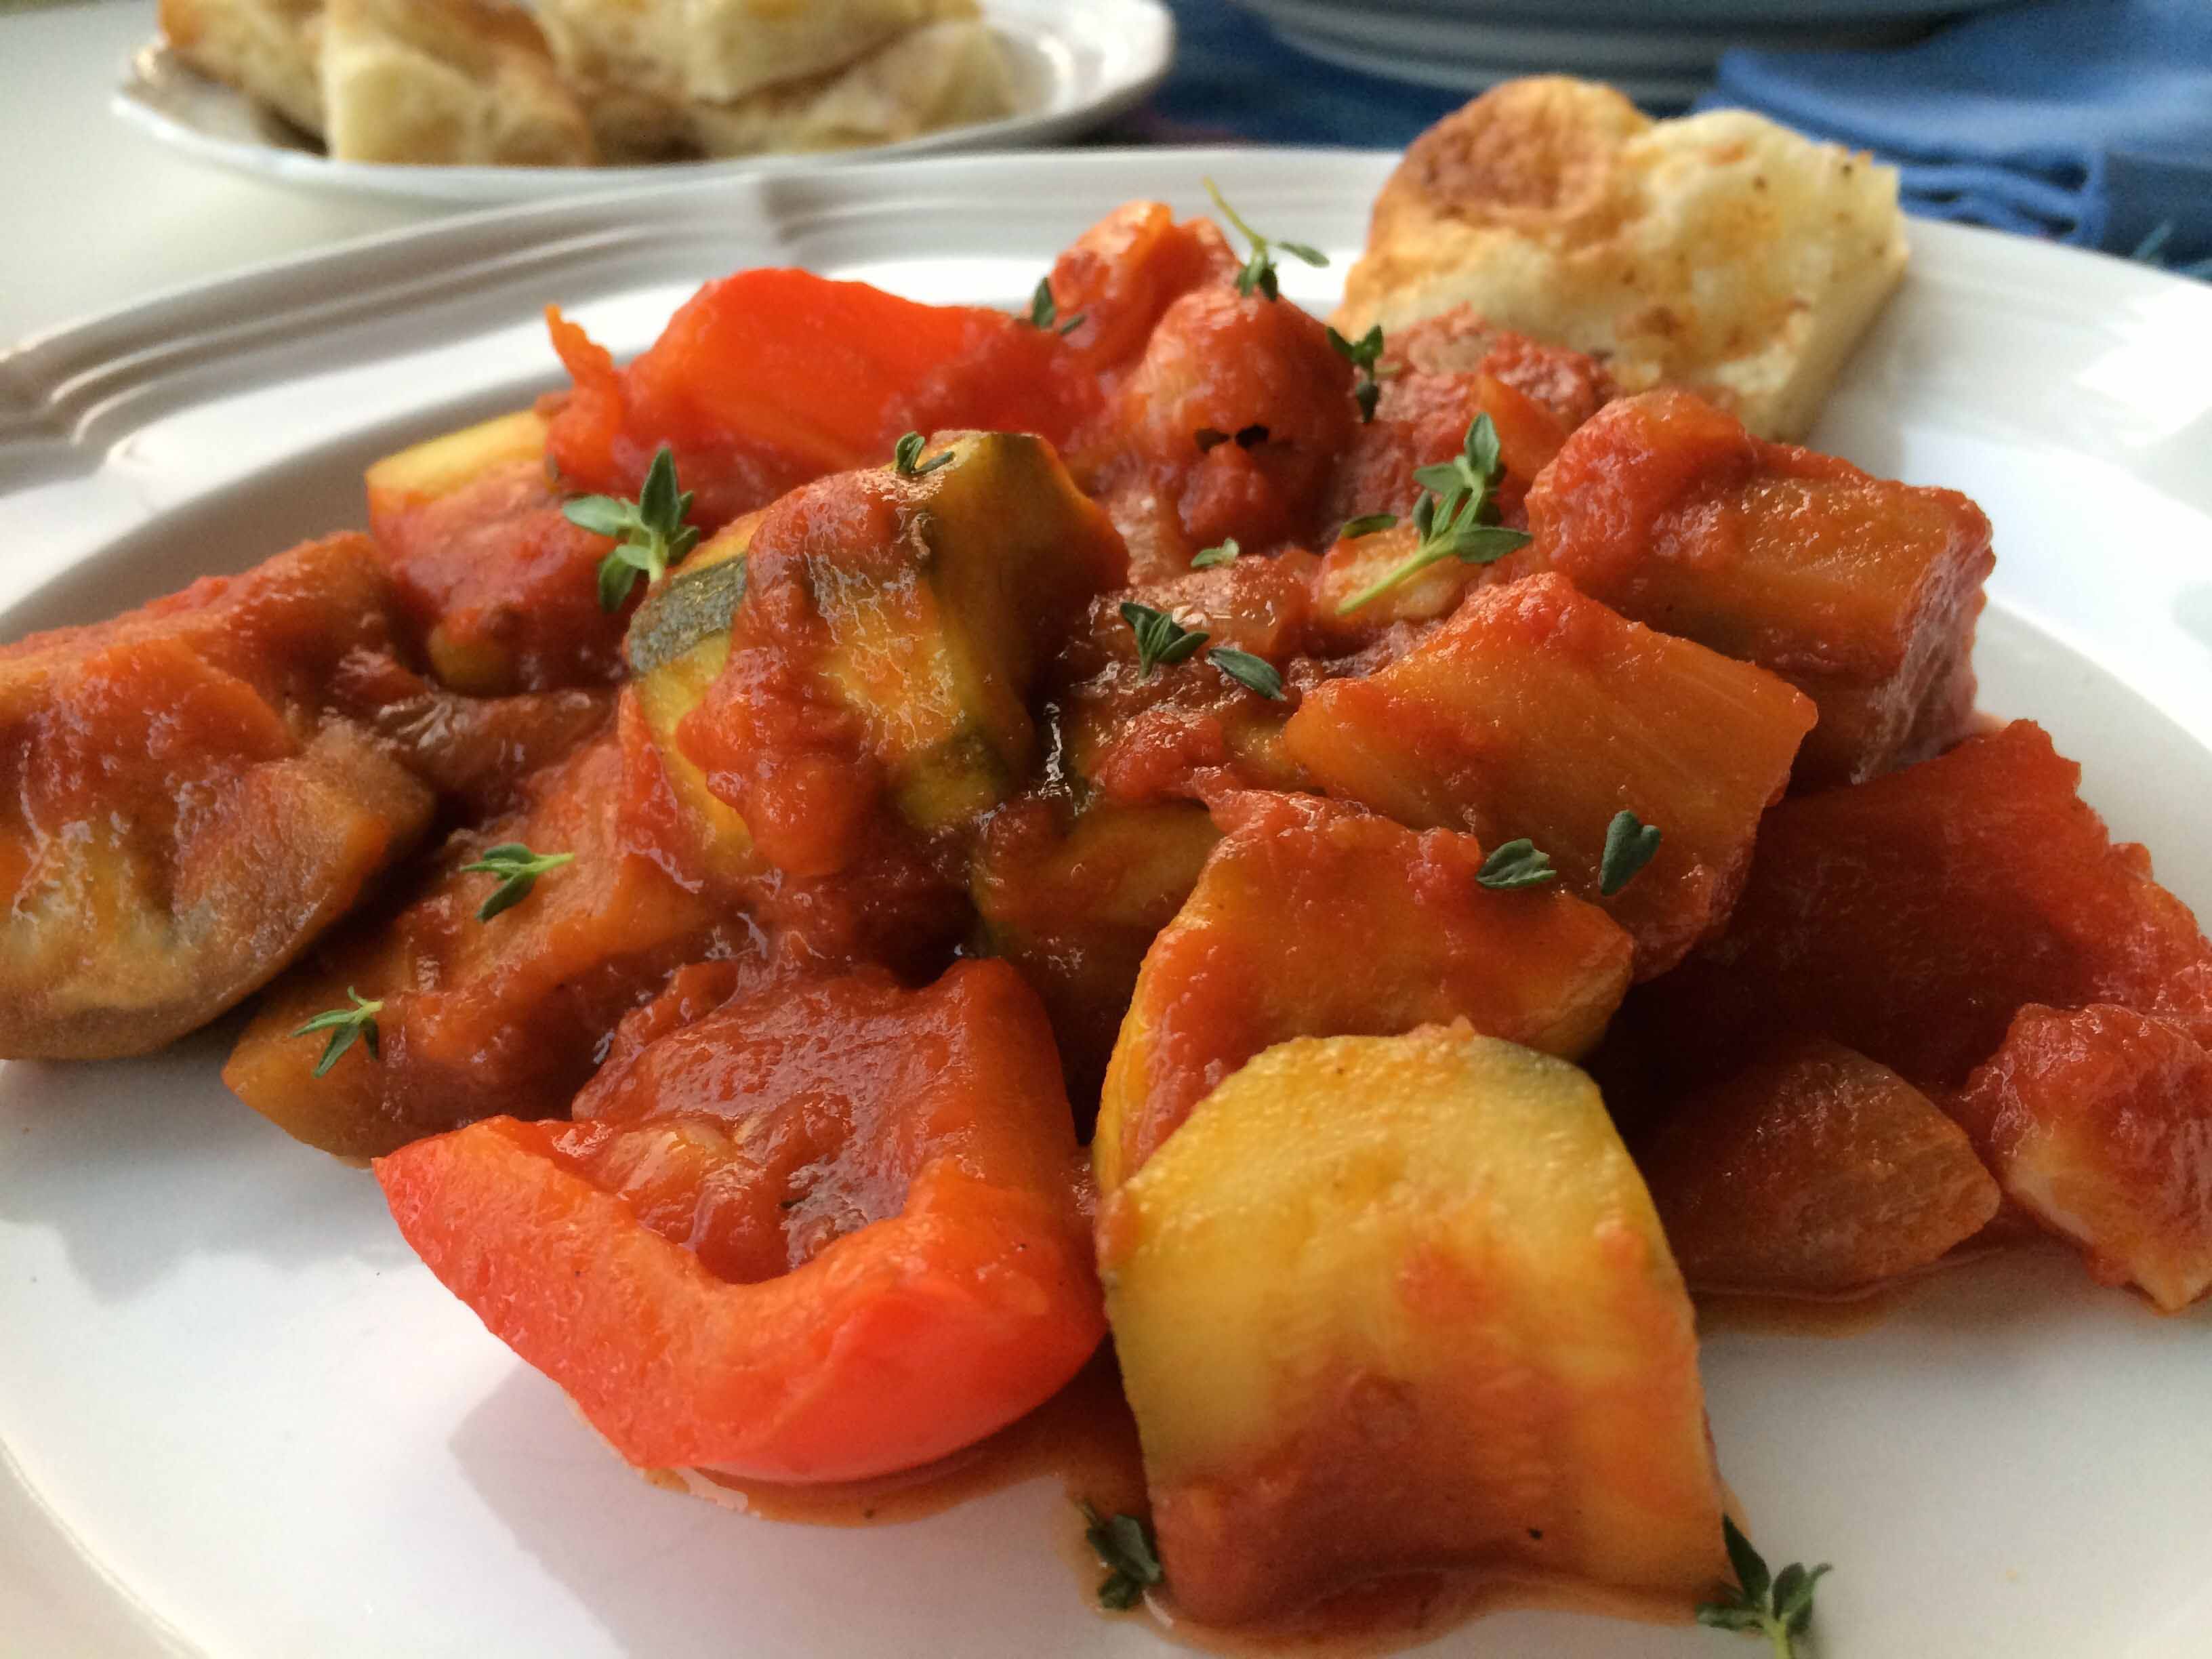
For leftovers, I go back to my roots and, like my mother and aunt, use either my stove or my oven to do the restoration work.The food is always as good and sometimes even better than it was on its debut. Such was the case last night, when I reheated our roasted chicken thighs from Monday night with our ratatouille from Tuesday. I placed both in a heavy bottomed pan, added a small amount of water, and cooked them covered for about 20 minutes starting with a medium flame followed by a low one. As they reheated, I prepared some fresh Basmati rice as a side. When finished, the chicken thighs were infused with the flavors of the ratatouille and the ratatouille was even more delicious than on the first night.
The old way of reheating may indeed take longer than the modern, but the 20 or 30 minutes difference is, in my opinion, well worth it.
Despite the noise, crowds, traffic, costs and other negatives of living in New York City, there are plenty of positives and, for me, one of the best is the ready availability of almost any culinary ingredient for most ethnic cuisines.
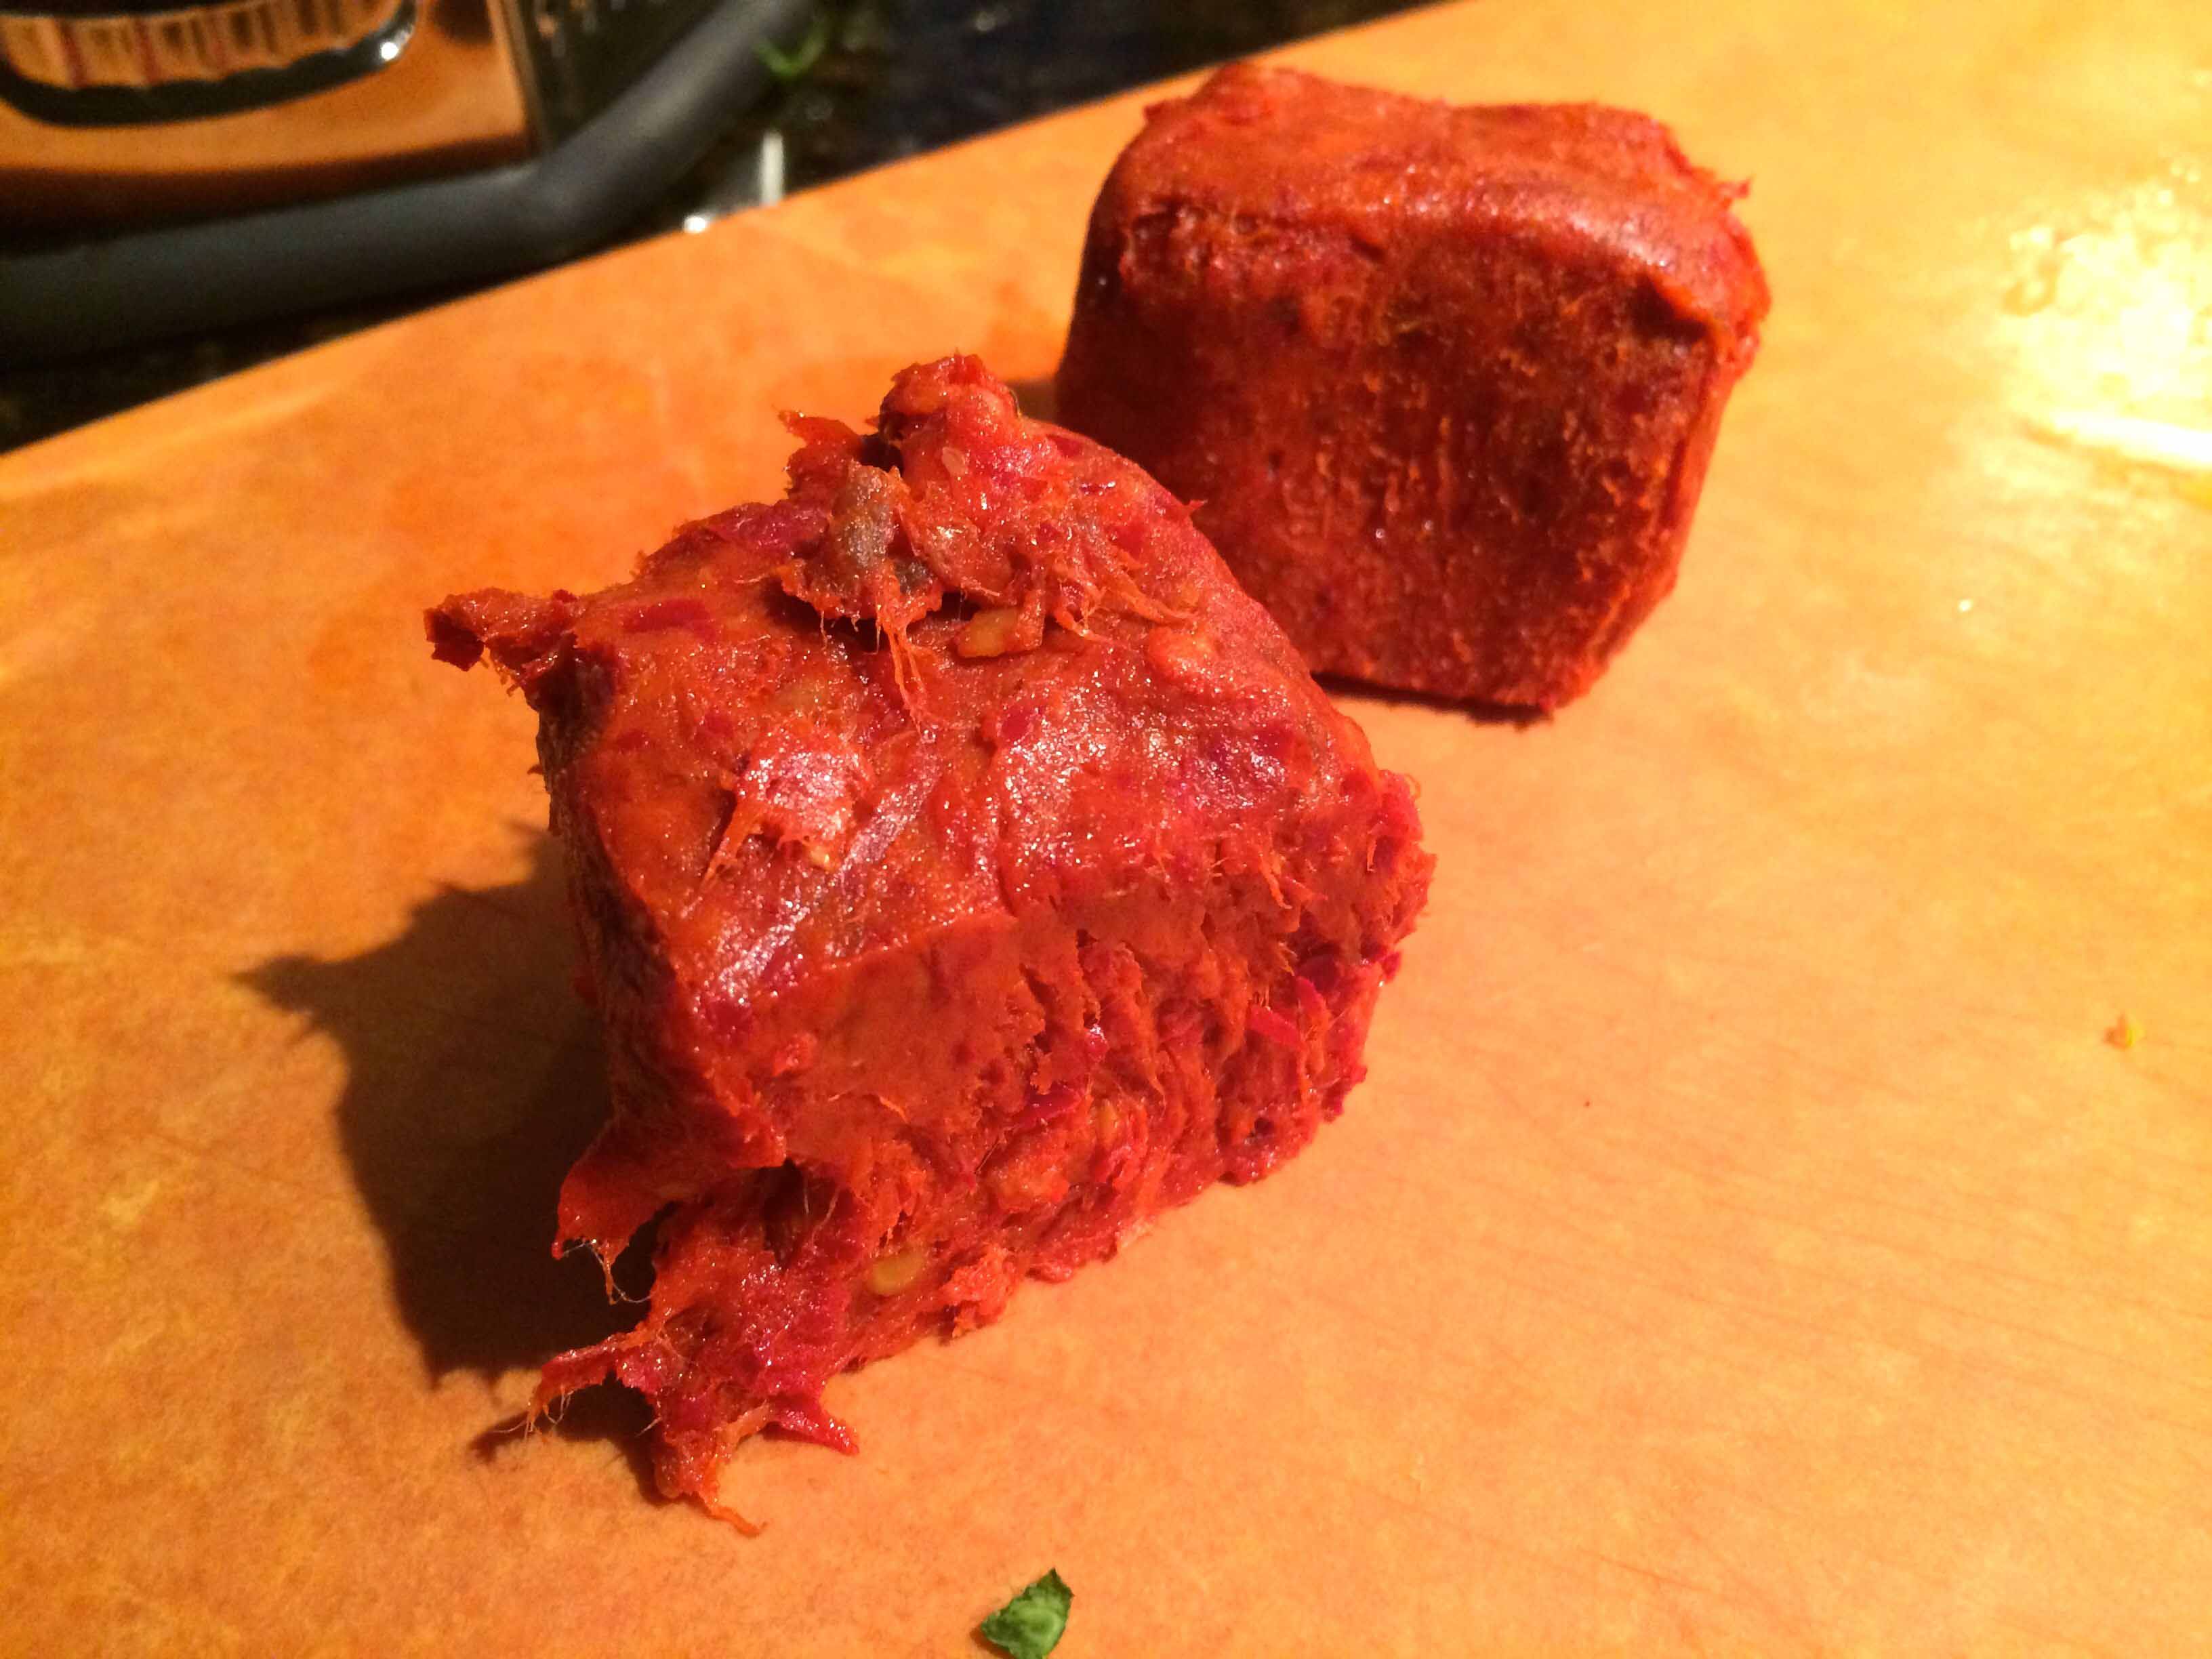
I was reminded of this yesterday when, paging through an old copy of the now sadly defunct American edition of La Cucina Italiana, I came across a recipe for spaghetti prepared with ‘nduja, a spreadable spicy salume from Calabria. Not at all familiar with this ingredient, a Google search provided me with plenty of background and within minutes I found a source for it a few blocks from home.
This highly spiced, fiery red Calabrian sausage is packed with plenty of flavor and so much red pepper that it’s thought by some to be an aphrodisiac. And given yesterday’s sweltering 90° F temperatures, I thought spicy spaghetti with zucchini and ‘nduja was the perfect dish. The delicately flavored zucchini provide a moderating counterpoint to the raw heat of the sausage.
Spaghetti with Zucchini and ‘Nduja
Fine sea salt (I used Kosher salt.)
1/4 cup extra-virgin olive oil
1 1/2 pounds zucchini, grated using the larger holes of a box grater
3 1/2 ounces ’nduja, removed from casing (scant 1/2 cup packed)
1 pound spaghetti
Bring a large pot of salted water to a boil.
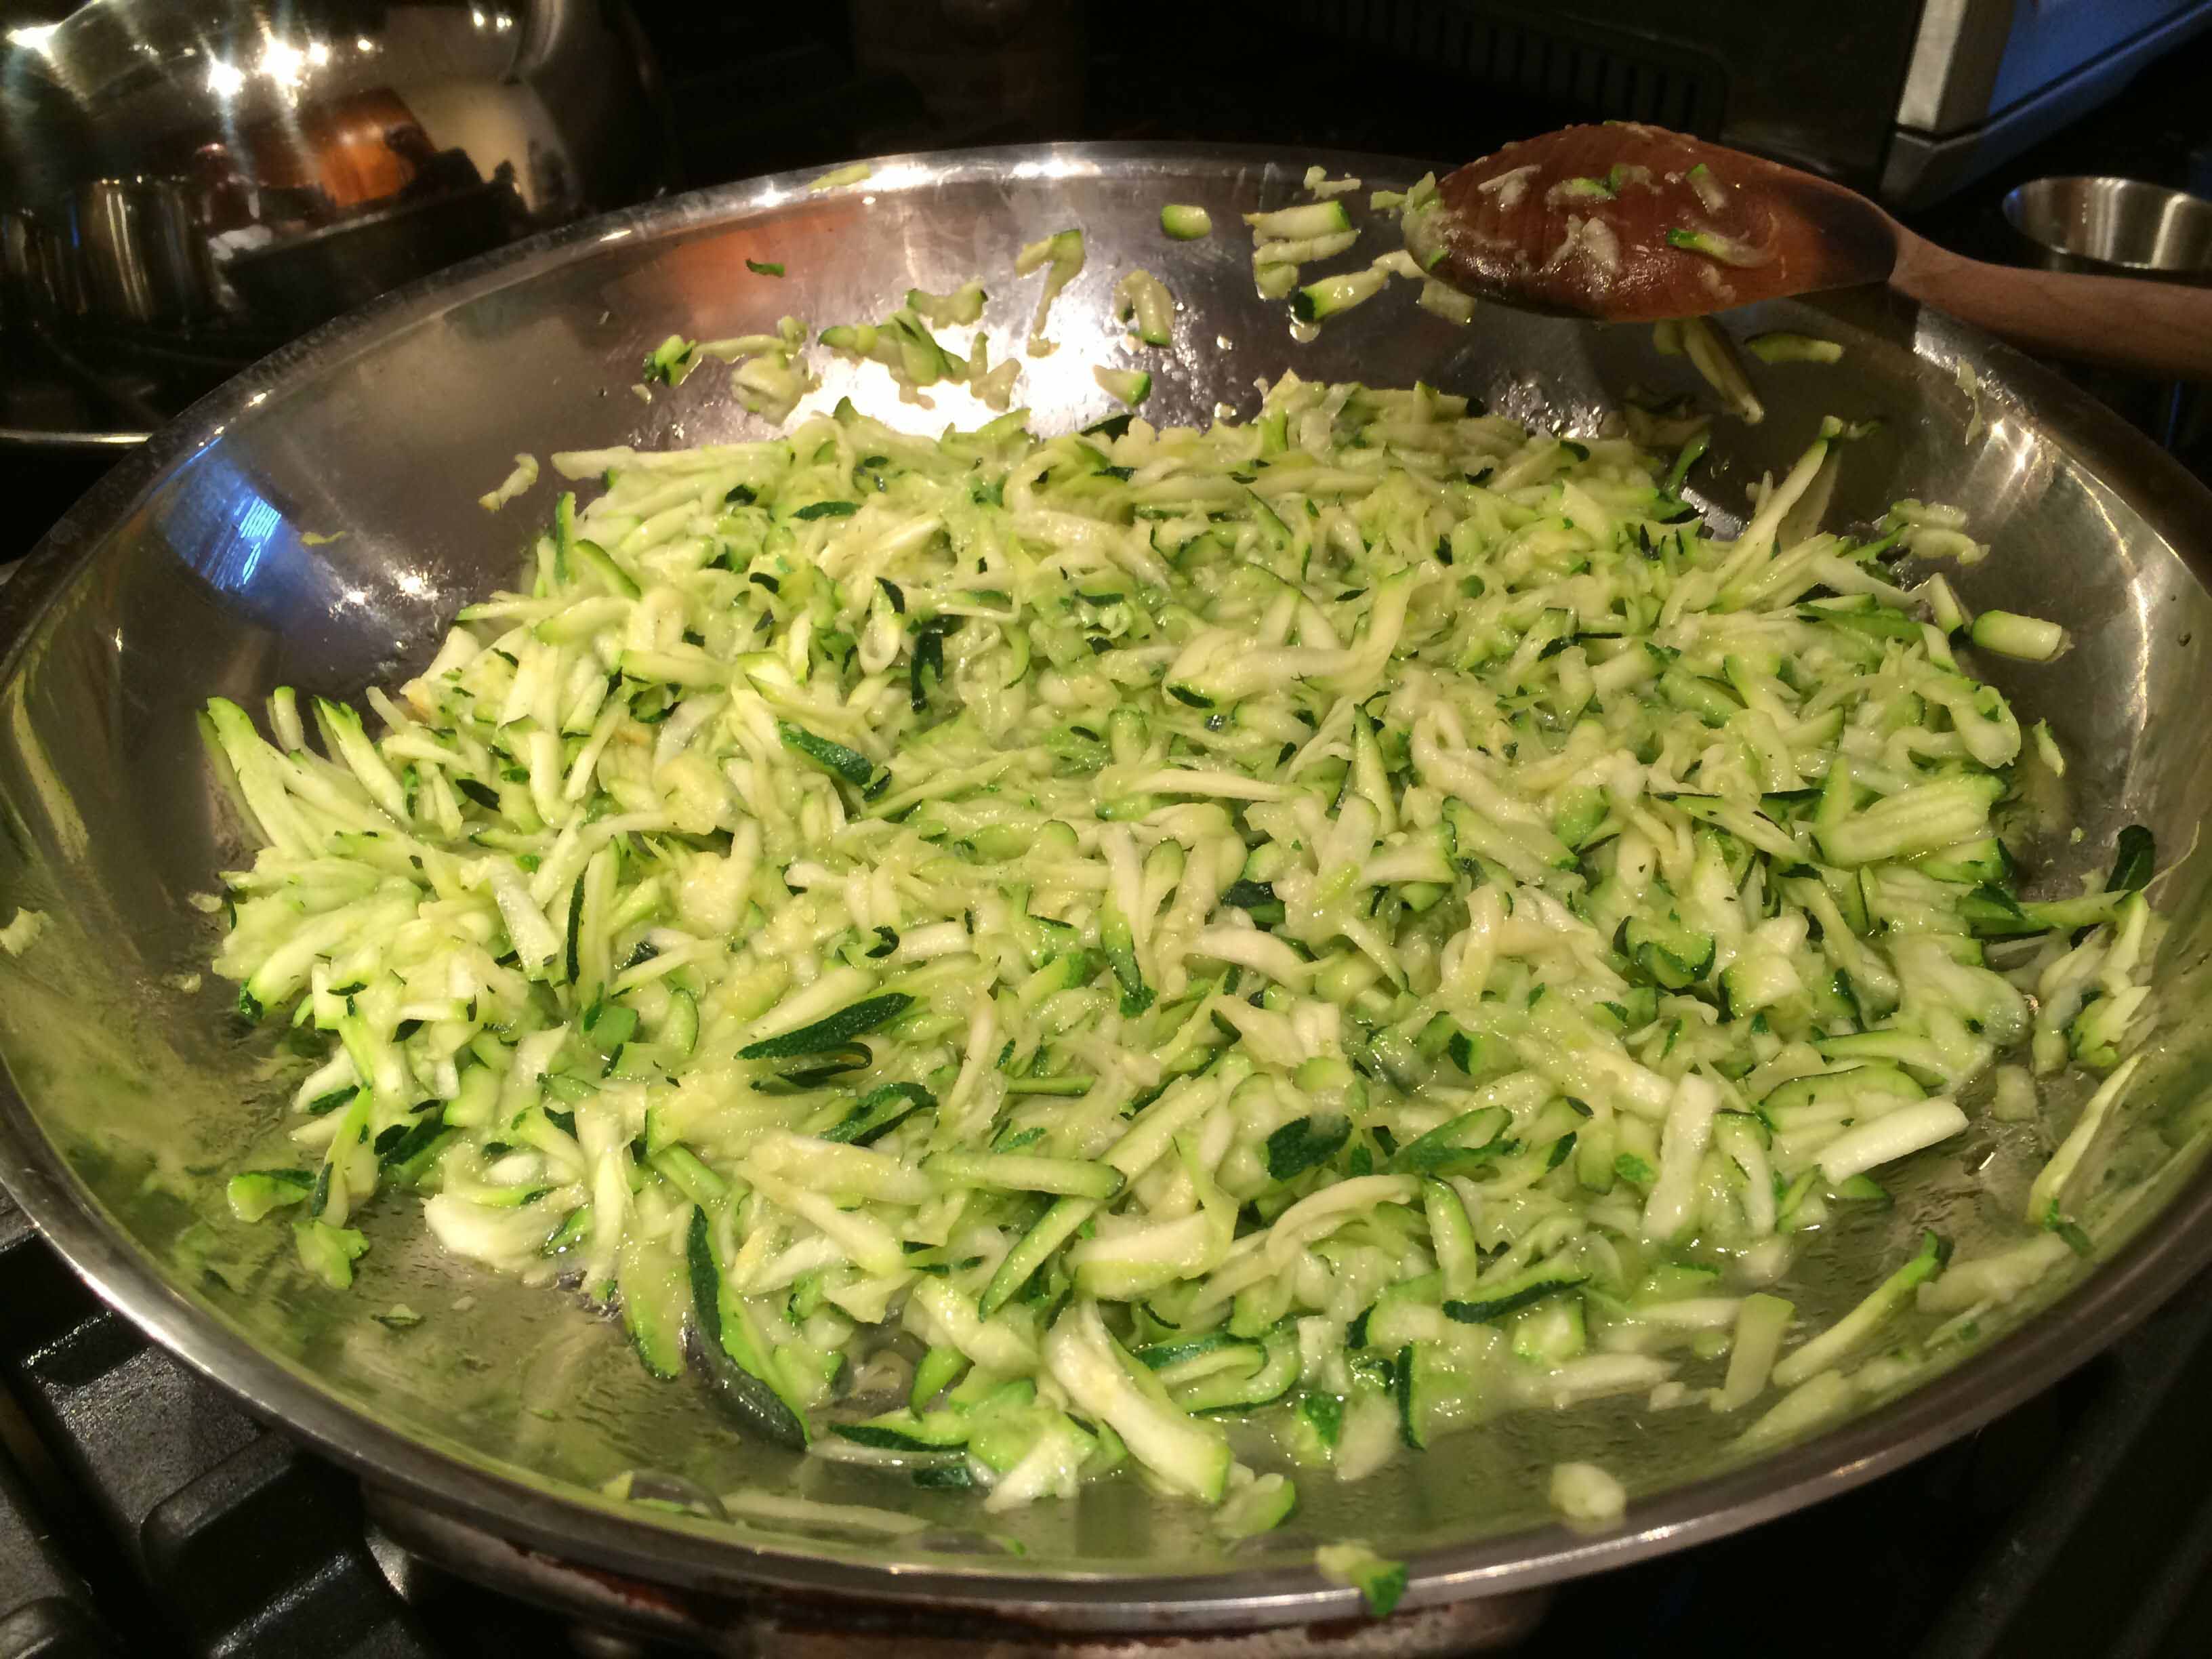
Meanwhile, in a large nonstick skillet, heat the oil over medium-high heat until shimmering. Add zucchini, 1/4 teaspoon salt, and 1 tablespoon water. Reduce heat to medium; cook, stirring occasionally, until tender, about 10 minutes. (Rather than a non-stick, I used a stainless-steel skillet.)
Sauteing the zucchini
Add half of the ’nduja; stir with a wooden spoon, breaking up the meat, until it has melted into the sauce. Remove from heat.
After adding the ‘nduja
Boil pasta until al dente. Reserving 1/4 cup of the pasta cooking liquid, drain pasta, and then transfer to a large serving bowl. Add zucchini mixture and pasta cooking liquid; toss to combine. Divide pasta among serving bowls. Serve immediately, topped with the remaining ’nduja. (Add the pasta cooking liquid judiciously; you may not need the full amount.)
‘Nduja out of casing
Note: An internet search for ’nduja should provide sources for purchasing it. In New York City, it is available at Buon Italia in Chelsea Market and I believe at Murray’s Cheese and possibly at Eataly.
When I was at our greengrocer yesterday, I spotted some beautiful Holland eggplants, deep purple in color, firm to the touch, heavy for their size. And right next to them, were some local zucchini looking equally as good. With these in my basket, I decided it was time for ratatouille. Unfortunately, I wasn’t lucky enough to find some equally good tomatoes. Nevertheless, I stayed with my original decision and bought the other ingredients onions, bell peppers, fresh thyme.
When I got back home, I searched for some recipes and found one from Martha Stewart that appealed to me because it called for large, chunky pieces of vegetables. However, its directions included some steps, like roasting individual canned tomatoes for 30 minutes and sweating eggplant with salt, that I didn’t feel necessary.
My go-to brand of canned tomatoes always have plenty of flavor and I thought rather than turning on the oven, I could get the roasted flavor from toasting some concentrated tomato paste in my pot along with the vegetables. I also find more and more that today’s eggplants aren’t as bitter as they once were and therefore the typical salting process isn’t as necessary as it once was.
I also digressed from Martha’s recipe in the timing. I thought her suggested times for cooking the vegetables were too short. I’m old school Italian and like my vegetables a little more cooked than more trendy recipes suggest. I remember how, when nouvelle cuisine was in vogue, I once served string beans to my aunt and she took them back to the kitchen and sautéed them in olive oil and garlic. She returned them to the table and announced, “Now these are beans cooked for people not for rabbits.”
Ratatouille Adapted from Martha Stewart
4 tablespoons extra-virgin olive oil
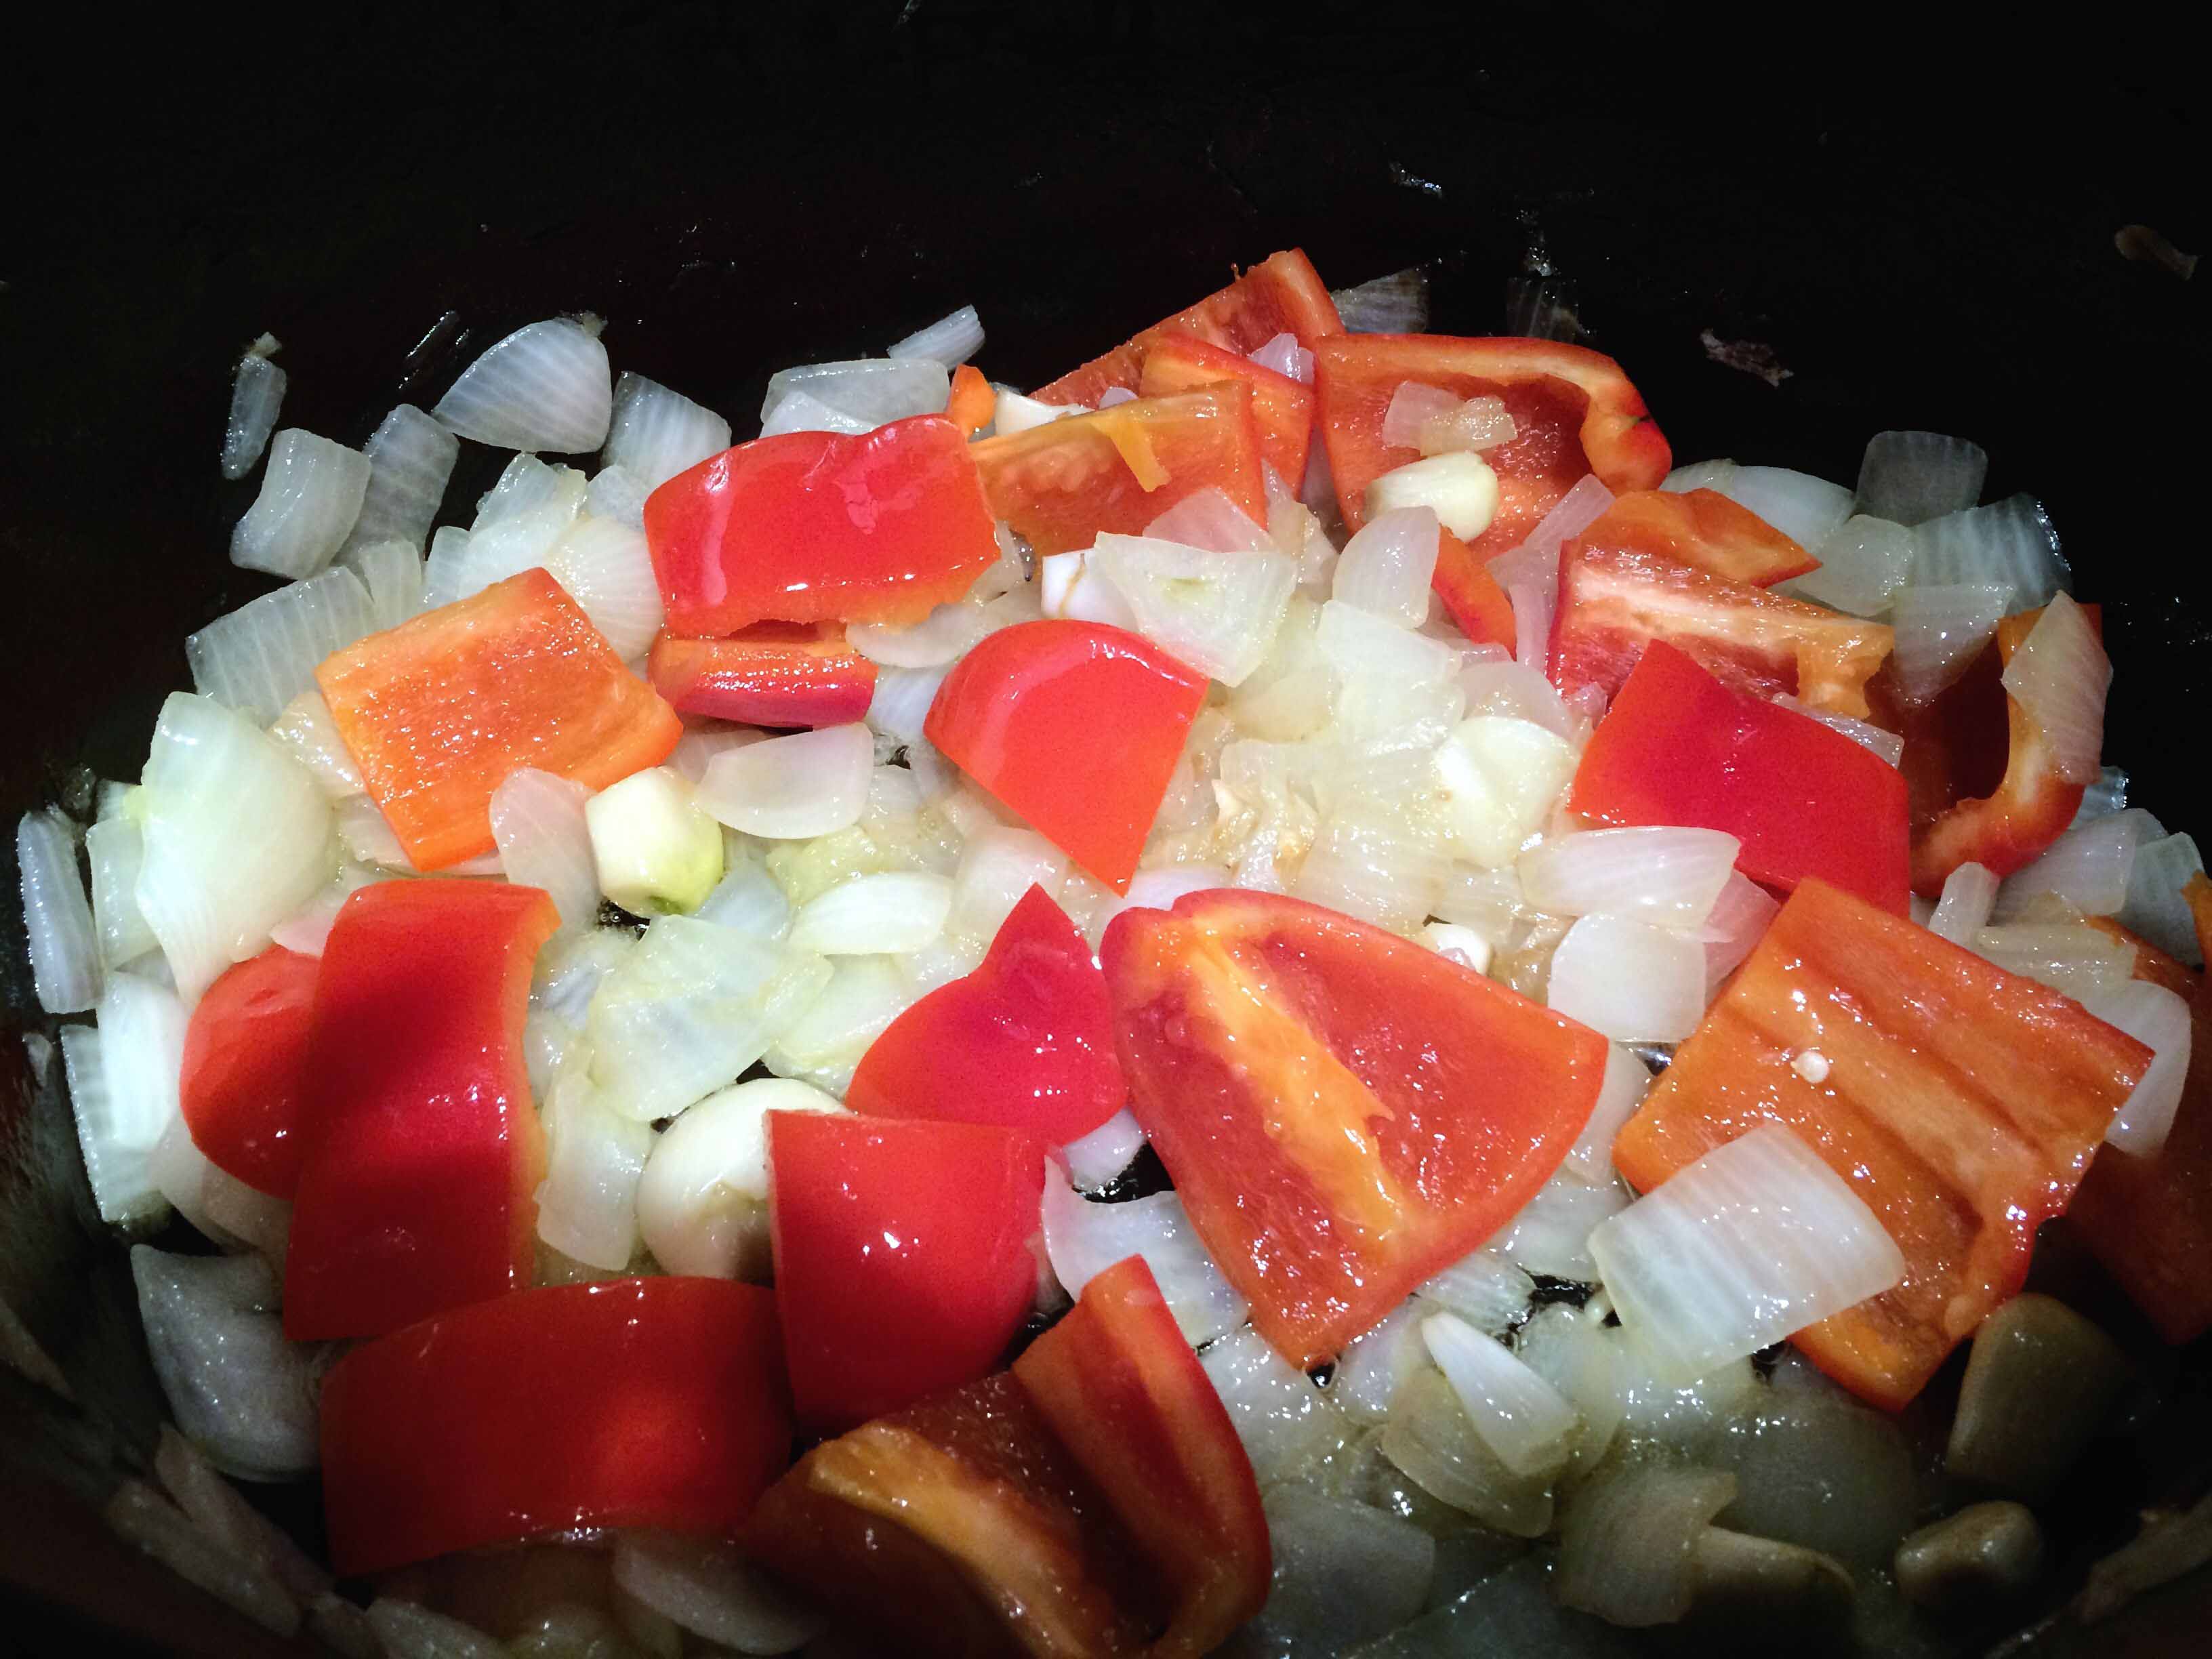
2 large yellow onions, (about 1 pound total) diced large
6 large cloves of garlic smashed and peeled
2 red bell peppers, seeded and diced large
1 tablespoon concentrated Italian tomato paste (the one in a tube)
1 can (28 ounces) crushed Italian tomatoes
2 medium sized eggplants, (about 1 pound total) cut into 1 to 1.5 inch pieces
2 large zucchini (about 1 pound total) peeled with alternating strips of peeled and unpeeled skin.
1 bay leaf
2 teaspoons fresh thyme leaves (Martha called for 1 tablespoon fresh marjoram or oregano)
3 tablespoons red-wine vinegar
Instructions
In a large non-reactive Dutch oven, preferably enameled cast iron, heat 4 tablespoons olive oil over medium heat. Add onion and cook, stirring, occasionally, until translucent. (Martha suggested 5 minutes; because of the size of the onions, I cooked mine for closer to 10 minutes.)
The onions and garlic
Add garlic cloves and cook until onions and garlic are soft. (Again, I cooked mine for about 10 minutes as opposed to Martha’s 5.)
Add peppers stirring and cook until tender. (Martha called for crisp-tender and 4 minutes; I went closer to 10.)
With the peppers
Add 1 tablespoon concentrated Italian tomato paste and toast briefly for about 2 minutes.
Add tomatoes, eggplant, zucchini, bay leaf, fresh thyme to the pot. Cook, stirring occasionally, until mixture come to a simmer. Reduce heat to medium low, partially cover, and cook at a gentle simmer until vegetables are cooked through, around 30 minutes. If sauce becomes too thick or starts to stick while cooking add a couple of tablespoons of water from time to time.
(Martha says to cook the vegetables are “tender but mushy, 15 minutes.” I almost doubled this time and my vegetables, perhaps because of their heft did not become mushy.)
With the zucchini, eggplant
Season to taste with vinegar, salt, and pepper. Remove bay leaf. (The vinegar is an essential part of the seasoning, adding a lot of brightness to this dish.)
I served the ratatouille accompanied by some crusty cheese focaccia.
Performance anxiety. It’s a terrible affliction, especially in the kitchen. I know this first hand, having experienced it for quite some time, until yesterday, when I decided to confront this fear head on.
It started about 15 years ago when on one winter’s eve, I failed at making a risotto. I had successfully prepared so many versions of this dish so many times before. It was a staple of my culinary repertoire. But on that fateful night, I just couldn’t do it; those pesky grains of rice just refused to come together and make that creamy mass of goodness. Was it hubris? Had I been over confident? All I remember now is how my guests politely smiled at my table as they strategically picked through their portions, picking out the few edible grains of rice, and waited patiently until I announced that we were ready for the next course.
To make matters worse, shortly thereafter, these same guests invited me to their home for dinner. When I asked what’s cooking, the hostess smiled demurely and said “You’ll see,” and then disappeared for about twenty minutes into the kitchen.
When we finally sat down to dinner, she appeared at the table with an oval tureen. Her eyes focused on me as she raised its lid to reveal an aromatic butternut-squash risotto. Not only was it beautiful with deeply colored chunks of squash, glowing grains of rice, it was absolutely delicious. Perfectly cooked al dente grains of creamy rice enveloped sweet roasted cubes of butternut squash. “Delicious,” I exclaimed (albeit enviously), and my friend shot me a knowing smile and said softly, with just a hint of sarcasm, “That’s how it’s done.”
After that evening, every time I wanted to prepare risotto, I thought of my failed attempt and heard my friend’s voice saying “That’s how it’s done.” I couldn’t bring myself to make one. I knew the steps, had learned the tricks. I had read so many recipes, watched so many chefs prepare their plain or fancy versions, bought so many varieties of Italian rice from traditional Arborio to Carnaroli to Vialone Nano. But I just couldn’t pull the trigger. I just couldn’t do it.
Then, yesterday, faced with a lot of left over chicken stock from a few nights ago, an abundant supply of dried porcini, and several packages of Italian rice in the cupboard, I thought it was time. Rather than going to my cookbook collection, I dug up a recipe from television chef Ina Garten that I had seen her prepare a while ago and always wanted to make.
I bought the few ingredients from the recipe that I didn’t have on hand—some fresh crimini mushrooms, a couple of shallots. I dug out my favorite, long-neglected enameled cast iron risotto pot, and opened a bottle of wine. I took a deep breath, a few swigs of wine, and started to prep.
I soaked the dried porcini, finely chopped the shallots, diced the pancetta, heated the stock, measured out the rice, the saffron, and grated the cheese. So far, so good. Maybe another sip of wine. Had I already finished a glass?
Onto the cooking. I melted the butter, sautéed the shallots and pancetta. The aromas encouraged me to proceed. It was time for the rice. One more sip of wine. The rice went into the pot and I coated the grains with the melted butter. They started to take on a pearly glow. A sigh of relief and another sip of wine. The rice was now ready for the stock to which I had added the soaking liquid from the porcini. The first two ladles. I was sweating now. Stirring (and sipping), I watched the pot as the rice started to absorb the stock. I added the soaked porcini and the saffron. “It’s smelling good in there,” I heard from the living room. Encouraged again, I proceeded, now standing erect and confident at the pot.
I continued adding the ladlefuls of stock, stirring, watching, and occasionally tasting for the next twenty of minutes. Finally, it was done. I took the pot off the heat, stirred in the grated Parmigiano, and tasted for seasoning. Perfect! One final, triumphant, swig of wine, and I announced: “We’re ready.” Seated at the table, after one taste, my spouse looked up at me, smiled, and said: “Now, that’s how it’s done.” My risotto mojo is back.
Wild Mushroom Risotto Adapted from Ina Garten Ingredients
1 -ounce dried morel mushrooms (I used dried porcini.)
1/2 pound fresh porcini or cremini mushrooms (I opted for cremini.)
4 cups chicken stock, preferably homemade
6 tablespoons (3/4 stick) unsalted butter
2 ounces pancetta, diced
1/2 cup chopped shallots (3 shallots)
1 1/2 cups Arborio rice (I used superfine carnaroli; I prefer its texture.)
1/2 cup dry white wine
1/2 teaspoon saffron threads
1 teaspoon kosher salt
1/2 teaspoon freshly ground black pepper
2/3 cup freshly grated Parmesan cheese, plus extra for serving
Directions
Place the dried mushrooms in a bowl and pour 2 cups boiling water over them. Set aside for 30 minutes. Scoop the mushrooms from the water with a slotted spoon, reserving the liquid. You should have 2 cups; if not, add water to make 2 cups. Drain the mushrooms and rinse once more. If some of the mushrooms are large, cut into 2 or 3 pieces. Pour the mushroom liquid through a coffee filter or paper towel, discarding the gritty solids. Set the mushrooms and the liquid aside separately.
Meanwhile, remove and discard the stems of the fresh mushrooms and rub any dirt off the caps with a damp paper towel. Don’t rinse them! Slice thickly and set aside.
In a small saucepan, heat the chicken stock with the 2 cups of reserved mushroom liquid and bring to a simmer.
Mushrooms, onions, and pancetta
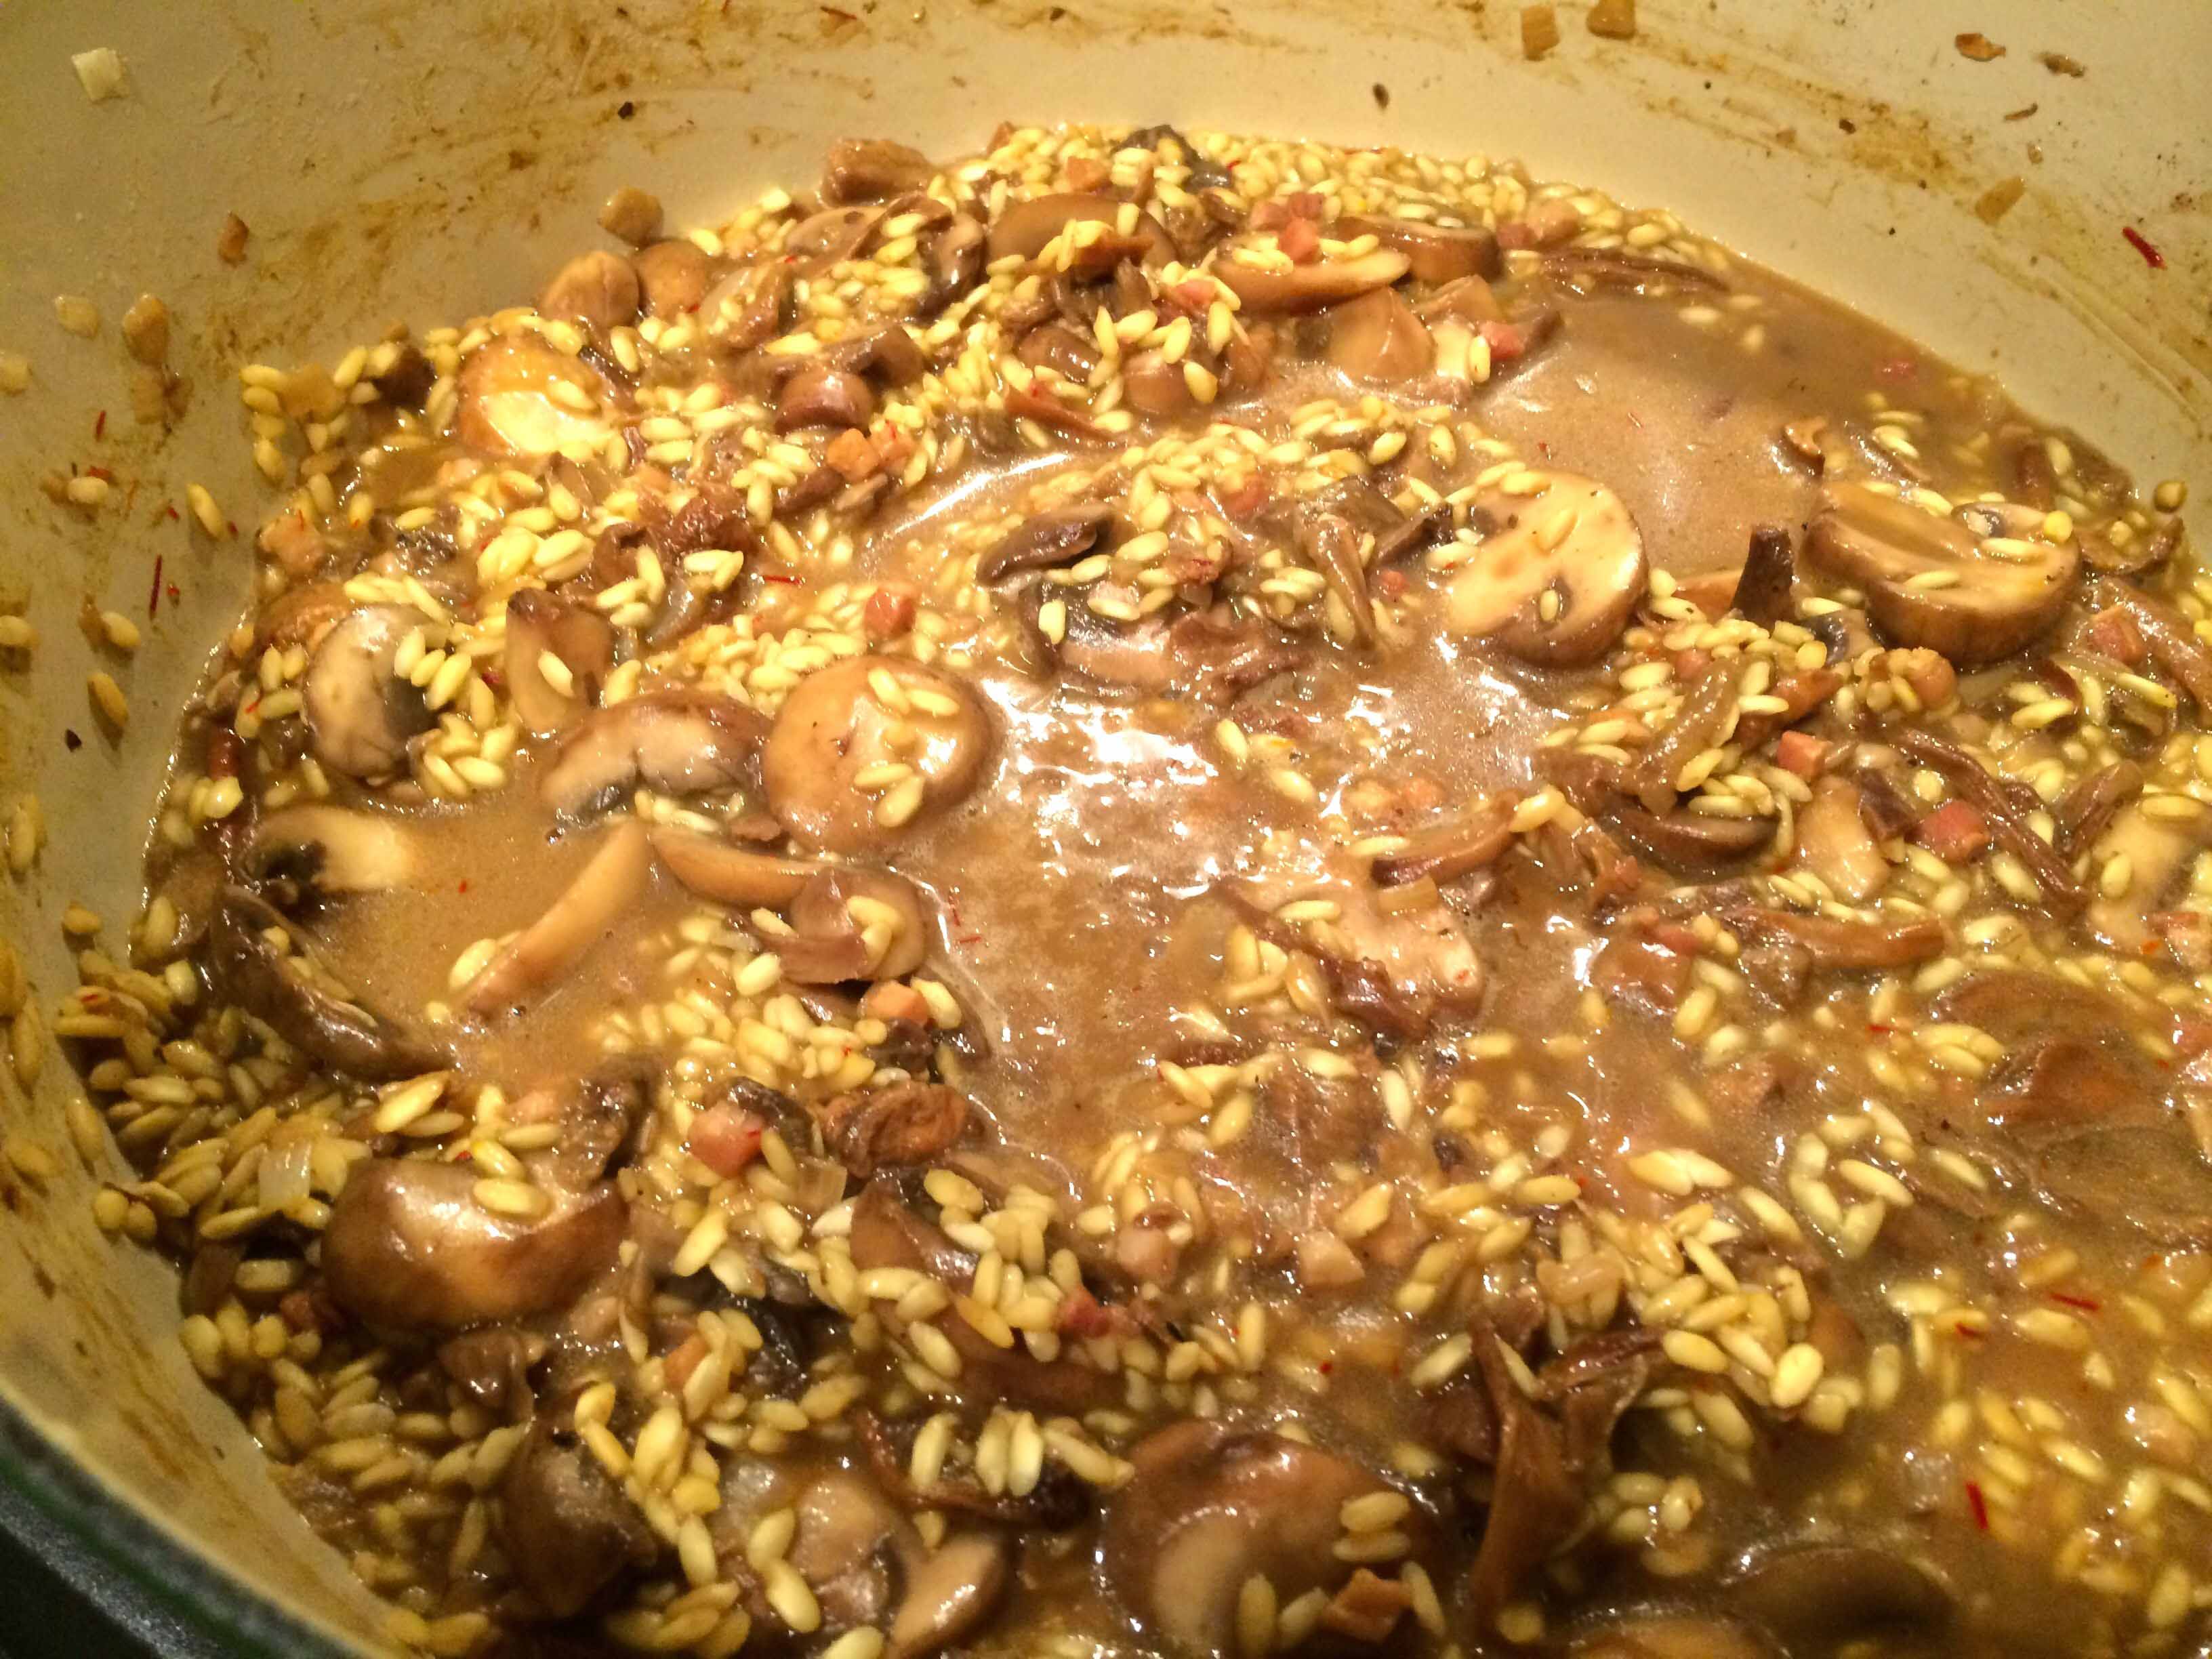
In a heavy-bottomed pot or Dutch oven, melt the butter and sauté the pancetta and shallots over medium-low heat for 5 minutes. Add the rehydrated and fresh mushrooms and sauté for another 5 minutes. Add the rice and stir to coat the grains with butter.
After wine and stock
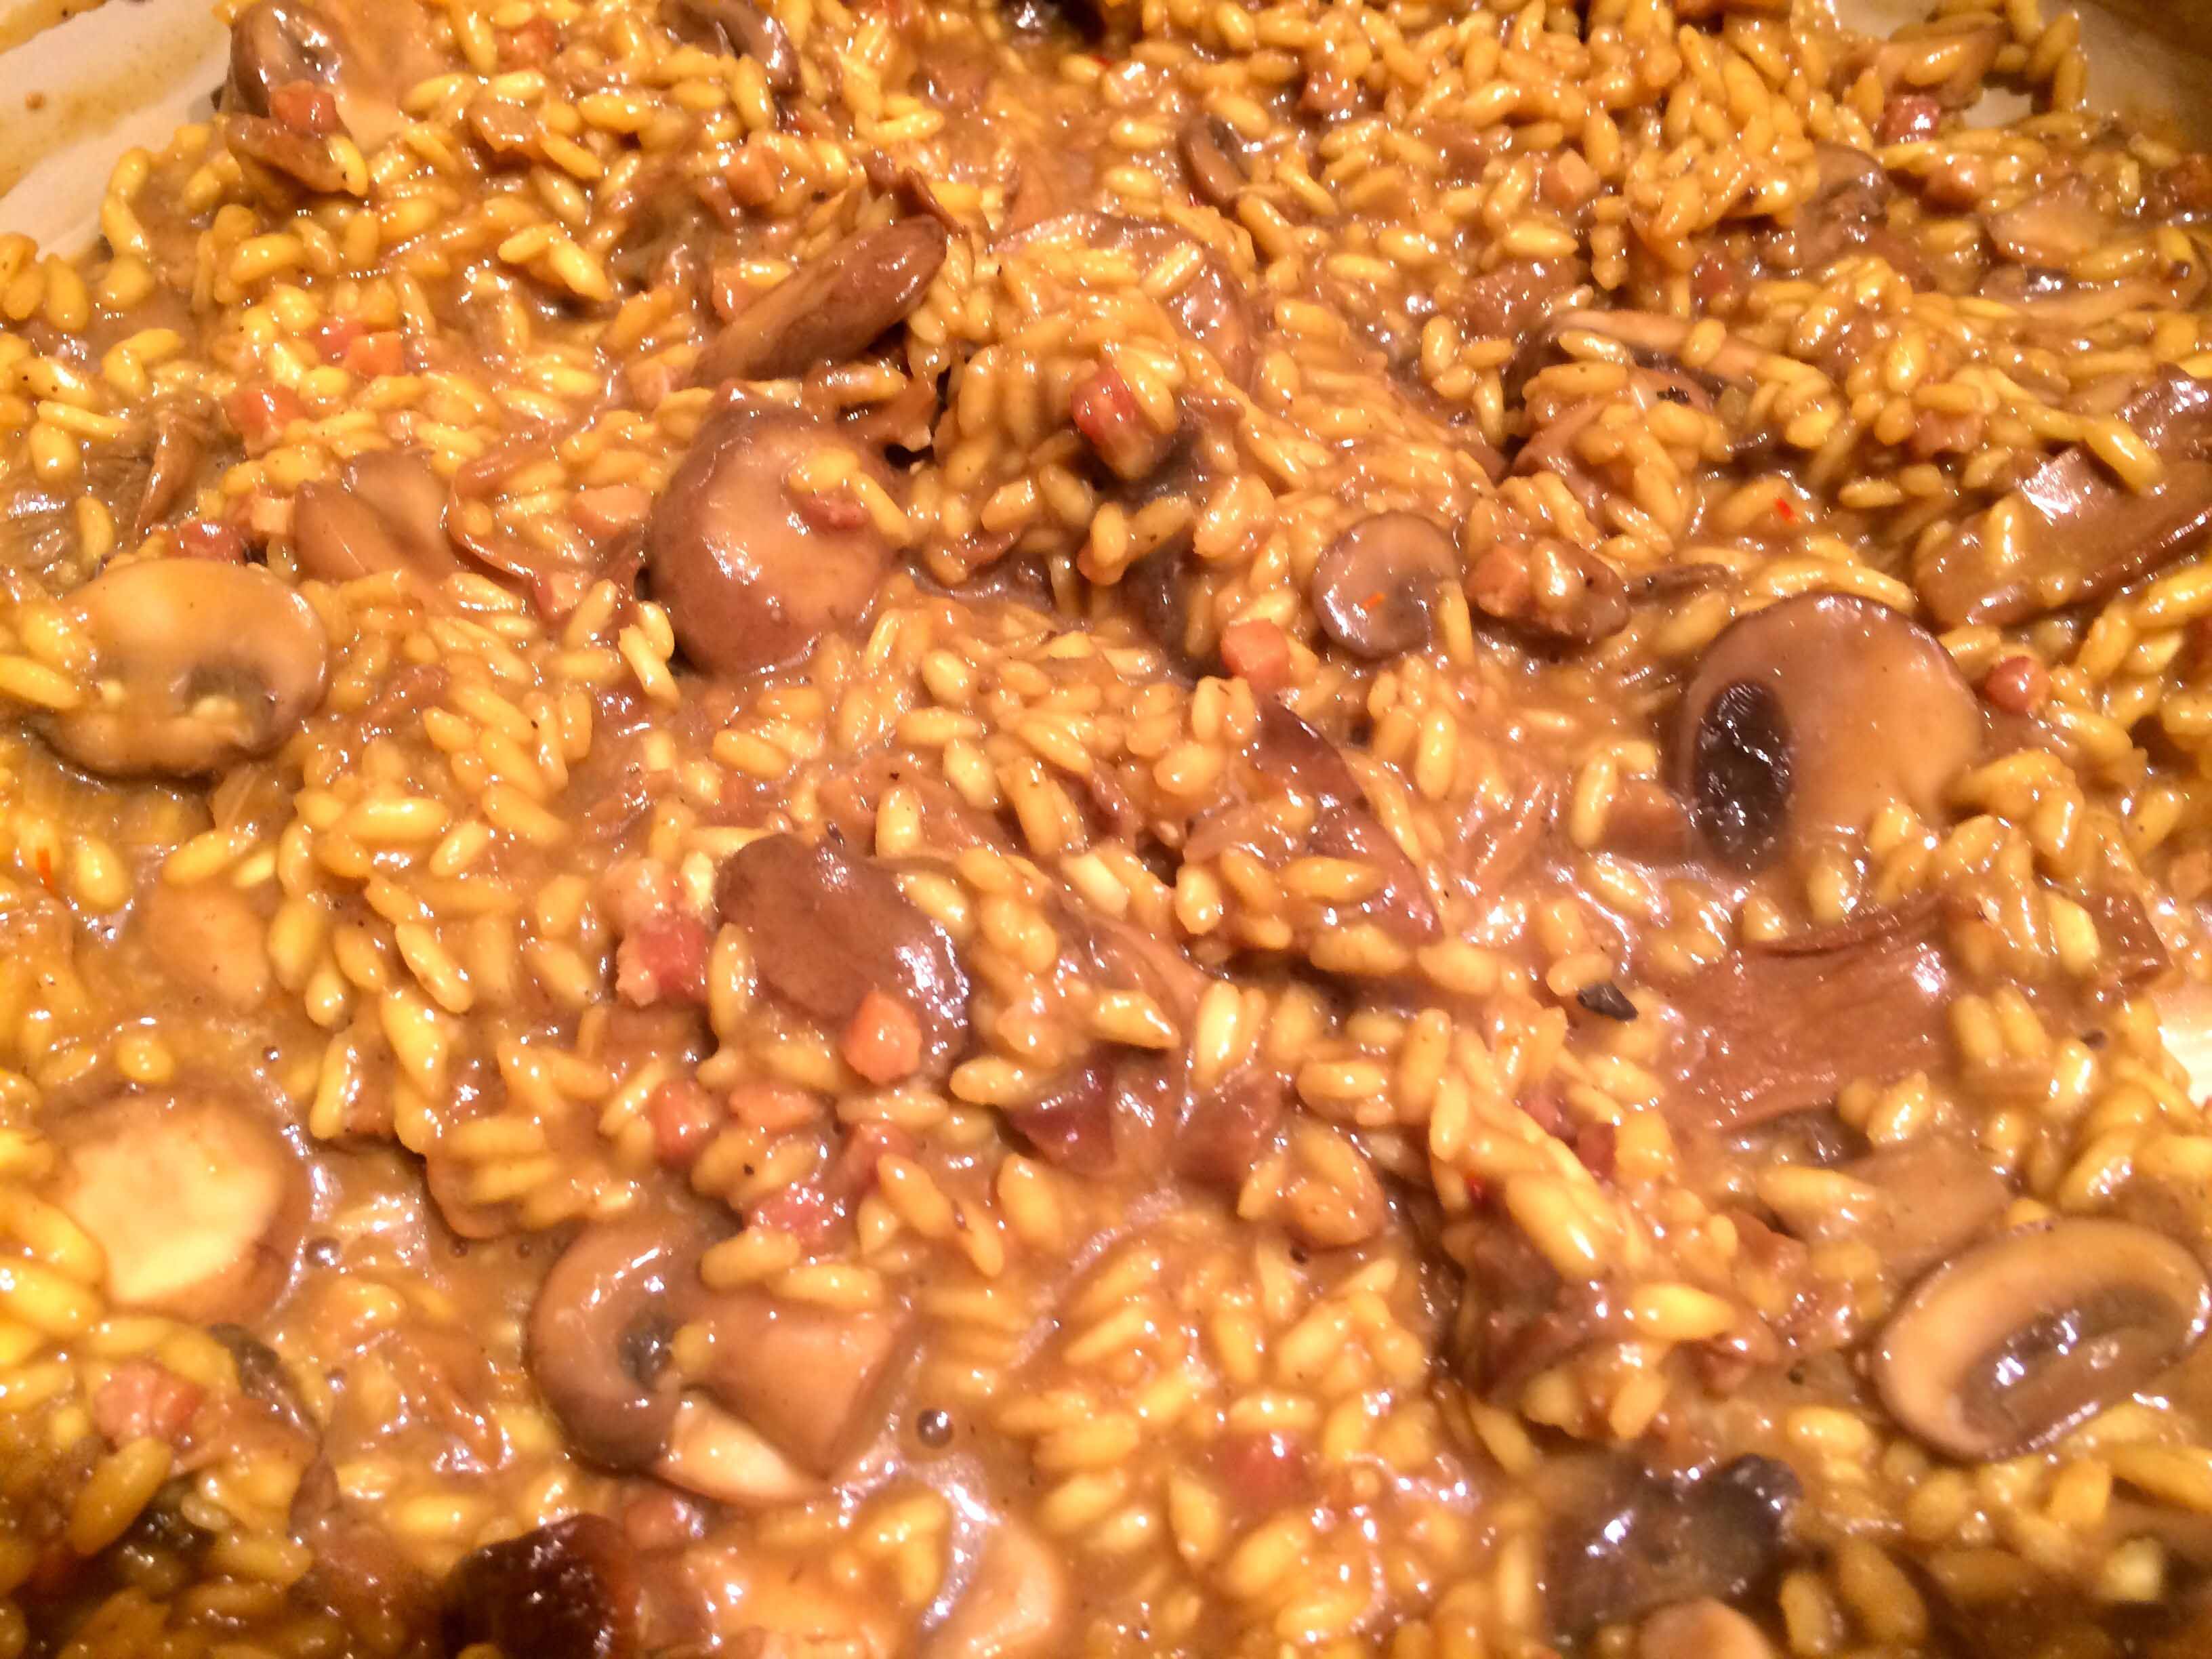
Add the wine and cook for 2 minutes. Add 2 full ladles of the chicken stock mixture to the rice plus the saffron, salt, and pepper. Stir and simmer over low heat until the stock is absorbed, 5 to 10 minutes. Continue to add the stock mixture, 2 ladles at a time, stirring every few minutes. Each time, cook until the mixture seems a little dry before adding more of the stock mixture. Continue until the rice is cooked through, but still al dente, about 25 to 30 minutes total. When done, the risotto should be thick and creamy and not at all dry. Off the heat, stir in the Parmesan cheese. Serve hot in bowls with extra cheese.
After making our wills yesterday, we found ourselves somewhat dispirited. Dealing with one’s own mortality, after all, isn’t easy. So we decided it was time for some Margarita Madness, a spread of chips, salsa, guacamole, and frozen Margaritas, to restore our spirits and start the evening.
To follow this festive beginning, we opted for a simple flank steak grilled and served with a compound garlic-and-parsley butter. A visit to one of our butchers yielded one of the finest looking flank steaks I’ve ever seen.
One beautiful flank steak
Because they are somewhat uneven in thickness, grilling flank steaks can be a little tricky. I get over come this hurdle by keeping the thickest part of the steak closest to the direct heat of my grill pan.
While the pan is heating, I dry the steak with paper towels and liberally season one side with Kosher salt and freshly ground black pepper and drizzle it lightly with extra-virgin olive oil. When the grill pan is hot, I place the steak on the pan, seasoned side down, with the thickest part of the steak closest to the hottest part of the pan, which is directly over the flame.
After one minute, I reduce the flame to medium and cook the steak for about 4 minutes. During this time, I season the exposed side with salt and pepper. When I see the juices starting to appear on top of the steak, I flip the steak and continue to cook for about another 4 minutes. I test for doneness by feeling the steak with my index finger. When it bounce back to the touch, it’s the perfect medium rare, for me the perfect temperature for flank steak.
I place the steak on the cutting board and place a thick round of my parsley-and-garlic compound butter in the middle of the steak and let the meat rest, tented, for about three minutes.
To serve, I slice the steak thick on an angle and serve with steamed spinach dressed with extra virgin olive oil.
Soup was on the menu last night. Nothing fancy, nothing exotic, nothing international, just plain, old-fashioned chicken noodle soup. Time constraints, however, led me to my pressure cooker, which considerably reduces the cooking time and, in my opinion, turns out a tastier, clearer soup than conventional methods.
My recipe came from one of my go-to books for this type of cooking: Pressure Cooker Perfectionfrom America’s Test Kitchen. Although the recipe at first glance would lead one to believe that the soup would be ready in 20 minutes (the time under pressure), in real time, including prep and cooking the noodles, it took about an hour. One ingredient, specifically soy sauce, gave me some pause, but it actually gave the soup a deeper meat flavor. And extra-wide egg noodles cooked in the finished broth added extra body.
Farmhouse Chicken Noodle Soup Adapted from Pressure Cooker Perfection by America’s Test Kitchen
1 tablespoon vegetable oil (I used extra-virgin olive oil.)
1 onion, chopped fine (I used a large yellow onion.)
3 garlic cloves, minced
1 teaspoon minced fresh thyme
8 cups water (I had to reduce the amount of water for my pressure cooker to avoid over filling by about a cup and a half. I compensated for the difference when I cooked the noodles in the broth.)
4 carrots, peeled and sliced 1/2 inch thick
2 celery ribs, sliced 1/2 inch thick
2 tablespoons soy sauce
1 (4 -pound) whole chicken, giblets discarded (I opted for an organic bird. I think they have more flavor.)
Salt and pepper
4 ounces (2 2/3 cups) wide egg noodles (I used extra wide.)
1/4 cup minced parsley
Heat oil in pressure cooker pot over medium heat until shimmering. Add onion (and a pinch of salt) and cook until softened, about 5 minutes.
Stir in garlic and thyme and cook until fragrant, about 30 seconds. (Be careful not to brown the garlic.)
Stir in water, carrots, celery, and soy sauce, scraping up any browned bits.
Season chicken with salt and pepper and place, breast-side up, in the pot. (Putting the chicken breast side up ensures more even cooking of the chicken. After adding the chicken, be sure that the contents of the pot do not exceed the max fill level of your pressure cooker.)
Lock pressure cooker lid in place and bring to high pressure over medium-high heat. As soon as the pot reaches high pressure, reduce heat to medium-low and cook for 20 minutes, adjusting heat as needed to maintain high pressure.
Remove pot from heat. Quick release pressure, then carefully remove the lid, allowing steam to escape away from you. (Follow your pressure cooker’s manual for quick-release instructions.)
Transfer chicken to cutting board, let cool slightly, then shred meat into bite-size pieces, discarding skin and bones. (I went for big chunks of chicken.)
Using a large spoon, skim excess fat from the surface of the soup. Bring soup to boil, stir in noodles, and cook until tender, about 5 minutes.
Stir in shredded chicken and parsley, season with salt and pepper to taste, and serve.
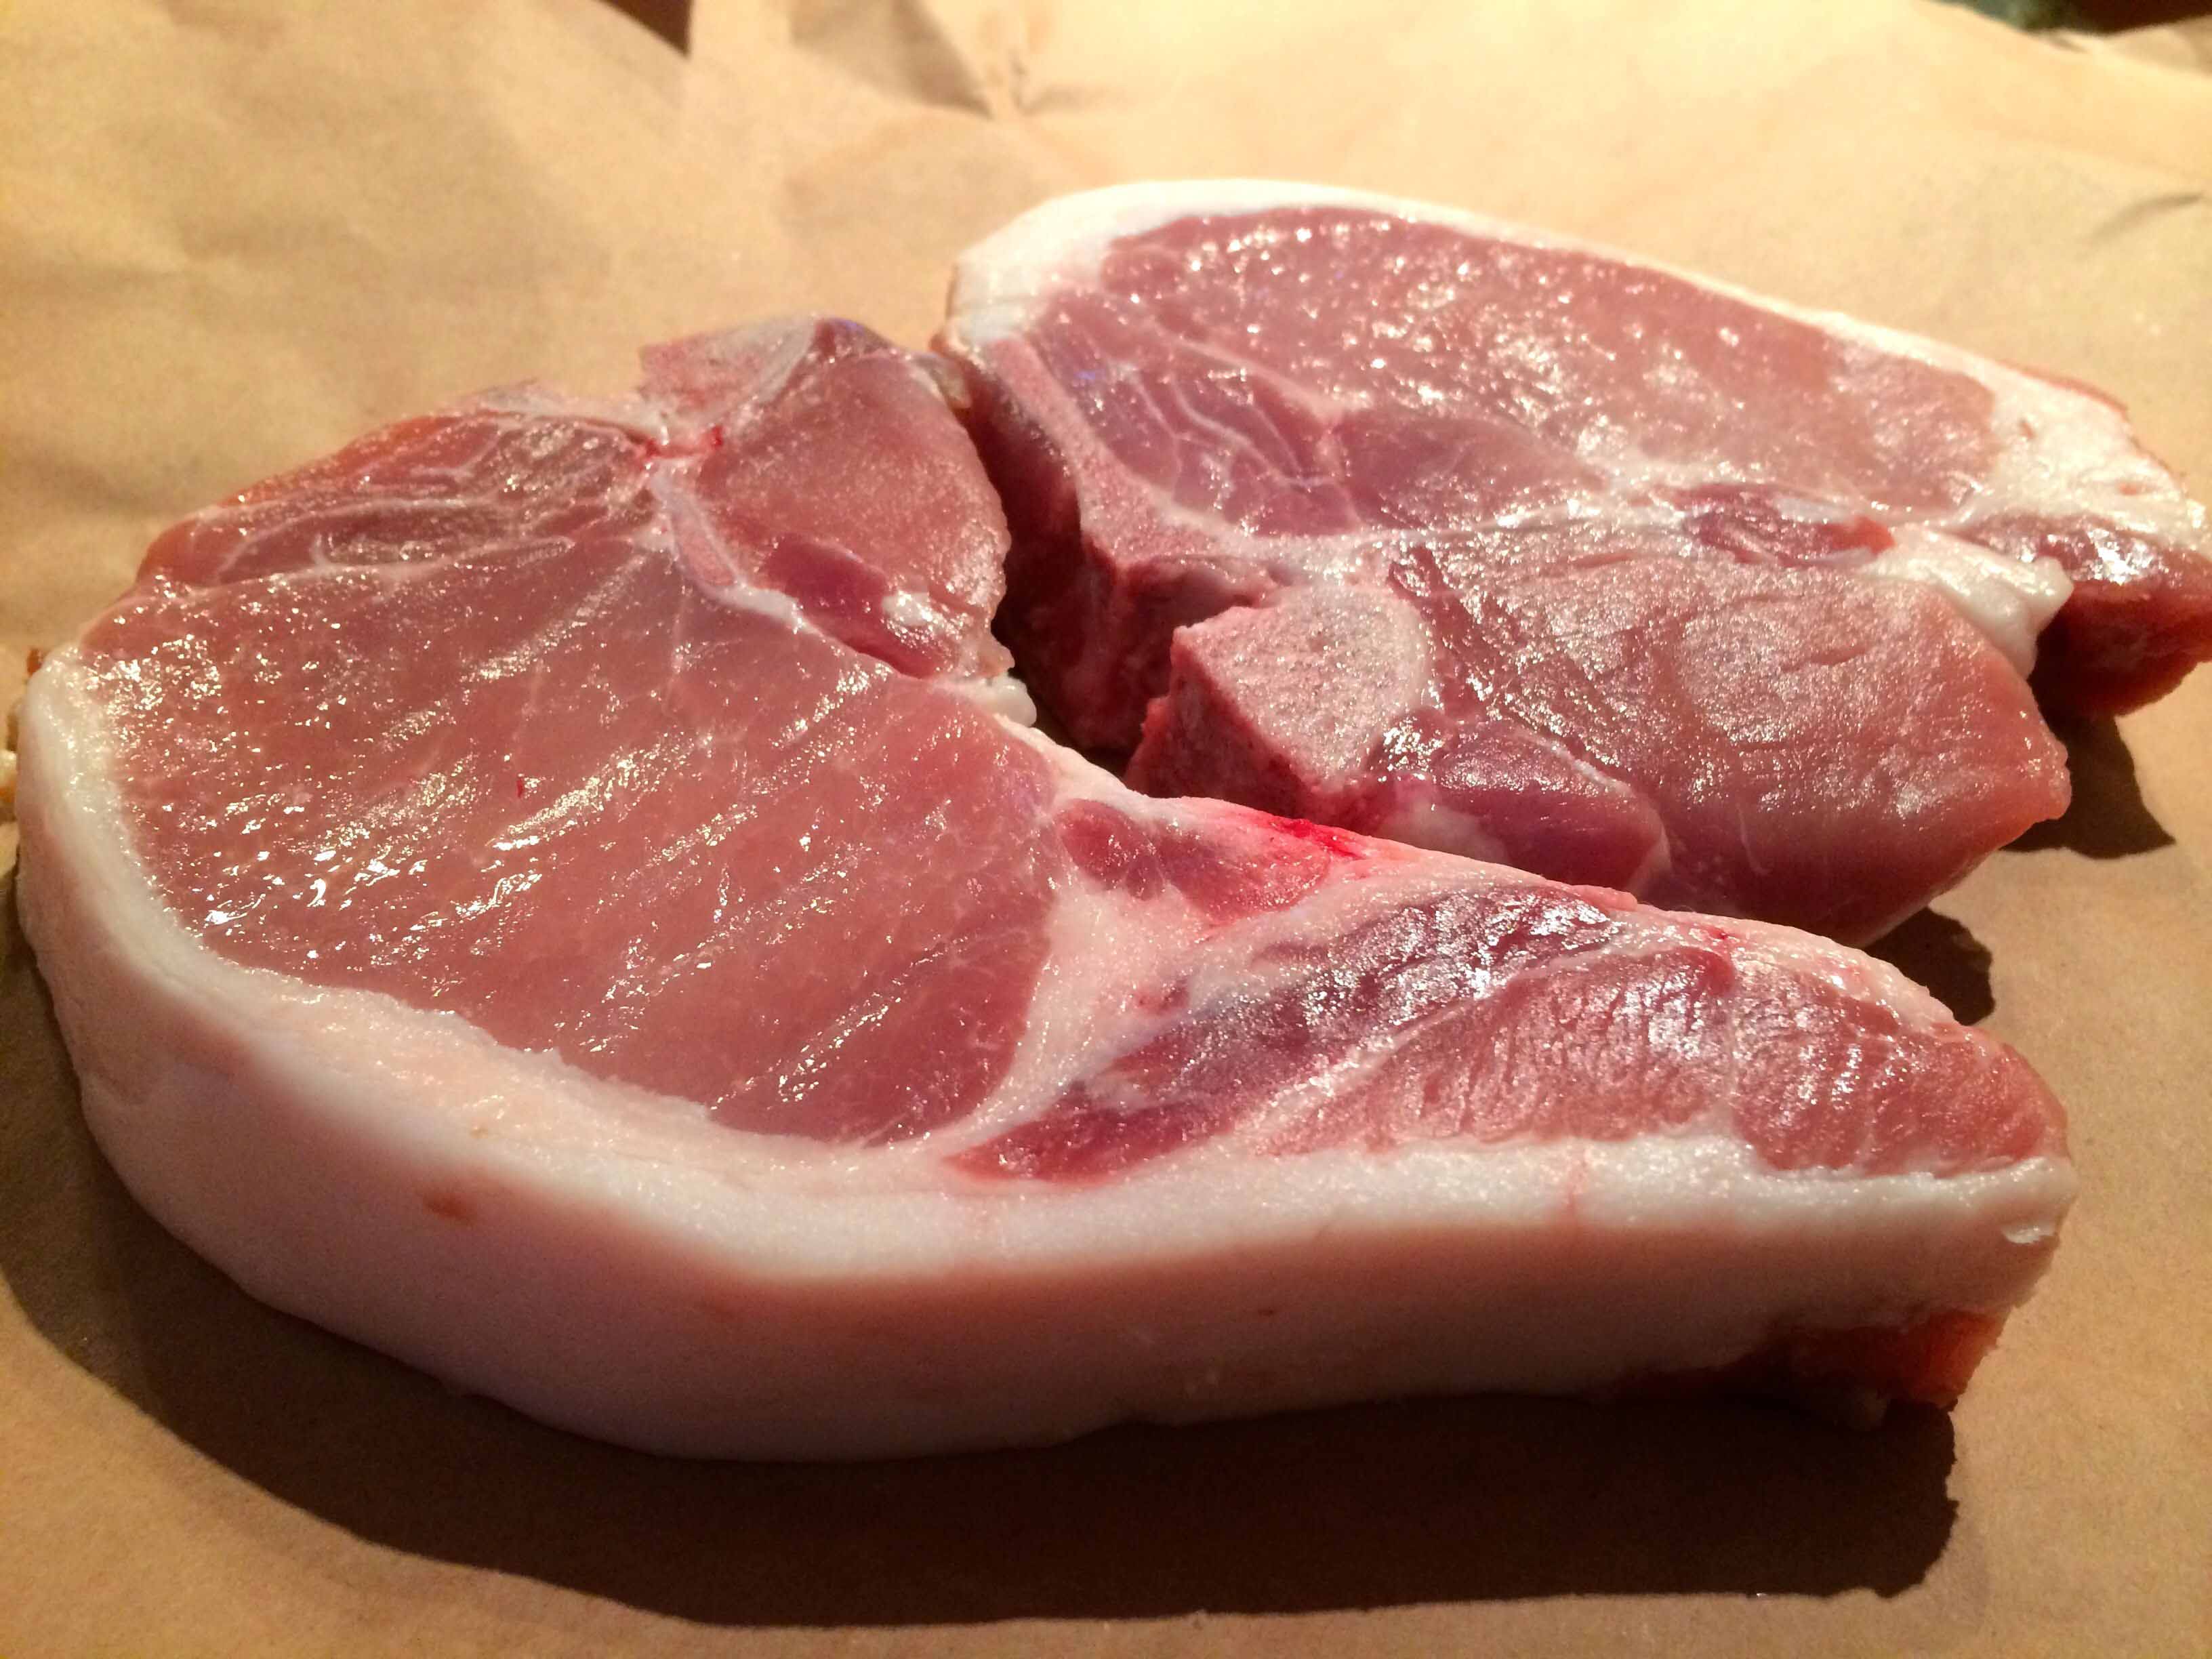
Often my choice of what we’ll have for dinner is determined by what’s in the market. Such was the case yesterday, when I went to our butcher and found some pretty good looking heritage pork chops sourced from local farms.
Locally sourced, heritage pork chops
I wanted a recipe for them that would do justice to their juicy fat and rich flavor. It didn’t take long before I settled on one from Carol Field’s In Nonna’s Kitchen. What attracted me to the recipe was its Tuscan austerity, using essentially only one ingredient other than the meat, onions. The onions are sliced very thin and are stewed for about an hour until they become a creamy sauce for the chops.
This sauce, however, reminded me of Marcella Hazan’s Smothered Onions for pasta, which is quite similar to Field’s except that at the end of the stewing, the onions are browned on high to sharpen their flavor. I thought this would work well with the chops.
One other influence on last night’s dish was James Peterson’s new book, Done.: A Cook’s Guide to Knowing When Food Is Perfectly Cooked. It had just arrived in the mail and I thought why not see what he says about pork chops. The section on sautéed pork chops illustrates with detailed photos exactly when to turn the chops (“When juices start to form on the top and sides. . .”) and suggests an internal temperature of 130° F as opposed to the typically recommended 145° F for the perfect medium. I incorporated Peterson’s instructions for cooking the chops into the original recipe from Field.
I am happy to report the results were. . .extraordinary. The pork chops came out perfectly cooked and juicy; the sauce was sweet and piquant. It may have taken three cookbooks to turn out this dish, but the prep and cooking were minimal.
Braciole di Maiale Contadine Pork Chops Smothered in Creamy Onions Adapted from In Nonna’s Kitchen
3 onions, sliced very fine (I used two rather large Vidalia onions sliced 1/8” thick with a mandolin.)
4-5 tablespoons extra-virgin olive oil (I used 4 tablespoons of oil and 2 tablespoons of butter.)
1-2 tablespoons of water (I skipped the water as my onions were quite moist.)
Salt
Freshly ground black pepper
6 pork chops (about 2 3/4 pounds) (I used 2 bone-in chops, about 1.5 pounds total.)
All-purpose flour with salt and pepper for dredging
1/2 cup dry red wine
1 – 2 tablespoons of unsalted butter (As I used butter when cooking the onions and did not puree the onions, I did not use it here.)
Put the onions in a large heavy sauté pan with 2 tablespoons of the olive oil, a tablespoon or two of water, salt, and pepper. (I used the oil but added 1 tablespoon of unsalted butter and omitted the water.)
Cover the pan and cook the onions at the lowest simmer over the lowest possible heat for 45 minutes to one hour, stirring occasionally. At the end the onions will be smooth creamy. (I cooked the onions for a full hour and at the end uncovered them, raised the heat to medium high and cooked them until they were deep gold in color. I then added a little dry vermouth and cooked until the wine evaporated and followed this with a tablespoon of chopped parsley.)
Set the sauce aside.
Dredge the pork chops in the the seasoned flour so they won’t stick while cooking. Drizzle the remaining oil into a heavy sauté pan large enough to hold the chops comfortably without crowding, add the pork chops, and brown them, turning so they cook evenly. (I used 2 tablespoons of oil and 1 tablespoon of butter. Following Peterson’s book, I heated the fats and cooked the chops on a medium heat about 5 minutes a side; they were about 3/4 of an inch thick. I turned them only once, when juices and blood started to appear on top of the bones and the meat—about 5 minutes and cooked the second side for about another 3 minutes.)
When they have browned, 2 to 3 minutes a side (again, note my comments about browning above) pour in the red wine and boil until it evaporates. (Before adding the wine, I drained off most of the accumulated cooking fat.)
Pork chops after adding the wine.
Put the cooked onions on top of the pork chops, cover and cook together briefly on top of the stove so the flavors meld, turning the chops several times. (I cooked the chops for about 2 minutes covered and turned them only once.)
The onions cook into a really thick sauce; at the end puree them in a processor or blender, adding a little water or a tablespoon or two of butter. (I skipped this step altogether because I wanted the sauce to have a little more texture and had already used enough butter in the sauce and in the browning of the chops.)
I know that with my commentary, this recipe may appear complicated; but trust me when I say it really isn’t difficult.
I served the chops accompanied by oven-roasted broccoli.
Wine Pairing: Morellino di Scansano, Chianti Classico