Perhaps owing to the bounty of summer produce at the market at this time of year, I inevitably wind up making ratatouille. Usually, I prepare it on top of the stove, cooking most of the vegetables individually. This year, however, I was lazy. (I’ll blame the excessive heat.) For this reason, I chose to make Mark Bittman’s oven-baked version from his book How to Cook Everything. What I especially liked about his recipe was that it called for cooking all the vegetables at the same time in the oven.
I admit that I was not totally faithful to Bittman’s recipe when it came to the amount of vegetables, the sizes in which they were cut, and the amount of olive oil. I also erroneously covered my casserole, which may have produced a more watery, though no less delicious result. The next time, I’ll choose the uncovered route. It will probably give the dish a more roasted flavor. I will also not make the mistake of scattering the fresh-herb sprigs over the vegetables, as removing them at the end of cooking was a chore.
Oven Baked Ratatouille (Adapted from Mark Bittman’s How to Cook Everything)
Ingredients
1 large eggplant, cut into 1/2 inch chunks
2 onions, chopped
2 medium zucchini, trimmed and cut into 1/2 inch chunks
2 red bell peppers, cored, seeded, and cut into 1/2 inch pieces.
2 round tomatoes, cored cut into 1/2 inch pieces
1 cup grape tomatoes
10 cloves of garlic, halved
Several sprigs fresh thyme and rosemary tied with a string for easy removal
3/4 cup extra virgin olive oil
Salt and pepper to taste
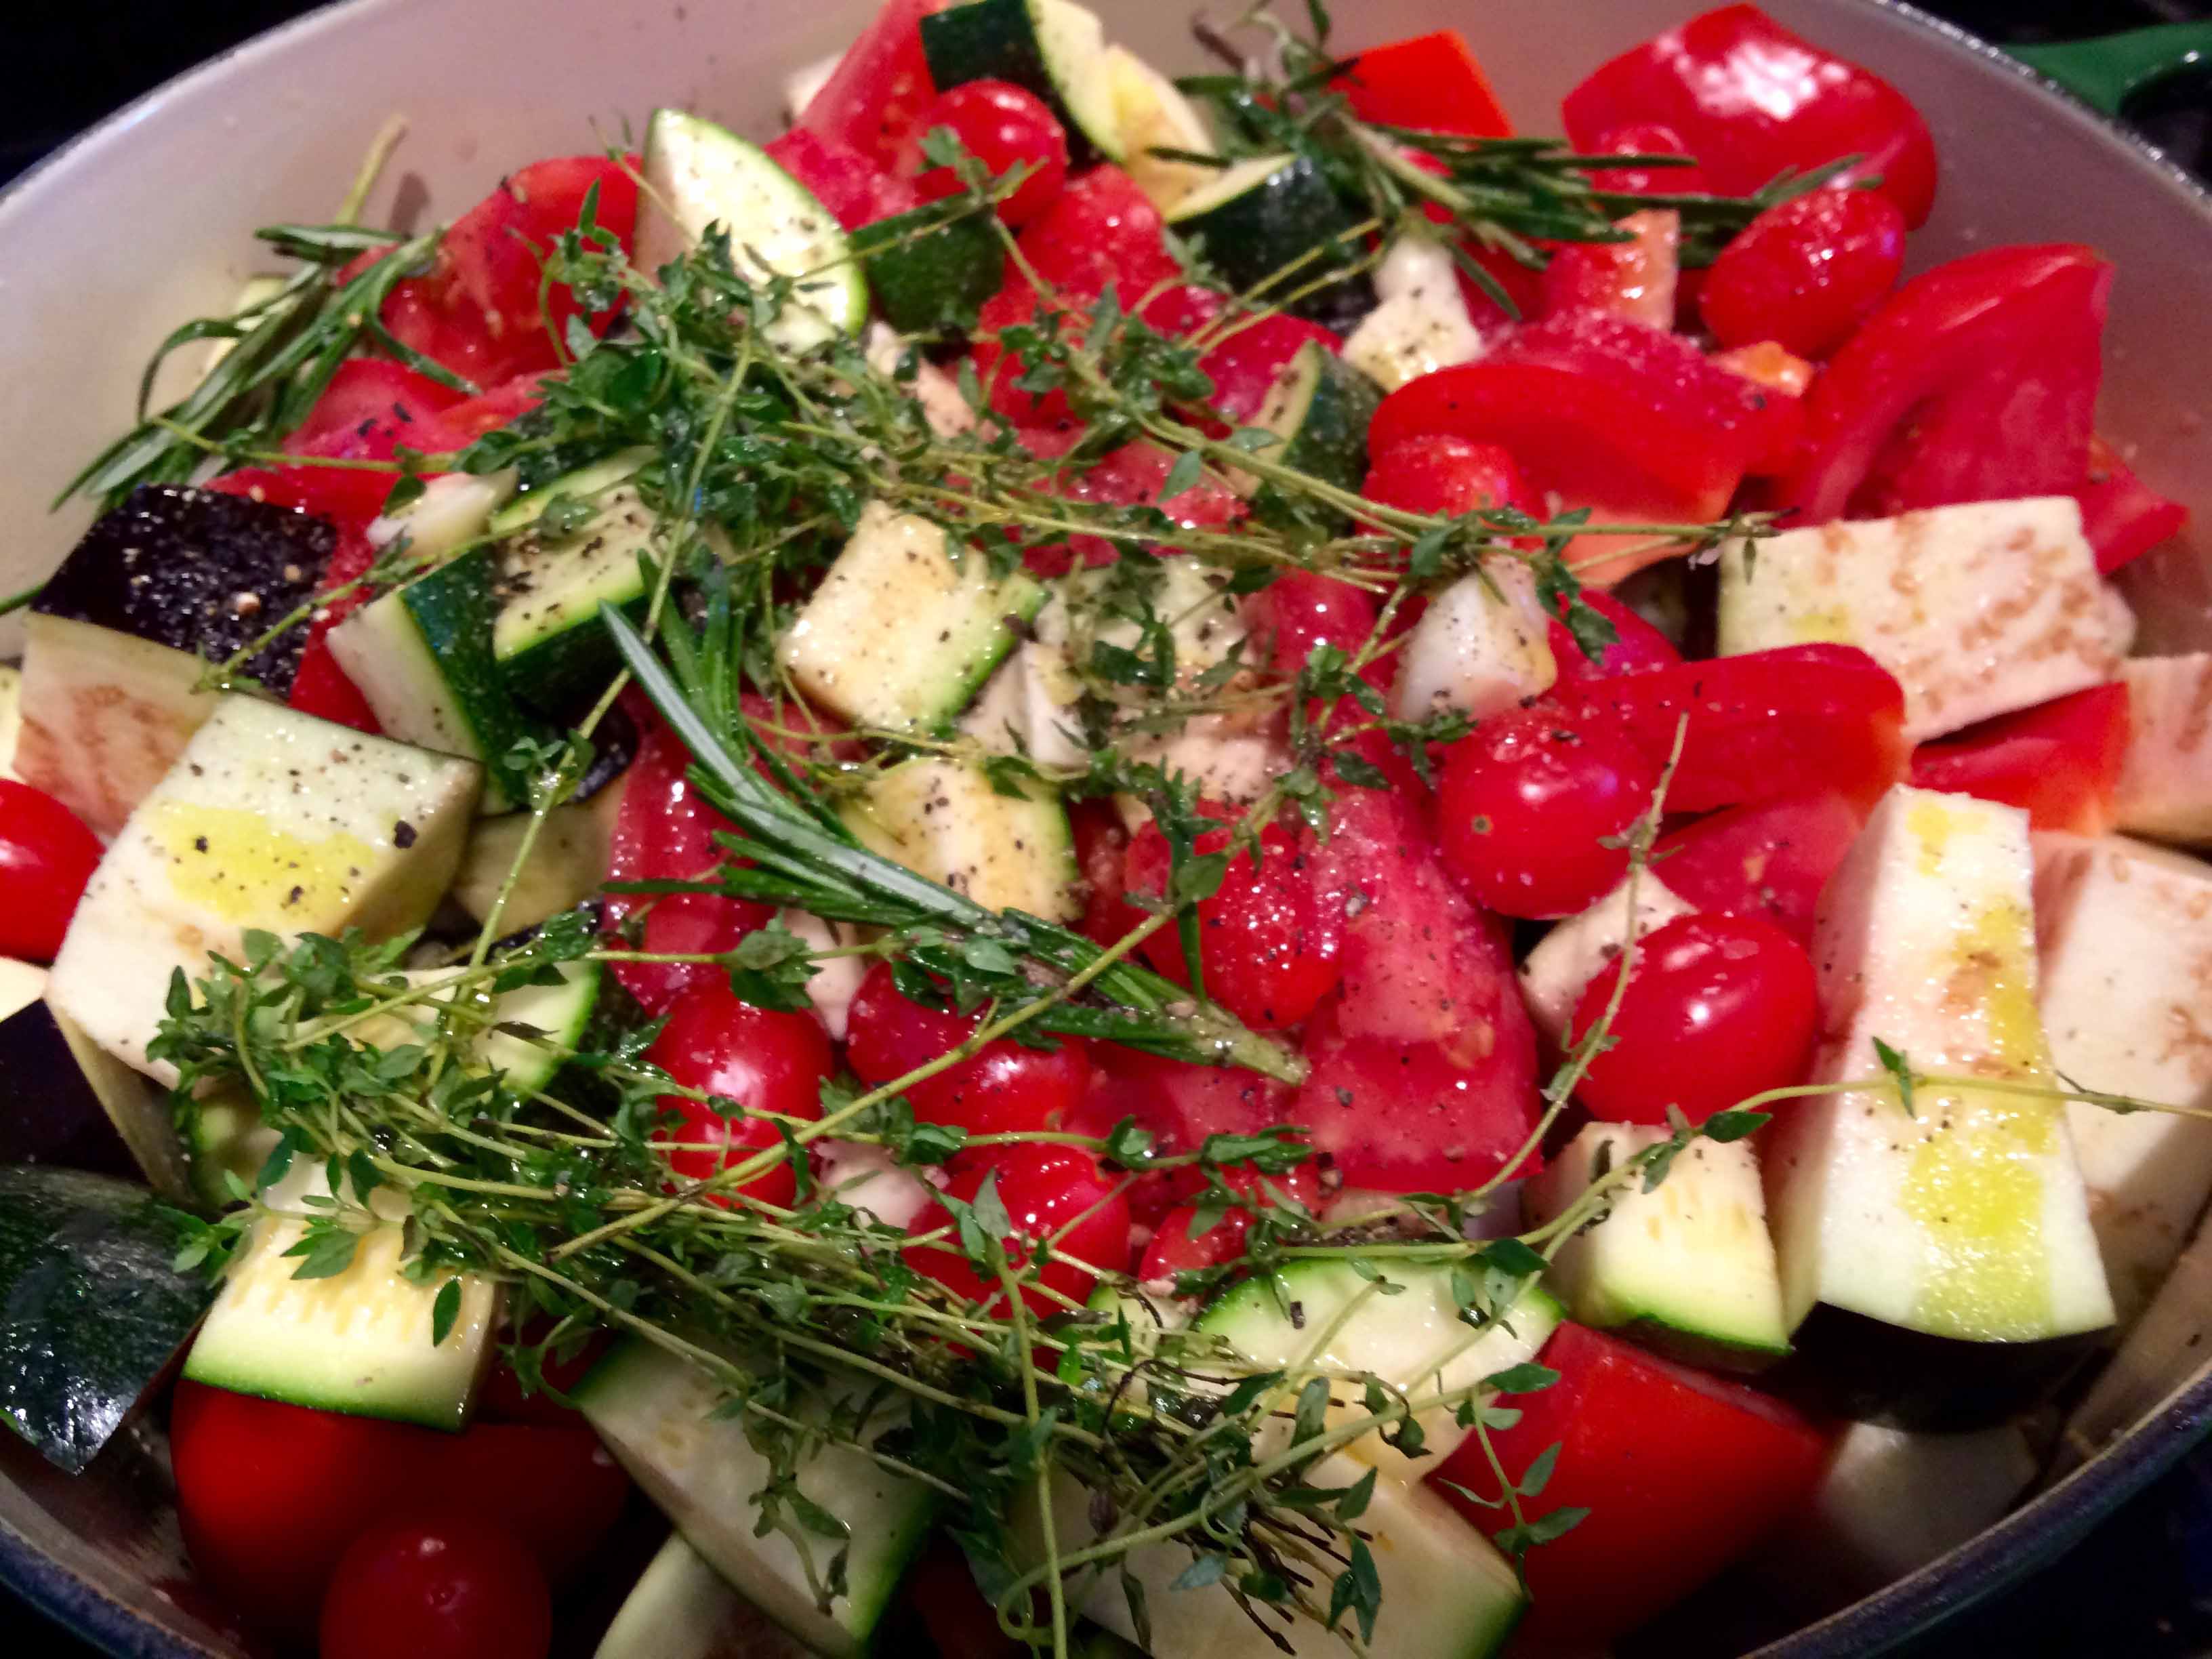
The prepped vegetables
Heat oven to 350 degrees F.
Film a casserole or heavy oven proof skillet dish with a couple tablespoons of the olive oil, then make a layer onion, followed by one of eggplant, zucchini, peppers, tomatoes, herbs, a sprinkling of salt and pepper, and half the the garlic (the order doesn’t matter at all). Repeat and make a second layer. Drizzle with the remaining olive oil.
The layered vegetables
Bake for about 1 to 1.5 hours, pressing down on the vegetables occasionally with a spatula, until they are all completely tender. When they are tender remove.
About mid-way through
Garnish with more herbs and drizzle with a little more olive oil, and serve hot, warm, or at room temperature.
I chose to serve the ratatouille as a side dish with a roasted chicken.
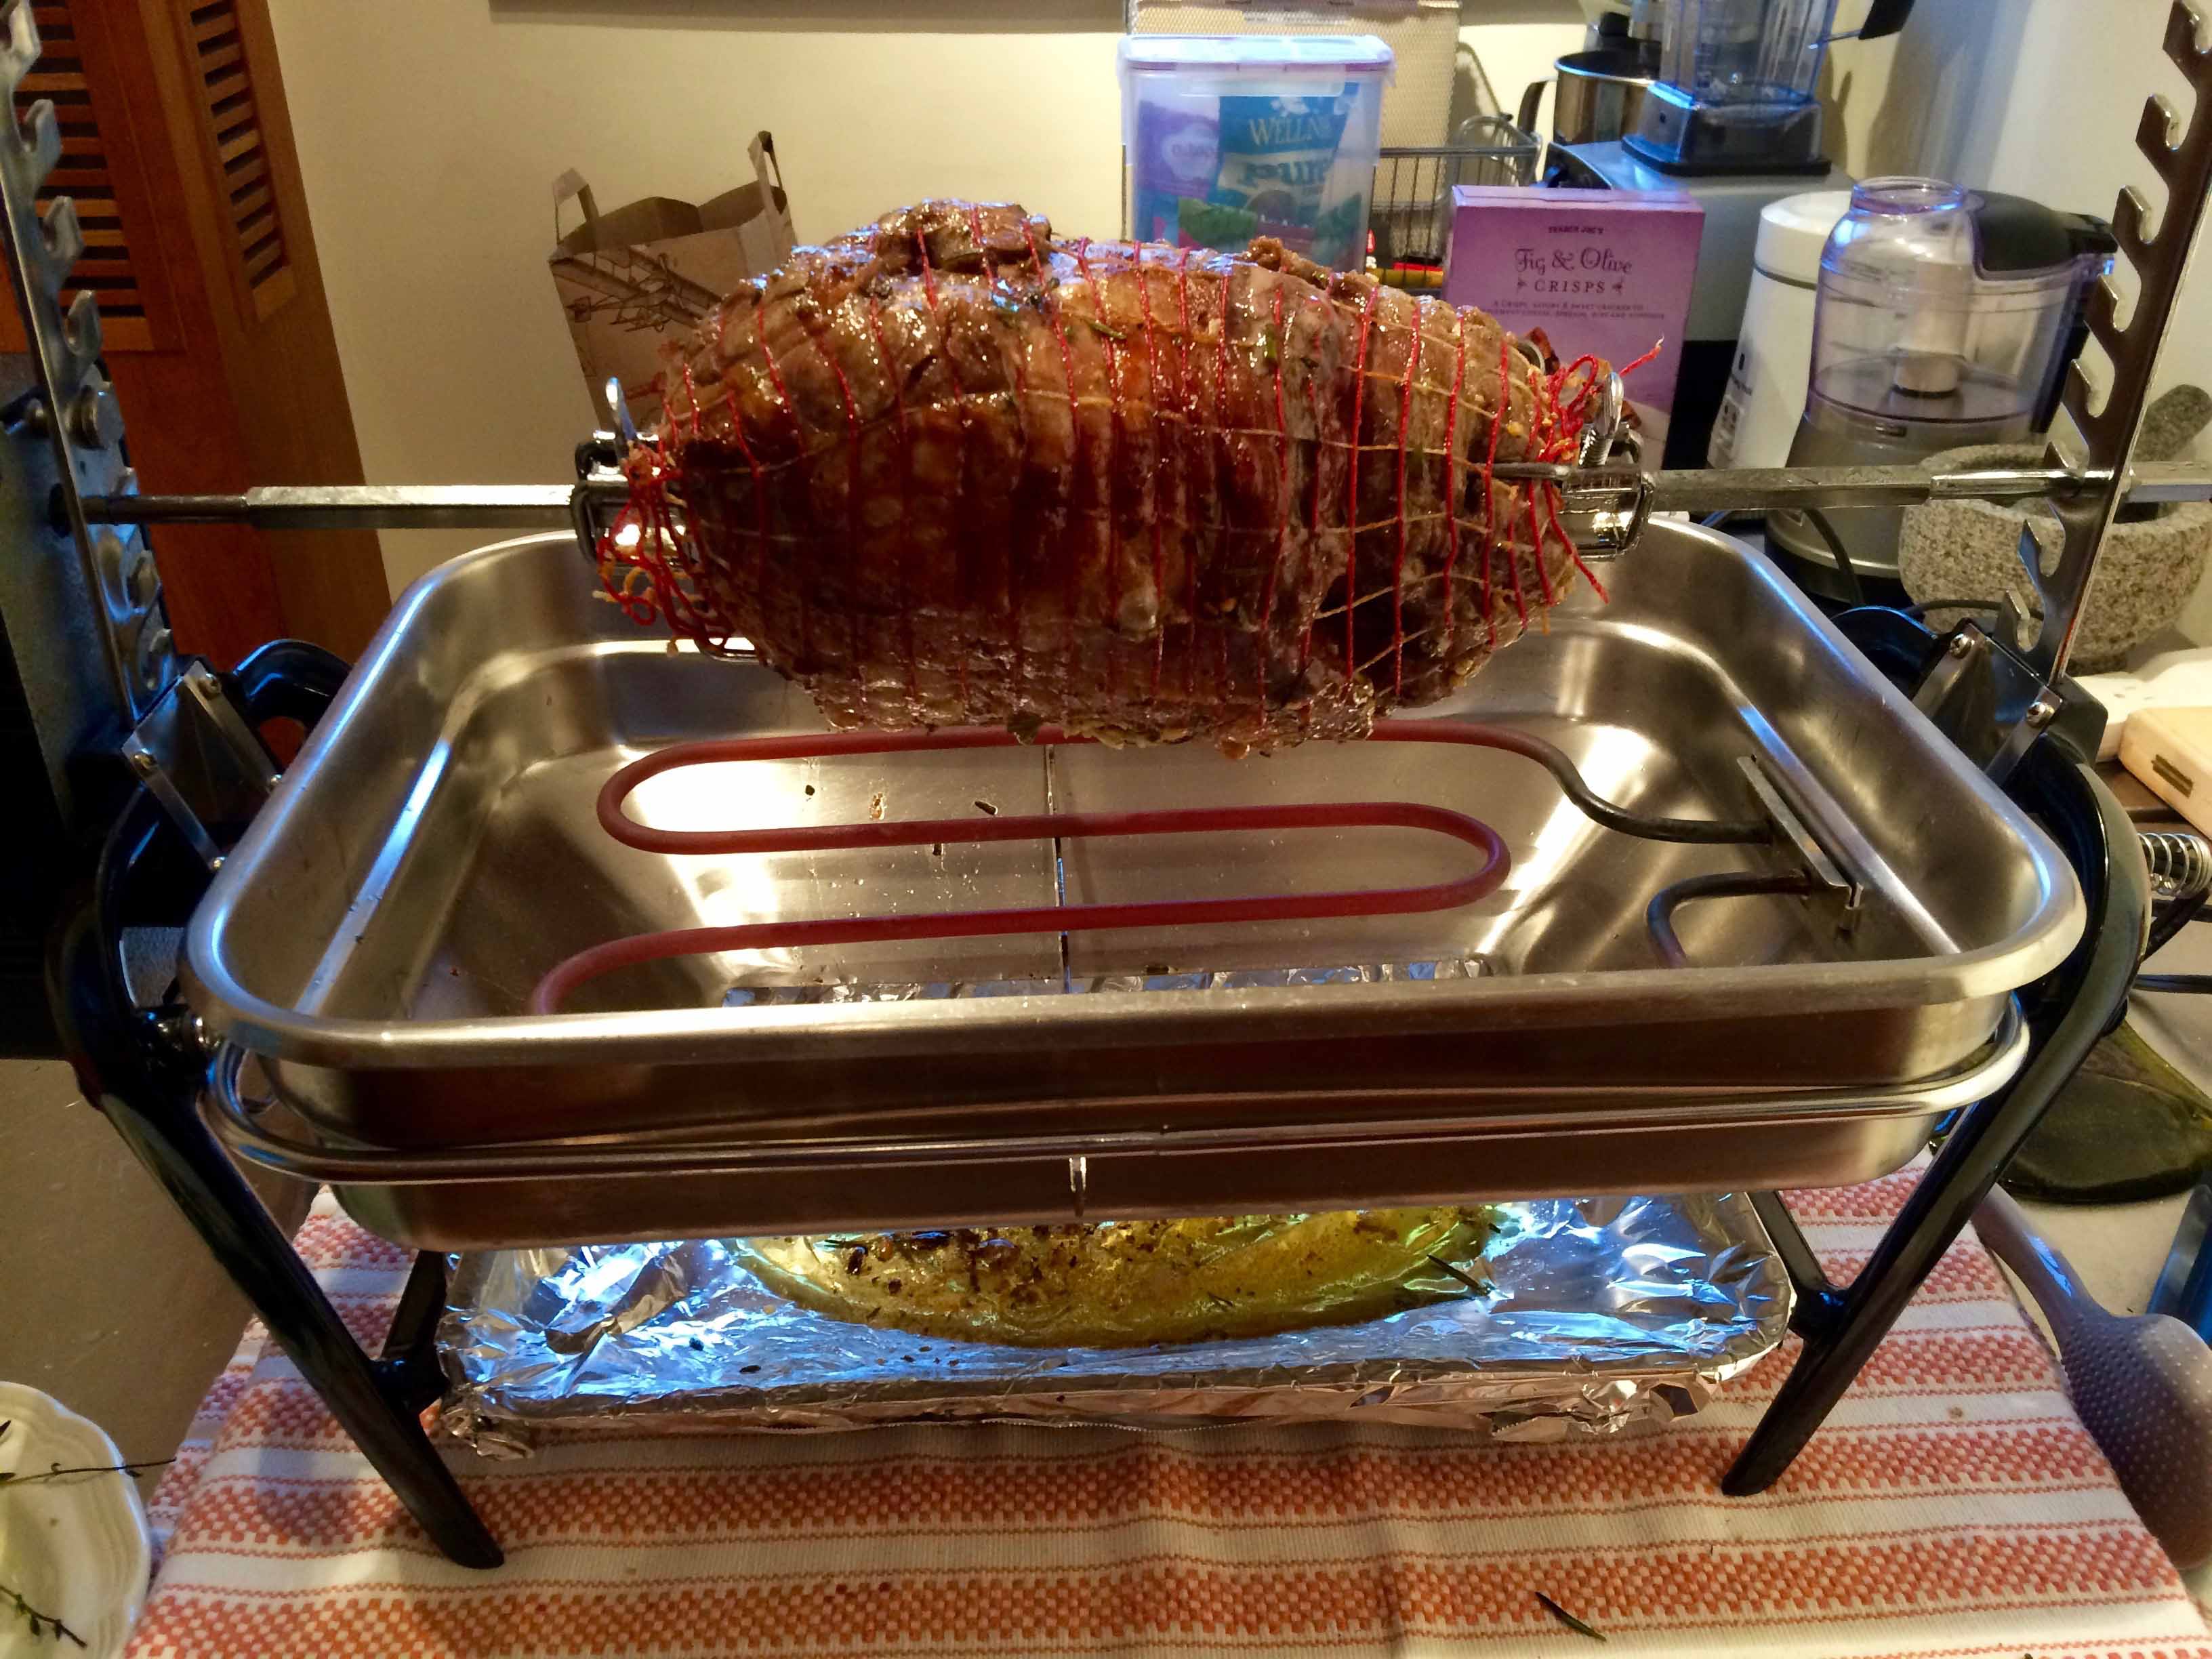
Last week, we acquired a new (“used” would be more accurate) kitchen appliance, a vintage Farberware open-hearth grill and rotisserie. Actually it is a replacement for the one I had in storage, which hurricane Sandy “washed” away a while back. I came across this one on e-bay while I was searching for something totally unrelated to cooking, which made me feel that fate brought us together.
The fact that this rotisserie cooks a hefty roast or whole chicken without any smoke and a minimum amount of heat and is easy to clean and store makes it perfect for a NYC-apartment kitchen, where smoke alarms are overly sensitive and space is at a premium.
The first food I cooked on this one is the same that I made on my last one: a roast boneless leg of lamb. Because I wasn’t sure if this used appliance would work, we didn’t take any photos of the lamb and its preparation until its final minutes of cooking. But after a little more than an hour of steadily turning over the glowing cooking element, the roast was a thing of beauty.
Lamb on the rotisserie
The recipe I used is by Joshua Bousel on Seriouseats.com and is relatively simple. That it uses only a marinade to flavor and baste the meat, as opposed to making holes in the meat for stuffing it with herbs and garlic, keeps the leg juicer during cooking on the spit. Basting it every fifteen minutes with some reserved marinade and a brush made from fresh herbs also helps. While the original recipe is for an outdoor gas grill/rotisserie, I adapted it for my indoor one.
Because we had plenty of meat left over from this 4.5-pound roast, I turned to one of my older cookbooks for a recipe. Published in 1967, a time when America seemed to rediscover serious cooking, Michael Field’s Culinary Classics and Improvisations is a collection of classic recipes for meats, poultry, fish, and vegetables, each of which is followed by a variety of improvisations for the leftovers from the classic dish. Many of these improvisations, like the one I chose for my leftover lamb, reflect America’s fascination at that time with international cuisine. Today, however, many may question these recipes’ authenticity or their ethnic accuracy. Yet one must remember that when Field wrote his book, a lot of the imported ingredients and spices we readily find today, not only in gourmet shops but even in supermarkets, were not widely available.
Field titled this improvisation for leftover roasted lamb, “Lamb in a Skillet with Fresh Tomatoes, Scallions, and Parsley in the Turkish Style.” I must confess that I cannot explain what is Turkish about this dish. Nonetheless, it has long been one of my favorites for repurposing a leftover roast.
In his recipe, Field calls for peeled, seeded, and cut tomatoes and provides instructions for peeling. However, while I cut and seeded the tomatoes as directed, I opted to skip the peeling.
Lamb in a Skillet with Fresh Tomatoes, Scallions, and Parsley in the Turkish Style (from Michael Field’s Culinary Classics and Improvisations)
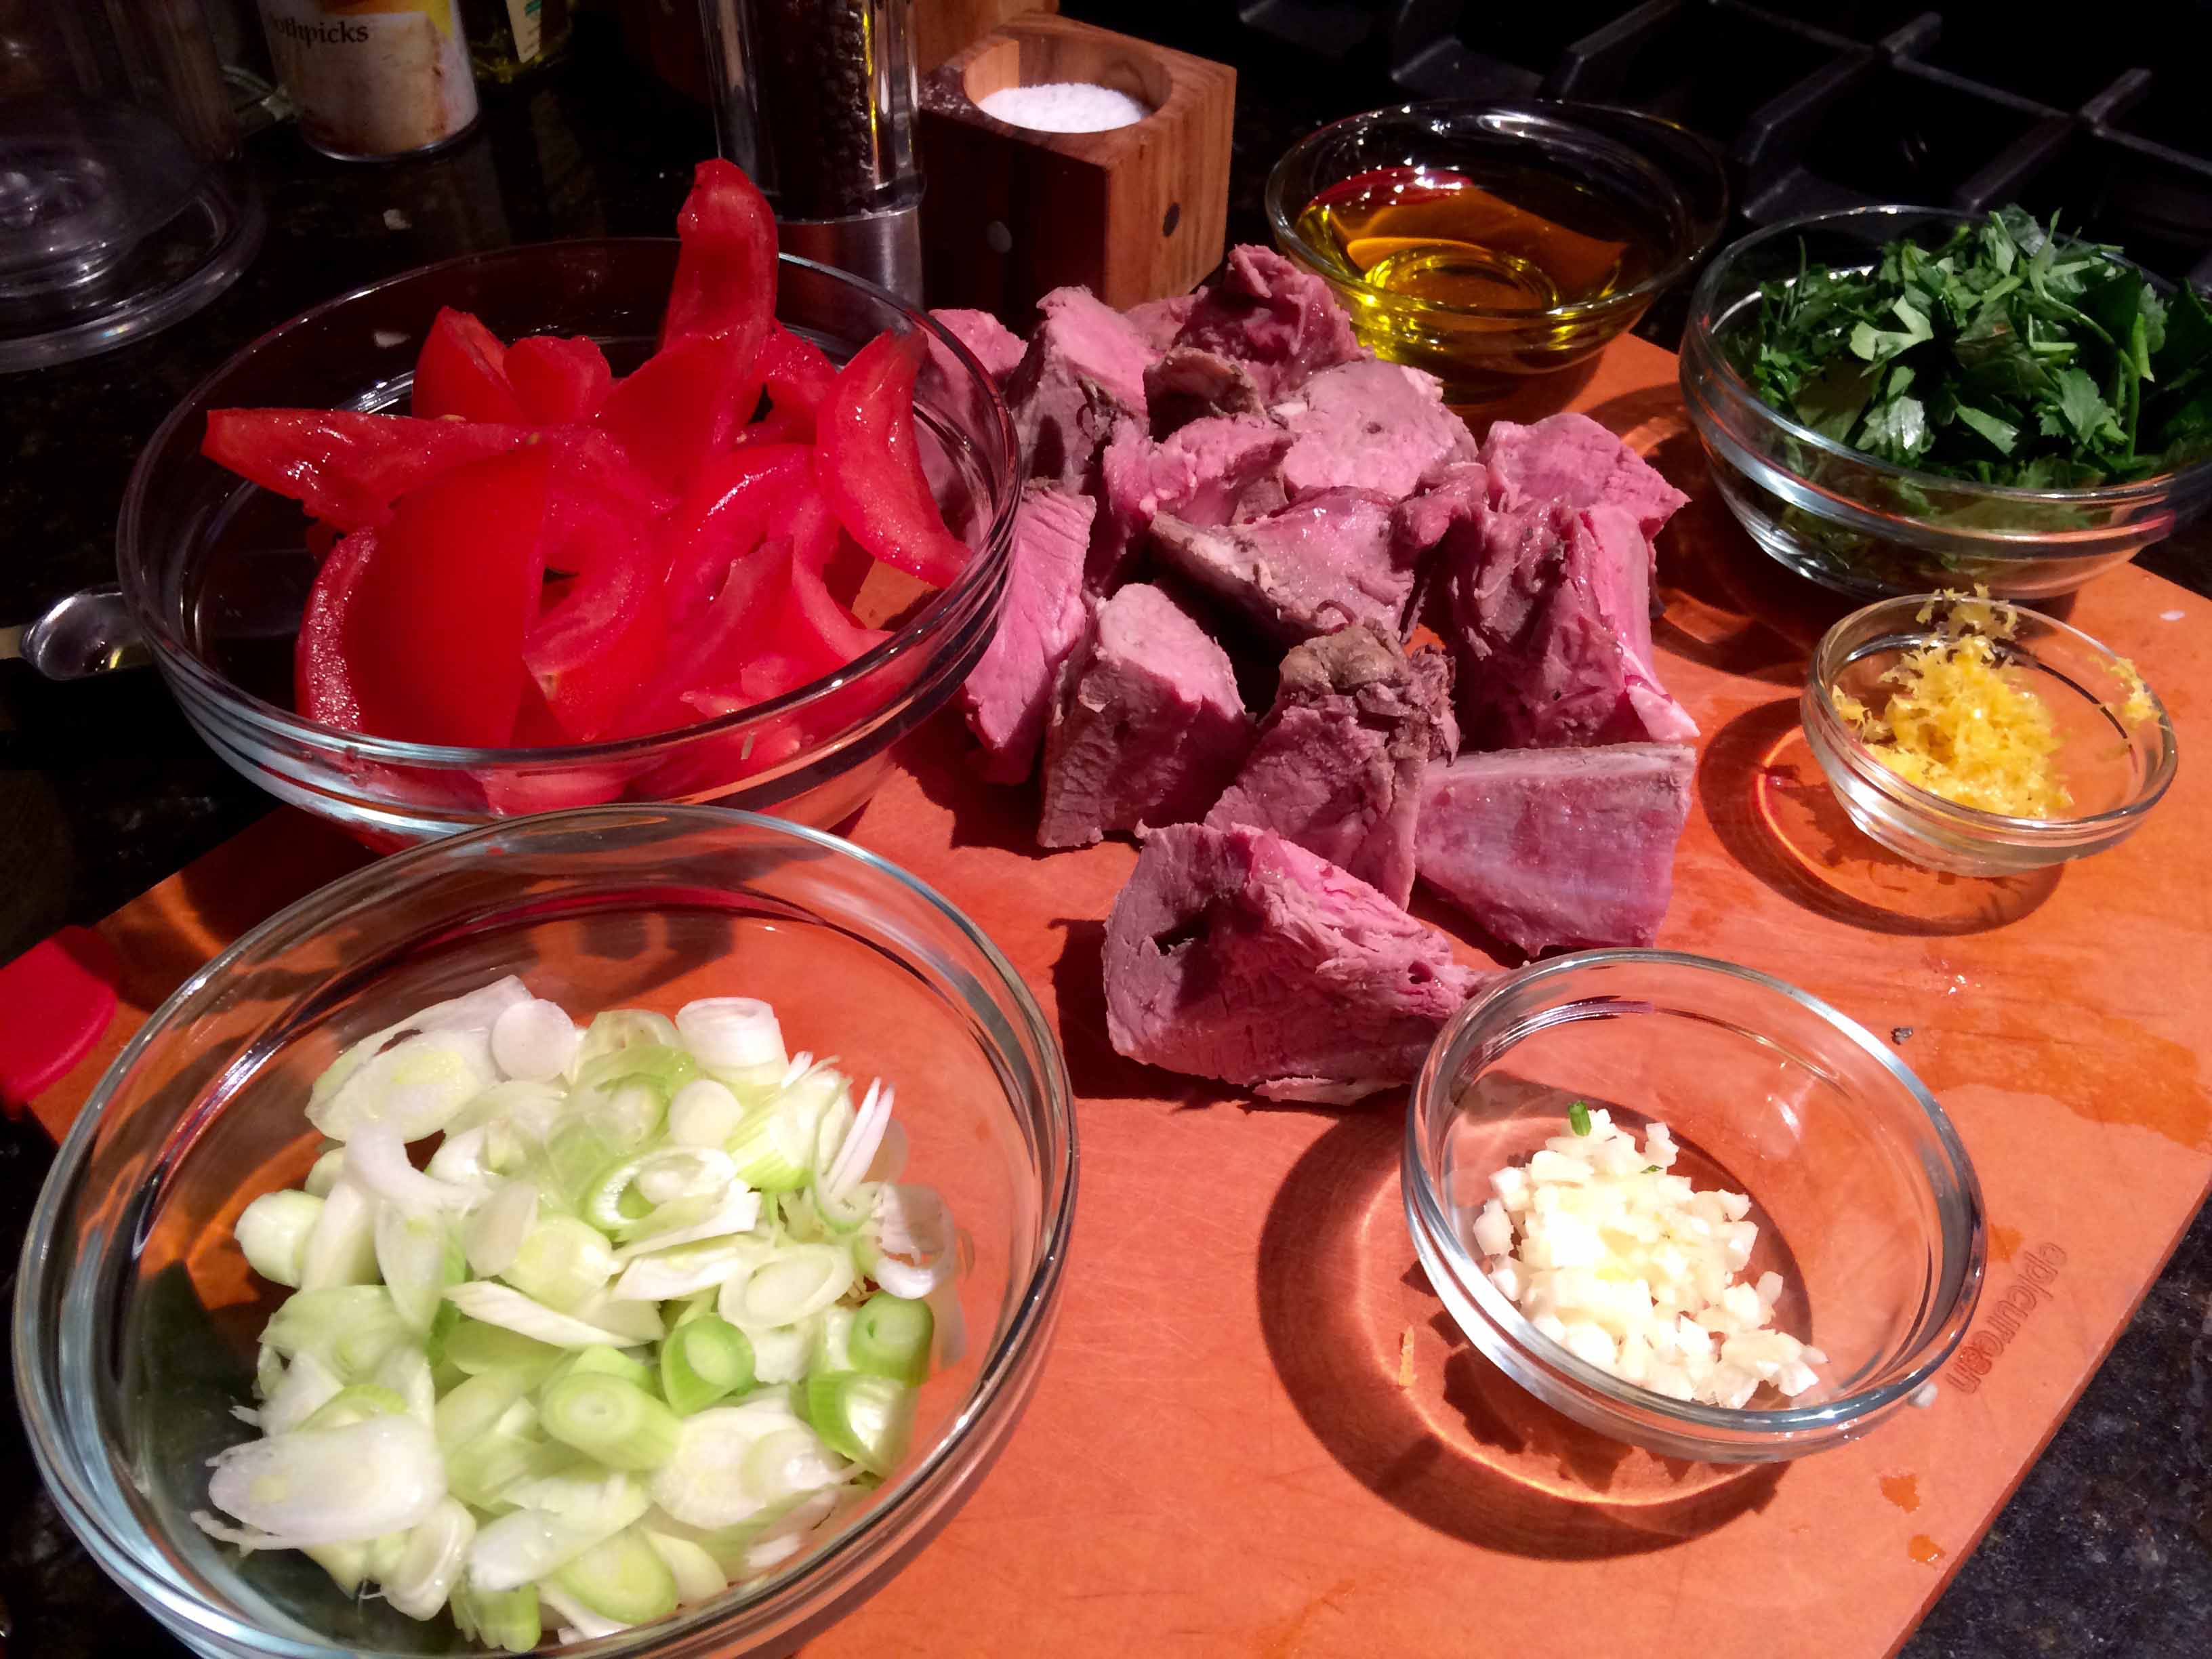
2 cups roast leg of lamb cut into ¾- to 1-inch pieces
1 teaspoon garlic, finely chopped
Salt
½ teaspoon freshly ground black pepper
4 tablespoons olive oil
½ cup fresh tomatoes, peeled, seeded and cut into julienne strips 1 inch by ½ inch
½ cup scallions, cut into paper-thin rounds (include some of the green stem also)
½ cup parsley (flat-leaf is possible), coarsely chopped
1 teaspoon lemon peel, grated
Lemon quarters
Prepped ingredients
Combine in a small bowl the pieces of lamb, the chopped garlic, salt to taste, and the freshly ground pepper. Mix together thoroughly.
The seasoned lamb
Choose a 10-inch traditional sauté pan or any deep heavy frying pan attractive enough to bring to the table.
Heat 4 tablespoons of olive oil in the pan until it almost begins to smoke. Add the seasoned lamb and, over high heat, brown the pieces quickly, turning them with a large spoon or spatula for about 8 minutes, taking care not to let them burn.
The browned lamb
Toss in the tomato strips* and, stirring continuously, cook them for about 3 minutes with the lamb; they should be barely cooked through and should retain more than a hint of their original texture and freshness.
Lamb with tomatoes
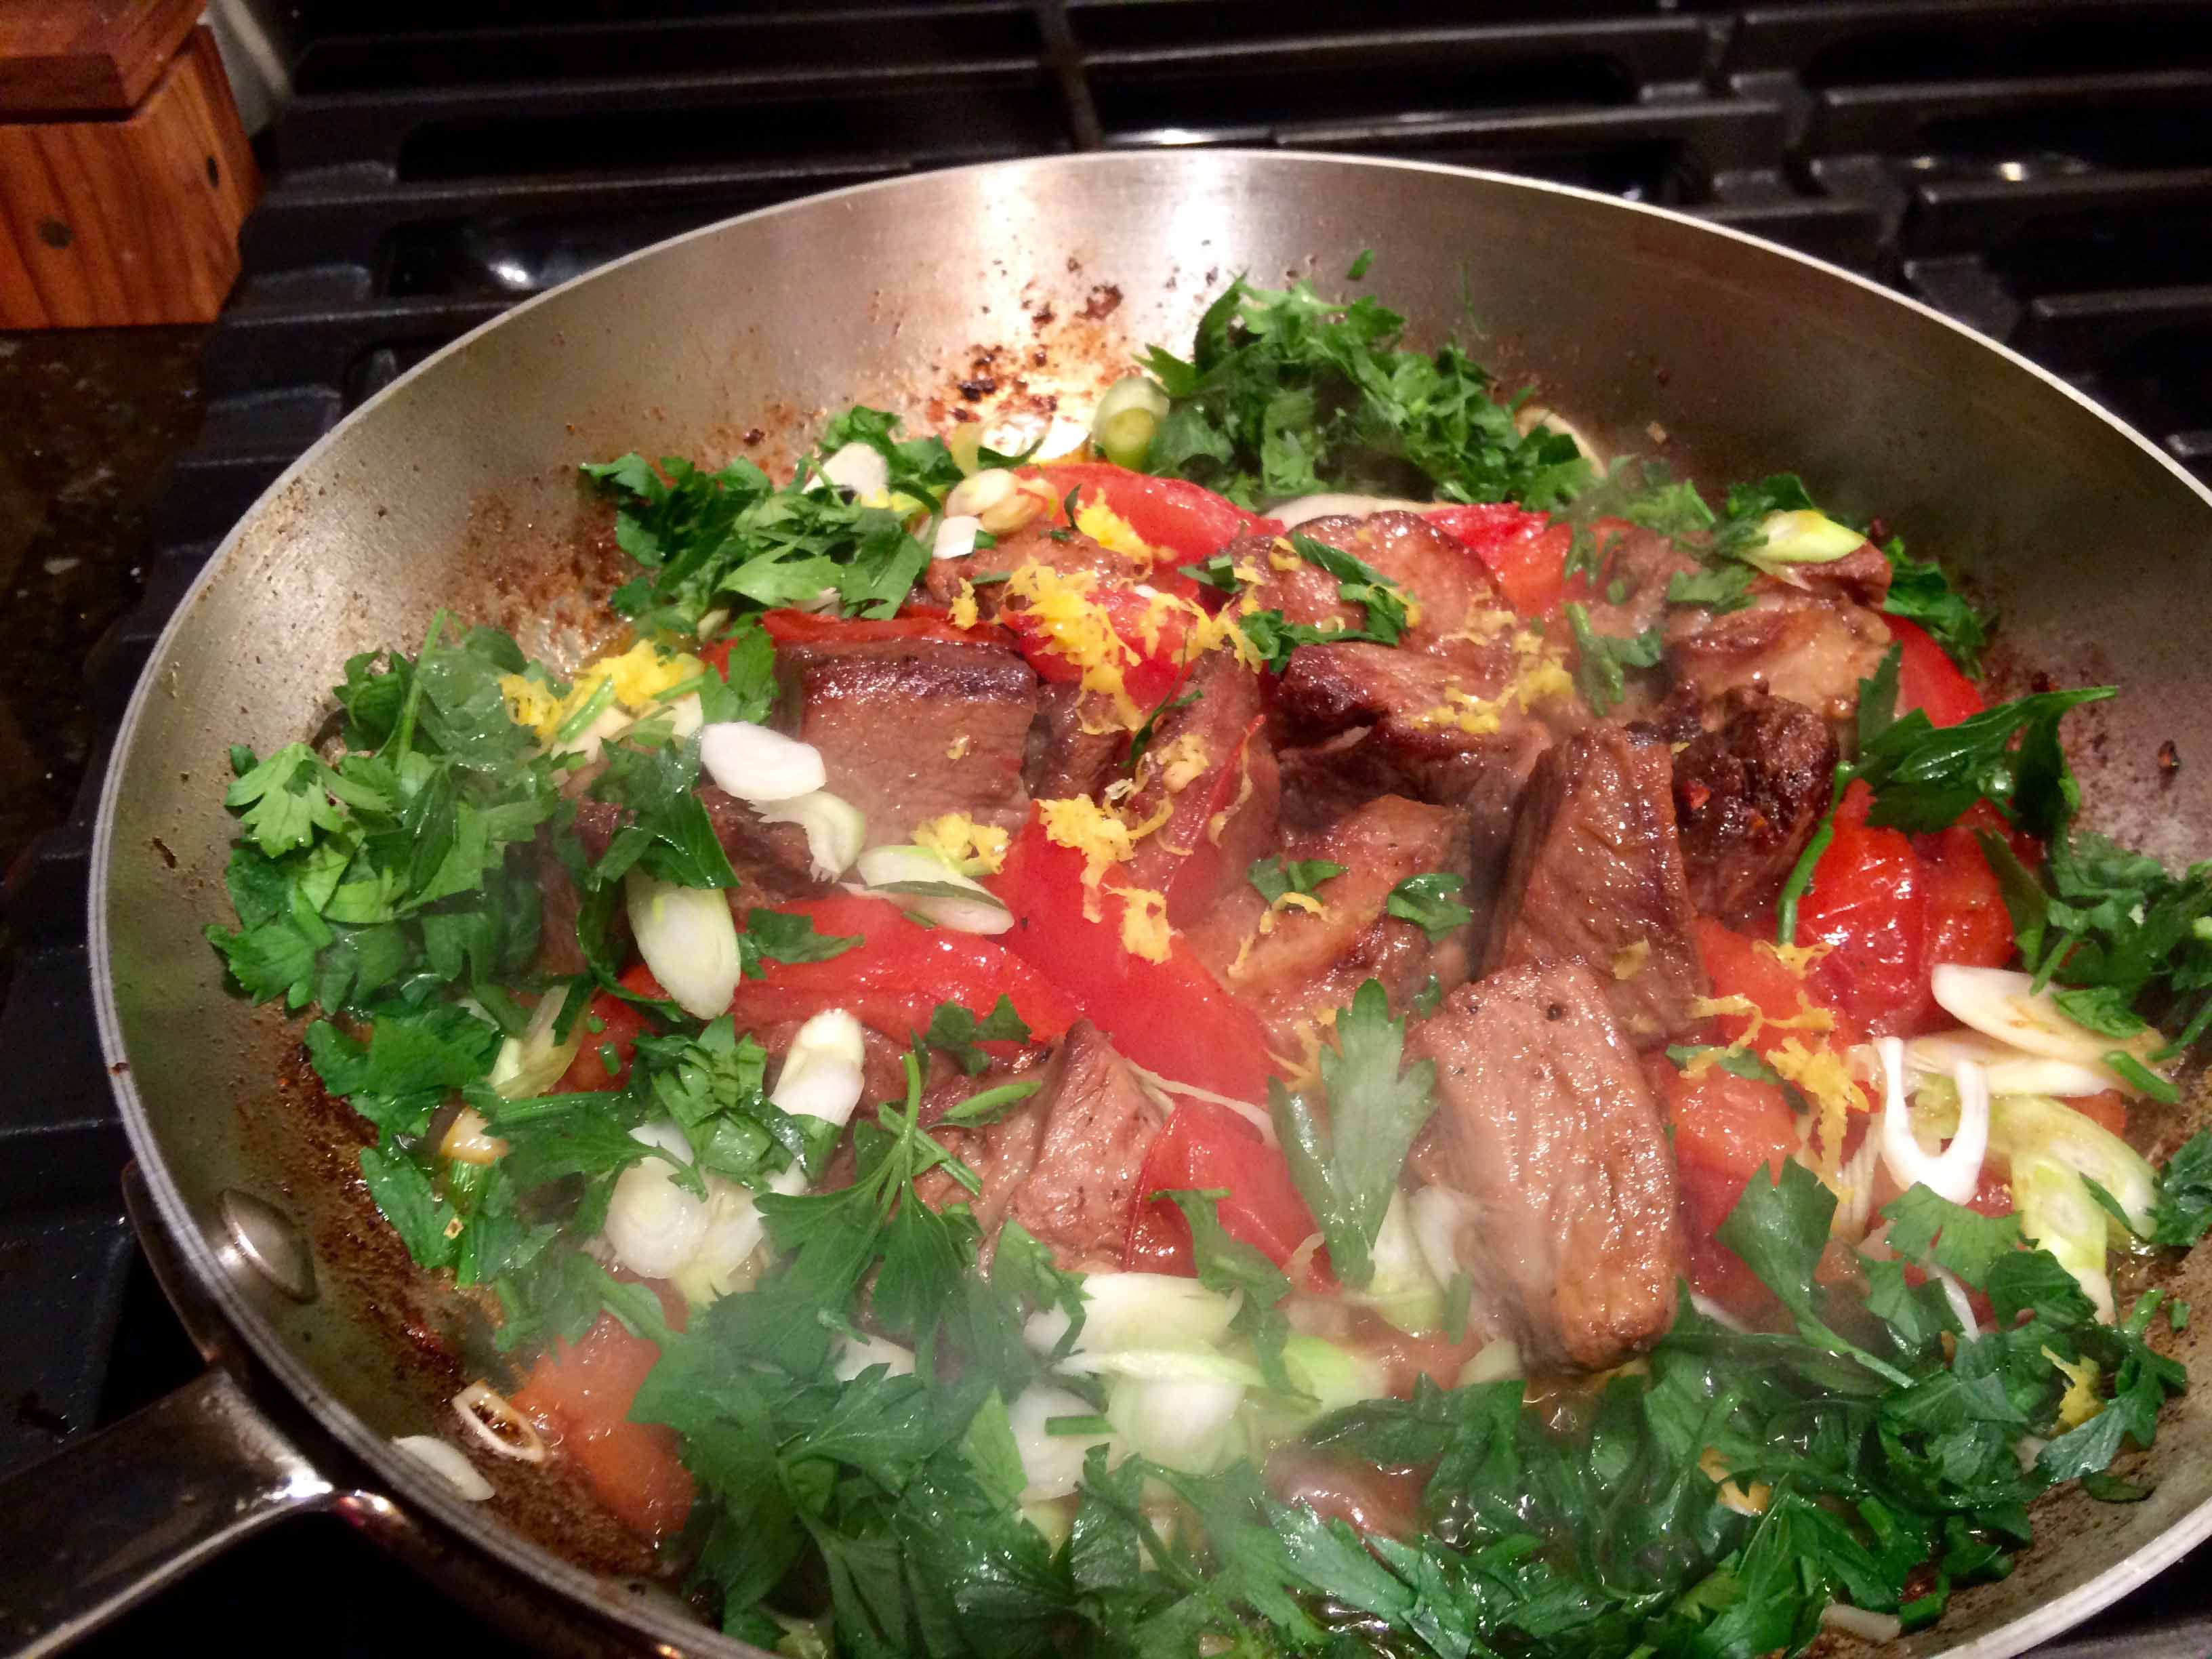
With a spatula, push the meat and tomatoes toward the center of pan and surround them with the scallions and parsley, arranged in a ring. Sprinkle meat with the lemon peel and cover the pan tightly.
After adding the parsley, scallions, and lemon zest
Turn off the heat and let the residual heat in the pan warm the herbs through. Serve directly from the pan after about 5 minutes.
The finished dish
Lemon quarters are the perfect accompaniment to the lamb and French or Italian bread should be served to sop up the tomato and herb-flavored olive oil.
*Note: To prepare the tomatoes, drop them into boiling water for about ten minutes. Peel them at once and cut them into quarters. Run a small sharp knife under the pulp of each quarter and cut it away, leaving the thin outer shell of the tomato. Cut the shells into julienne strips and use the tomato pulp for other purposes.
As I said earlier, I skipped the blanching and peeling of the tomatoes to preserve their texture. I also added a bit of cumin to the initial seasoning of the lamb and, as may be seen in the photos, took some liberties with measuring the ingredients. Finally, rather than serving bread, I opted for basmati rice to sop up the delicious sauce.
It’s always a pleasure to find serious, well-researched, and eloquently written cookbooks that, like those of Elizabeth David and Alice Waters, promote and celebrate seasonal cooking. Recently, I came upon such a cookbook: The Seasons of the Italian Kitchen, authored by Diane Darrow and Tom Maresca.
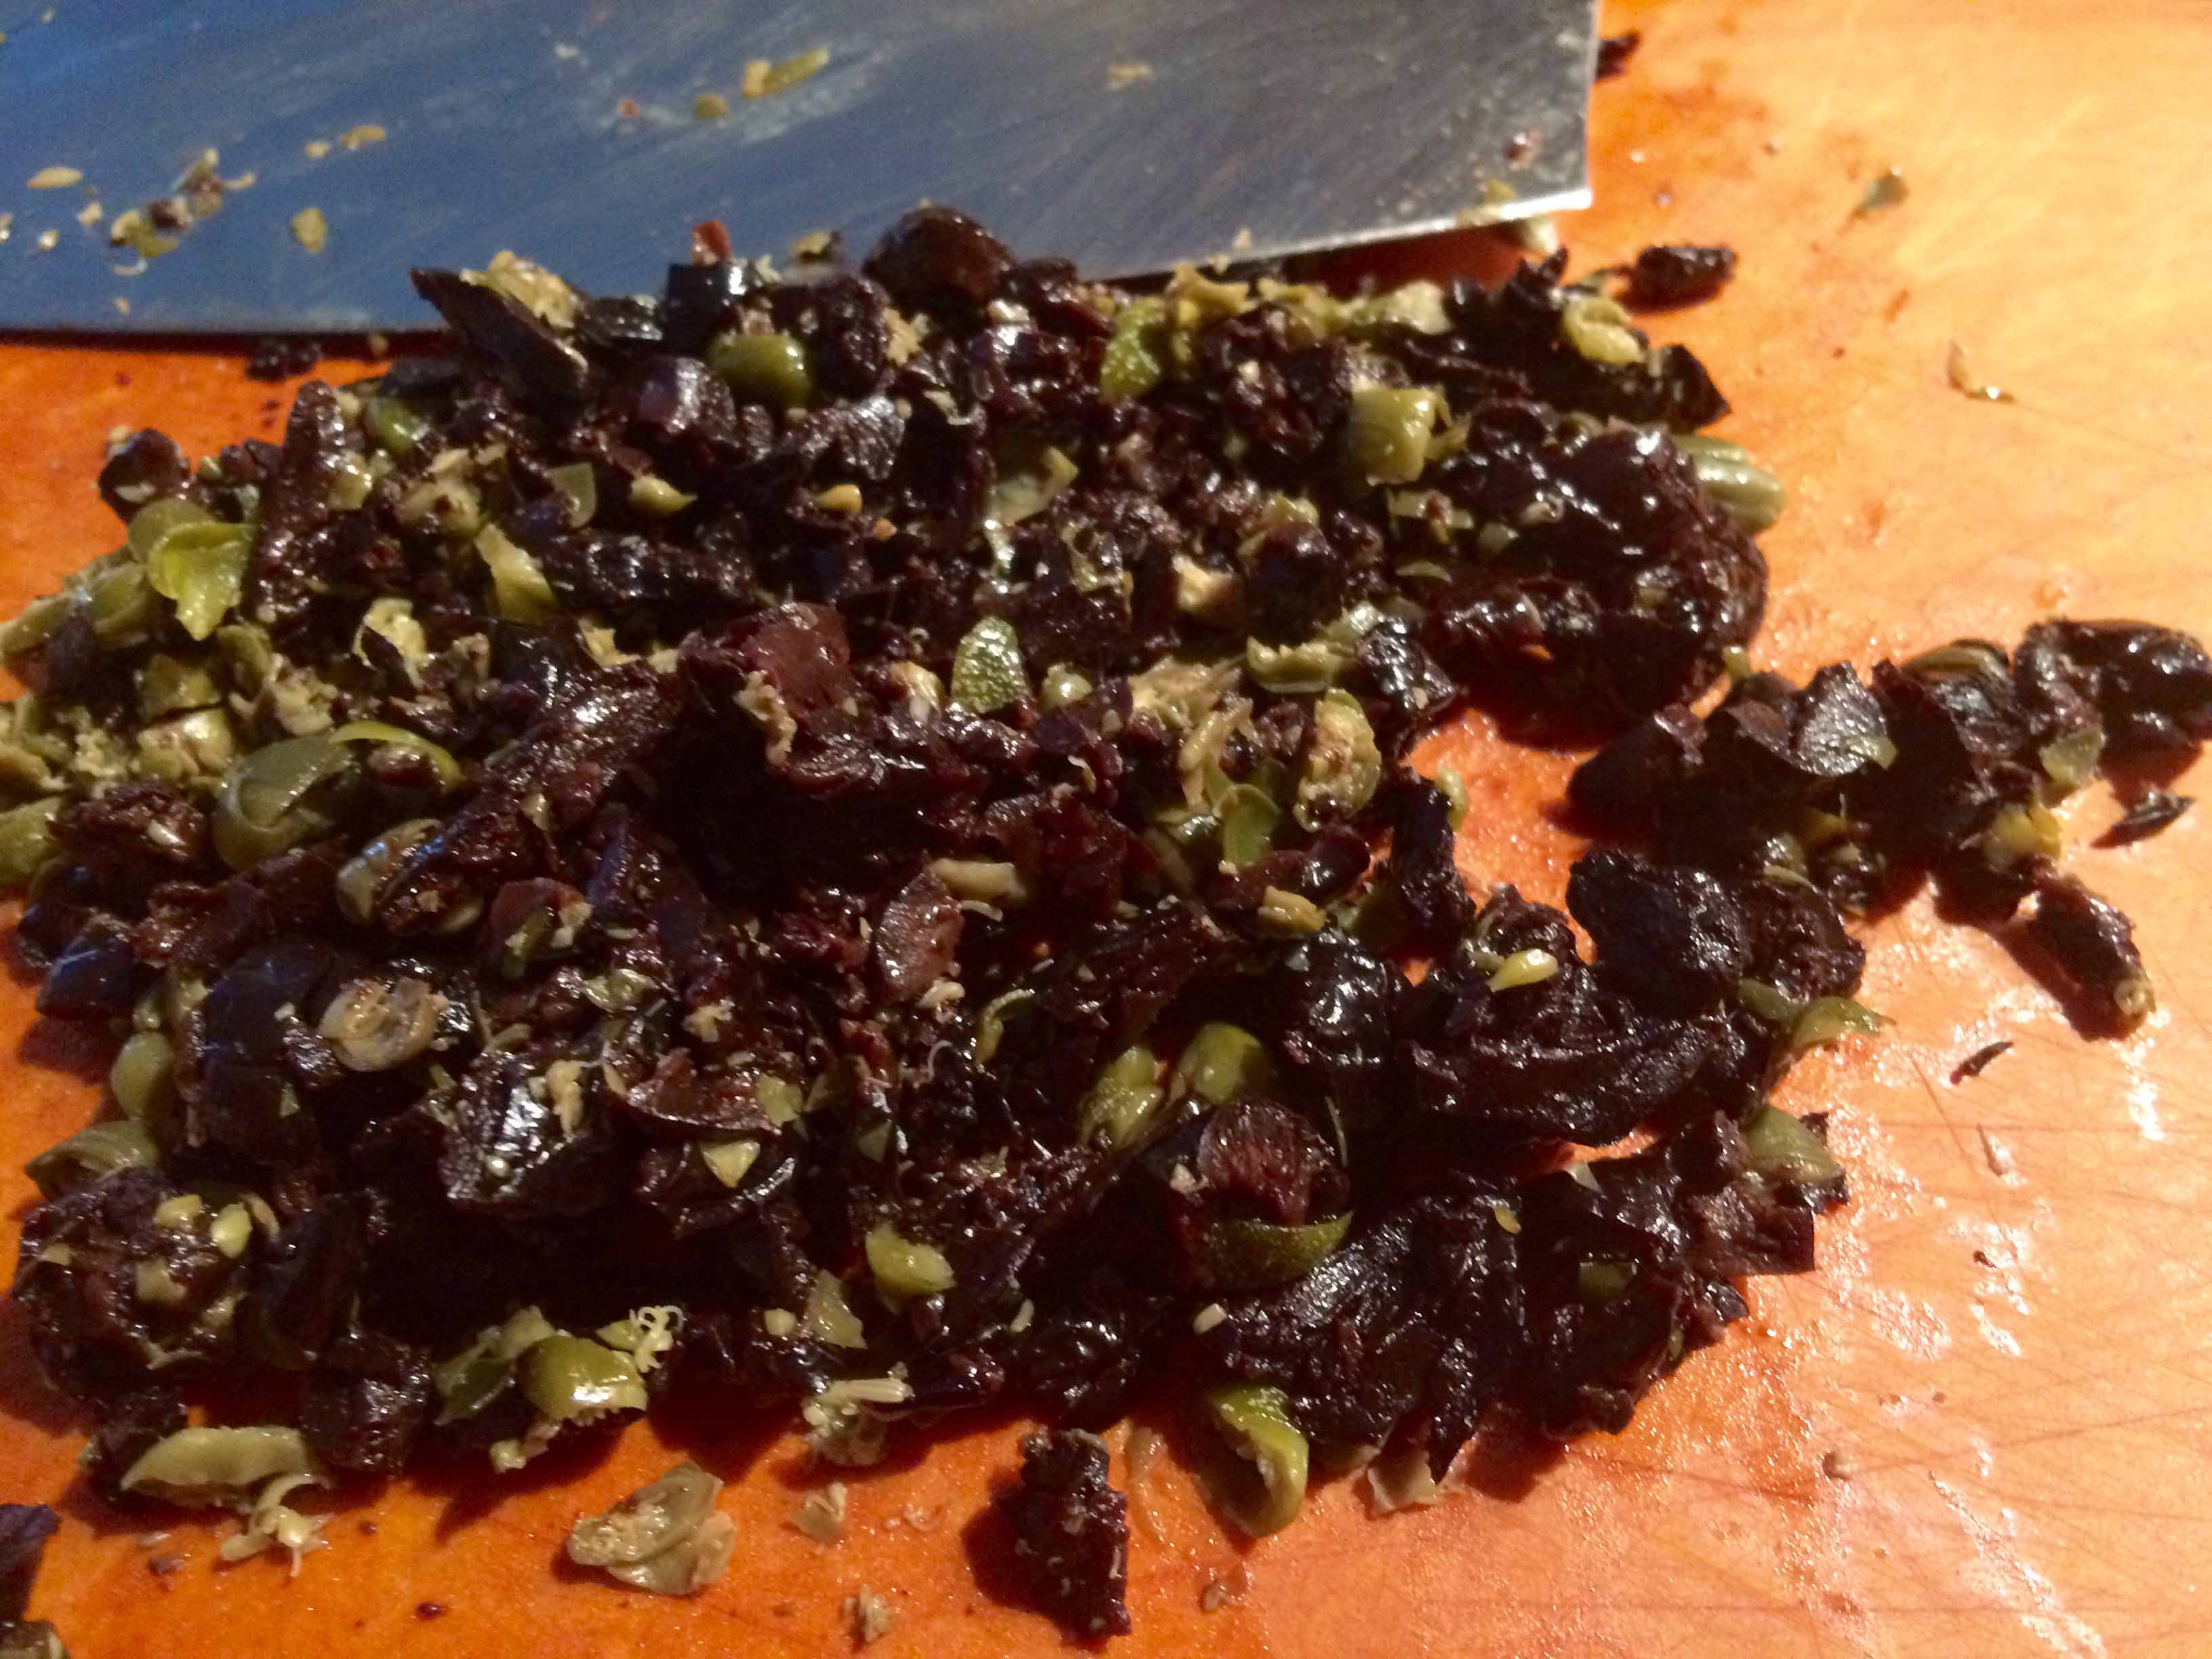
Looking through the book’s summer section, I found a recipe for one of my favorite pastas: spaghetti alla puttanesca (spaghetti in the style of the prostitute). Although I’ve made this dish many times before, I was intrigued by the recipe’s instruction to make a fine mince of two of its main ingredients: the capers and half of the olives. I discovered that this simple step shifted the focus of the dish from the tomatoes and emphasized its olive and caper flavors, which was in line with the authors’ belief that true puttanesca is “not so much a tomato sauce with olives as an olive sauce with tomatoes.”
I adapted the book’s recipe to our tastes and used considerably more anchovies and capers than called for and opted for the stronger flavor of oil-cured black olives. Unable to find good tomatoes, I also substituted the canned San Marzano variety.
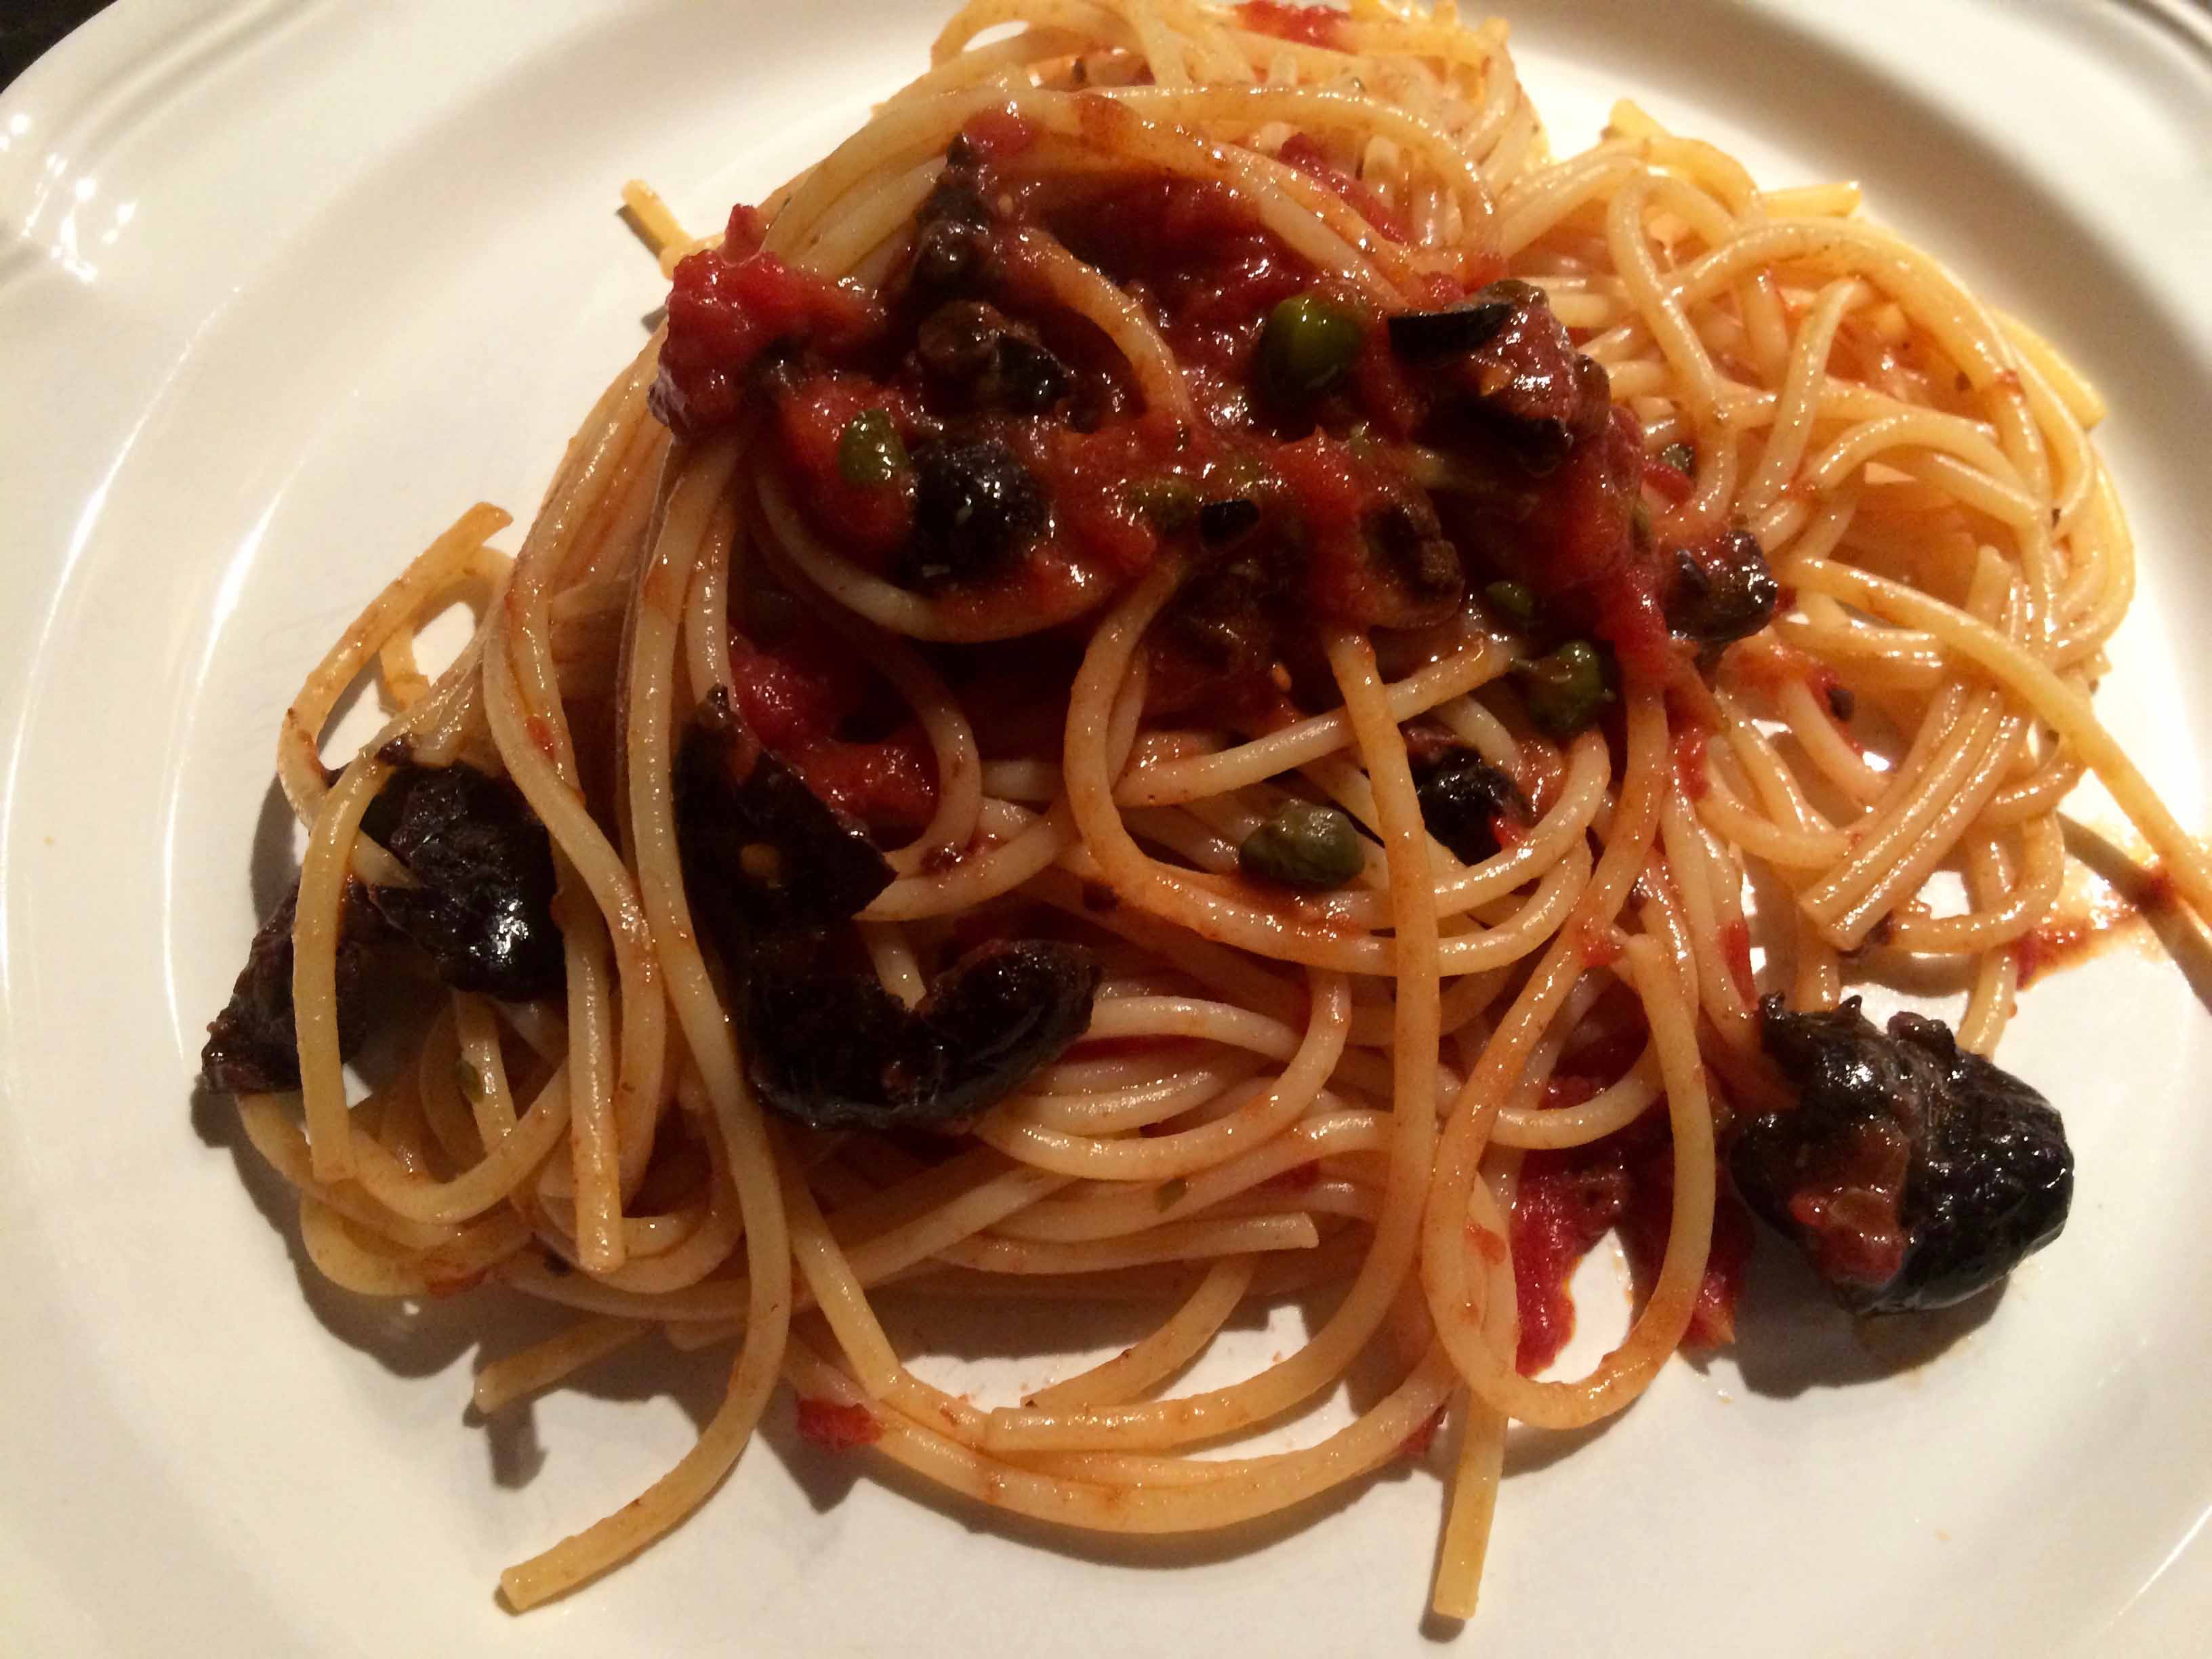
I must admit that this version of puttanesca was the best I’ve had and it made the perfect dish for a hot summer night’s dinner on the terrace.
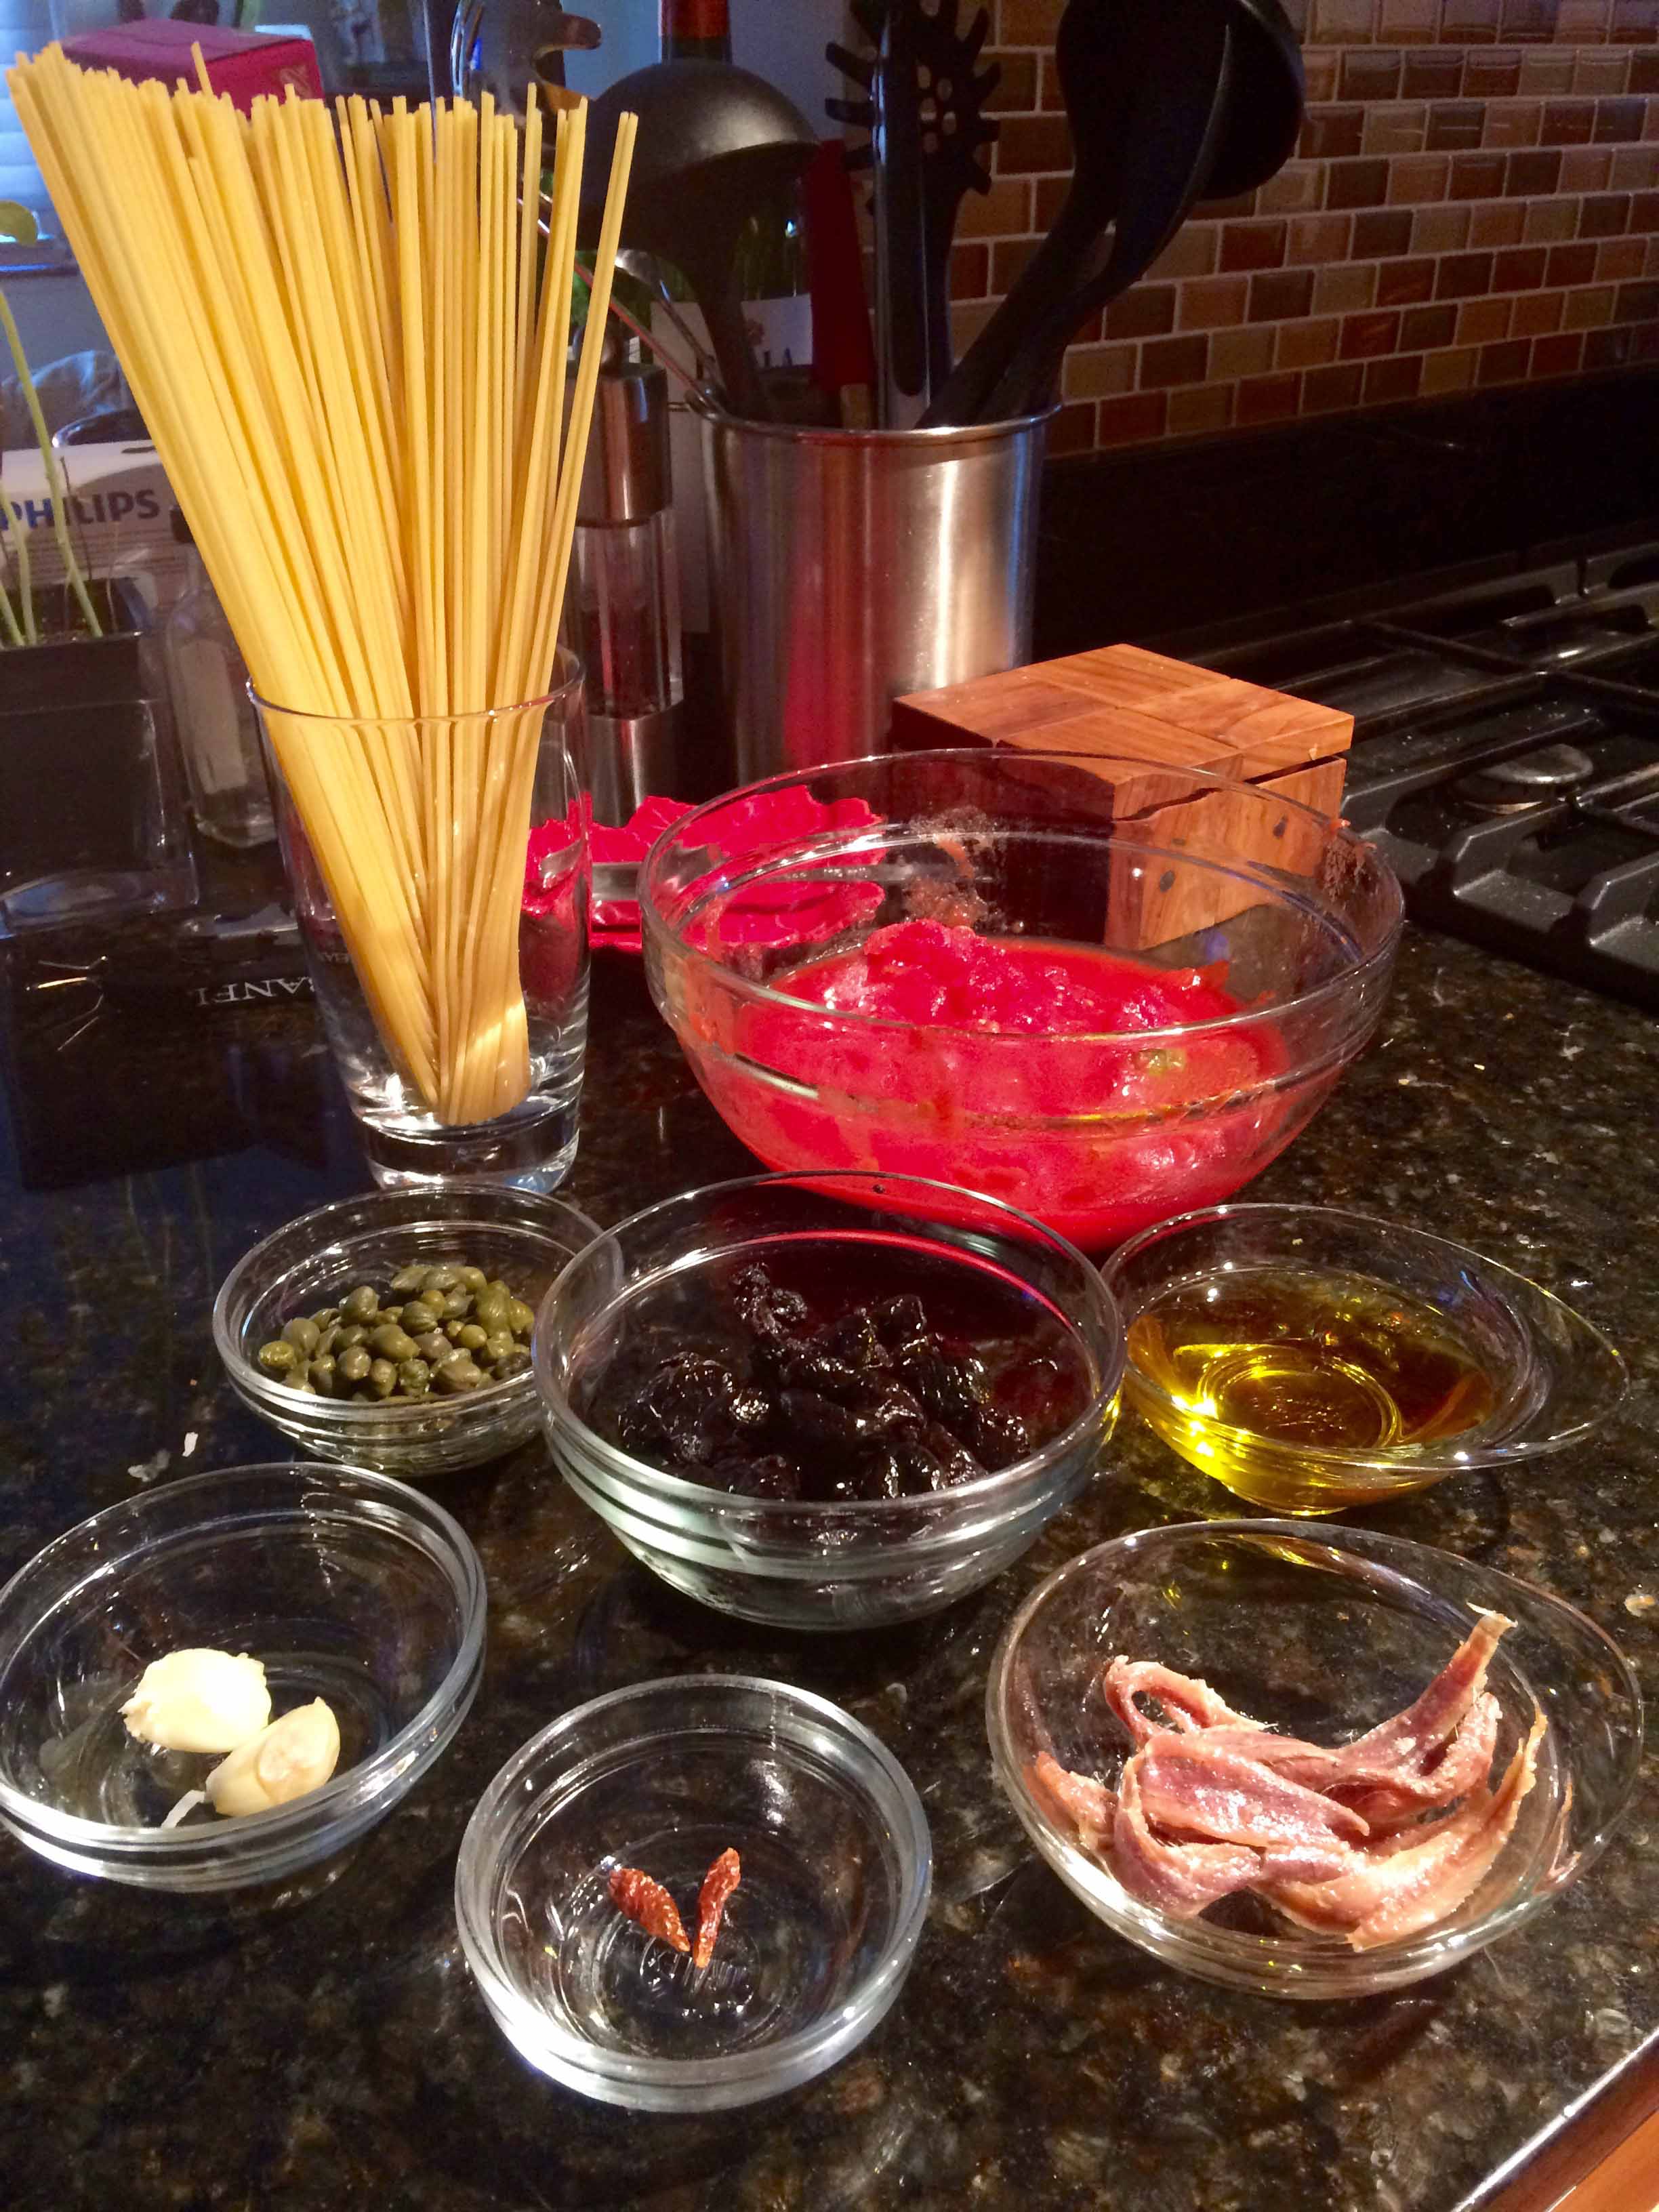
Spaghetti Puttanesca (Adapted from The Seasons of the Italian Kitchen by Diane Darrow and Tom Maresca)
Ingredients
3 tablespoons capers, drained and rinsed
½ cup oil-cured Moroccan-style black olives
3 tablespoons extra-virgin olive oil
2 garlic cloves, peeled and lightly smashed
2 small dried diavolino pepperoncini
8 anchovy fillets, chopped
1 28-ounce can of imported San Marzano tomatoes, drained and crushed
1 pound spaghetti
Salt
Directions Mince the capers together with half of the olives.
Minced capers and olives
In a large skillet, heat the olive oil, garlic, and peperoncino and sauté until the garlic just begins to turn a light gold. Be careful not to burn the garlic. Remove the garlic and the peperoncino.
Sautéed garlic and peperoncino
Add the anchovies and sauté, stirring until they dissolve.
Dissolved anchovies
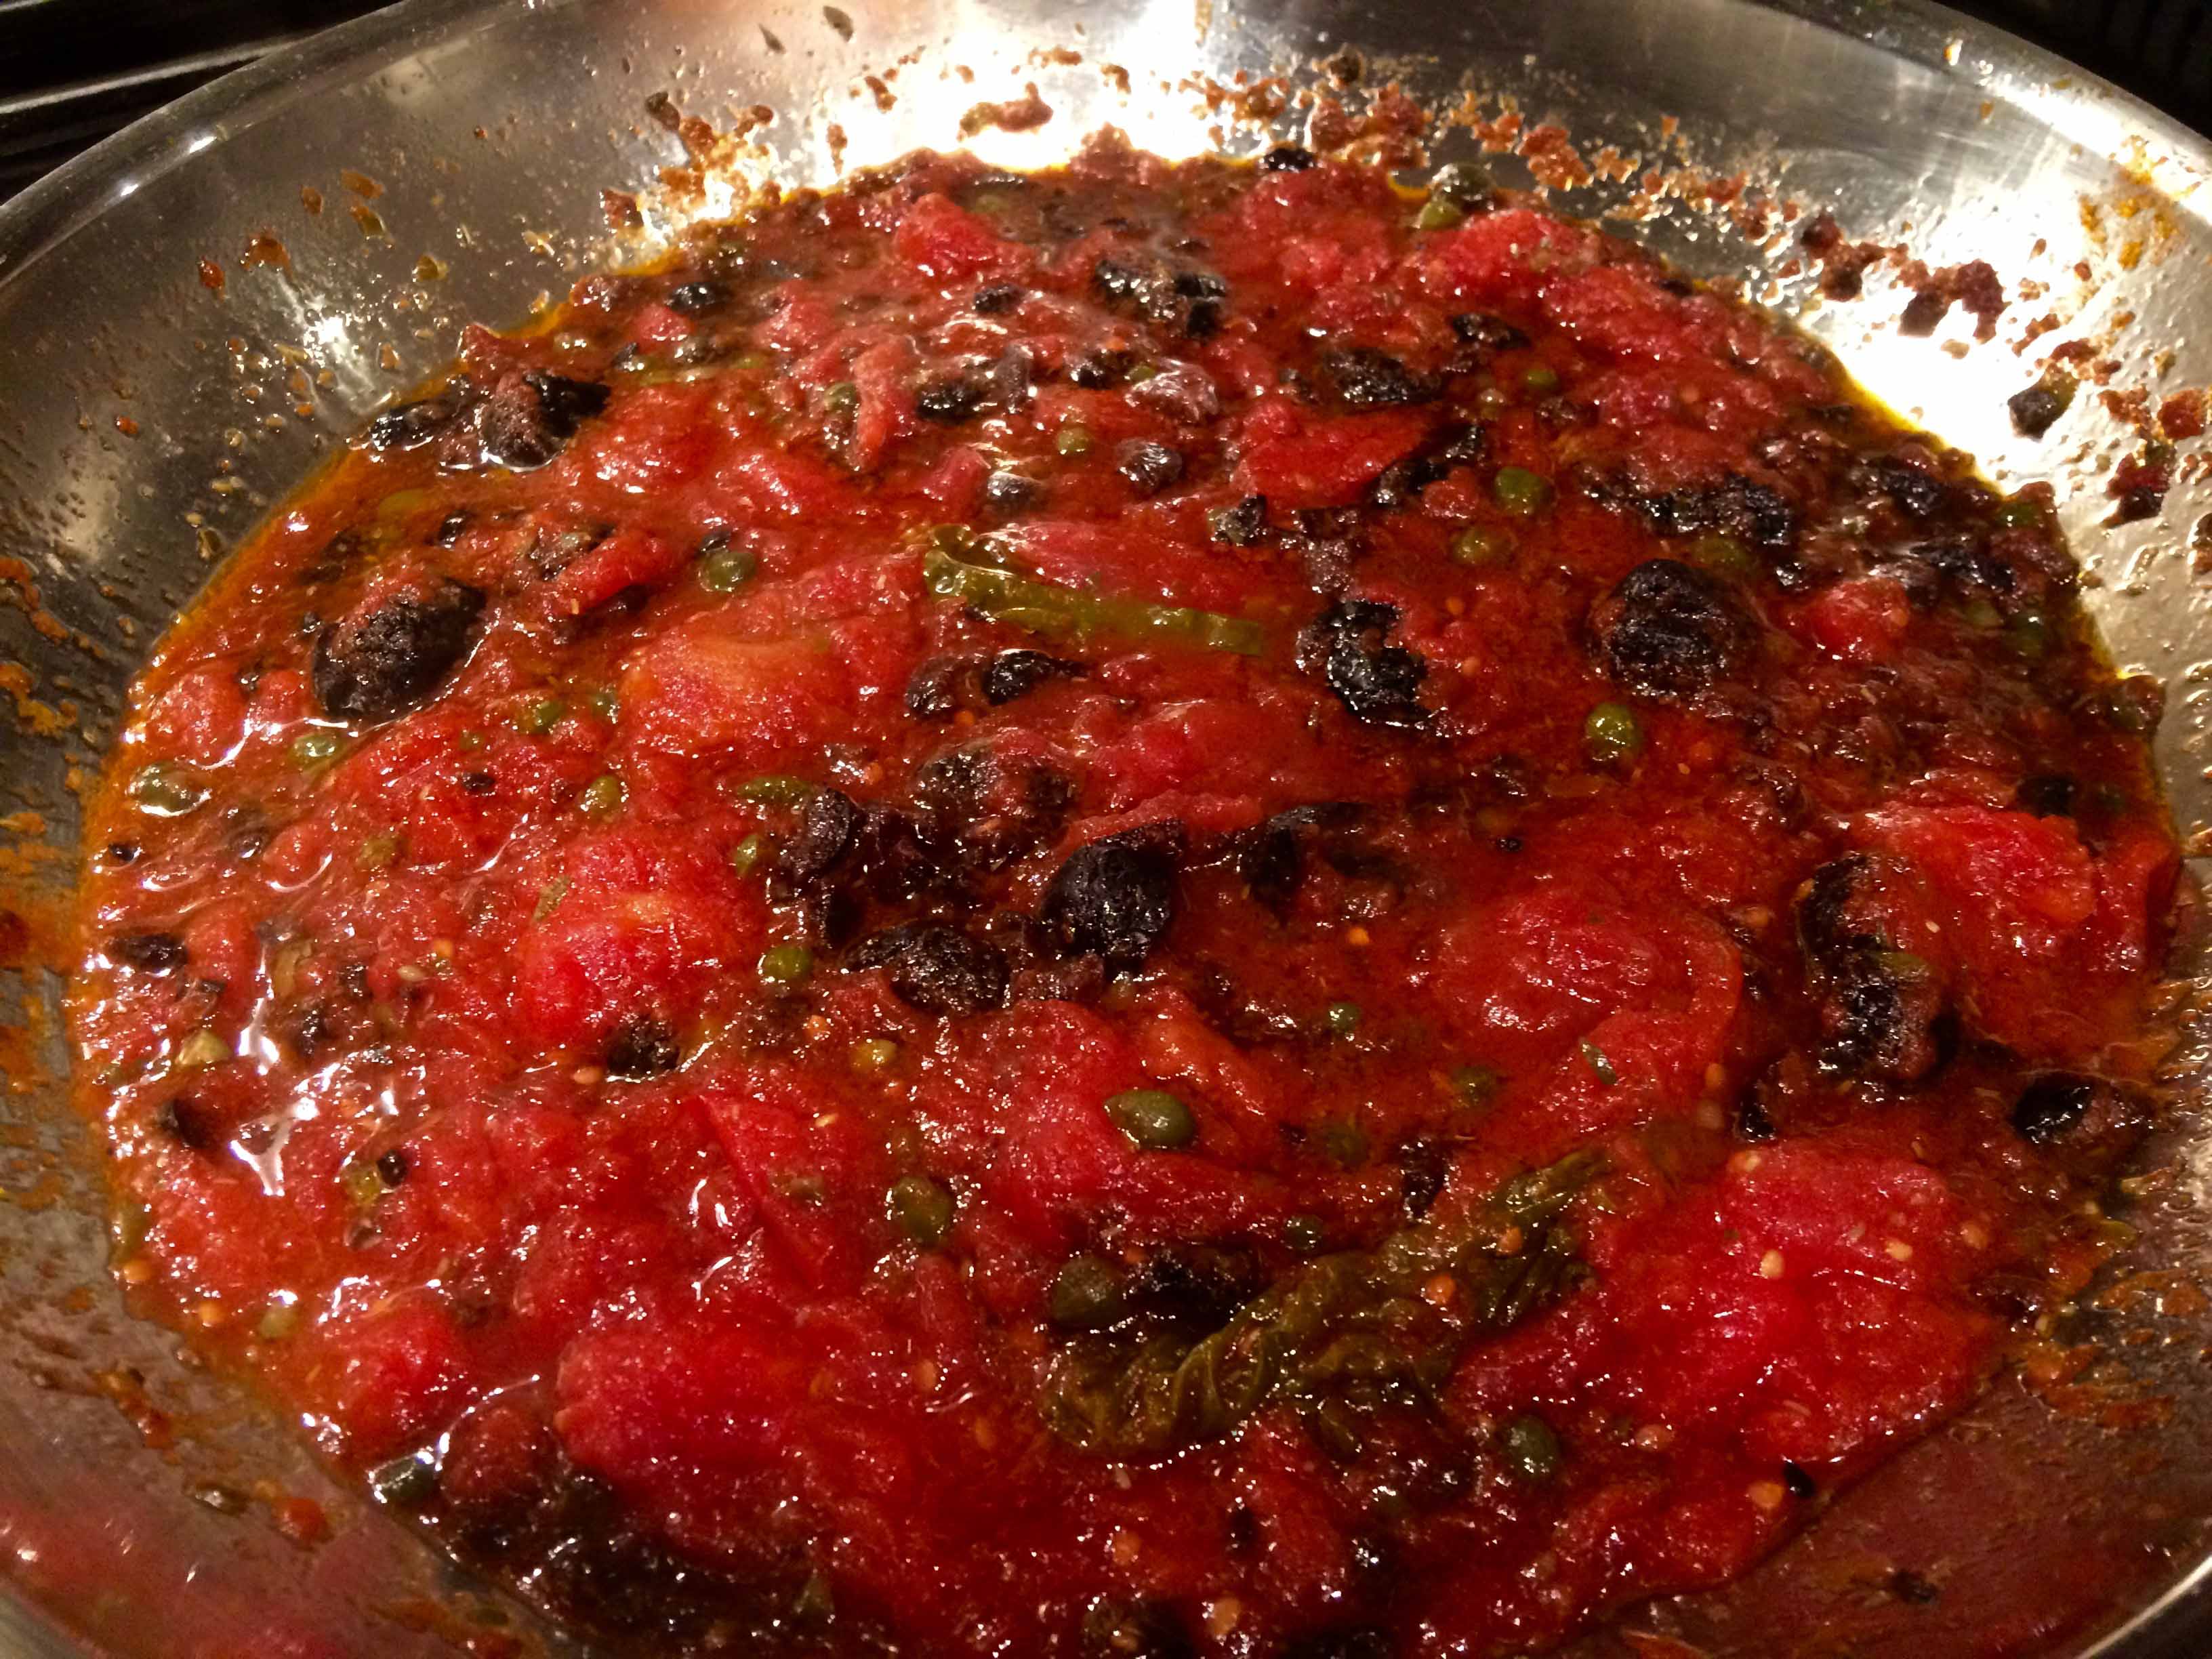
Add the minced capers and olives, followed by the tomatoes and whole olives.
Adding the minced capers and olivesAdding the tomatoes and whole olives
Reduce the heat and simmer covered for 10 minutes, stirring occasionally.
The finished sauce
Meanwhile, cook the spaghetti in well-salted boiling water following package directions for al dente.
About a minute before the pasta is finished cooking, using tongs transfer the pasta to the skillet and finish cooking the pasta in the sauce.
One of the cookbooks I remember from my youth was chef-restaurateur Romeo Salta’s The Pleasures of Italian Cooking, which was published in the early ‘60s. In its time, Salta’s New York City tony restaurant was a haven for celebrities and was well reviewed by the likes of Mimi Sheraton and Gael Greene. In fact, Sheraton is quoted in Salta’s NY Times obituary as saying: “New York has never had an Italian restaurant as good as Romeo Salta was in its heyday.”
The only recipe I vaguely recall from Salta’s book was one for a chicken cacciatore that, compared to my Neapolitan aunt’s, was far more involved and more heavily sauced.
About ten years ago, I came across another recipe for this classic dish in Giada De Laurentiis’s Everyday Italianthat evoked a recollection of Salta’s. Since that time, I’ve cooked it often, tweaking it and, in so doing, have probably made the dish less authentic and more Italian-American. Nevertheless, it’s one of my favorites and so I decided to share it here with my readers, even though I’ve already posted at least two others for this dish.
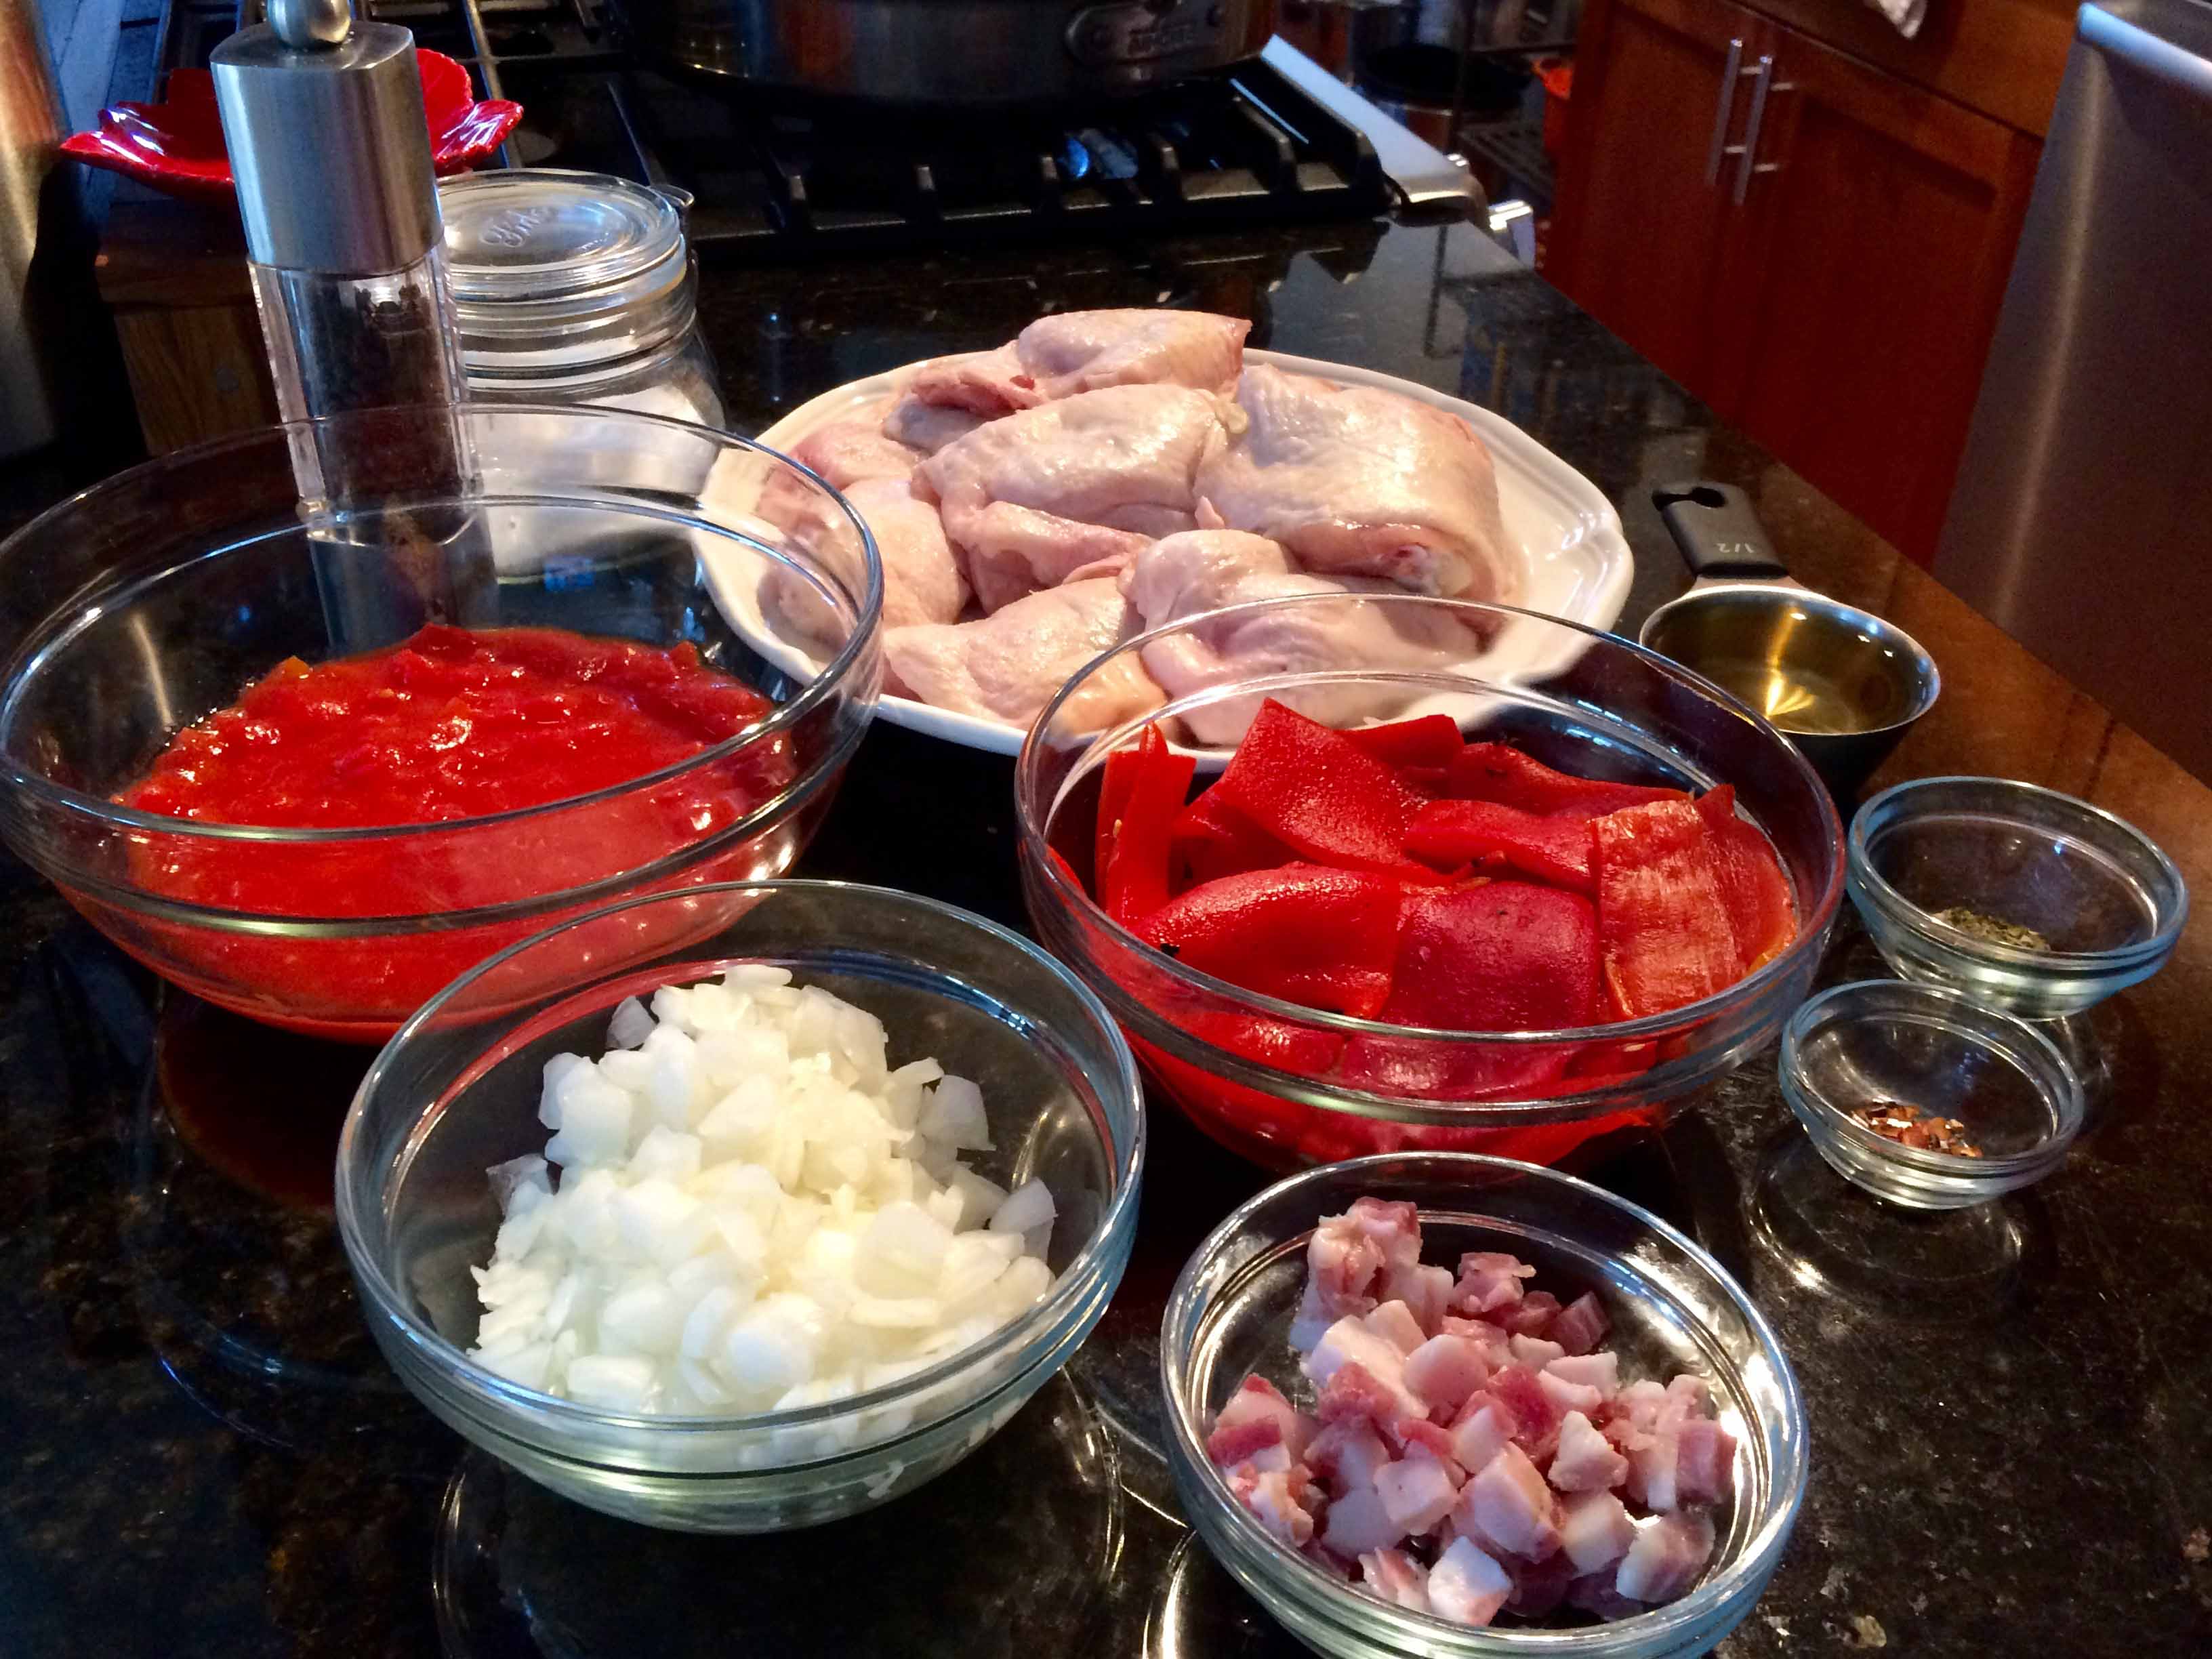
8-9 skin-on, bone-in chicken thighs (approximately 3 pounds) well trimmed of excess fat and skin
Salt
Freshly ground black pepper
½ cup all purpose flour, for dredging
3 tablespoons olive oil
2 large red bell peppers, cut into 1.5- to 2-inch chunks
1 onion, roughly chopped
3 garlic cloves, finely chopped
¾ cup dry white wine
1 (28-ounce) can San Marzano whole tomatoes with juice, crushed
3/4 cup chicken broth
3 to 4 tablespoons non-pareil capers, rinsed and drained
1 ½ teaspoons dried oregano
¼ to ½ teaspoon crushed red-pepper flakes
1.5 cups frozen peas, thawed
1.5 cups sliced cremini mushrooms
¼ cup coarsely torn fresh basil
Directions
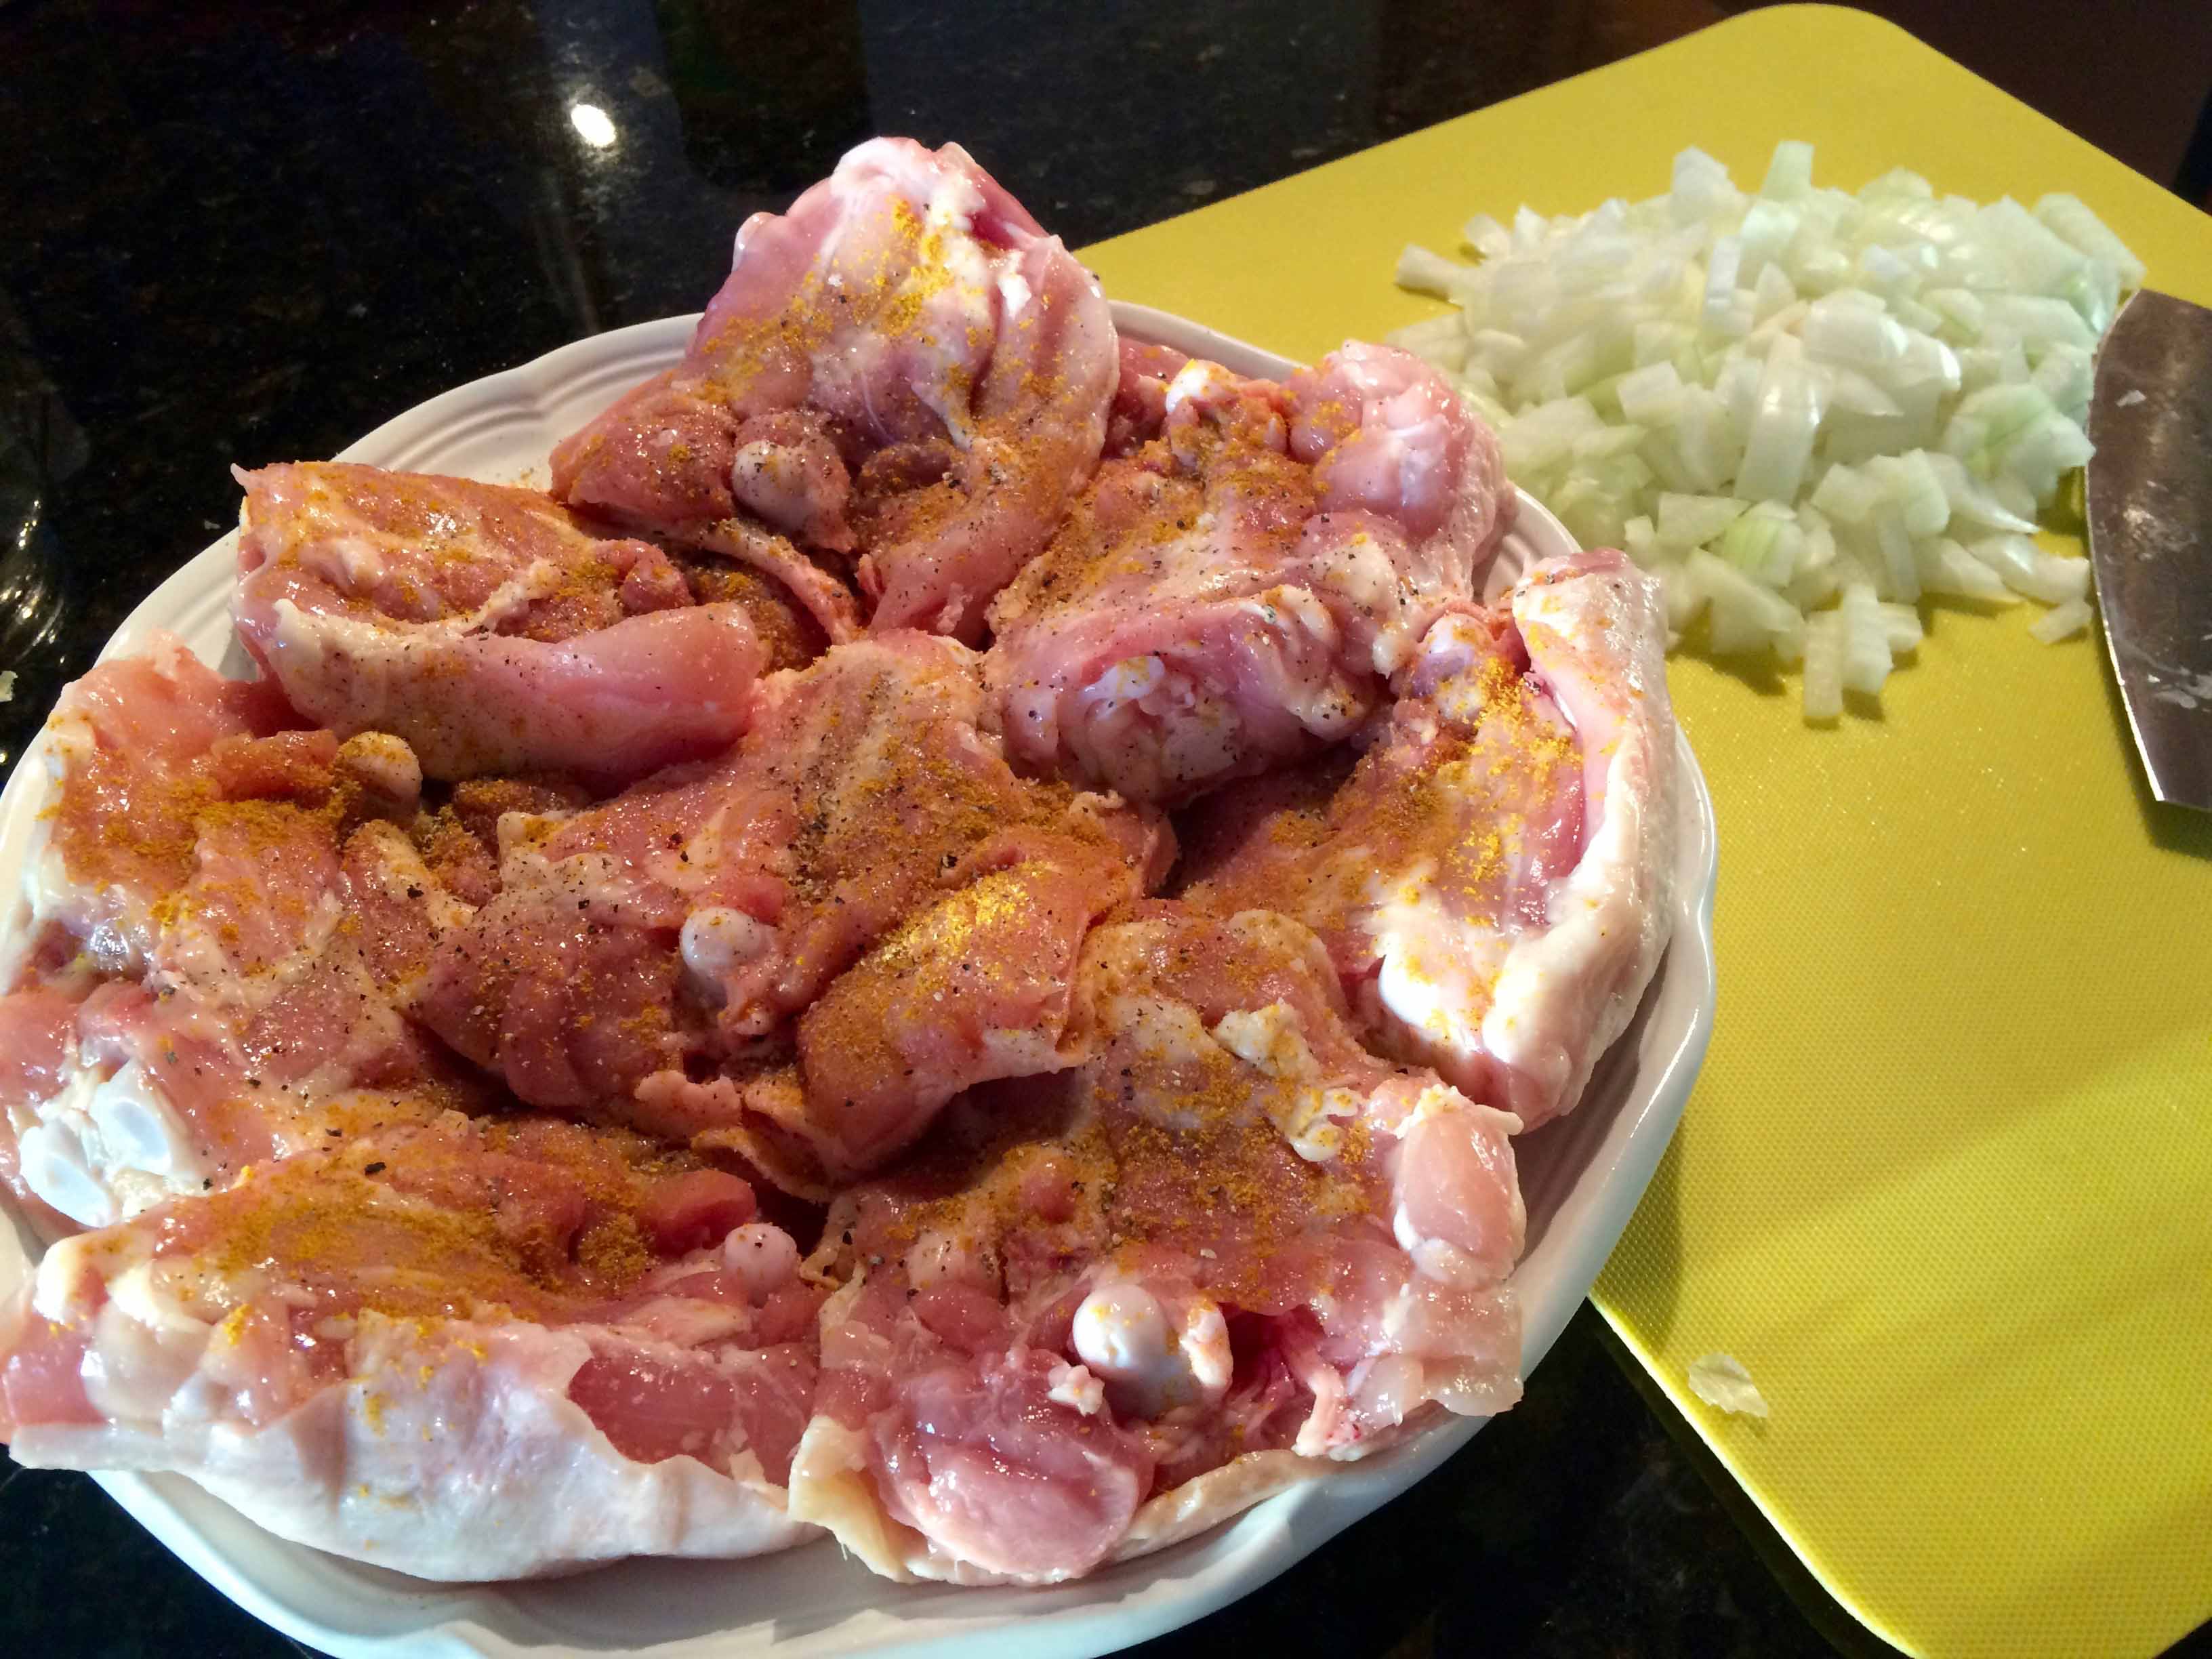
1. Season the chicken with 1 teaspoon of each salt and pepper.
2. Dredge the chicken thighs in the flour to coat lightly, shaking off any excess.
Floured chicken
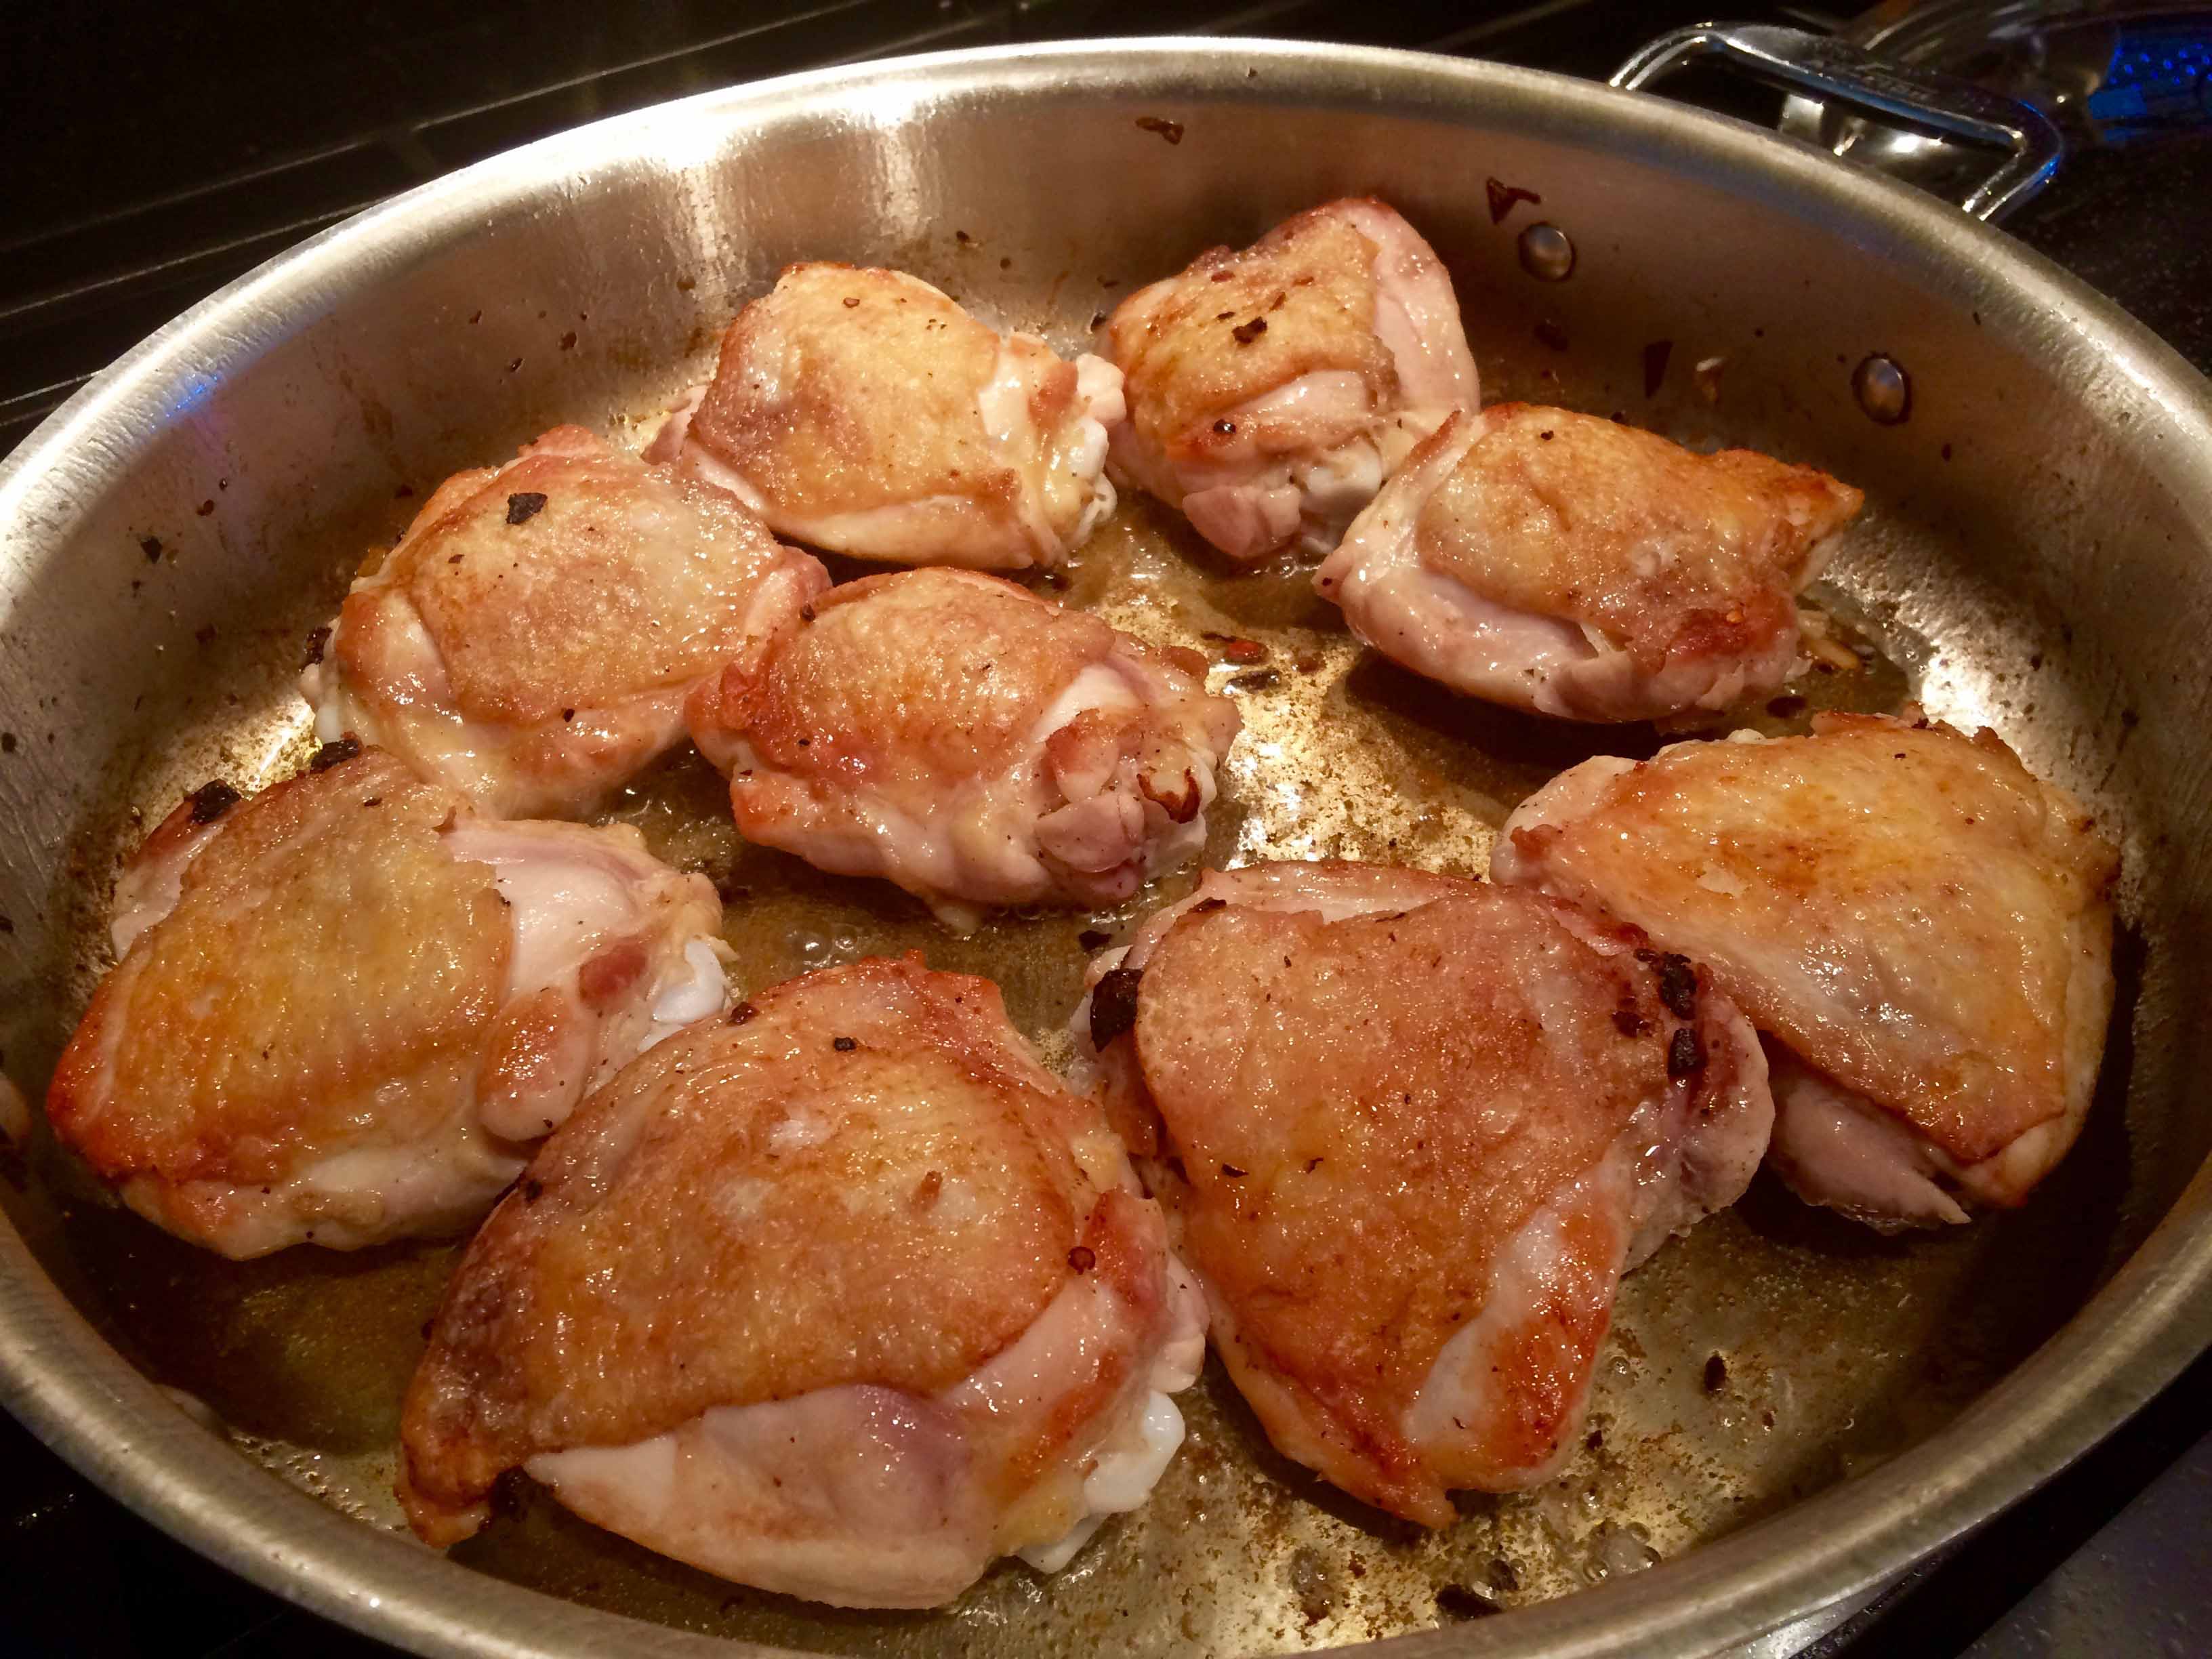
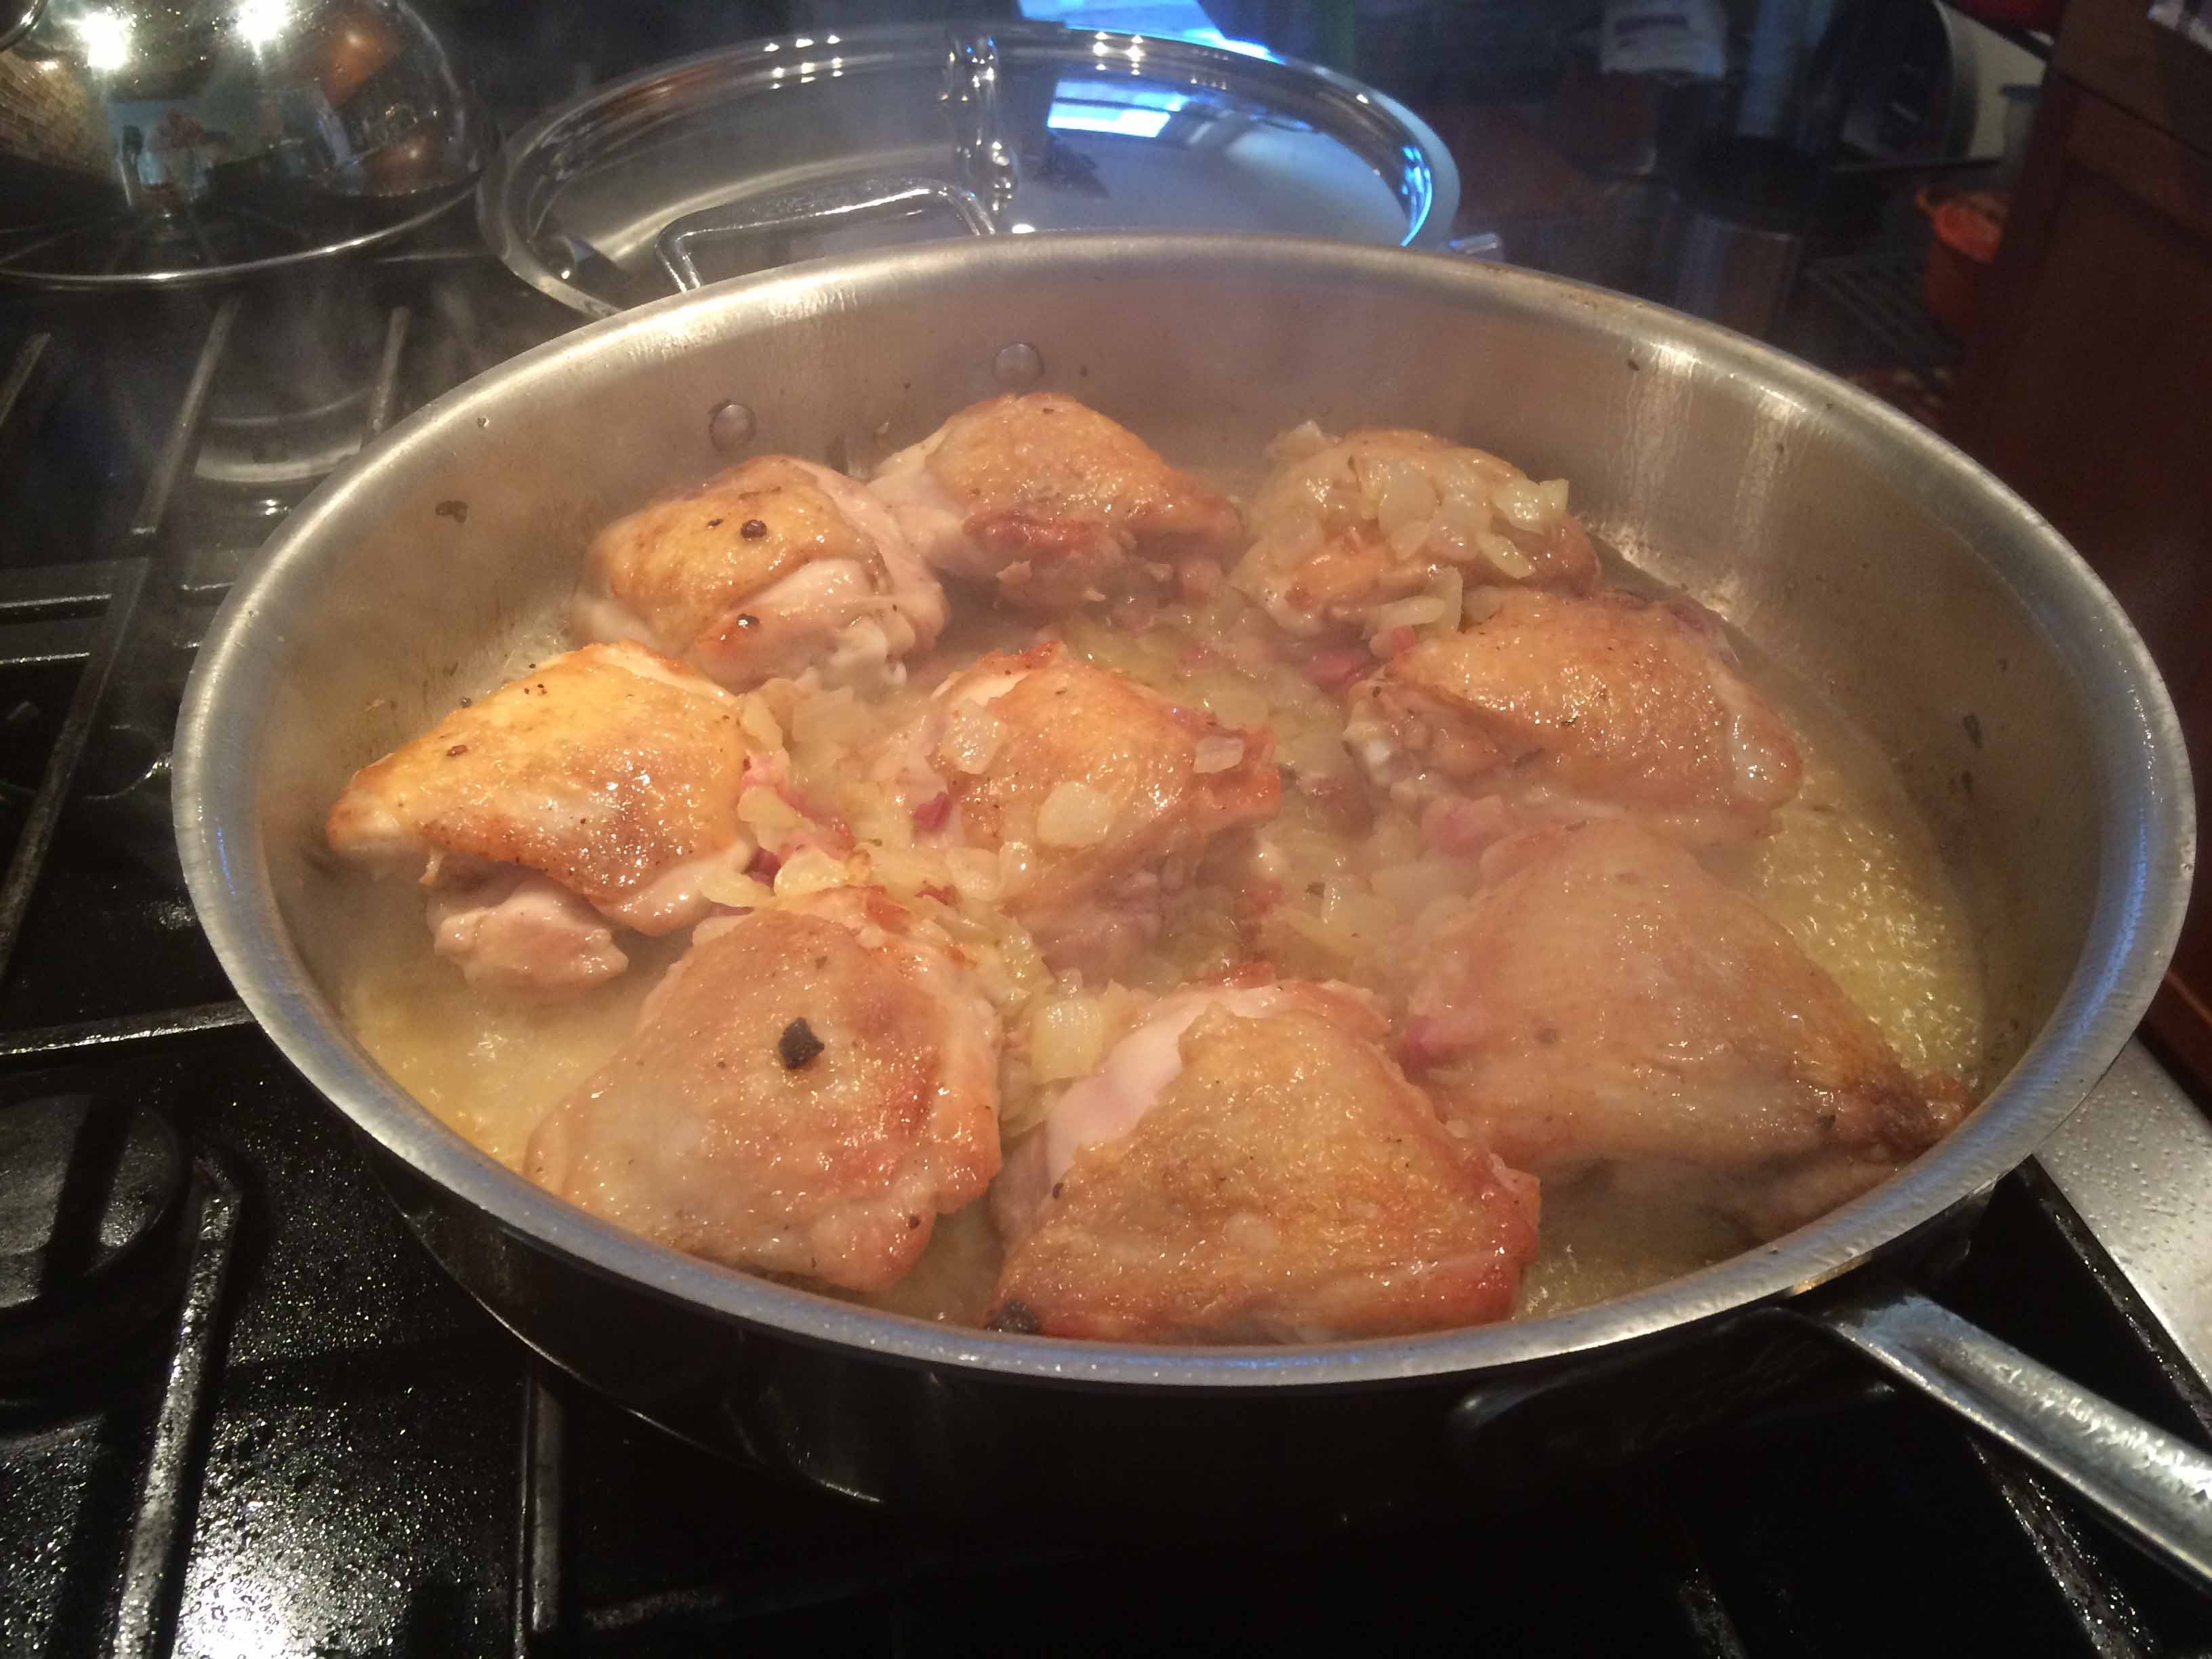
3. In a large heavy sauté pan, heat the oil over a medium-high flame. Add the chicken pieces to the pan and sauté until brown, about 5 minutes per side. If all the chicken does not fit in the pan, sauté it in 2 batches.
Browned chicken
4. Transfer the chicken to a plate and set aside. You may also want to remove any excess fat from the pan.
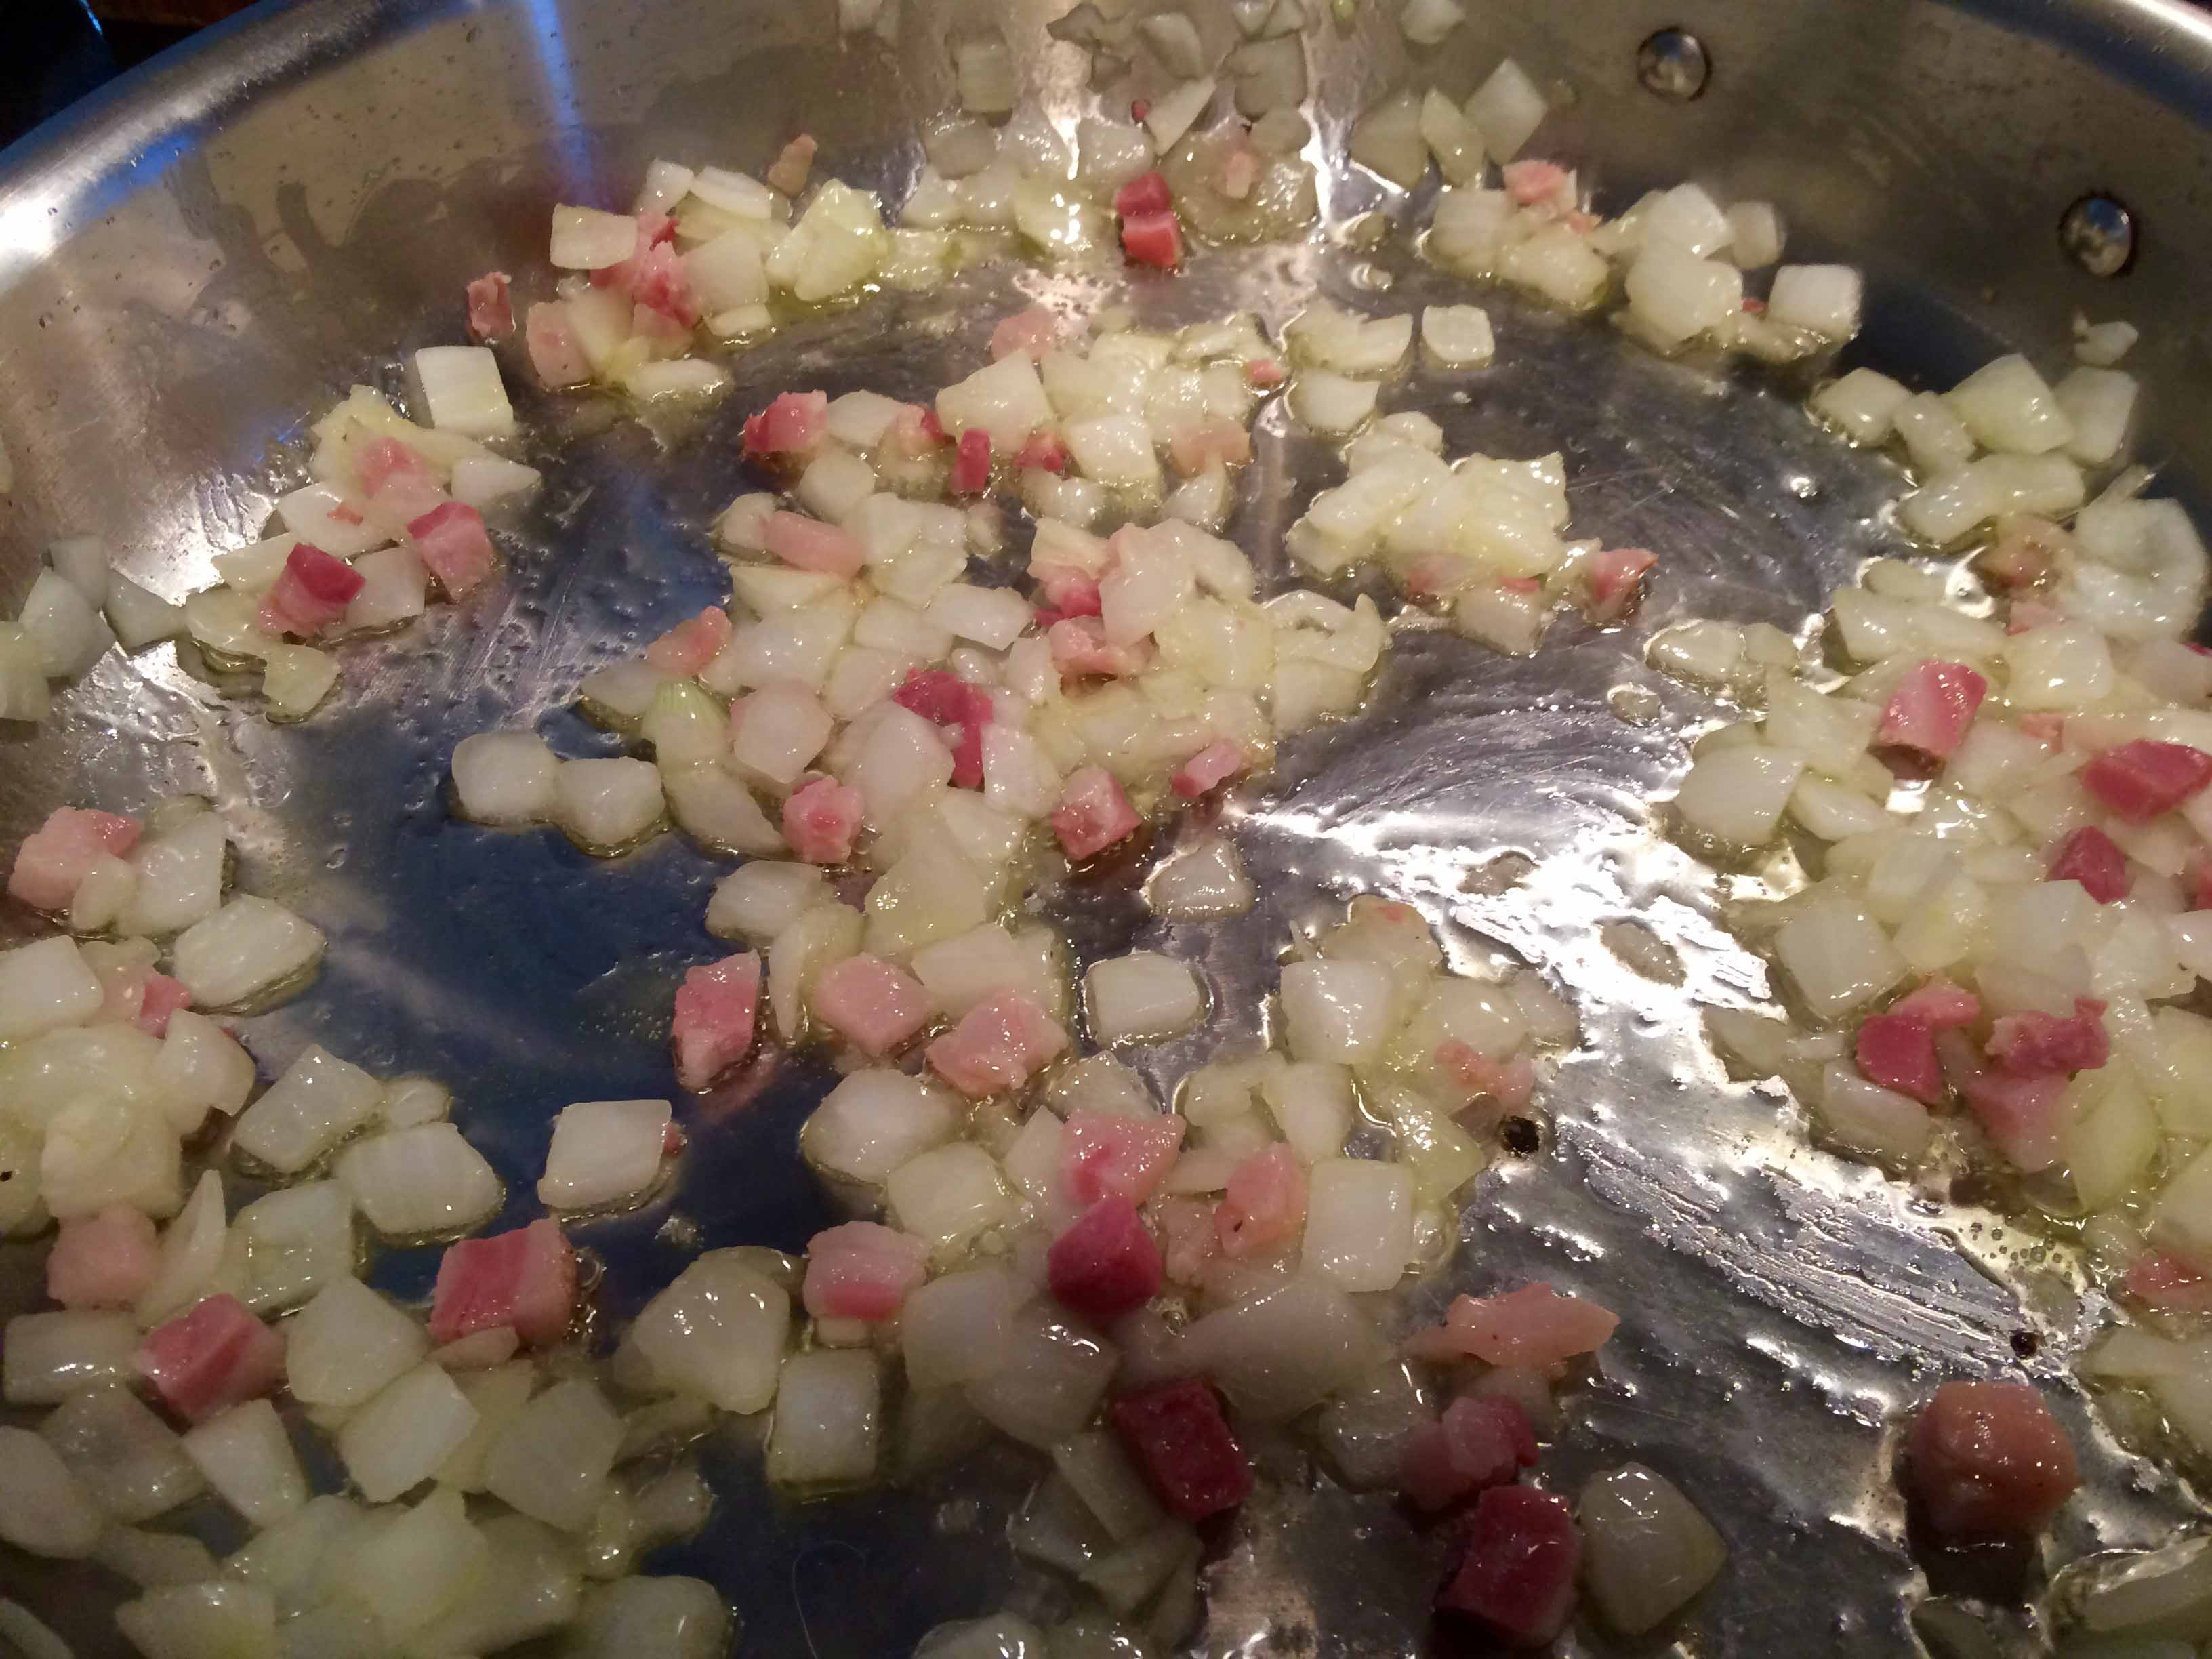
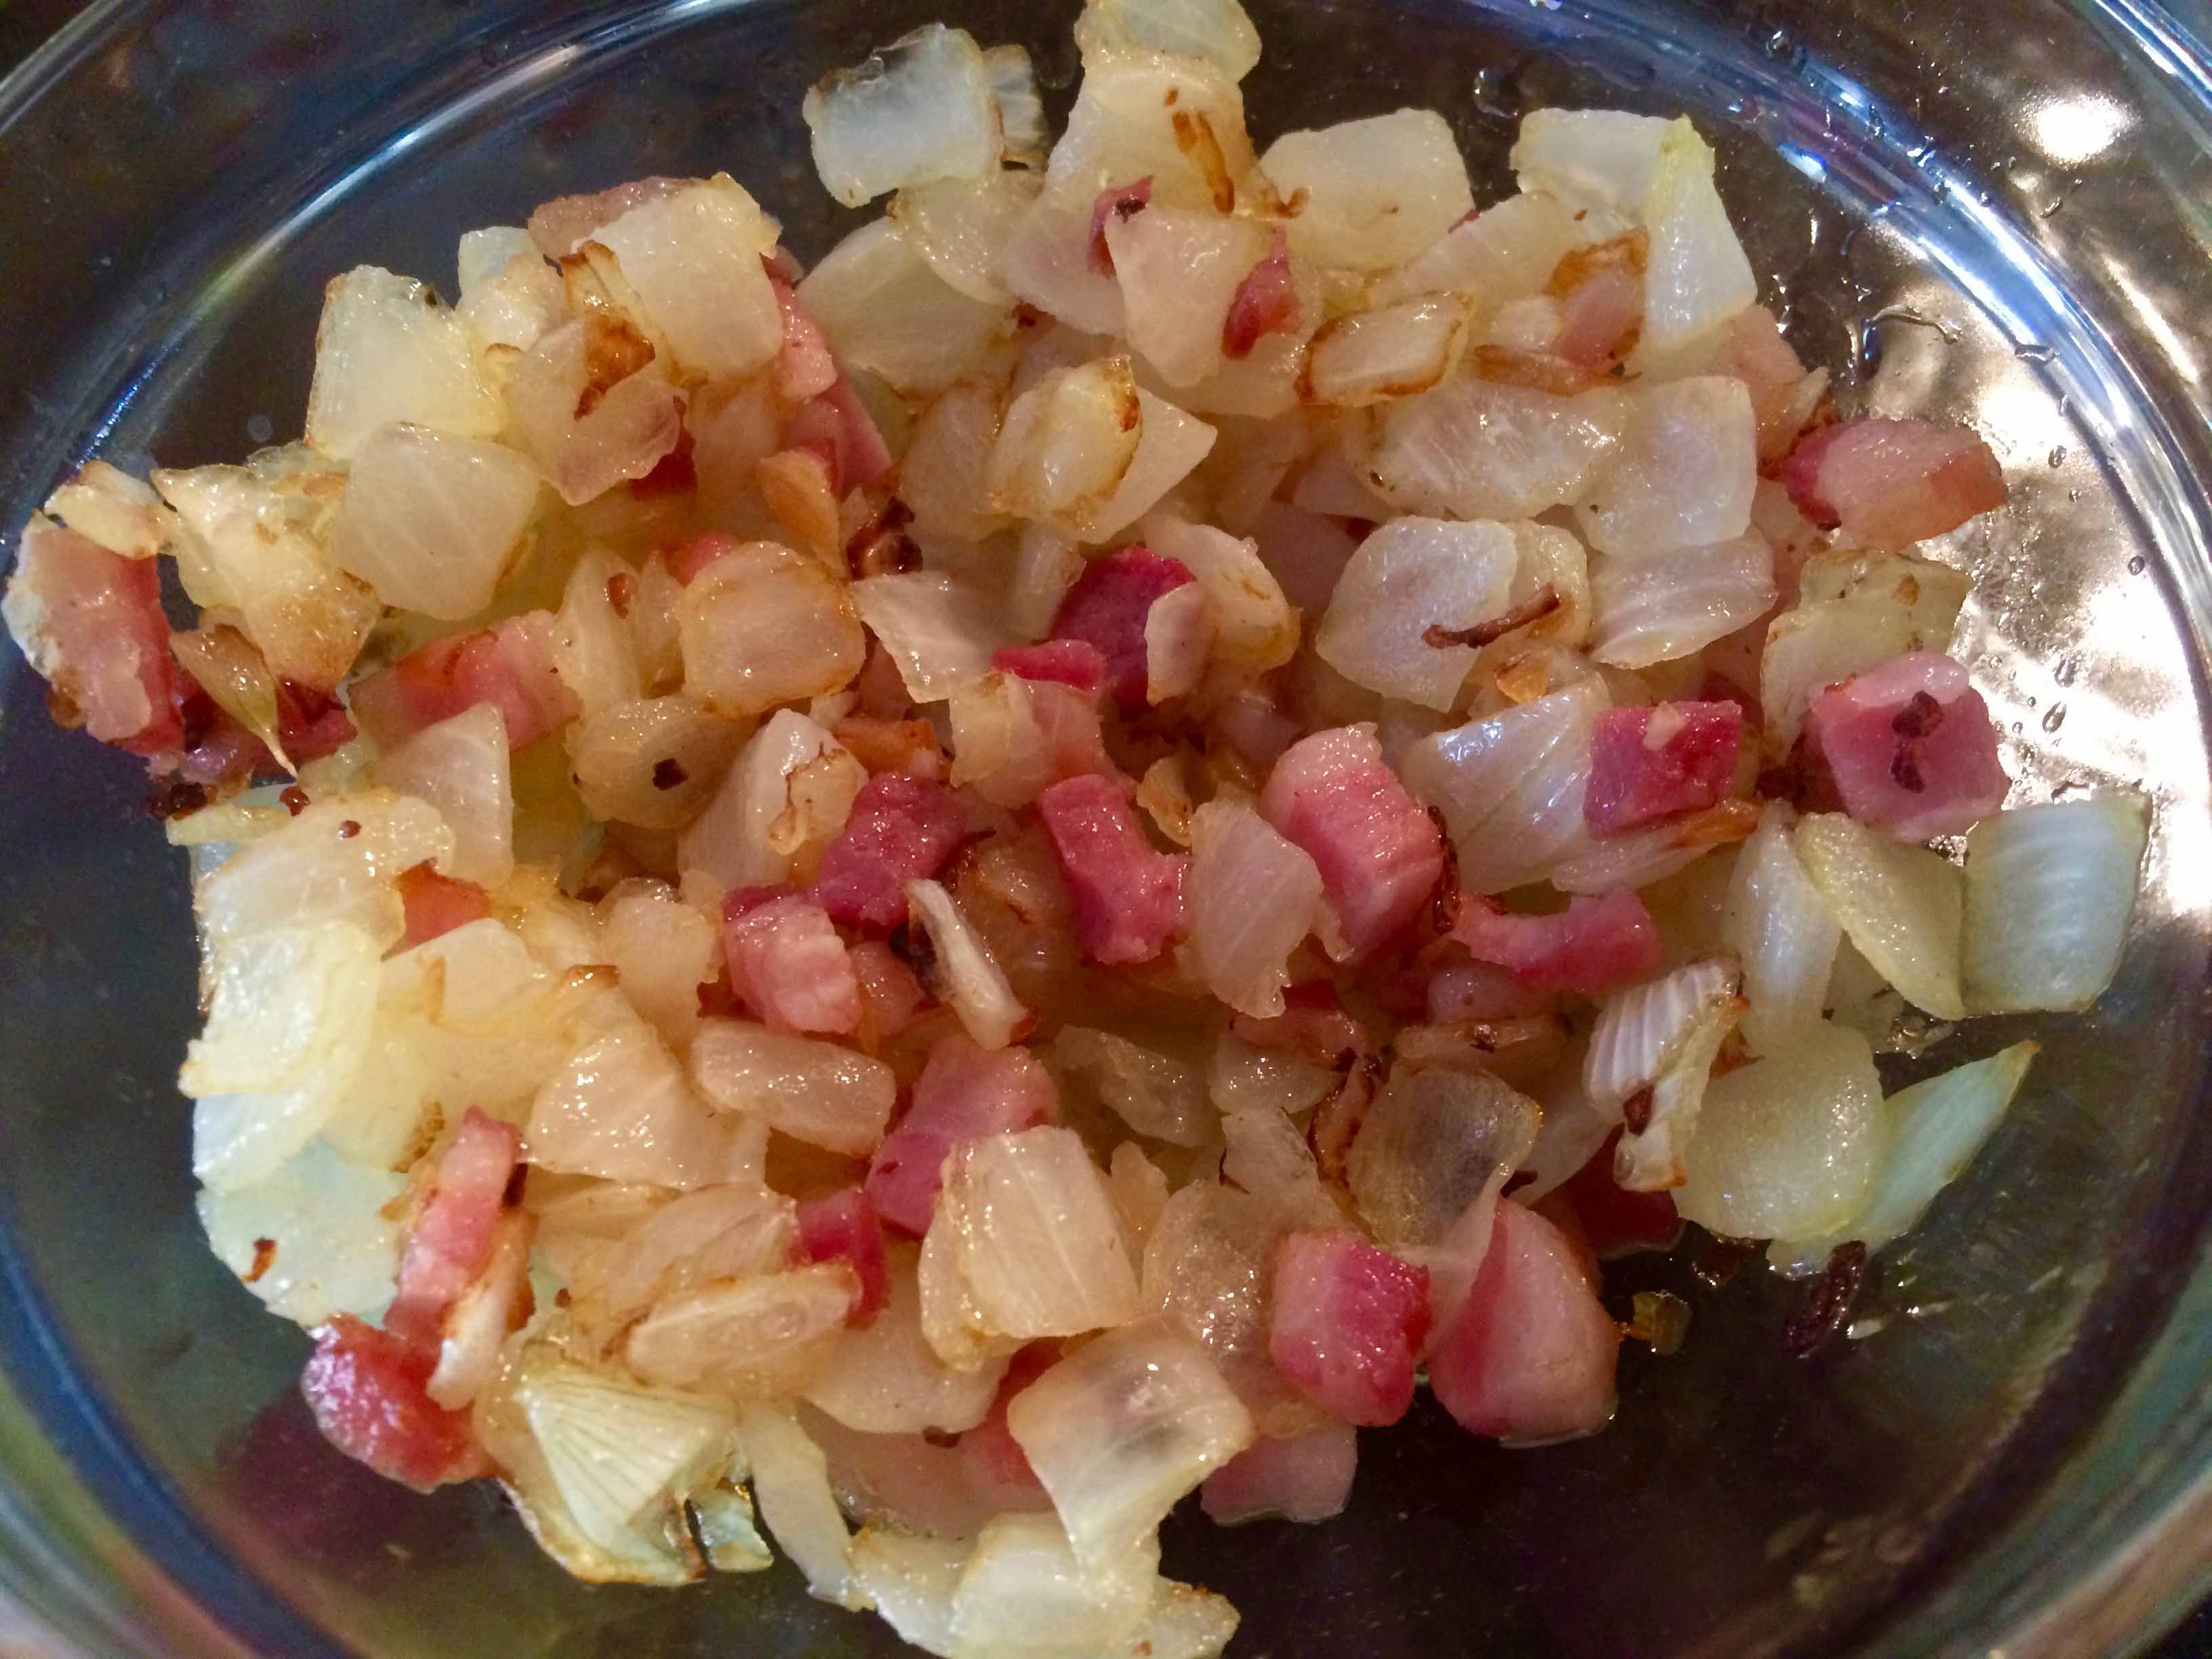
5. Add the bell peppers and onion to the same pan, season with salt and pepper, and sauté over medium heat until the onion is tender, about 5 minutes.
6. Add the garlic, and cook until fragrant about 1 minute, being careful not to burn it.
Sautéed peppers, onions, and garlic
7. Add the wine and simmer until reduced by half, about 3 minutes.
8. Add the broth and simmer for another 2 minutes.
After wine and broth reduction
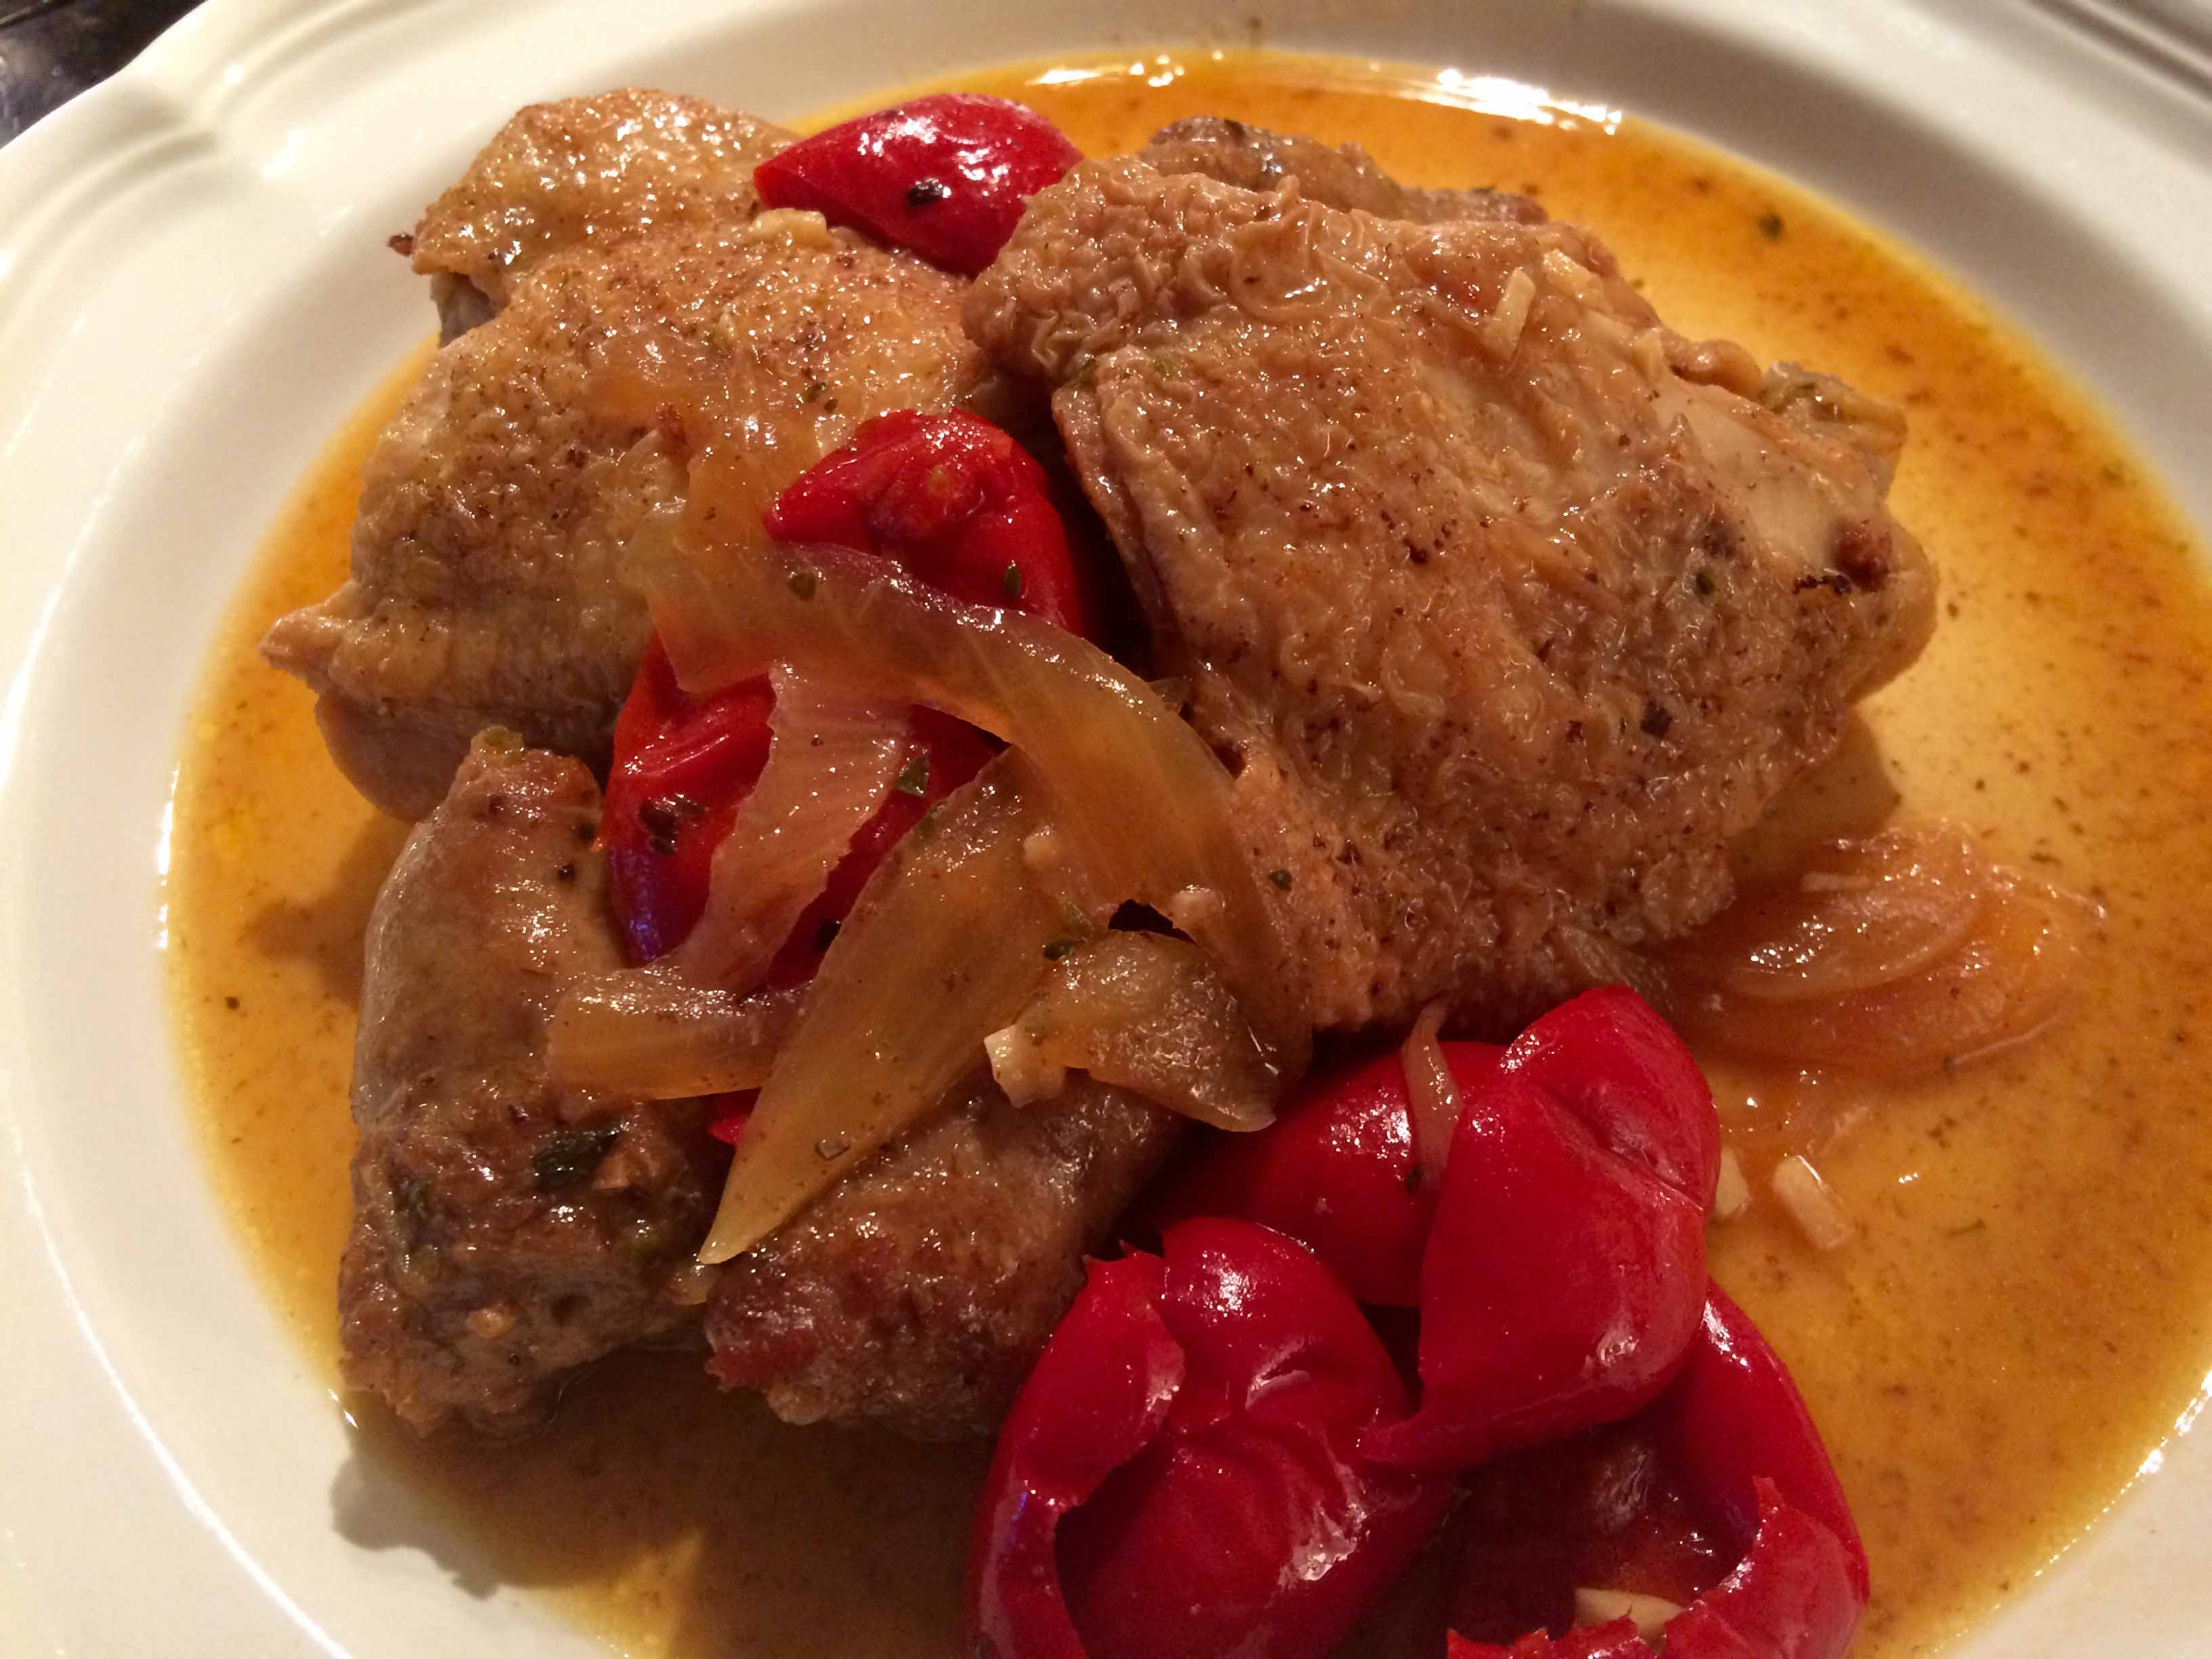
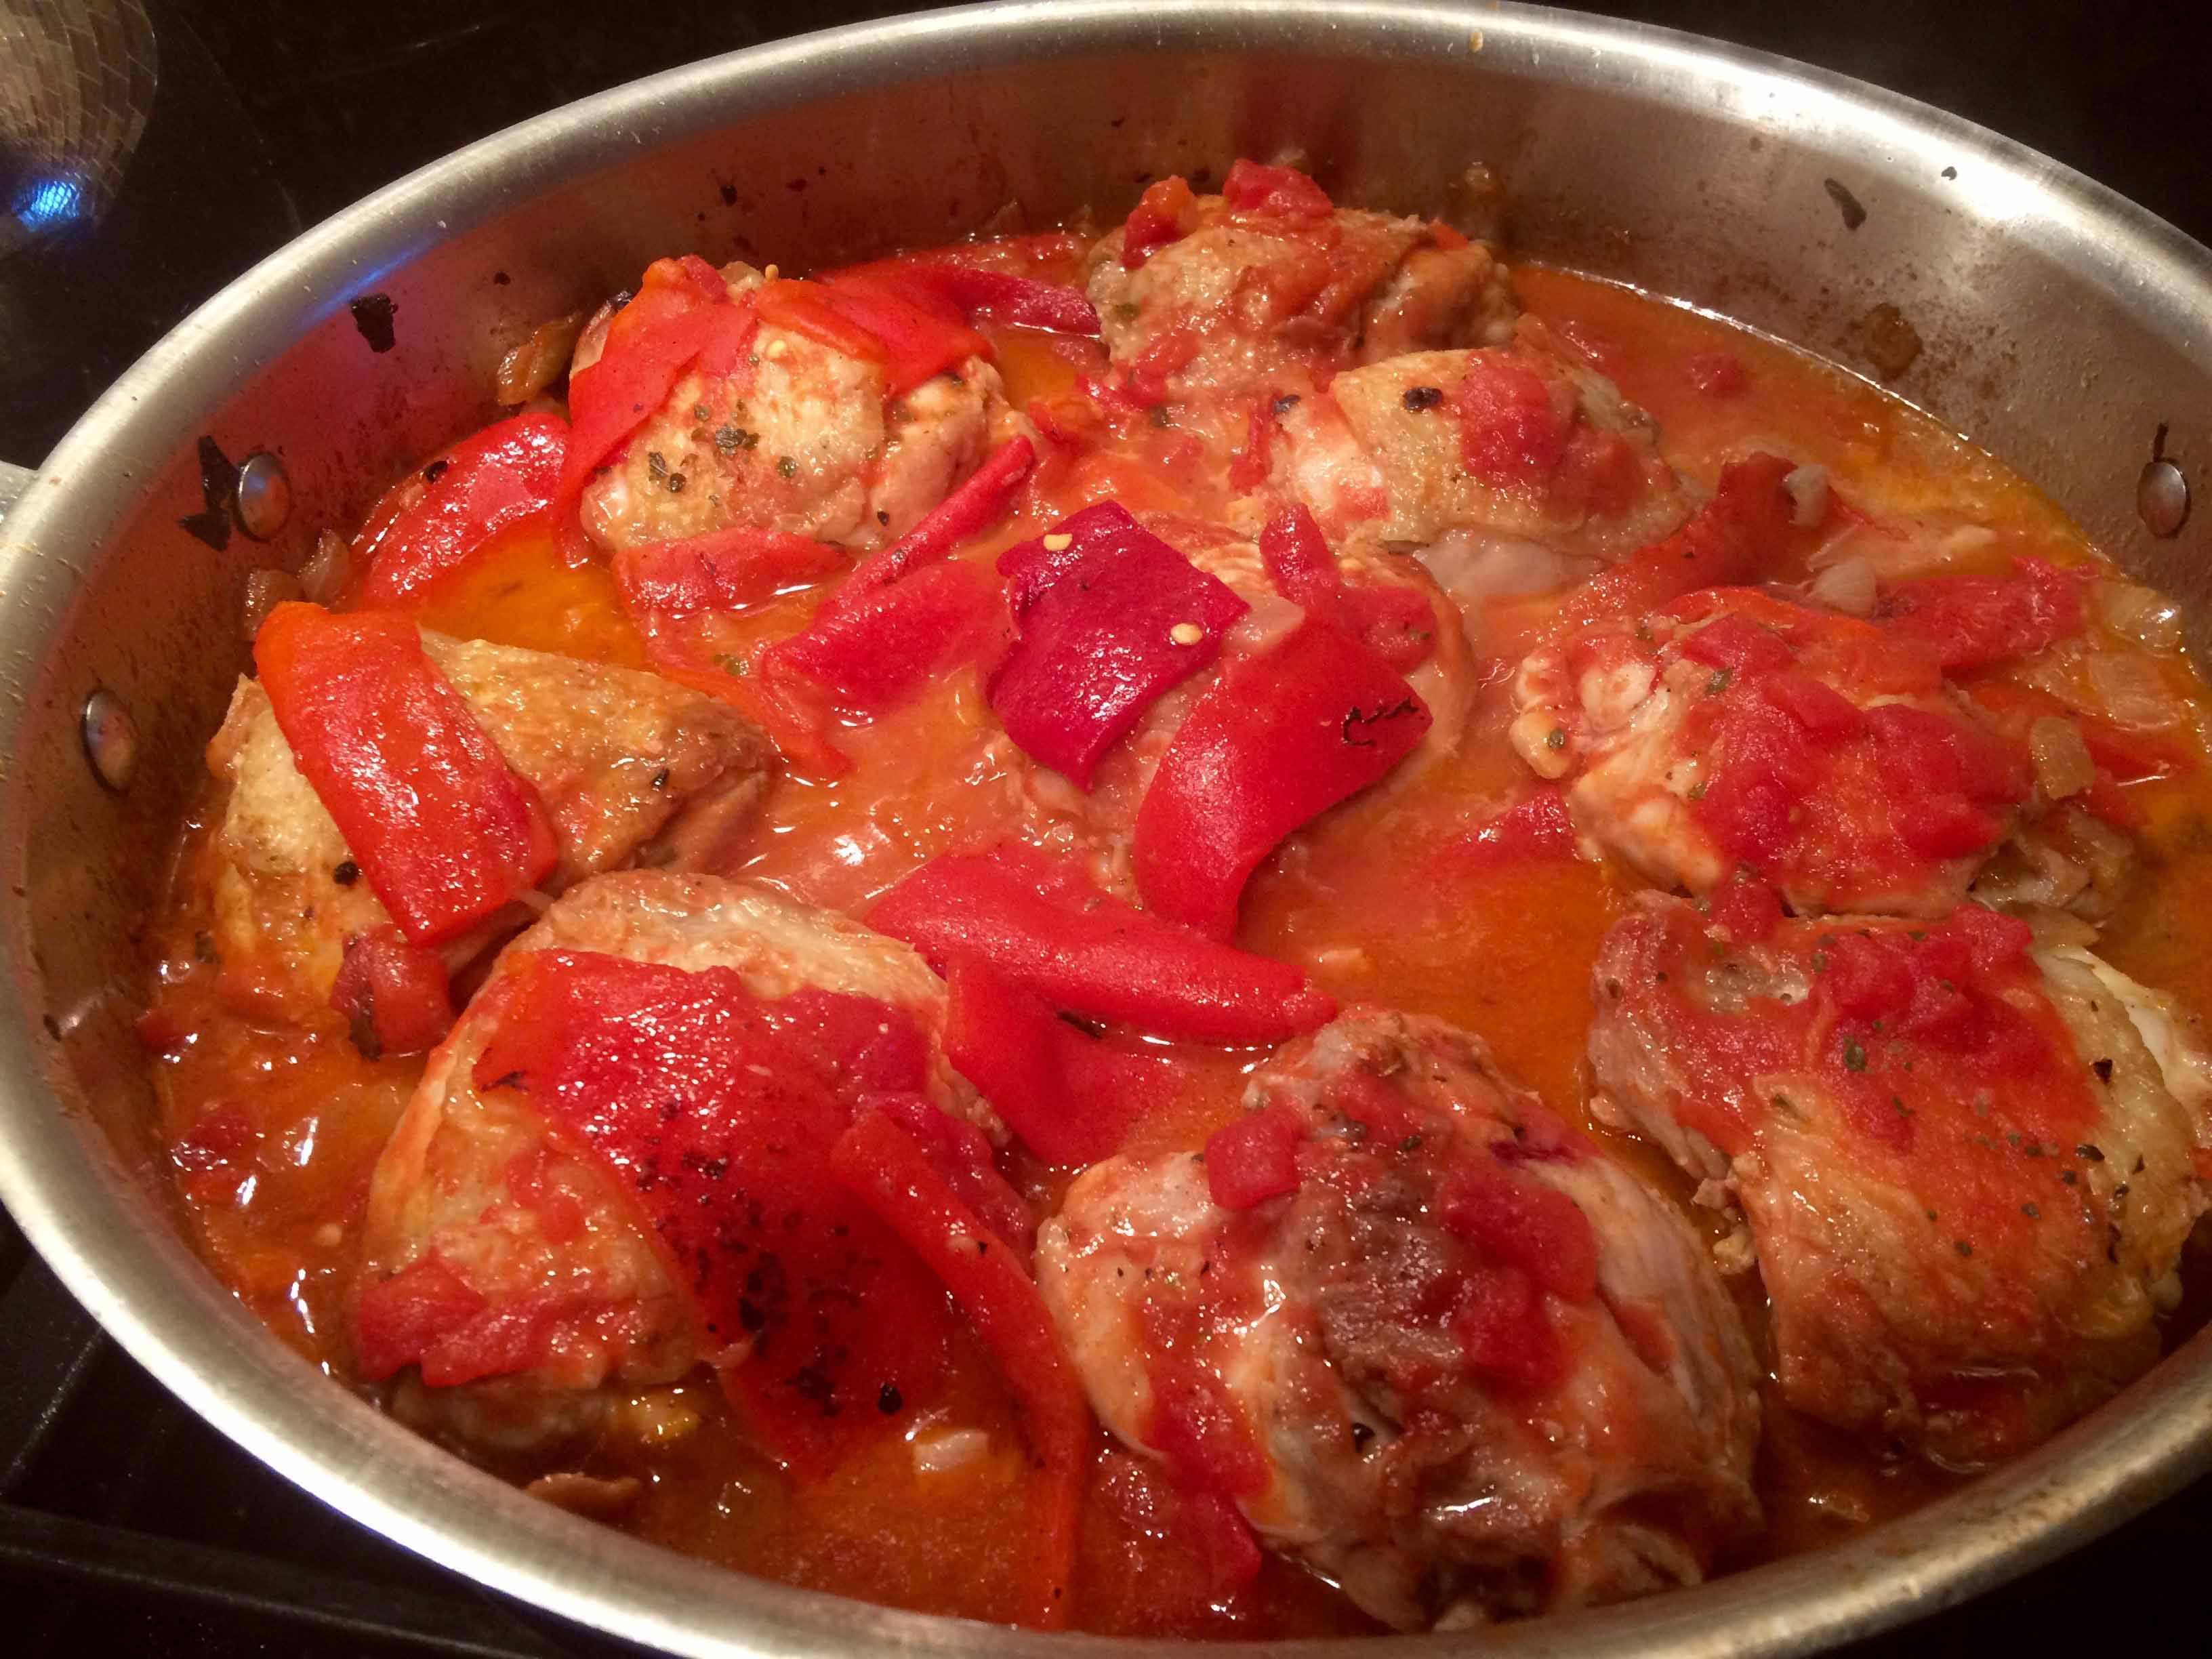
9. Add the tomatoes with their juice, capers and oregano. Return the chicken pieces to the pan, along with any juices that may have accumulated in the dish, and turn them to coat in the sauce. Bring the sauce to a simmer.
Chicken returned to the pan
10. Continue simmering uncovered over medium-low heat for 30 minutes.
11. Add the peas and the mushrooms.
Adding peas and mushrooms
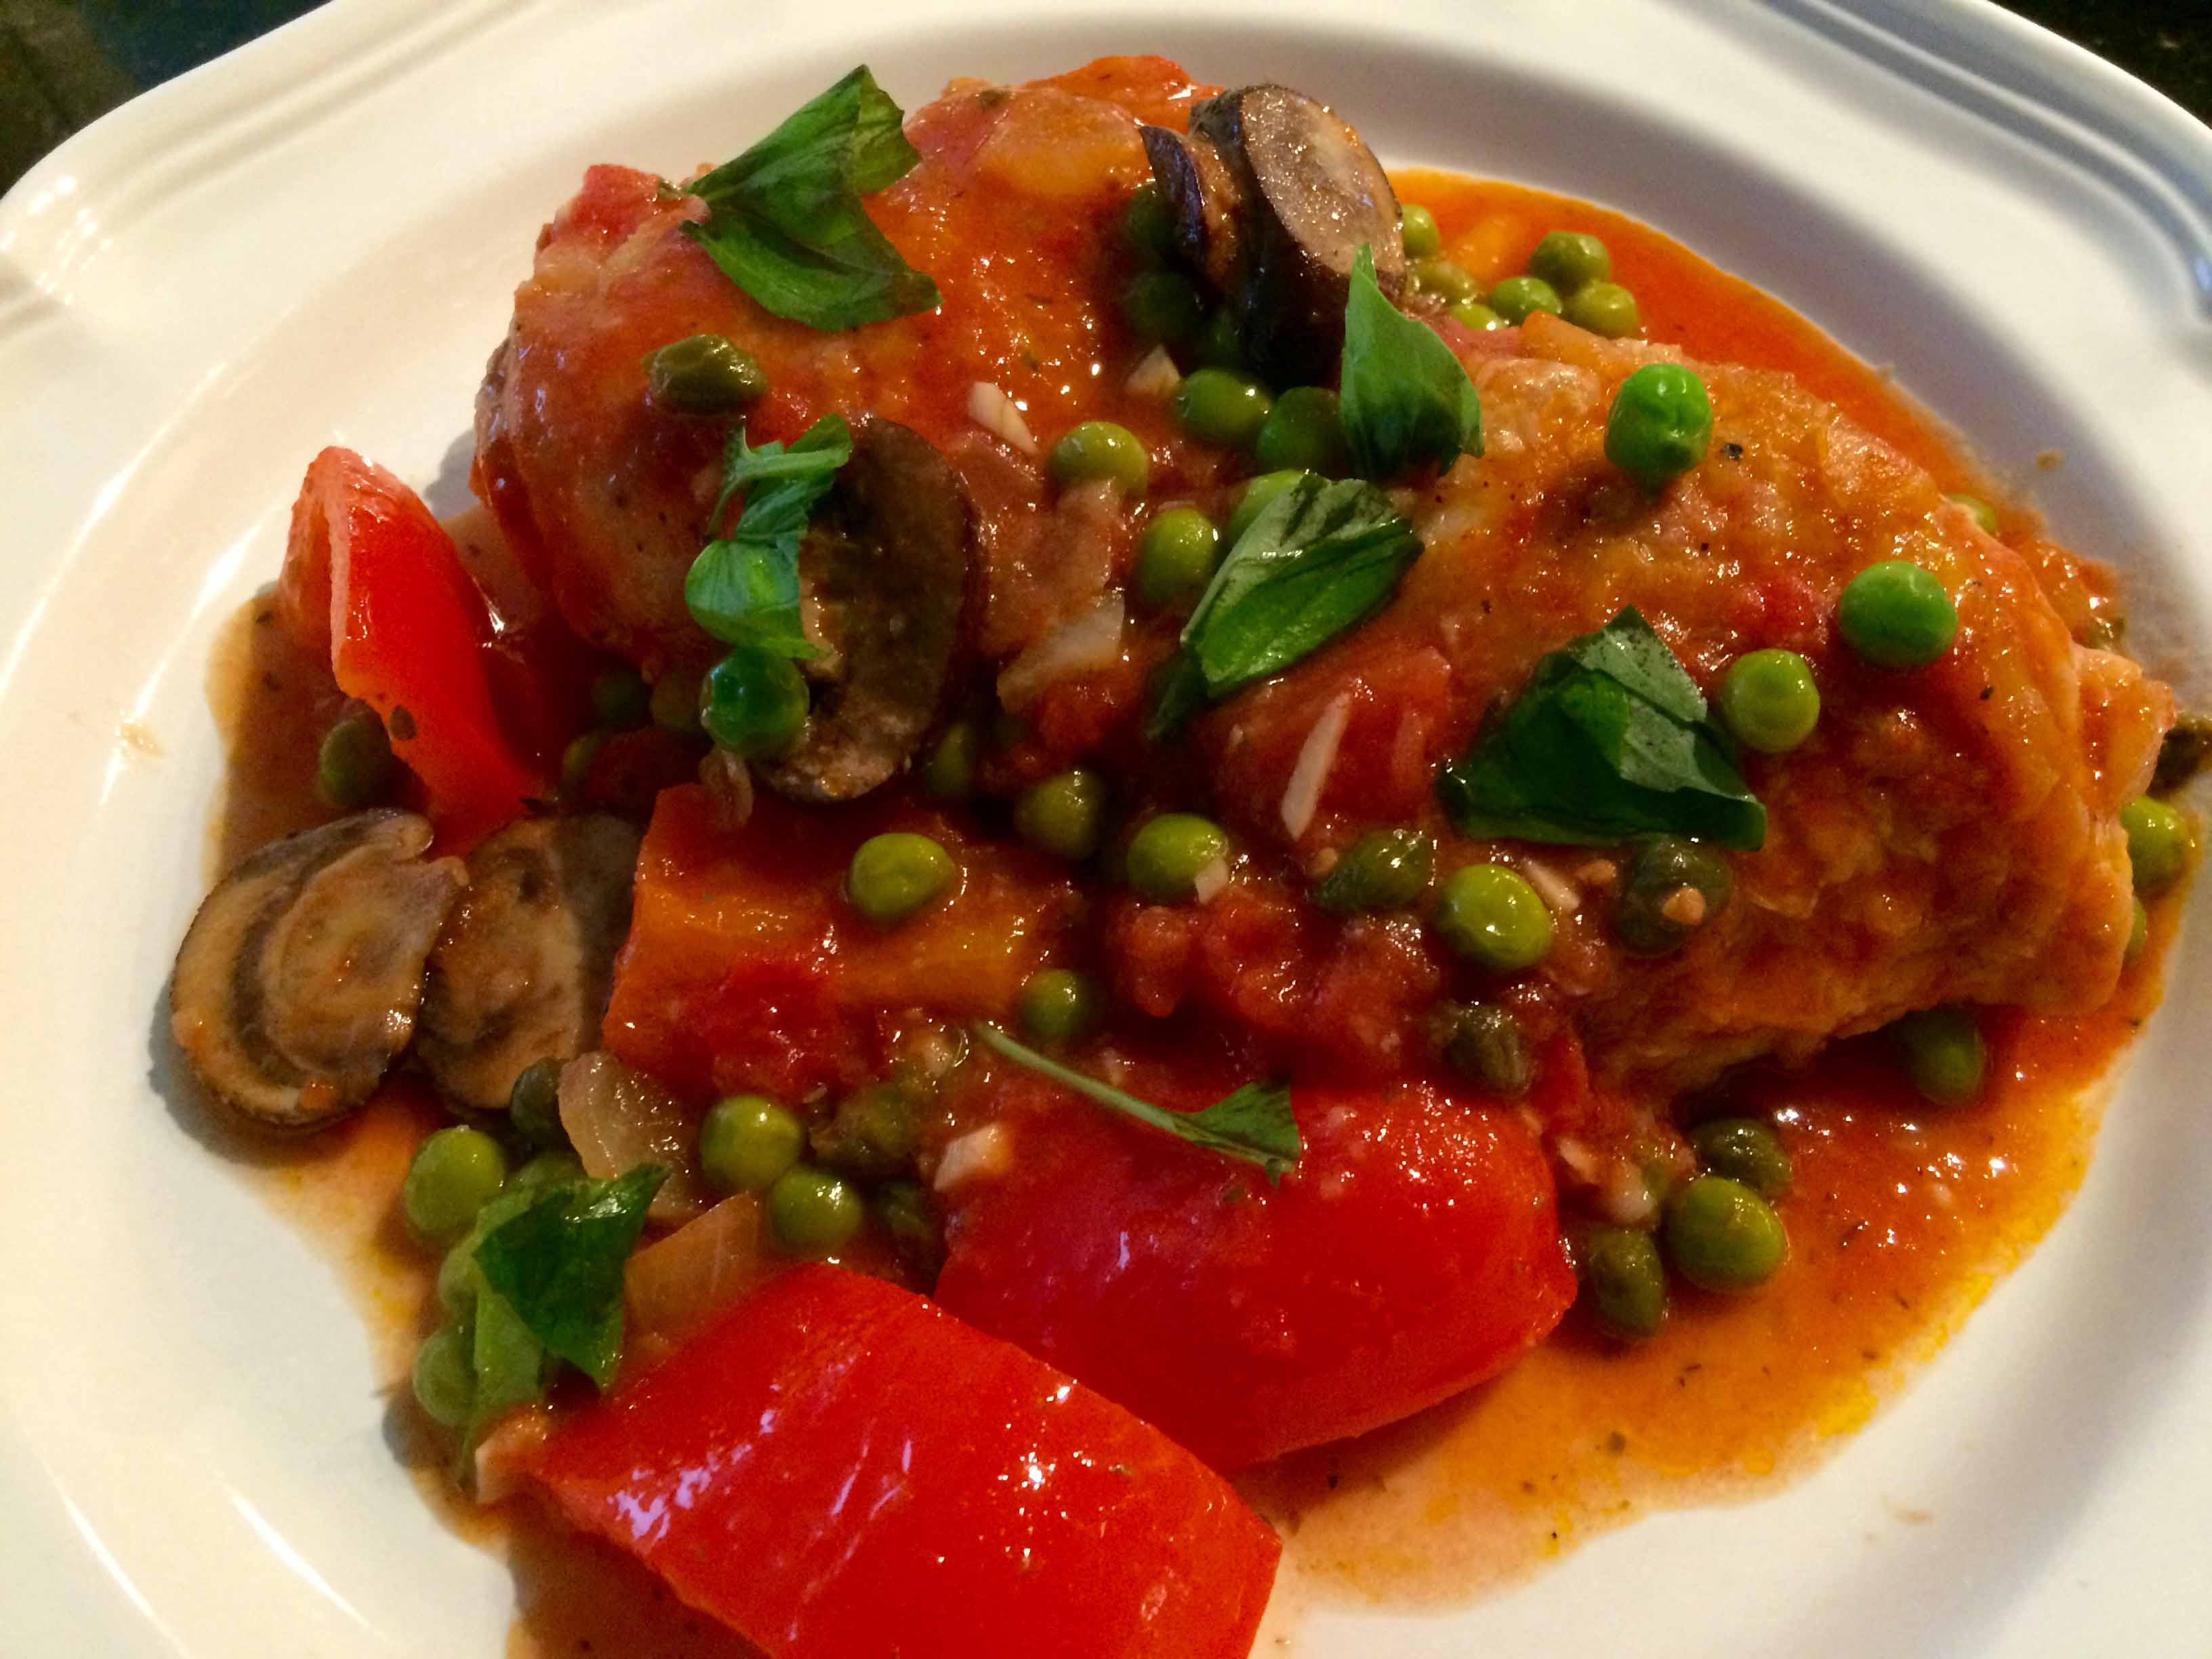
12. Cook for another 10 minutes, or until the chicken is just cooked through. Taste and adjust for seasoning.
Finished cooking
13. Using tongs, transfer the chicken to a platter. If necessary, boil the sauce until it thickens slightly, about 3 minutes. Spoon off any excess fat from the sauce. Spoon the sauce over the chicken, then sprinkle with the basil and serve.
A request from my better half for chicken scarpariello, which by the way I had never had, led me to search my cookbooks for a recipe. None of them, however, contained one that met his expectations. Consequently, I expanded my (now our) search to the Internet, where we finally found a recipe by Anne Burrell on the Food Network website that came close to meeting all the requirements.
This Italian-American dish appears to have originated in New York City. Its name, scarpariello, or shoemaker style, has been attributed to its being “cobbled” together from several ingredients that play a key role in it: chicken, sausage, and cherry peppers.
Although a good number of versions call for cutting up the chicken into small pieces to better absorb the sauce, I chose to use whole thighs, which allow for a slightly longer cooking time to reduce the sauce without drying out the chicken. For the same reason, I also cut my sausages and peppers slightly larger than called for by the original recipe. Finally, rather than using hot cherry peppers, I opted for peppers that were labeled “hot & sweet” in order to reduce the heat and keep older digestive systems happy.
Chicken Scarpariello (Adapted from Anne Burrell on the Food Network Website)
Ingredients
Ingredients
Extra-virgin olive oil
1 pound fennel sausage, cut into 1.5 inch pieces
3-pounds skin-on bone-in chicken thighs
Kosher salt
Freshly ground black pepper
1 large Spanish onion, cut into 1/4-inch slices
3 cloves garlic, finely chopped
3/4 cup white wine
1 1/2 cup hot and sweet cherry peppers halved or quartered depending on size
1/2 cup pepper juice, from the jar
1 cup chicken stock, plus a little more if needed
1 teaspoon dried oregano
Directions
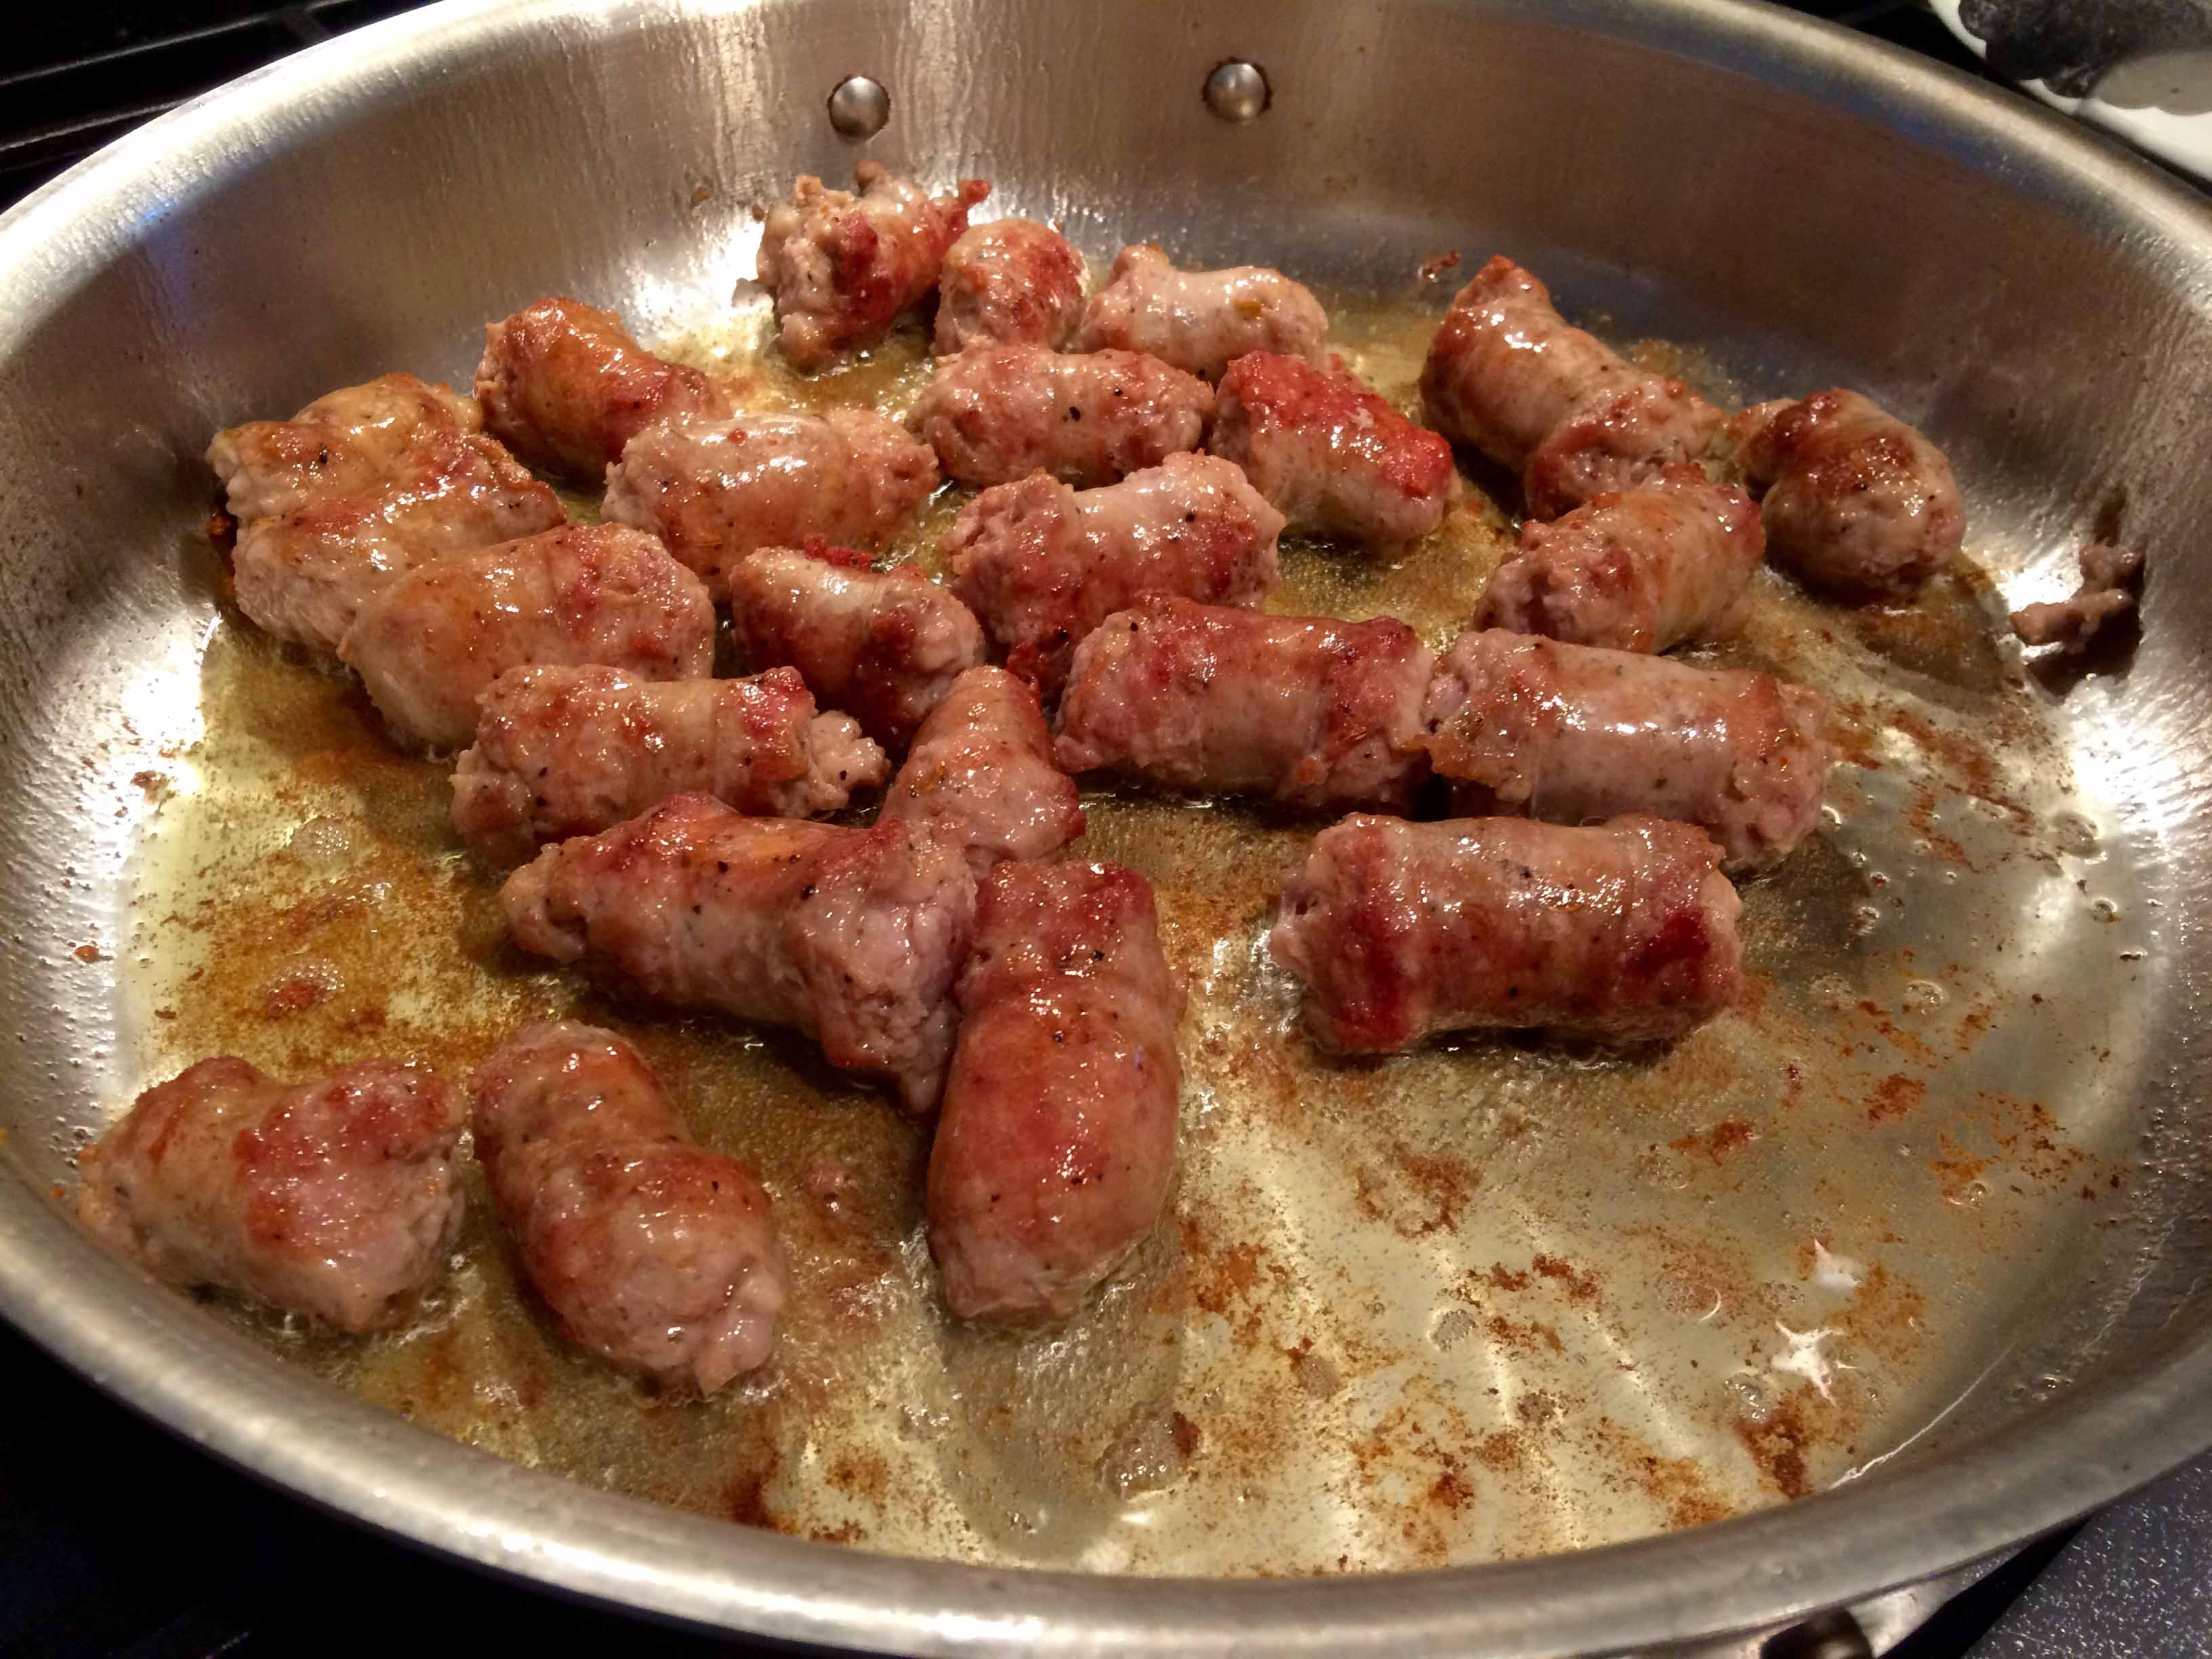
Coat a large, wide, heavy-bottomed pan with olive oil and bring the pan to a medium-high heat. Add the sausage and brown well.
Browning sausage
Remove the sausage with a slotted spoon and reserve.
Trim any excess skin and fat from the chicken. Season generously with salt and pepper and add to the pan that the sausage was browned in. Brown the chicken well.
Browning chicken
Once the chicken is brown on all sides, remove it from the pan and reserve.
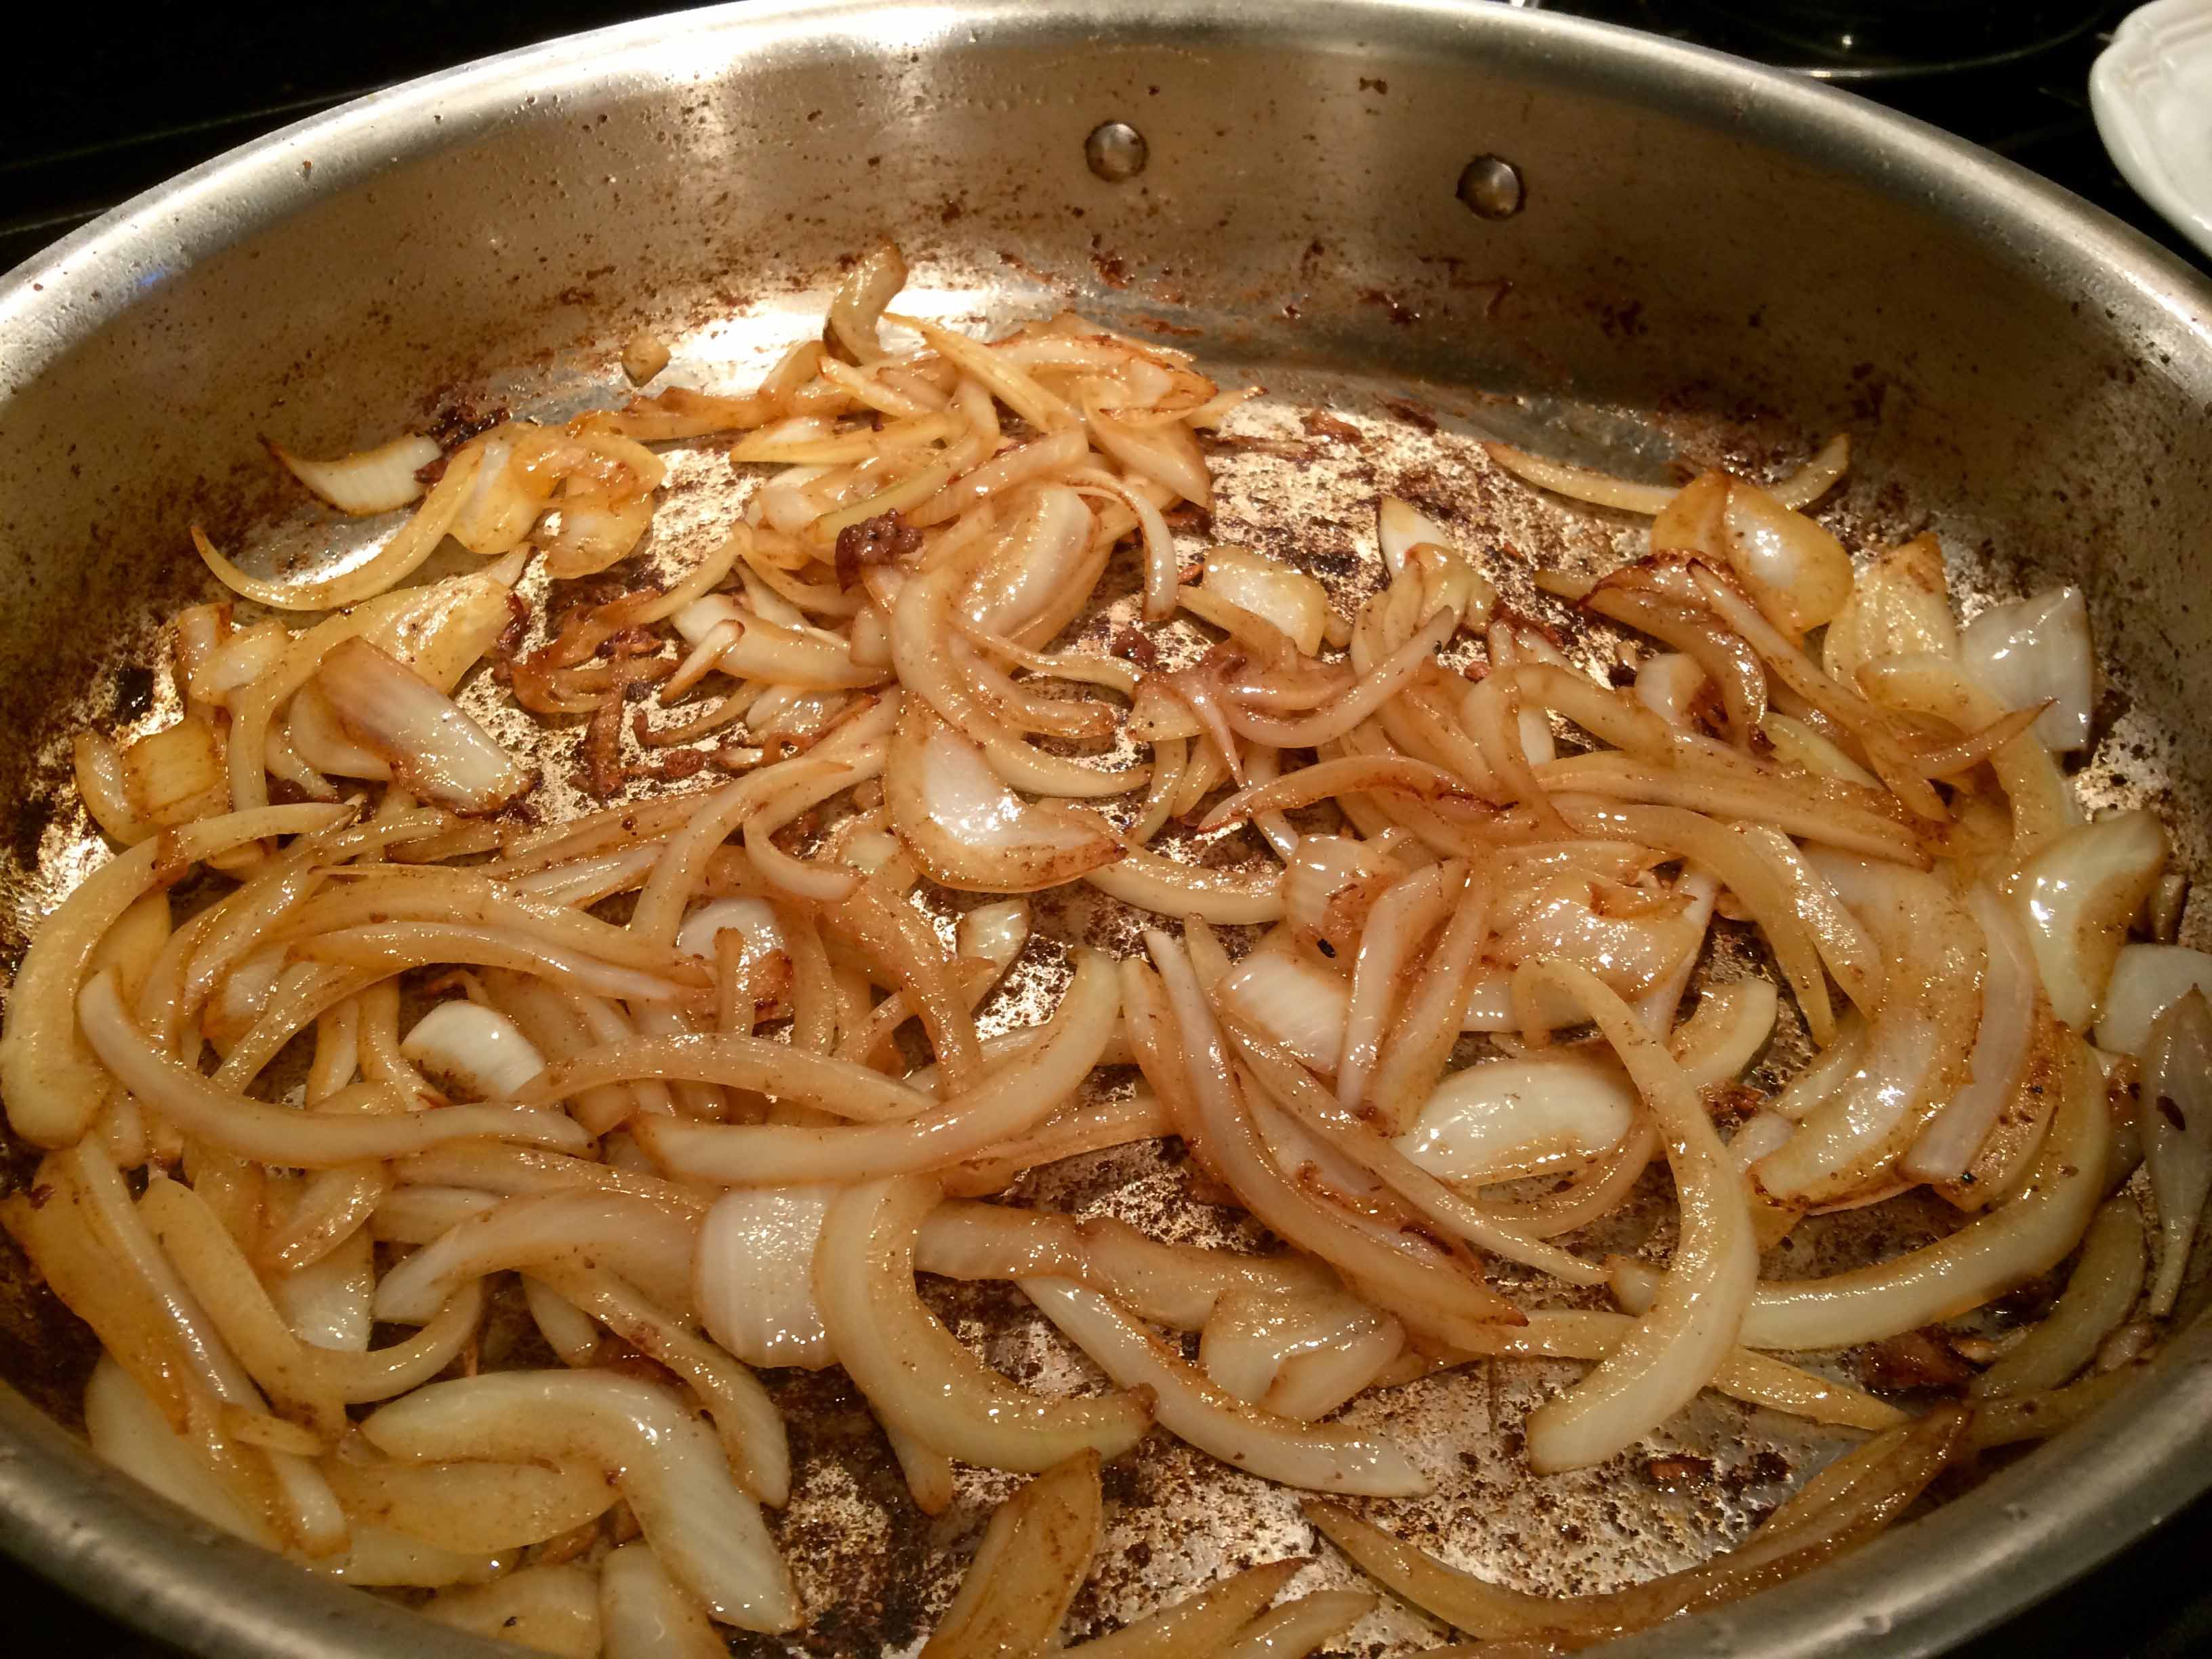
Drain the oil from the pan and return it to the heat. Coat the pan lightly with new olive oil, add the onions, and season with salt. Cook the onions over medium heat until they are translucent and very aromatic, 6 to 7 minutes, stirring occasionally. Add the garlic and cook for 1 to 2 more minutes, being careful not to burn the garlic.
Browning onions
Add the wine to the pan and reduce it by half. While the wine is reducing, scrape any browned bits off the bottom of the pan.
Reducing the wine and deglazing
Return the sausage and chicken, along with any accumulated juices, to the pan and add the cherry peppers, cherry-pepper juice, chicken stock, and oregano.
The chicken and sausageAdding the peppers, pepper juice, stock and oregano
Bring to a boil, reduce to a simmer, and simmer, partially covered, for 15 to 20 minutes. Remove the lid and simmer for 5 to 10 more minutes; add more chicken stock if the sauce has reduced too much.
The finished dish
Taste and adjust the seasoning, if needed. The finished dish should be slightly soupy, spicy, and delicious.
Early on Sunday evening, we usually sit down with a cocktail and some appetizers to watch the string of cooking shows on PBS. They’re a welcome calm alternative to the increasingly competition-driven line-up on the Food Network.
One of our favorite shows is America’s Test Kitchen, which is both entertaining and instructive. A recent episode of the series included a relatively simple weeknight recipe for sweet Italian sausages with seedless red grapes and balsamic vinegar that we both thought had to be on our table before the end of the week. We found the combination of ingredients intriguing and came away with a better all-purpose method for browning and cooking sausage. I’m including a link to the show’s website, which, if you’re not a registered user, requires you to sign up. Registration is free. It’s worth the time and this page has an informative article on cooking sausages.
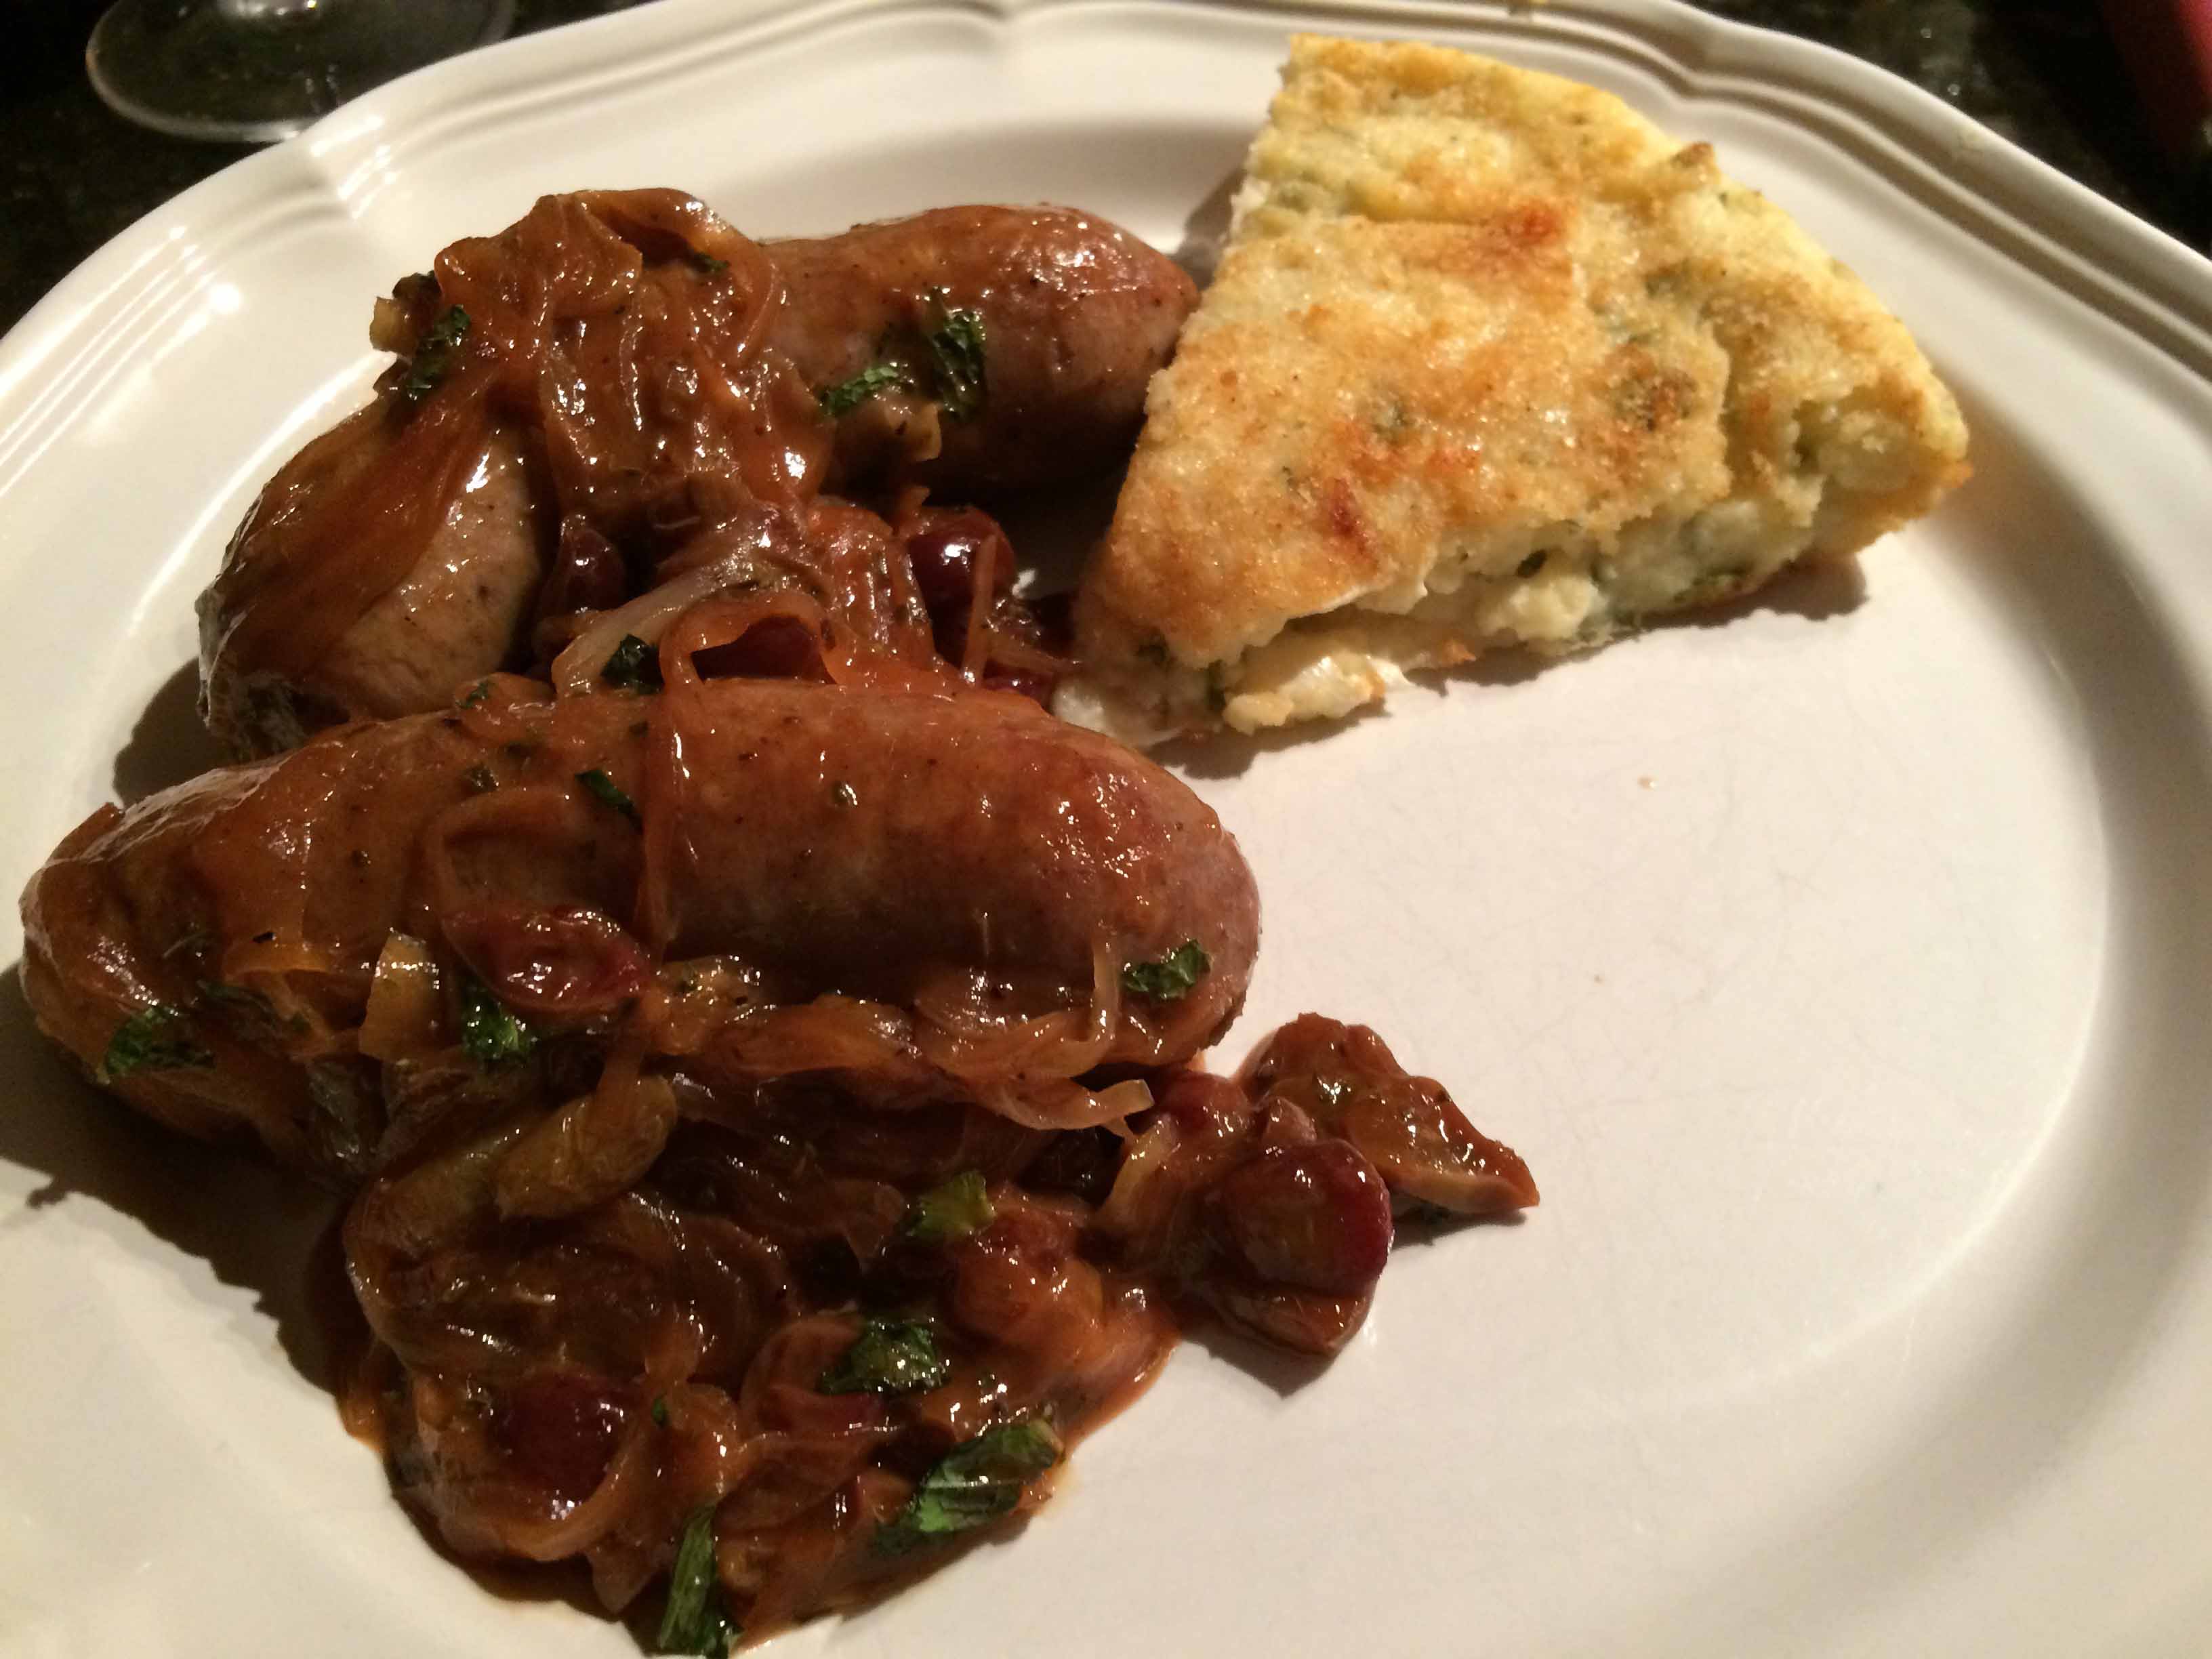
I served the sausages with my aunt’s Italian potato pie, but they would also go well with polenta.
Italian Sausage with Grapes and Balsamic Vinegar (Adapted from America’s Test Kitchen)
INGREDIENTS
1 tablespoon extra-virgin olive oil
1 1/2 pounds sweet Italian sausage
1 pound seedless red grapes, halved lengthwise (3 cups)
1 large onion, halved and sliced 1/8” thin
1/4 cup water
1/4 teaspoon pepper
1/8 teaspoon salt
1/4 cup dry white wine
1/2 tablespoon dried oregano
2-3 teaspoons balsamic vinegar
2 tablespoons chopped fresh mint
INSTRUCTIONS
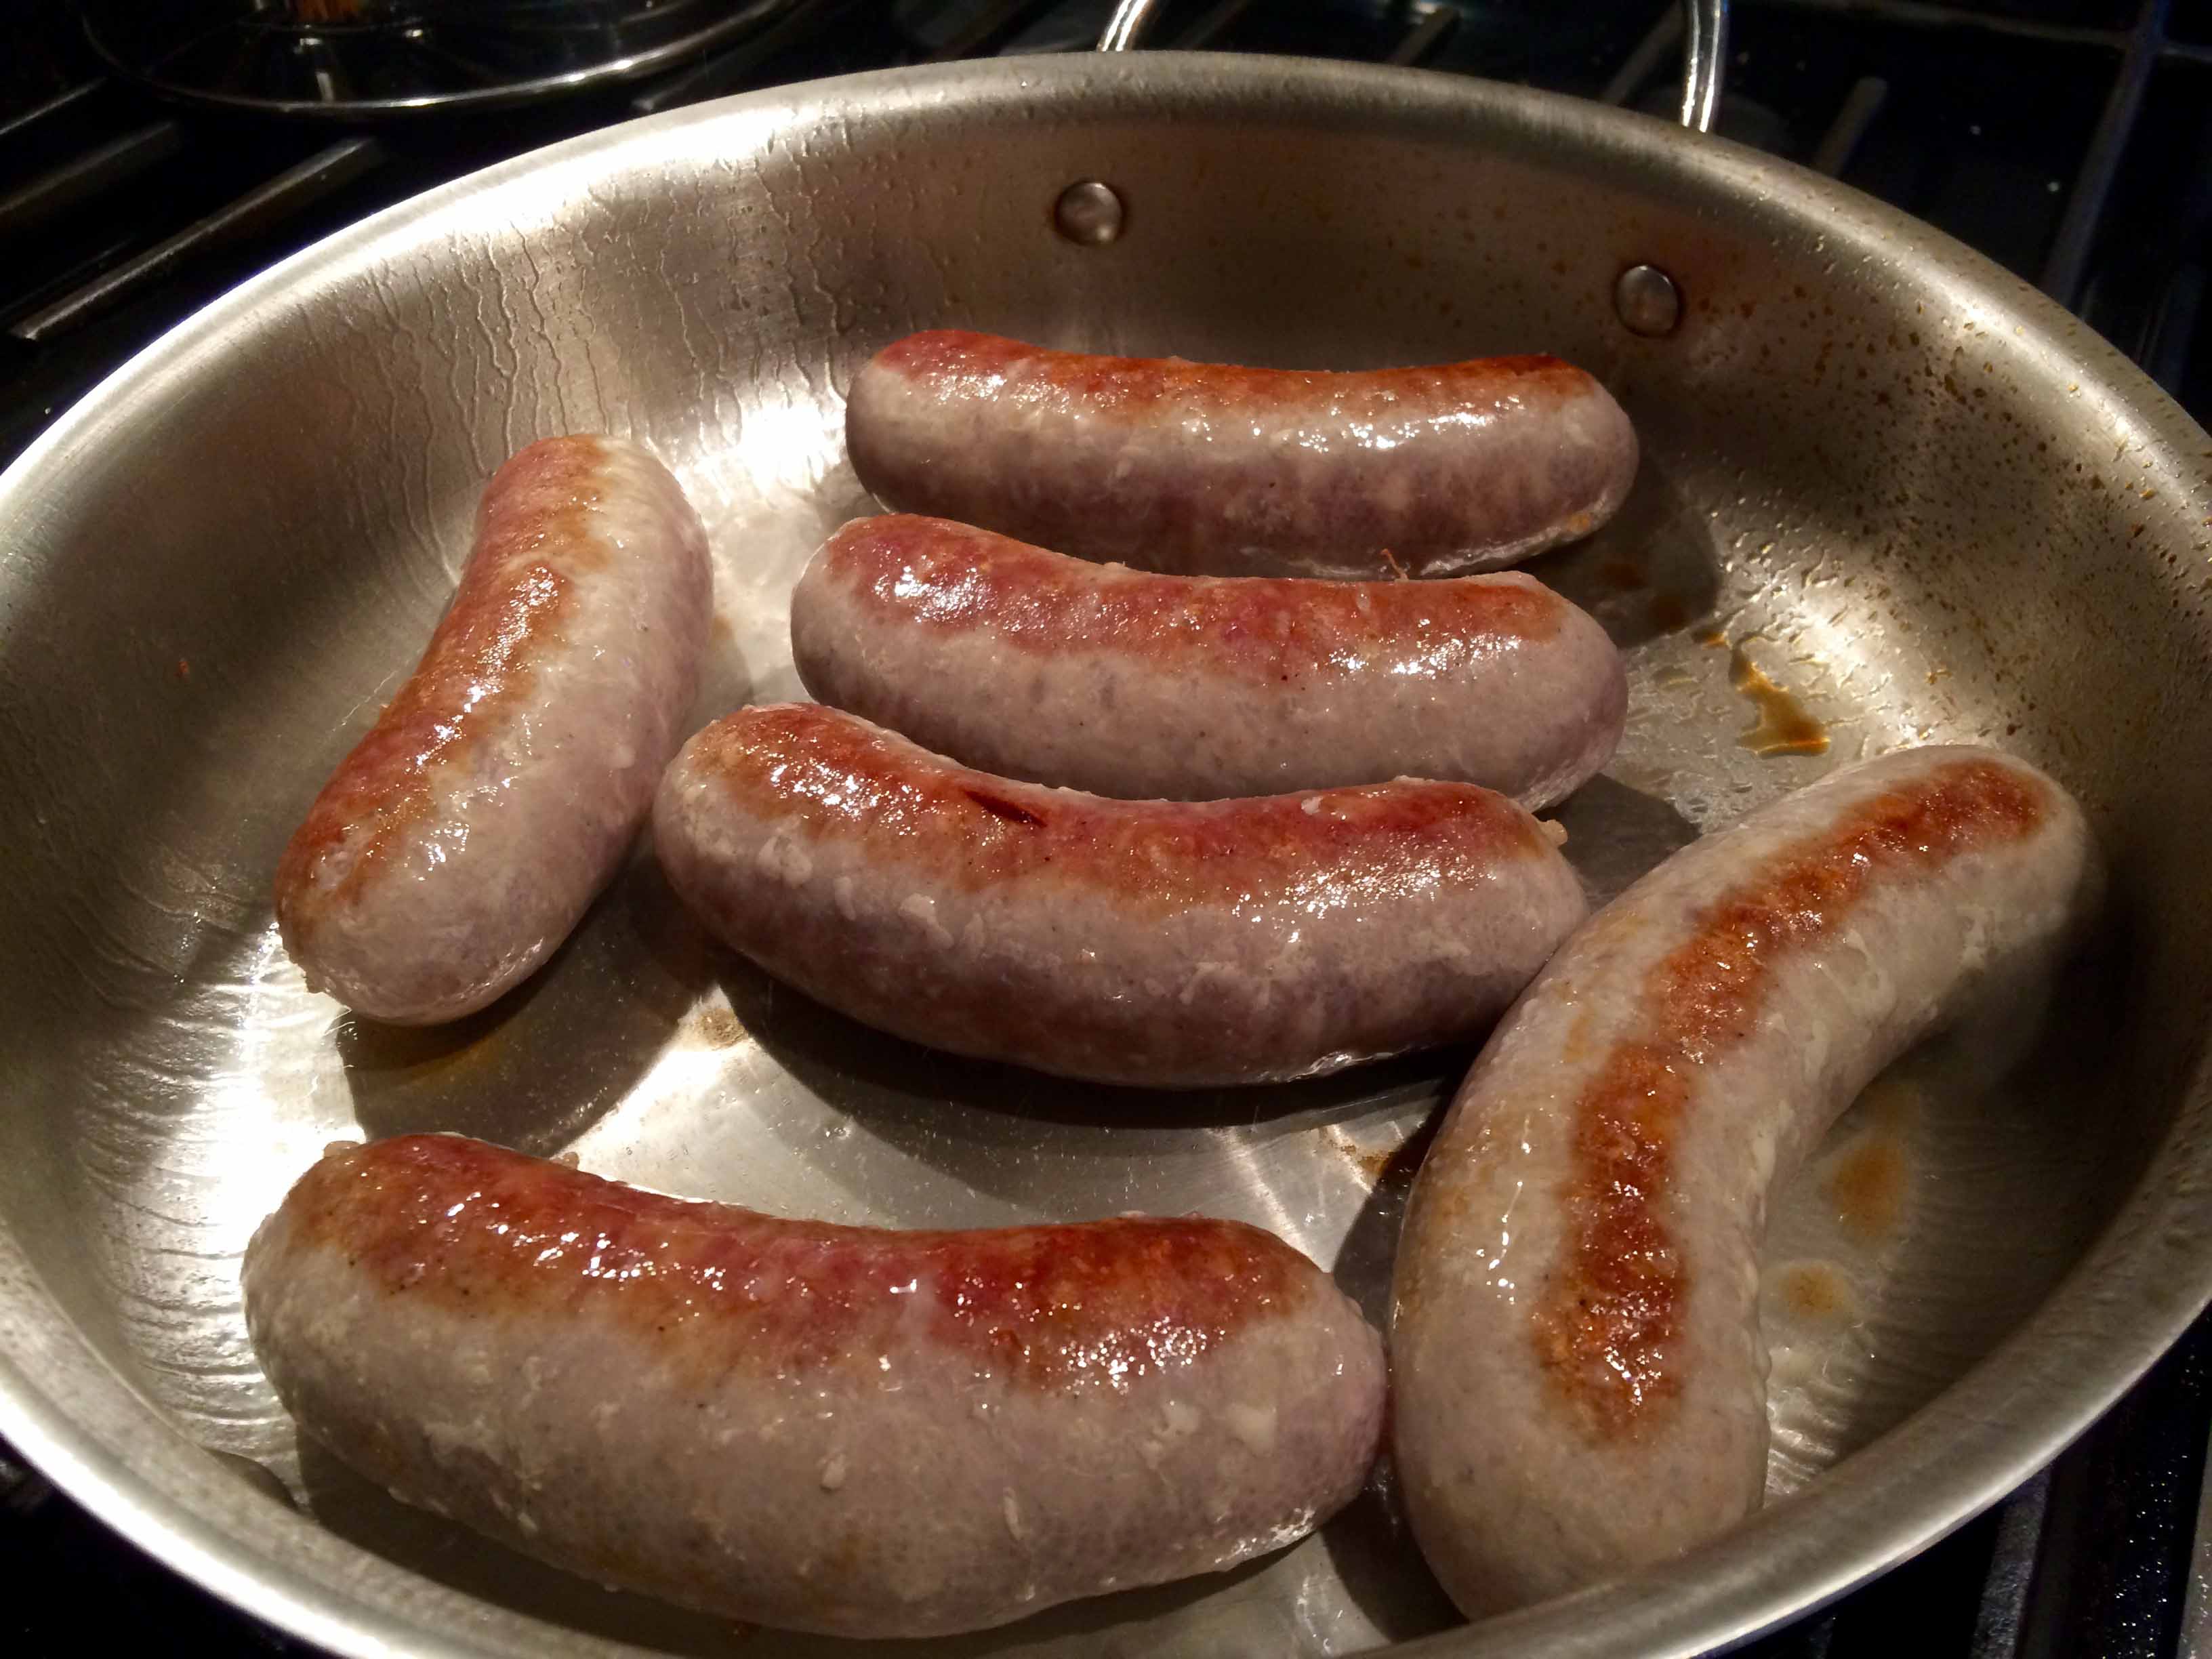
1. Heat oil in 12-inch skillet or sauté pan over medium heat until shimmering. Arrange sausages in pan and cook, turning once, until browned on 2 sides, about 5 minutes.
Browned sausages
2. Take off the heat, tilt skillet and carefully remove excess fat with paper towel.
3. Return the pan to the stove and distribute grapes and onion over and around sausages.
Adding grapes and onions
4. Add water and immediately cover. Cook over medium heat, turning sausages once, until they register between 160 and 165 degrees and onions and the grapes have softened, about 10 minutes.
Softened grapes and onions
5. Transfer sausages to paper towel–lined plate and tent with aluminum foil.
6. Return skillet to medium-high heat and stir pepper and salt into grape-onion mixture. Spread grape-onion mixture in even layer in skillet and cook without stirring until browned, 3 to 5 minutes.
Cooking grapes and onions
7. When browned, stir and continue to cook, stirring frequently, until mixture is well browned and grapes are soft but still retain their shape, 3 to 5 minutes longer.
Browning onions
8. Reduce heat to medium, stir in wine and oregano, and cook, scraping up any browned bits, until wine is reduced by half, 30 to 60 seconds.
Browned onionsAfter deglazing pan with wine.
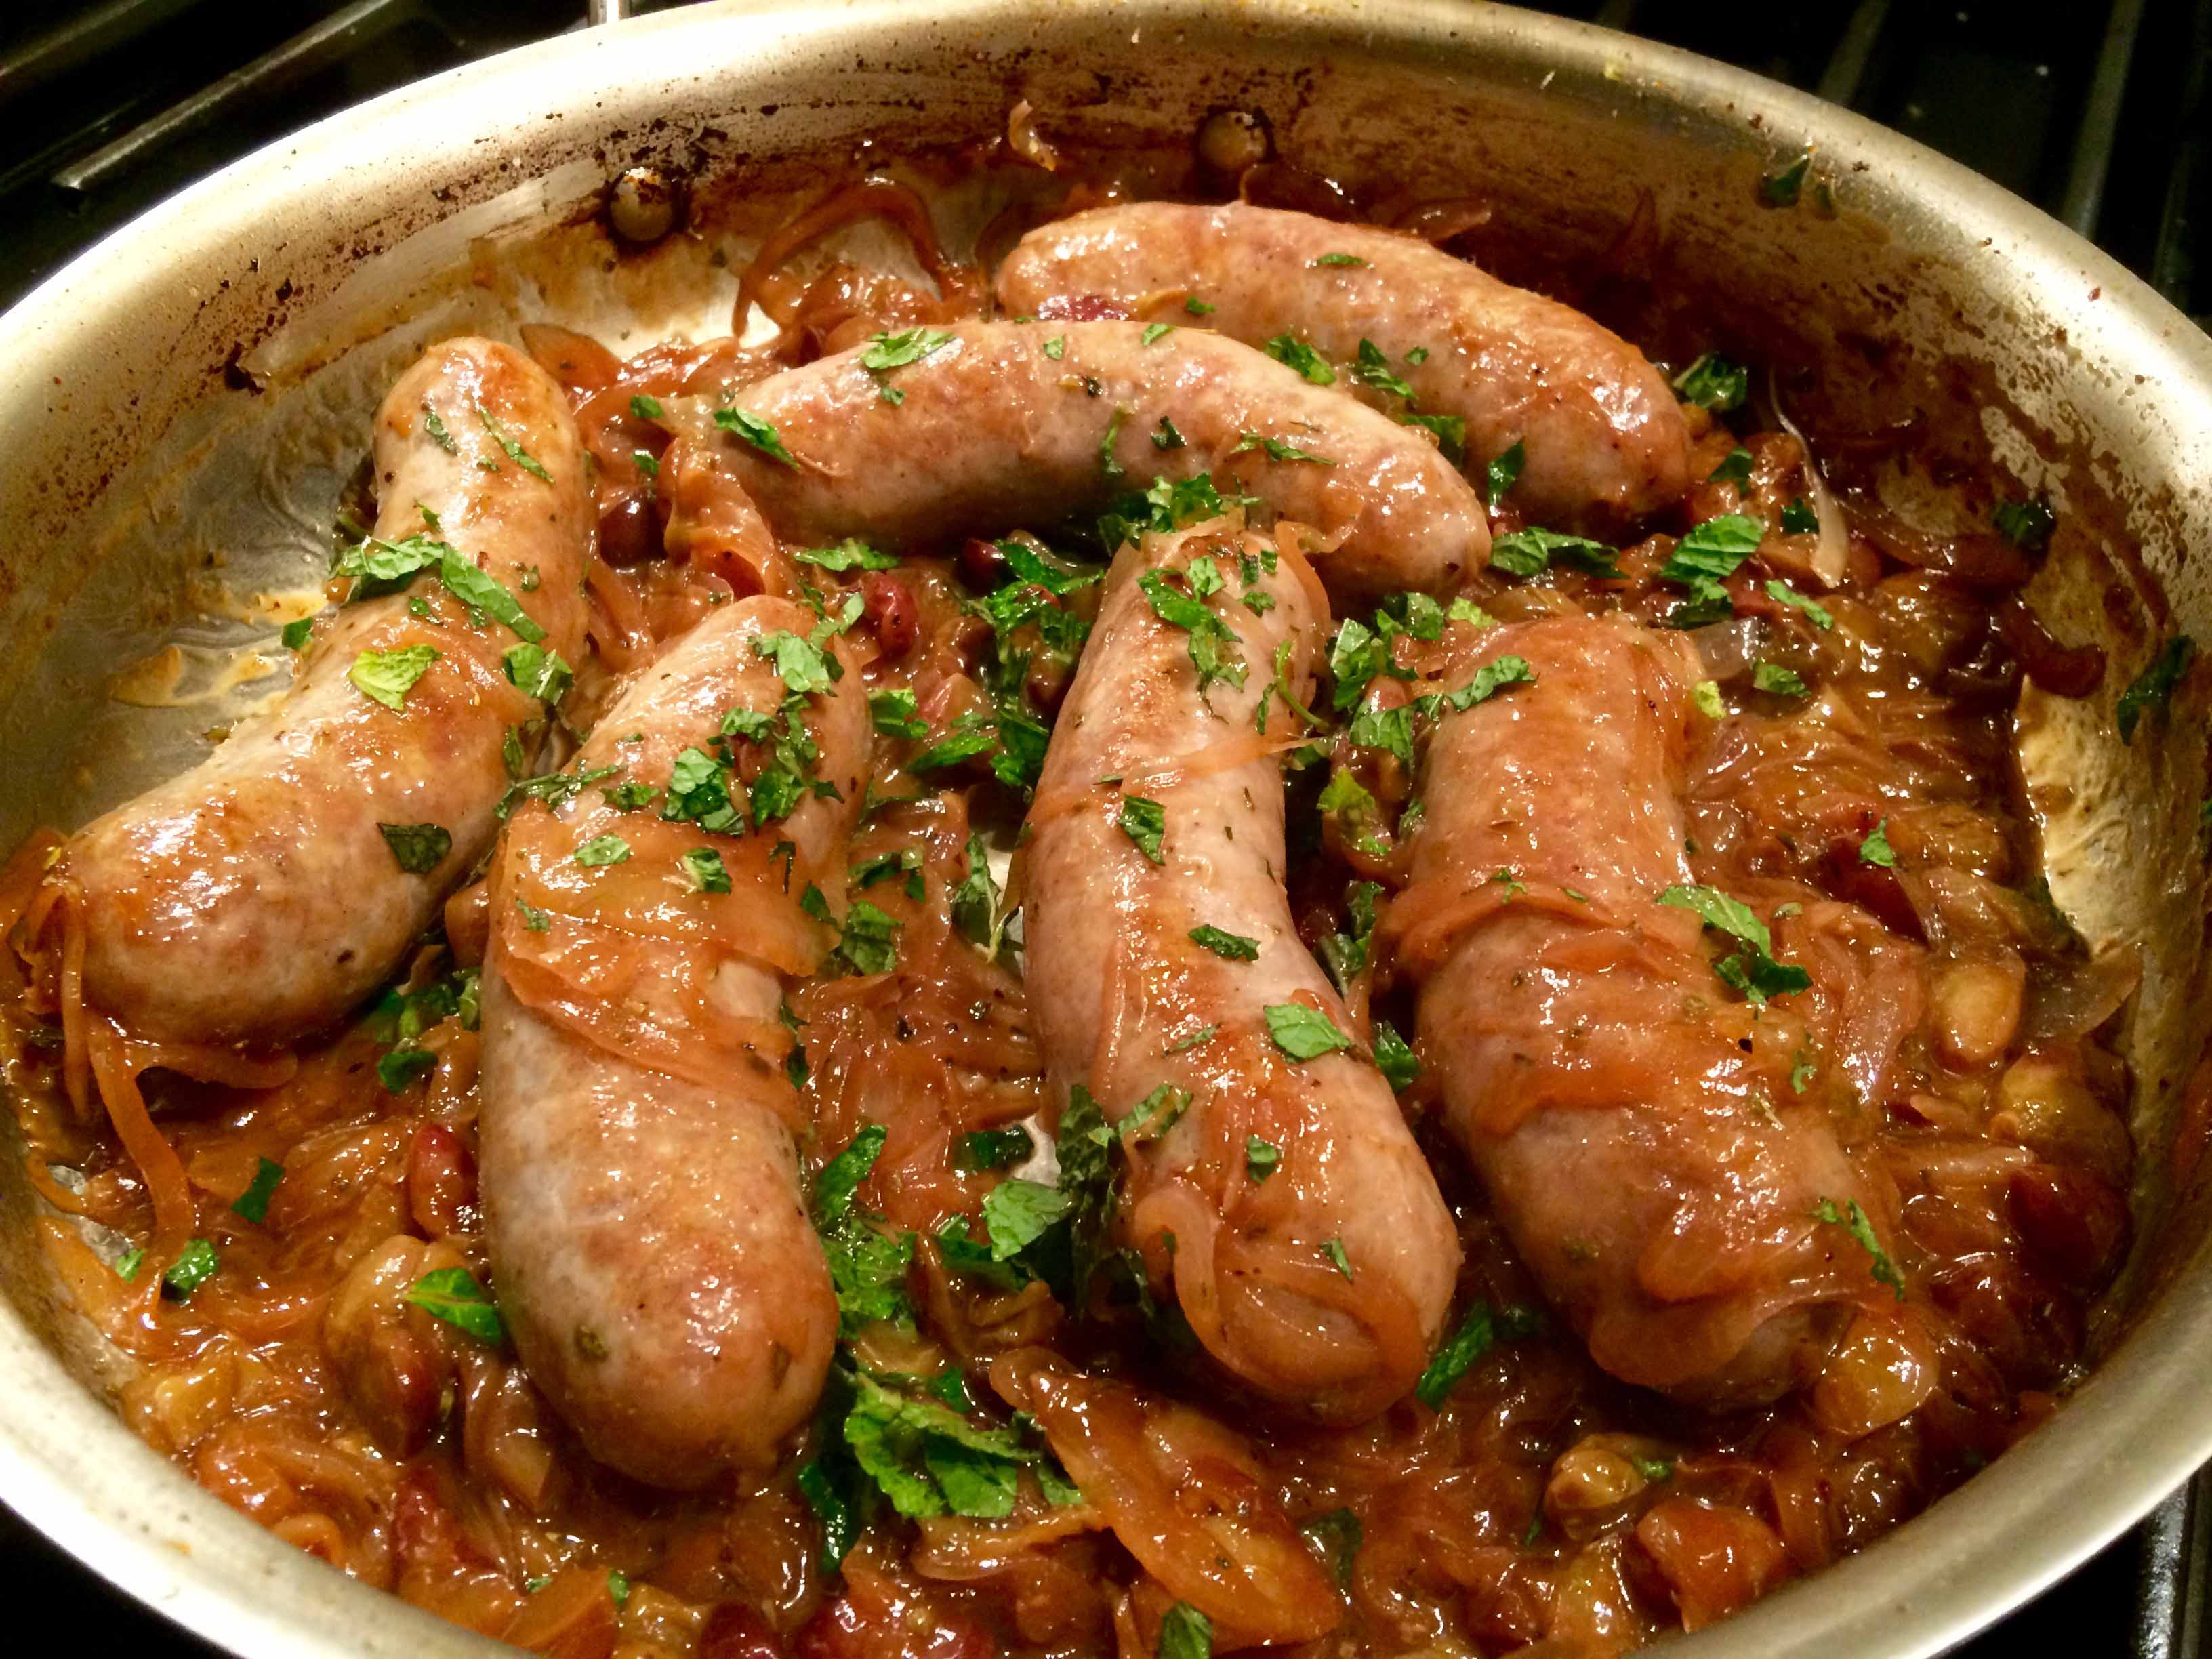
9. Return sausages to the pan to heat briefly.
Sausages returned to the pan
10. Remove pan from heat and stir in vinegar. Sprinkle with mint and serve.
Yesterday, I was inspired by a post on Diane Darrow’s insightful blog Another Year in Recipes to cook one of my favorite Roman dishes, pollo alla Romana. Darrow’s post focused on a contemporary recipe for the dish that she compared with her own, which she had published years ago in The Seasons of the Italian Kitchen. The newer recipe seemed far more involved than Darrow’s, which in my opinion more closely resembled the ones I’ve enjoyed in Roman trattorie.
I wrote to Darrow about the recipe I’ve always used for this dish from David Downie’s Cooking the Roman Way, which uses pancetta and roasted peppers. She responded, and I agree, that this recipe may reflect a trend in Italian cooking where people have more interest in experimenting and elaborating on simple traditional dishes.
Below is my adaptation of Downie’s recipe, which I must say yields an extraordinary chicken dish with many layers of flavor. I served the chicken with some grilled polenta, but crusty Italian bread would work just as well.
Pollo coi Peperoni alla Romana (Adapted from Cooking the Roman Way by David Downie.)
Ingredients
Ingredients
3 to 4 pounds skin-on bone-in chicken thighs, about 9 thighs
Kosher salt
Freshly ground black pepper
1 large white onion, roughly chopped
2 ounces pancetta, finely diced
2 tablespoons extra-virgin olive oil
1/4 teaspoon crushed red pepper flakes
1/2 cup dry white wine
1 (14.5-ounce) can Italian crushed tomatoes
4 to 5 large red peppers, roasted, skinned, and seeded and then sliced into strips 1/2 to 1 inch wide and 1-1/2 to 2 inches long.
1 teaspoon dried oregano
1. Trim the chicken thighs of any excess fat or skin and pat dry. Season the chicken with salt and pepper to taste.
2. Heat the oil in a large, high-sided frying pan over medium heat. Add the onion and pancetta. Sauté, stirring with a wooden spoon or spatula, until the onion becomes translucent and the pancetta barely starts to crisp, about 3 to 4 minutes.
Sautéing onions and pancetta
3. With a slotted spoon, remove the onions and pancetta from the pan to a bowl and cover with a lid.
Cooked onions and pancetta
4. Add the pepper flakes to the pan and stir briefly. Increase the heat to high, add the chicken parts skin side down and brown them thoroughly, turning once, about 8 to 10 minutes. If the chicken is very fatty pour off some of the fat.
Browned chicken
5. Return the sautéed onions and pancetta to the pan and stir thoroughly.
6. Pour in the wine and boil to evaporate it, 1 to 2 minutes, scraping any browned bits from the bottom of the pan with a wooden spoon or spatula.
Reducing the wine
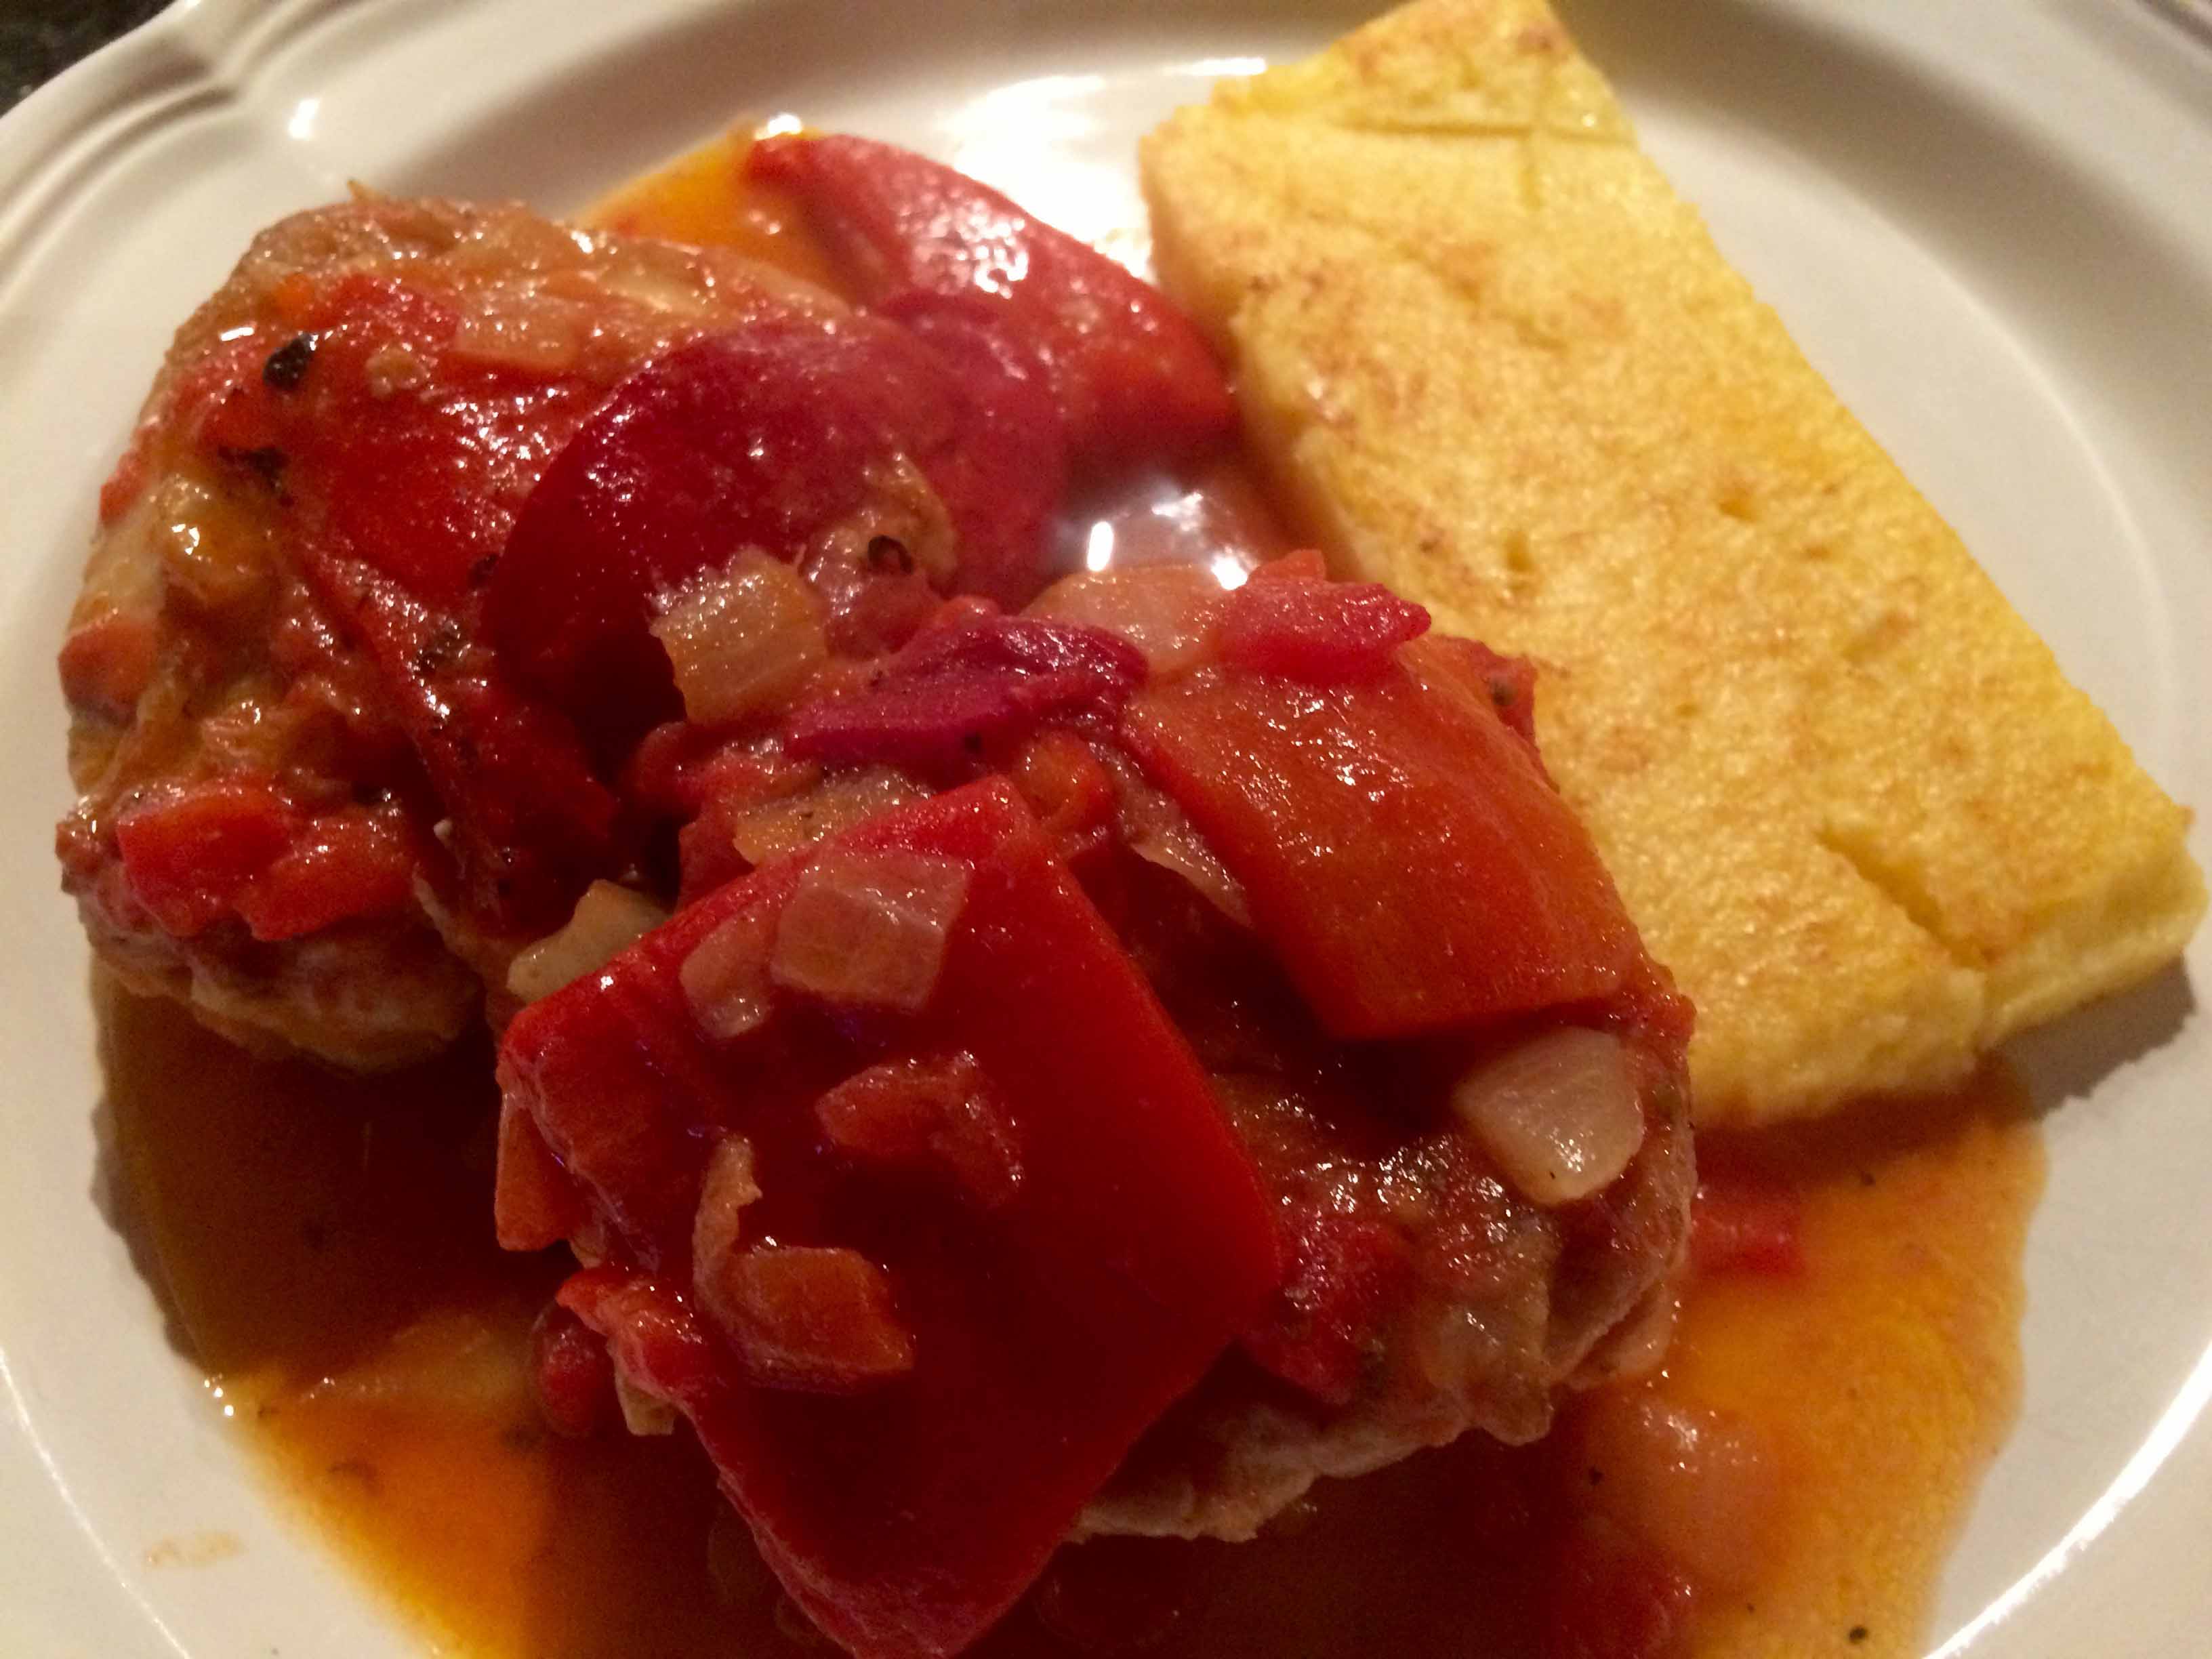
7. Add the crushed tomatoes, the roasted peppers, and the oregano. Bring to a simmer over medium heat stirring. Then reduce the heat to low and simmer slowly, partially covered, for 20 to 25 minutes or until the chicken is tender.
The finished dish
8. Serve immediately on warmed plates accompanied by polenta or crusty Italian bread.
Wine Pairing: Sangiovese di Romagna, Montepulciano d’Abruzzo, Merlot
Long, long ago when I was in graduate school and living in my first apartment, I started to have dinner parties. My guests were fellow students all of whom shared a love of food that was only constrained by our limited budgets. Each of us had a specialty: mine, of course, was Italian food, inspired by my family’s menus. Others ventured into French or vegetarian or Indian.
Granted, the authenticity of some of our dishes might not have met the more stringent standards of today’s foodies, but nevertheless they were quite tasty. Among the most delicious of these was my friend Leslie’s chicken curry that was always served with rice and Major Grey’s chutney along with a bottle of the then ubiquitous and affordable Schwarze Katz wine, a semi-dry Riesling blend.
The dish I’m writing about today brought back these memories of meals shared with fellow scholars on a budget. Given the ingredients and method of cooking, however, I fear that my kitchen credibility may be called into question by some of my readers.But this chicken curry has become one of my quick-meal, easy clean-up, comfort-food staples perfect for a mid-week late night dinner. My recipe is roughly based on Lorna Sass’s “Curry in a Hurry” in her book Pressure Perfect.
Pressure-Cooker Chicken Curry
Ingredients
3 pounds skin-on bone-in chicken thighs, well trimmed of excess skin and fat Madras curry powder, to taste Salt, to taste 1 medium yellow onion, chopped 1 12.5-ounce jar Maya Kaimal Madras Curry Indian Simmer Sauce
1. Sprinkle the underside of the trimmed chicken thighs with the curry powder and salt to taste.
Seasoned chicken
2. Place the chopped onion in a pressure cooker followed by the chicken thighs. I make two layers of chicken, starting with skin-side down for the bottom layer and then going to skin-side up for the top layer.
3. Pour in a jar of the simmer sauce making sure to evenly distribute it over the chicken.
4. Lock the lid and and bring the cooker to high pressure, following the instructions of your cooker’s manufacturer. More often than not I use my electric pressure cooker, which facilitates bringing the pot to pressure. For stove-top cookers, Sass’s recipe recommends bringing the cooker to high pressure over high heat and then reducing the heat just enough to maintain high pressure.
5. Cook at high pressure for 10 minutes and then let the pressure release naturally for 4 minutes followed by quick release if necessary. Be careful of the steam, when removing the lid of your pressure cooker. If the chicken is not tender, simmer covered until done. If there is too much fat, you may wish to skim it from the top before serving.
My brother recently sent me a link to a Mark Bittman recipe for pasta alla gricia on The New York Times website. In his email, he wrote that he had some success with it, but wasn’t sure he had executed the recipe 100%.
Since this classic Roman pasta is one of my go-to dishes when I’m in Rome, I thought I’d try it out. But as I read through the recipe, I was surprised not to find two ingredients, which, although used sparingly, are essential to the dish: olive oil and peperoncino (Italian hot chili pepper). Their absence led me to consult David Downie’s Cooking the Roman Way, which 14 years ago provided me with my first recipe for this dish. The olive oil adds an additional layer of unctuousness to the sauce and the peperoncino, that playful heat so typical of many Roman dishes.
Ultimately, I decided to use Downie’s recipe. Bittman’s recipe, however, contained a link to a story he had written for The Times last year on Roman pasta: “For Perfect Pasta Add Water and a Vigorous Stir.” In it, he describes how a renowned Roman chef, Flavio de Maio, demonstrated for him the “magic of water,”which creates a cremina, or a sauce, which Bittman describes as “thick and round and rich” for dishes like pasta alla gricia or carbonara. Intrigued, I applied this “magical” technique of adding some pasta water to the sauce and vigorously whisking it with a fork into the cooked pasta.
This relatively simple step yielded the best version of this dish I have ever prepared, and I believe it could stand up to many that I have enjoyed abroad. One word of caution. Should you choose to follow my version, which combines Downie’s and Bittman’s, or the original Bittman recipe on the Times website, please be sure to read the above mentioned Times story, which clearly explains how to use the pasta water. Bittman rightly warns that it can be tricky and, if not done correctly, can result in a “pile of pasta with a watery sauce on top.”
Pasta Alla Gricia (Adapted from David Downie’s Cooking the Roman Way and Mark Bittman’s NY Times recipe.)
The ingredients
Ingredients 1/4 cup extra-virgin olive oil 1 pepperoncino (hot chile pepper), shredded or -1/4 teaspoon crushed red pepper flakes 8 ounces (about 8 1/4-inch-thick slices) guanciale, pancetta or bacon, roughly chopped 1 pound bucatini, rigatoni, or spaghetti About 1-1/2 cups freshly grated imported Pecorino Romano
Bring at least 5 quarts of salted water to boil in a large pot.
2. Heat the oil in a very large, high-sided frying pan over medium heat. Add the peperoncino and the guanciale and sauté, stirring until the guanciale is deeply golden, about 5 minutes.
Sautéing the guanciale
3. Adjust the heat as necessary to render the fat without burning the meat. The meaty parts should be browned and the fatty parts should be cooked but still slightly transparent. Remove the frying pan from the heat. (For this step, I’ve included elements from both recipes. Downie says to crisp the guanciale and calls for 1 minute of cooking; but I did not find this to be enough time to render the fat from the guanciale. I also did not want the meat too crisp. Bittman calls for 15 to 20 minutes to bring the meat to a deep golden color; but this seemed a bit too much time. Finally, if your meat is very fatty, you may want to remove some of the rendered fat from the pan.)
The browned guanciale
4. Drop the pasta into boiling water and stir. Cover the pot. When the water returns to boil, cook uncovered until the pasta is barely al dente, about 1 minute less than the suggested cooking time on the package.
5. About 5 minutes before the pasta is cooked, return the frying pan to medium heat and add 1/2 to 3/4 cup of the pasta cooking water to the pan, turn the heat to high, and reduce by about half. (This and the following step are adapted from the Bittman recipe.)
The reduced sauce
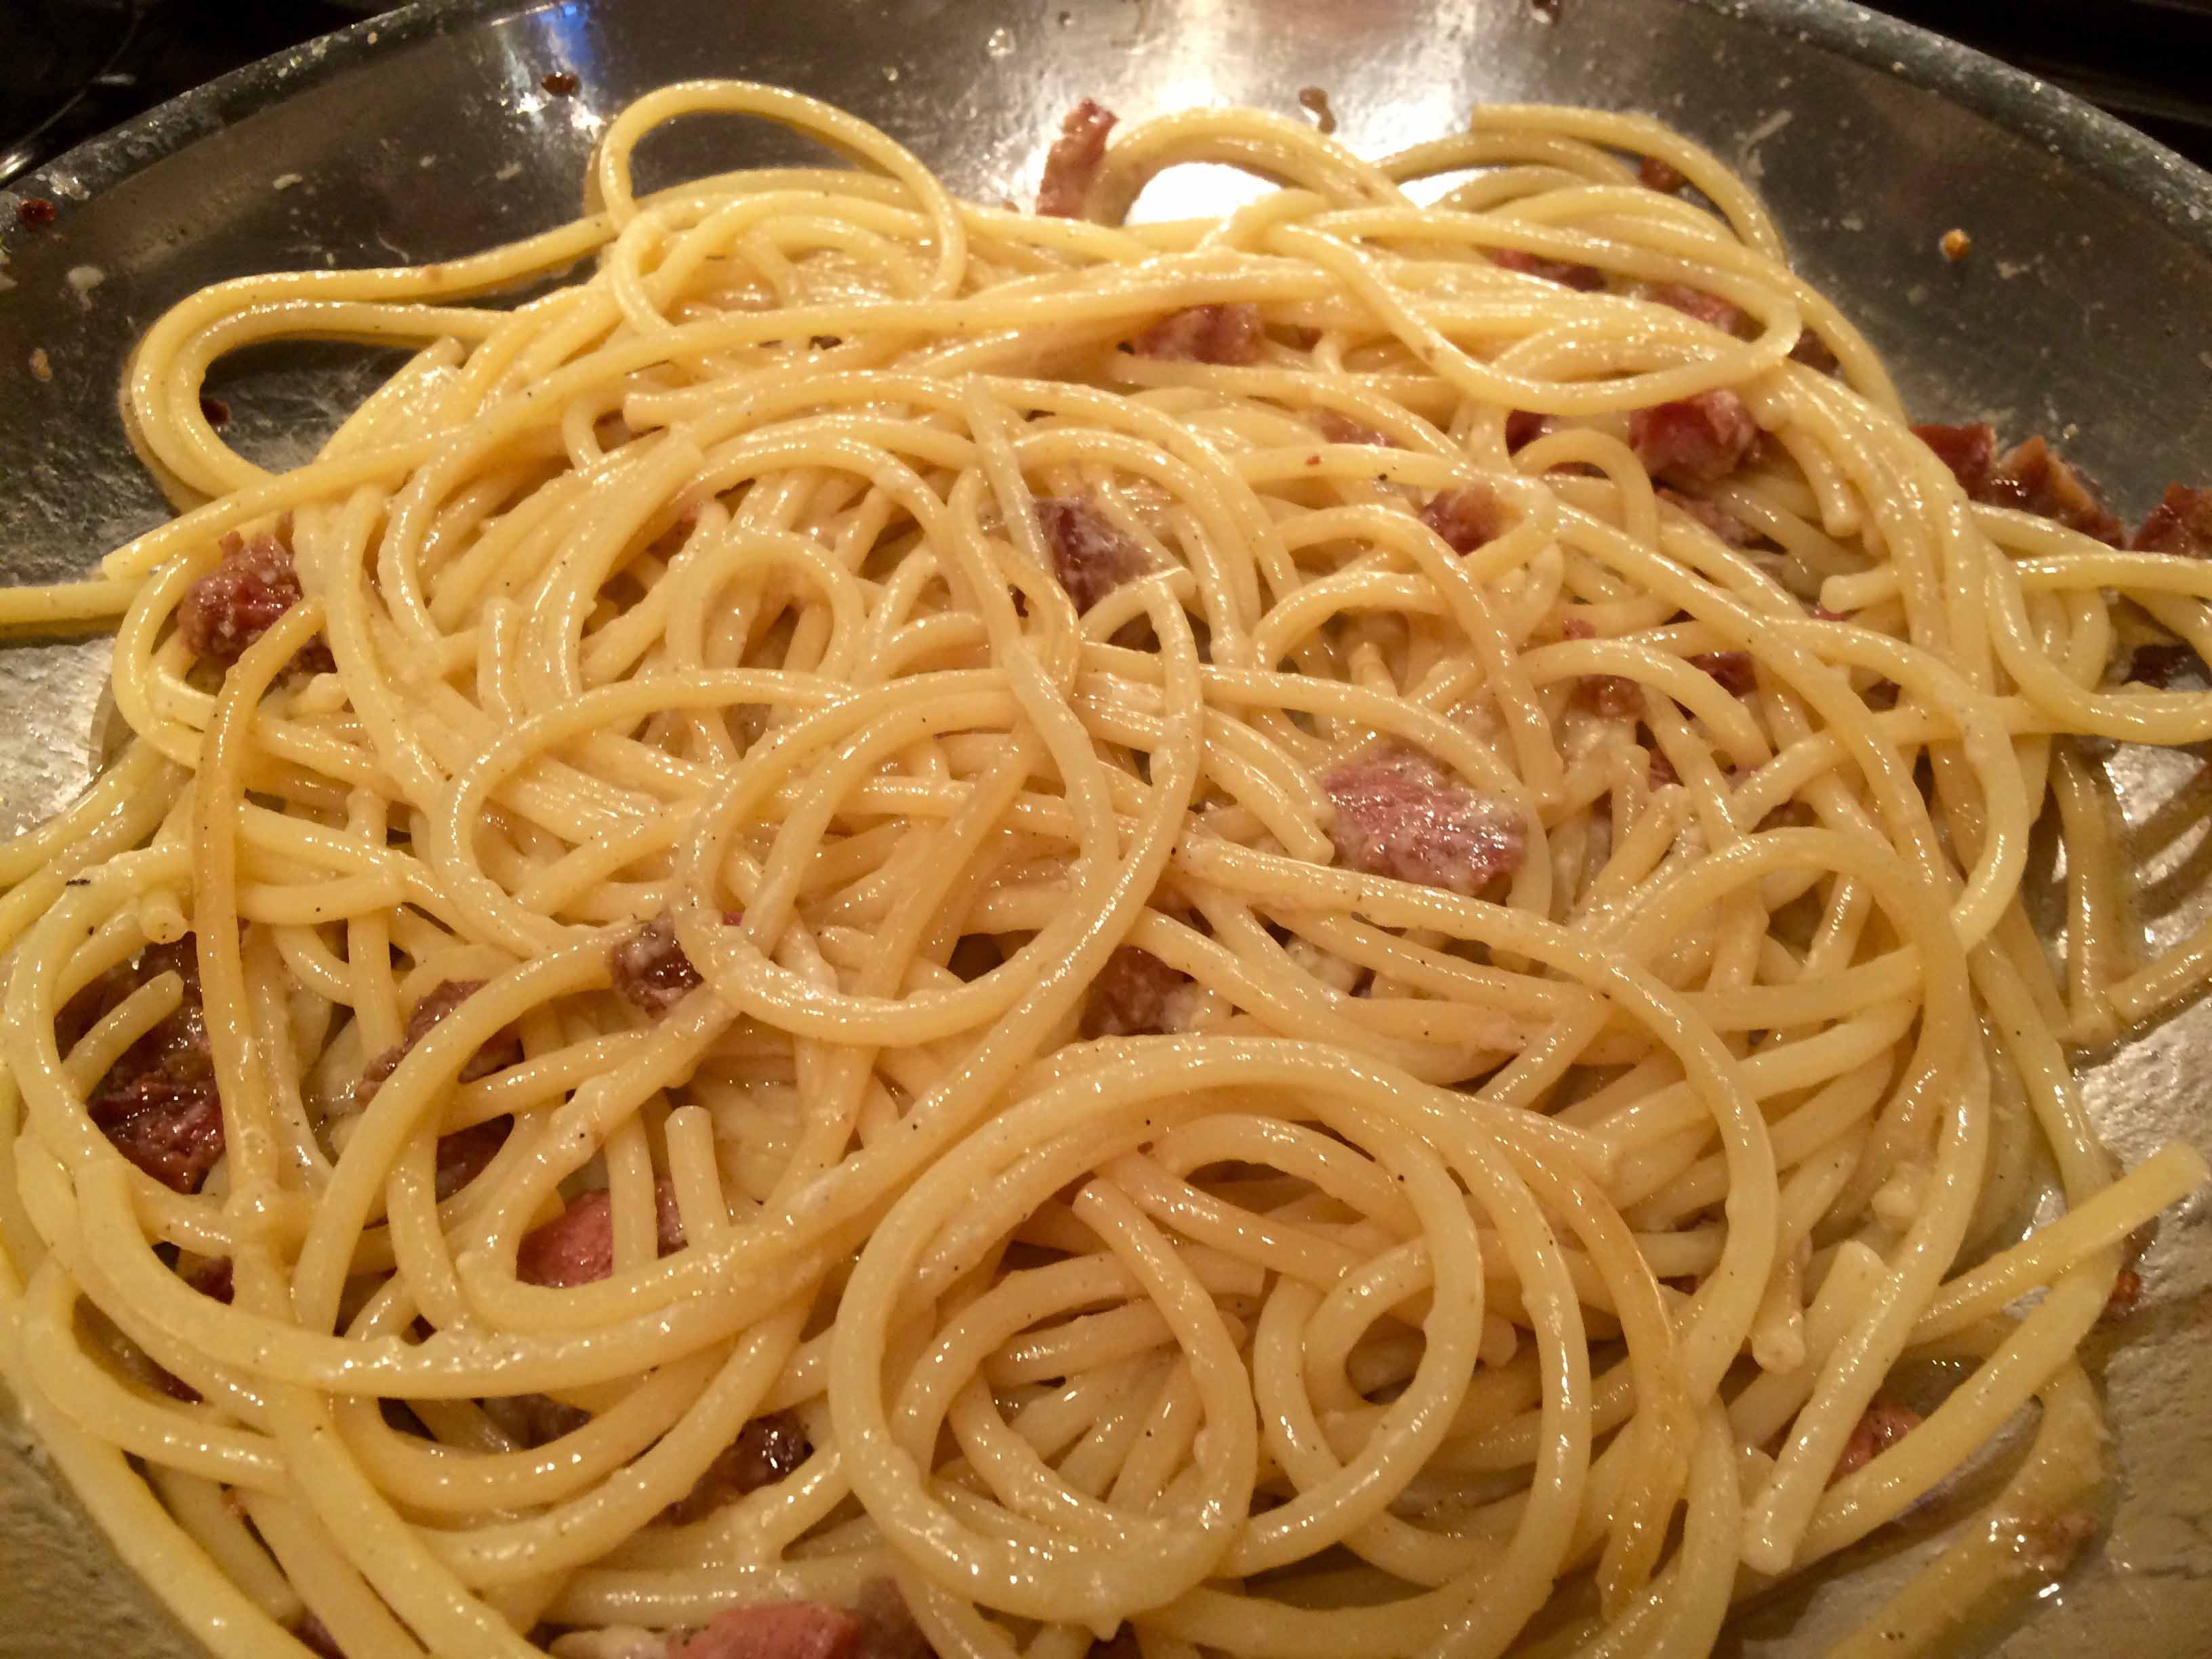
6. When the pasta is ready, use tongs to transfer it to the pan with the sauce. Stir the pasta in the sauce to let it finish cooking, adding more pasta cooking water if necessary until the pasta is done and the sauce thick and creamy. Add half the cheese and a pinch of black pepper, and stir vigorously to incorporate.
The vigorous stirring
7. Serve the pasta on heated plates or in bowls, passing the remaining Pecorino Romano. Makes 4 to 6 servings.
The other night when plans to dine out fell through at the last minute, I had to whip up something fast for dinner at home. Earlier in the day, I caught Giada De Laurentiis on the Food Network preparing a quick and easy shrimp sauté with pesto and thought why not make that tonight. Here’s a link to the recipe with a video.
I didn’t plan to write this recipe up until I tasted the final product, so I only have the one photo of the finished dish. My one reservation was using Parmigiano with seafood, but it worked. Having a plethora of basil on hand and not being able to find fresh mint, I omitted it and just used basil. I also substituted on-sale large shrimp rather than the jumbo. Finally, rather than adding my pesto to the pan, I chose to add the cooked shrimp to my pesto and tossed them with it in the bowl.
Served with steamed rice and a chilled Sauvignon Blanc, this was a perfect dish for a warm spring evening on the terrace.
Giada de Laurentiis’s Jumbo Shrimp with Basil and Mint Pesto
Ingredients 3/4 cups lightly packed fresh mint leaves 1/2 cup lightly packed fresh basil leaves 1/4 cup pine nuts, toasted 1 garlic clove 1/4 cup olive oil 2 tablespoons freshly grated Parmesan Salt and freshly ground black pepper 2 pounds uncooked jumbo shrimp, peeled and de-veined 2 tablespoons extra-virgin olive oil
Directions Blend the mint, basil, pine nuts, and garlic in a food processor until finely chopped. With the machine running, gradually add 1/4 cup of olive oil, processing until well blended. Transfer the pesto to a medium bowl. Stir in the Parmesan. Season, to taste, with salt and pepper.
Toss the shrimp with the extra-virgin olive oil in a large bowl to coat. Sprinkle with salt and pepper, and toss again.
Heat a heavy large skillet over high heat. Working in 2 batches, add the shrimp and sauté until just cooked through, about 3 minutes.