Beef Short Ribs with Red Wine and Mustard

sribsplatedsmall

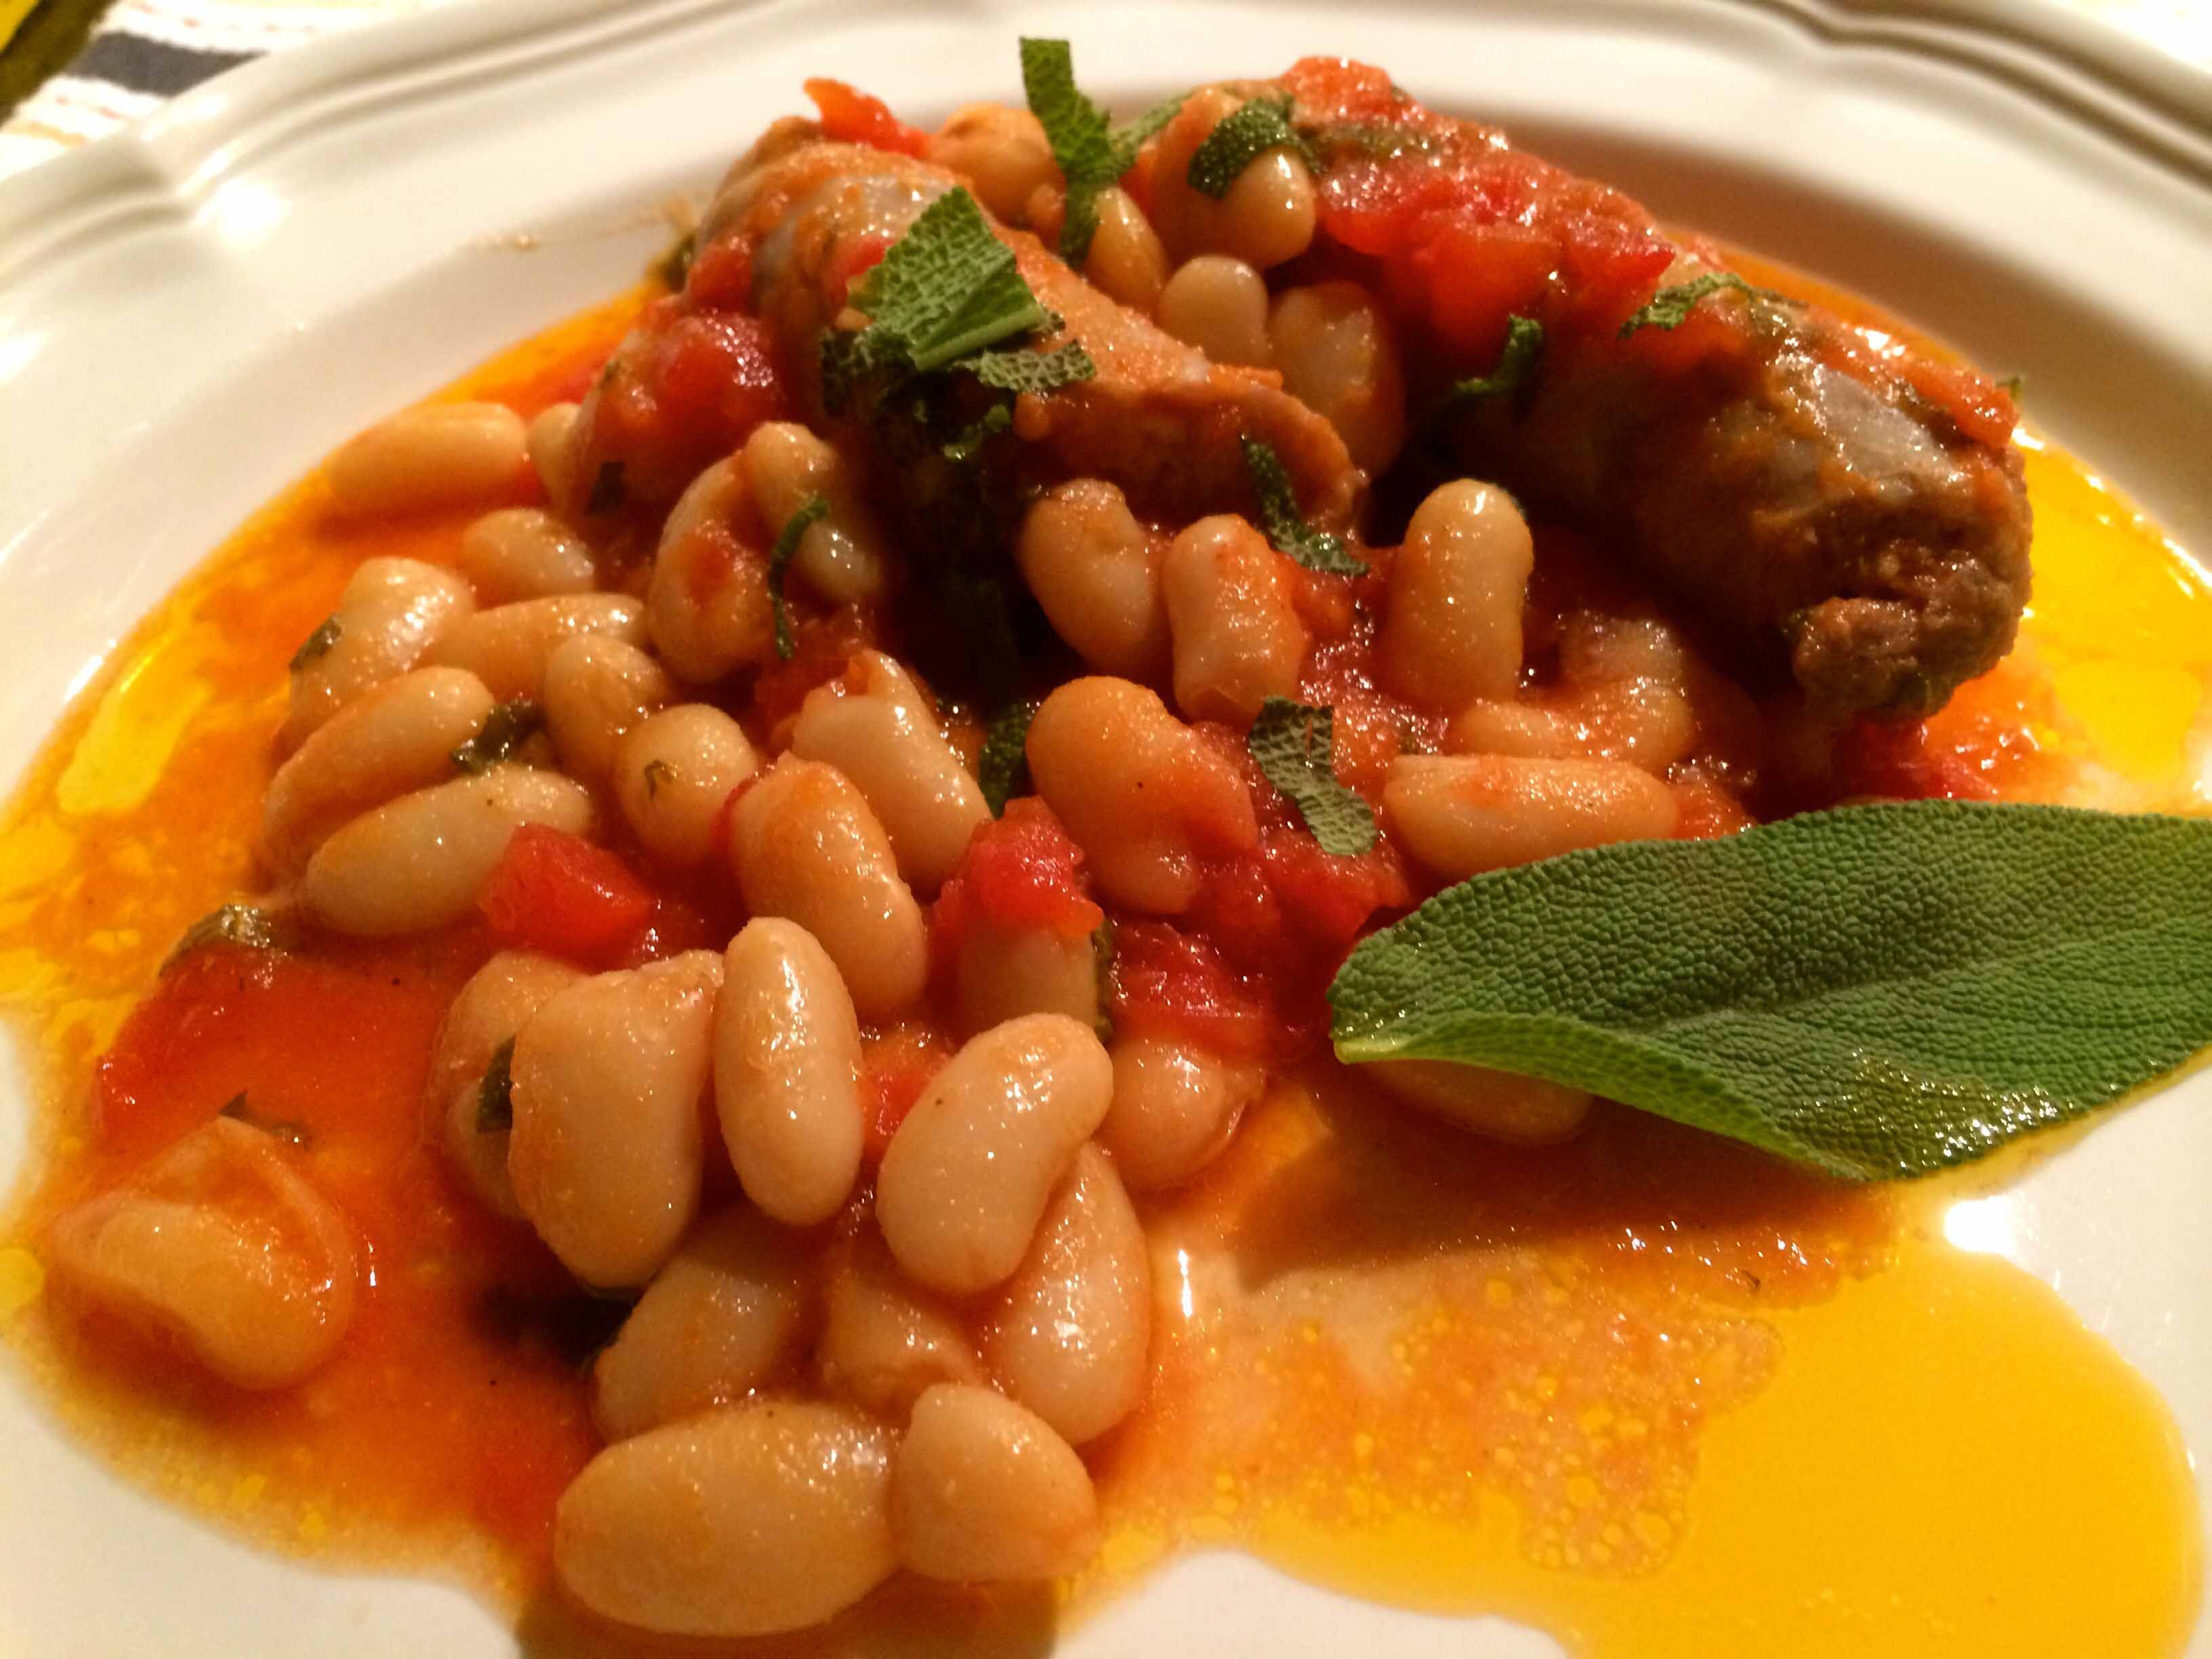
“Simply the best short ribs we’ve ever had” was all we could say after finishing these succulent and flavorful braised ribs. Although not typical summer fare, the short ribs looked irresistible when I saw them at the market and I thought we both could use a little comfort food.

For me, braising is the best way to cook this cut of meat, and the most convenient method is slow cooking. And for slow cooking, I usually turn to one of Michele Scicolone’s slow-cooker cookbooks. For last night’s supper, I selected her recipe “Beef Short Ribs with Mustard and Red Wine” from The Mediterranean Slow Cooker.

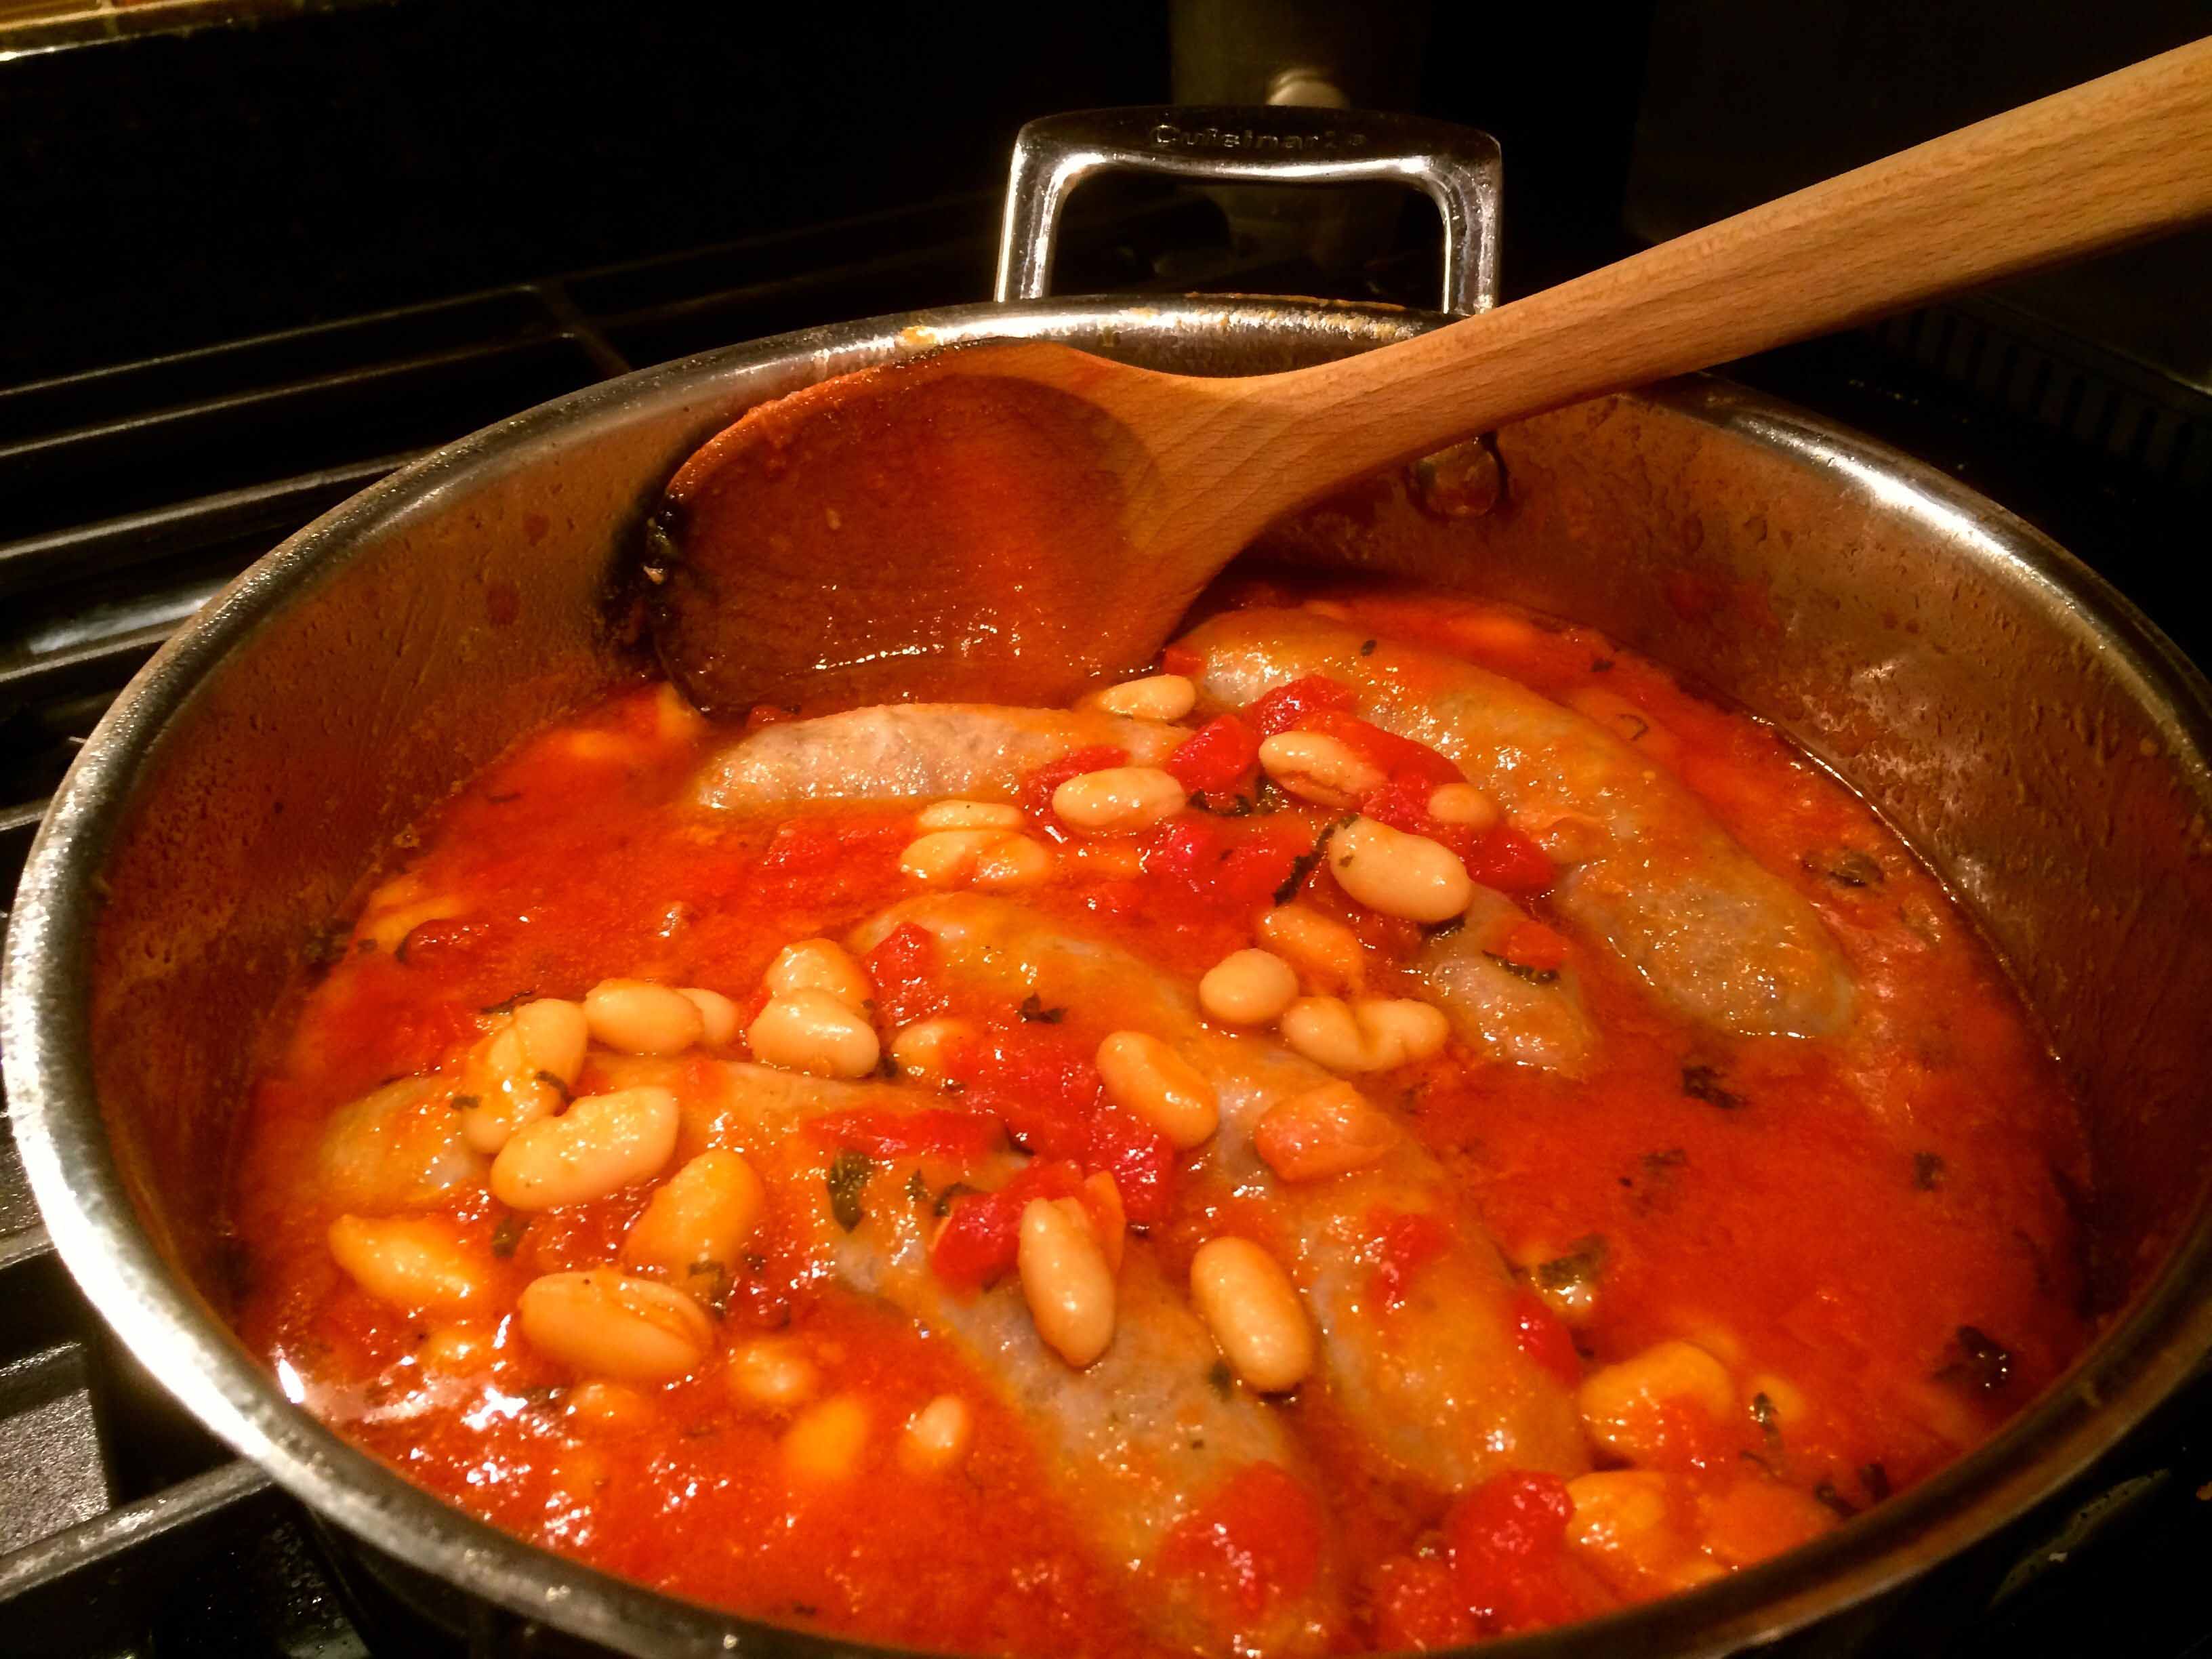
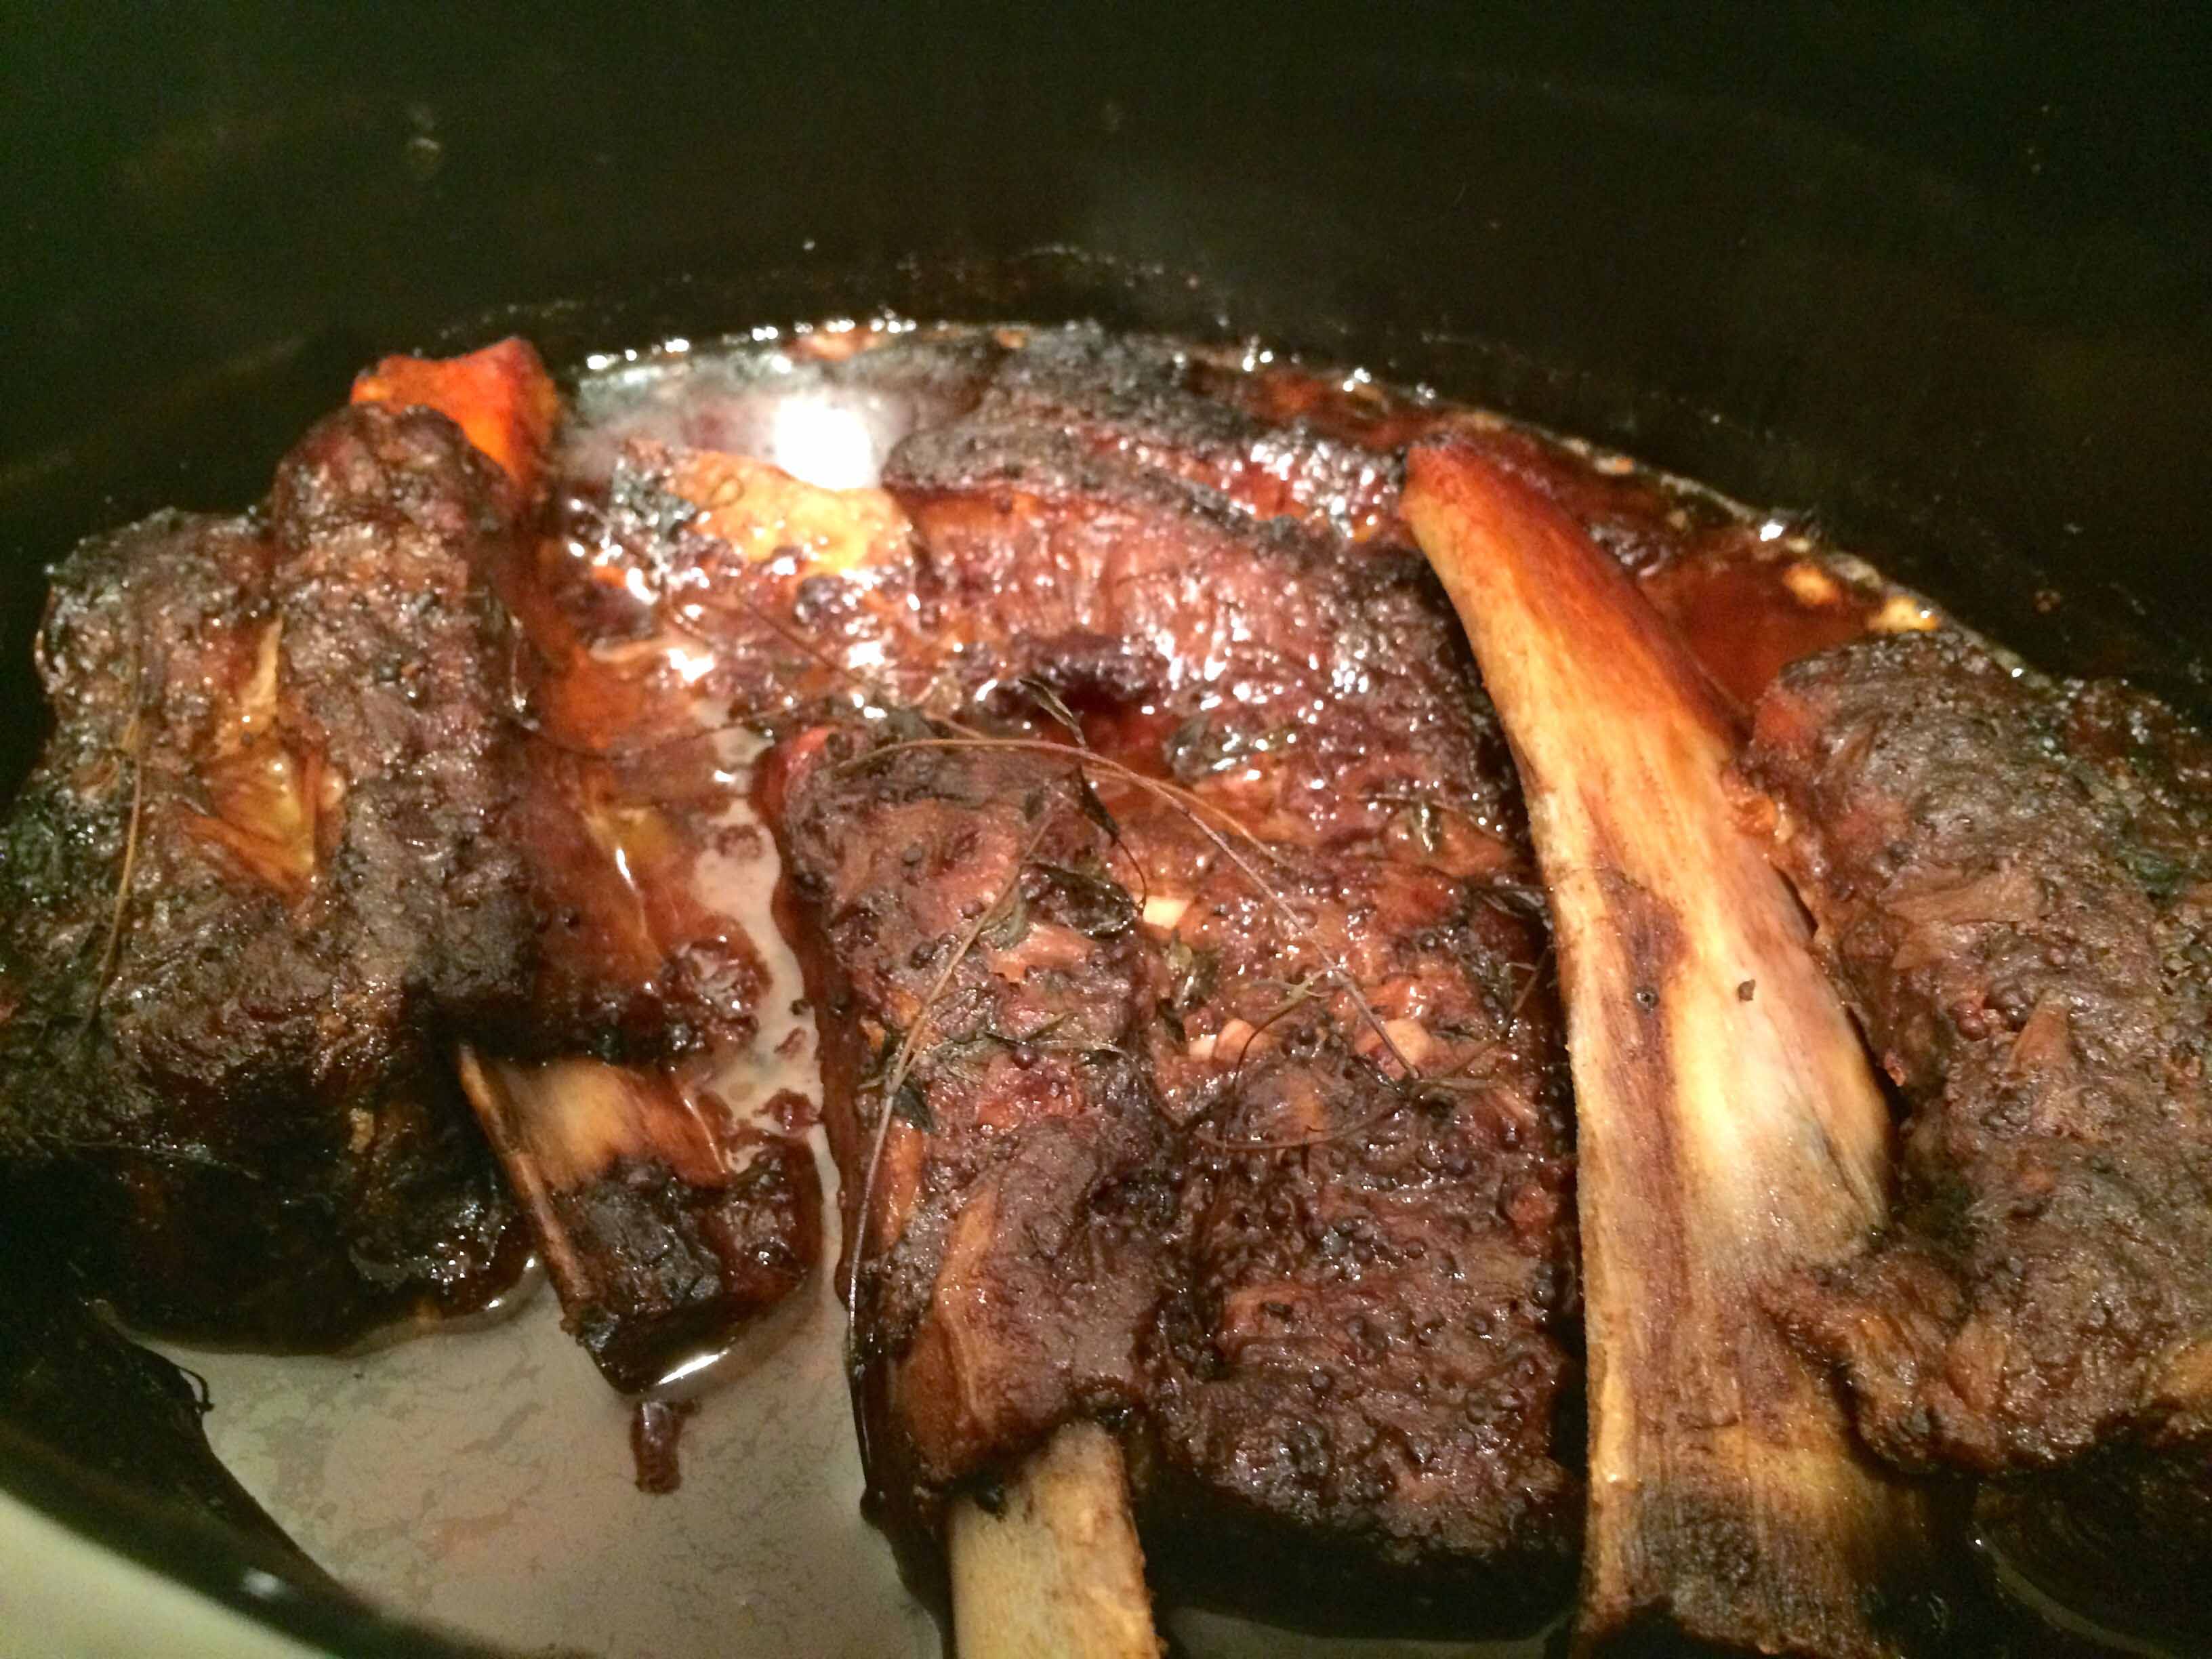
After browning the trimmed bone-in ribs well on all sides in olive oil, I removed them from the pot and discarded all but 2 tablespoons of the fat. I placed the ribs in the slow cooker and seasoned them generously with salt and pepper.

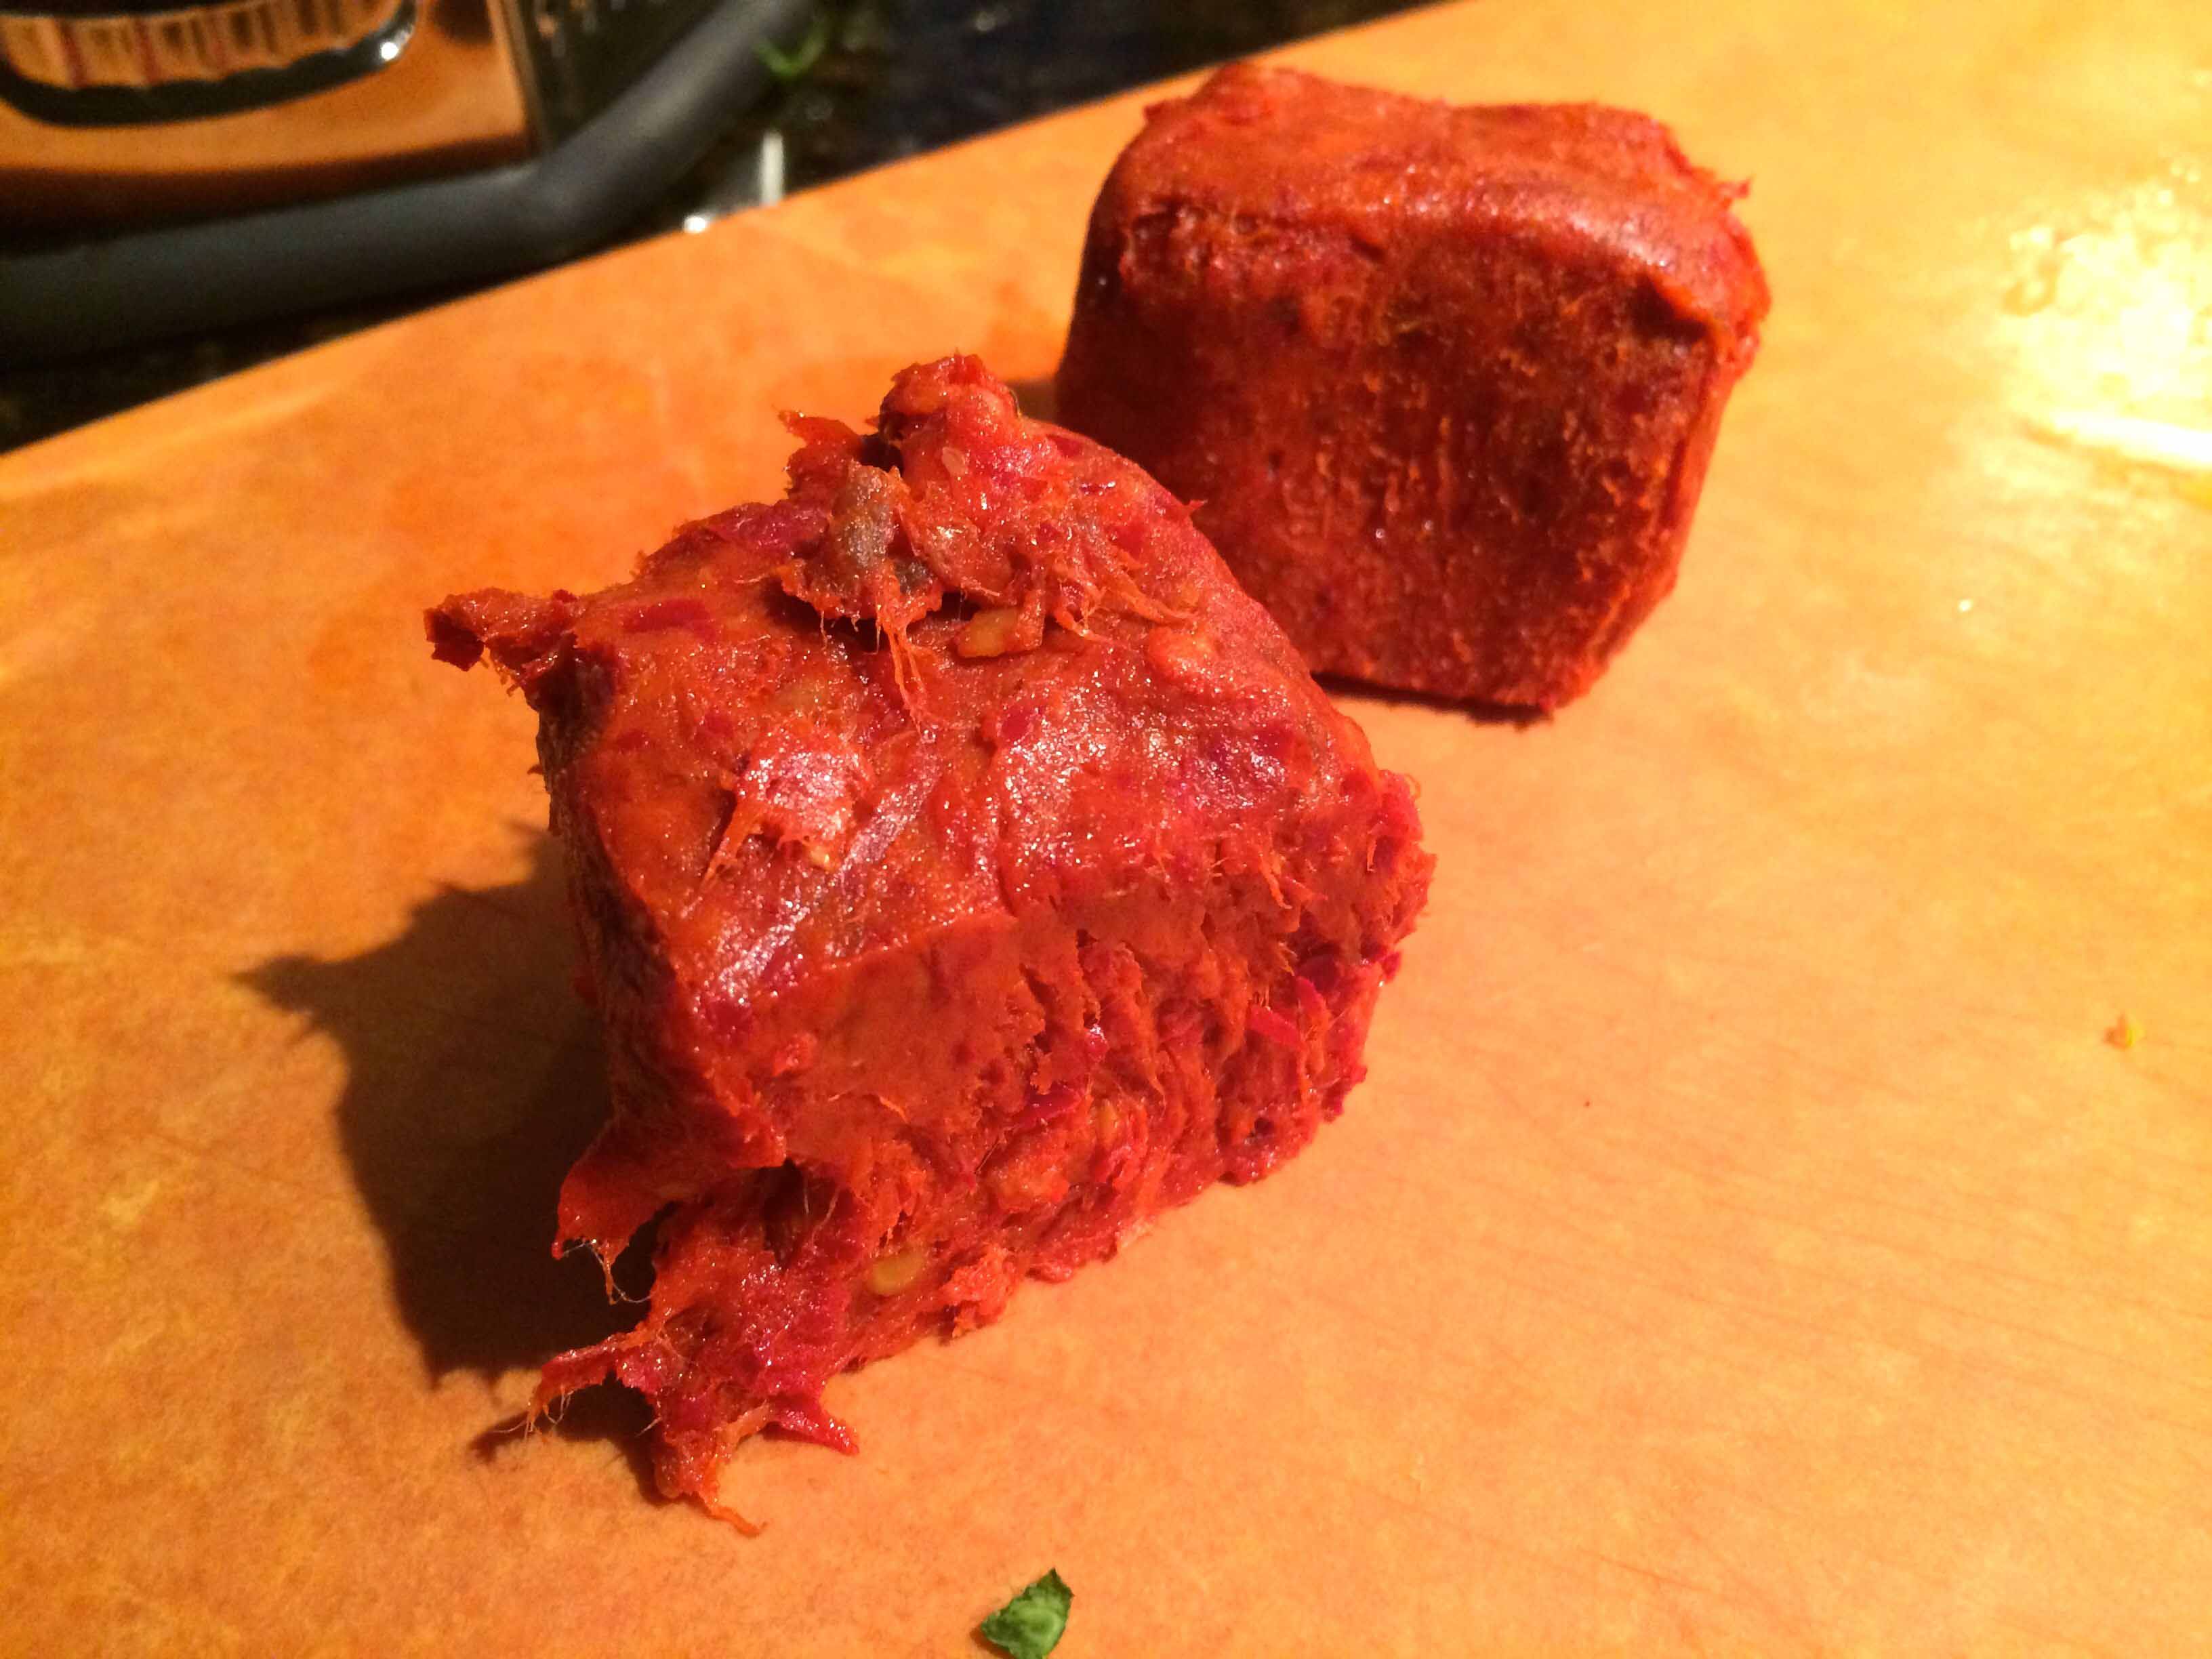
In the remaining fat, I quickly sautéed some chopped shallots and finely minced garlic followed by a generous amount of concentrated tomato paste. I decided to toast the paste for about a minute, which I believe gave the dish a deeper tomato flavor.

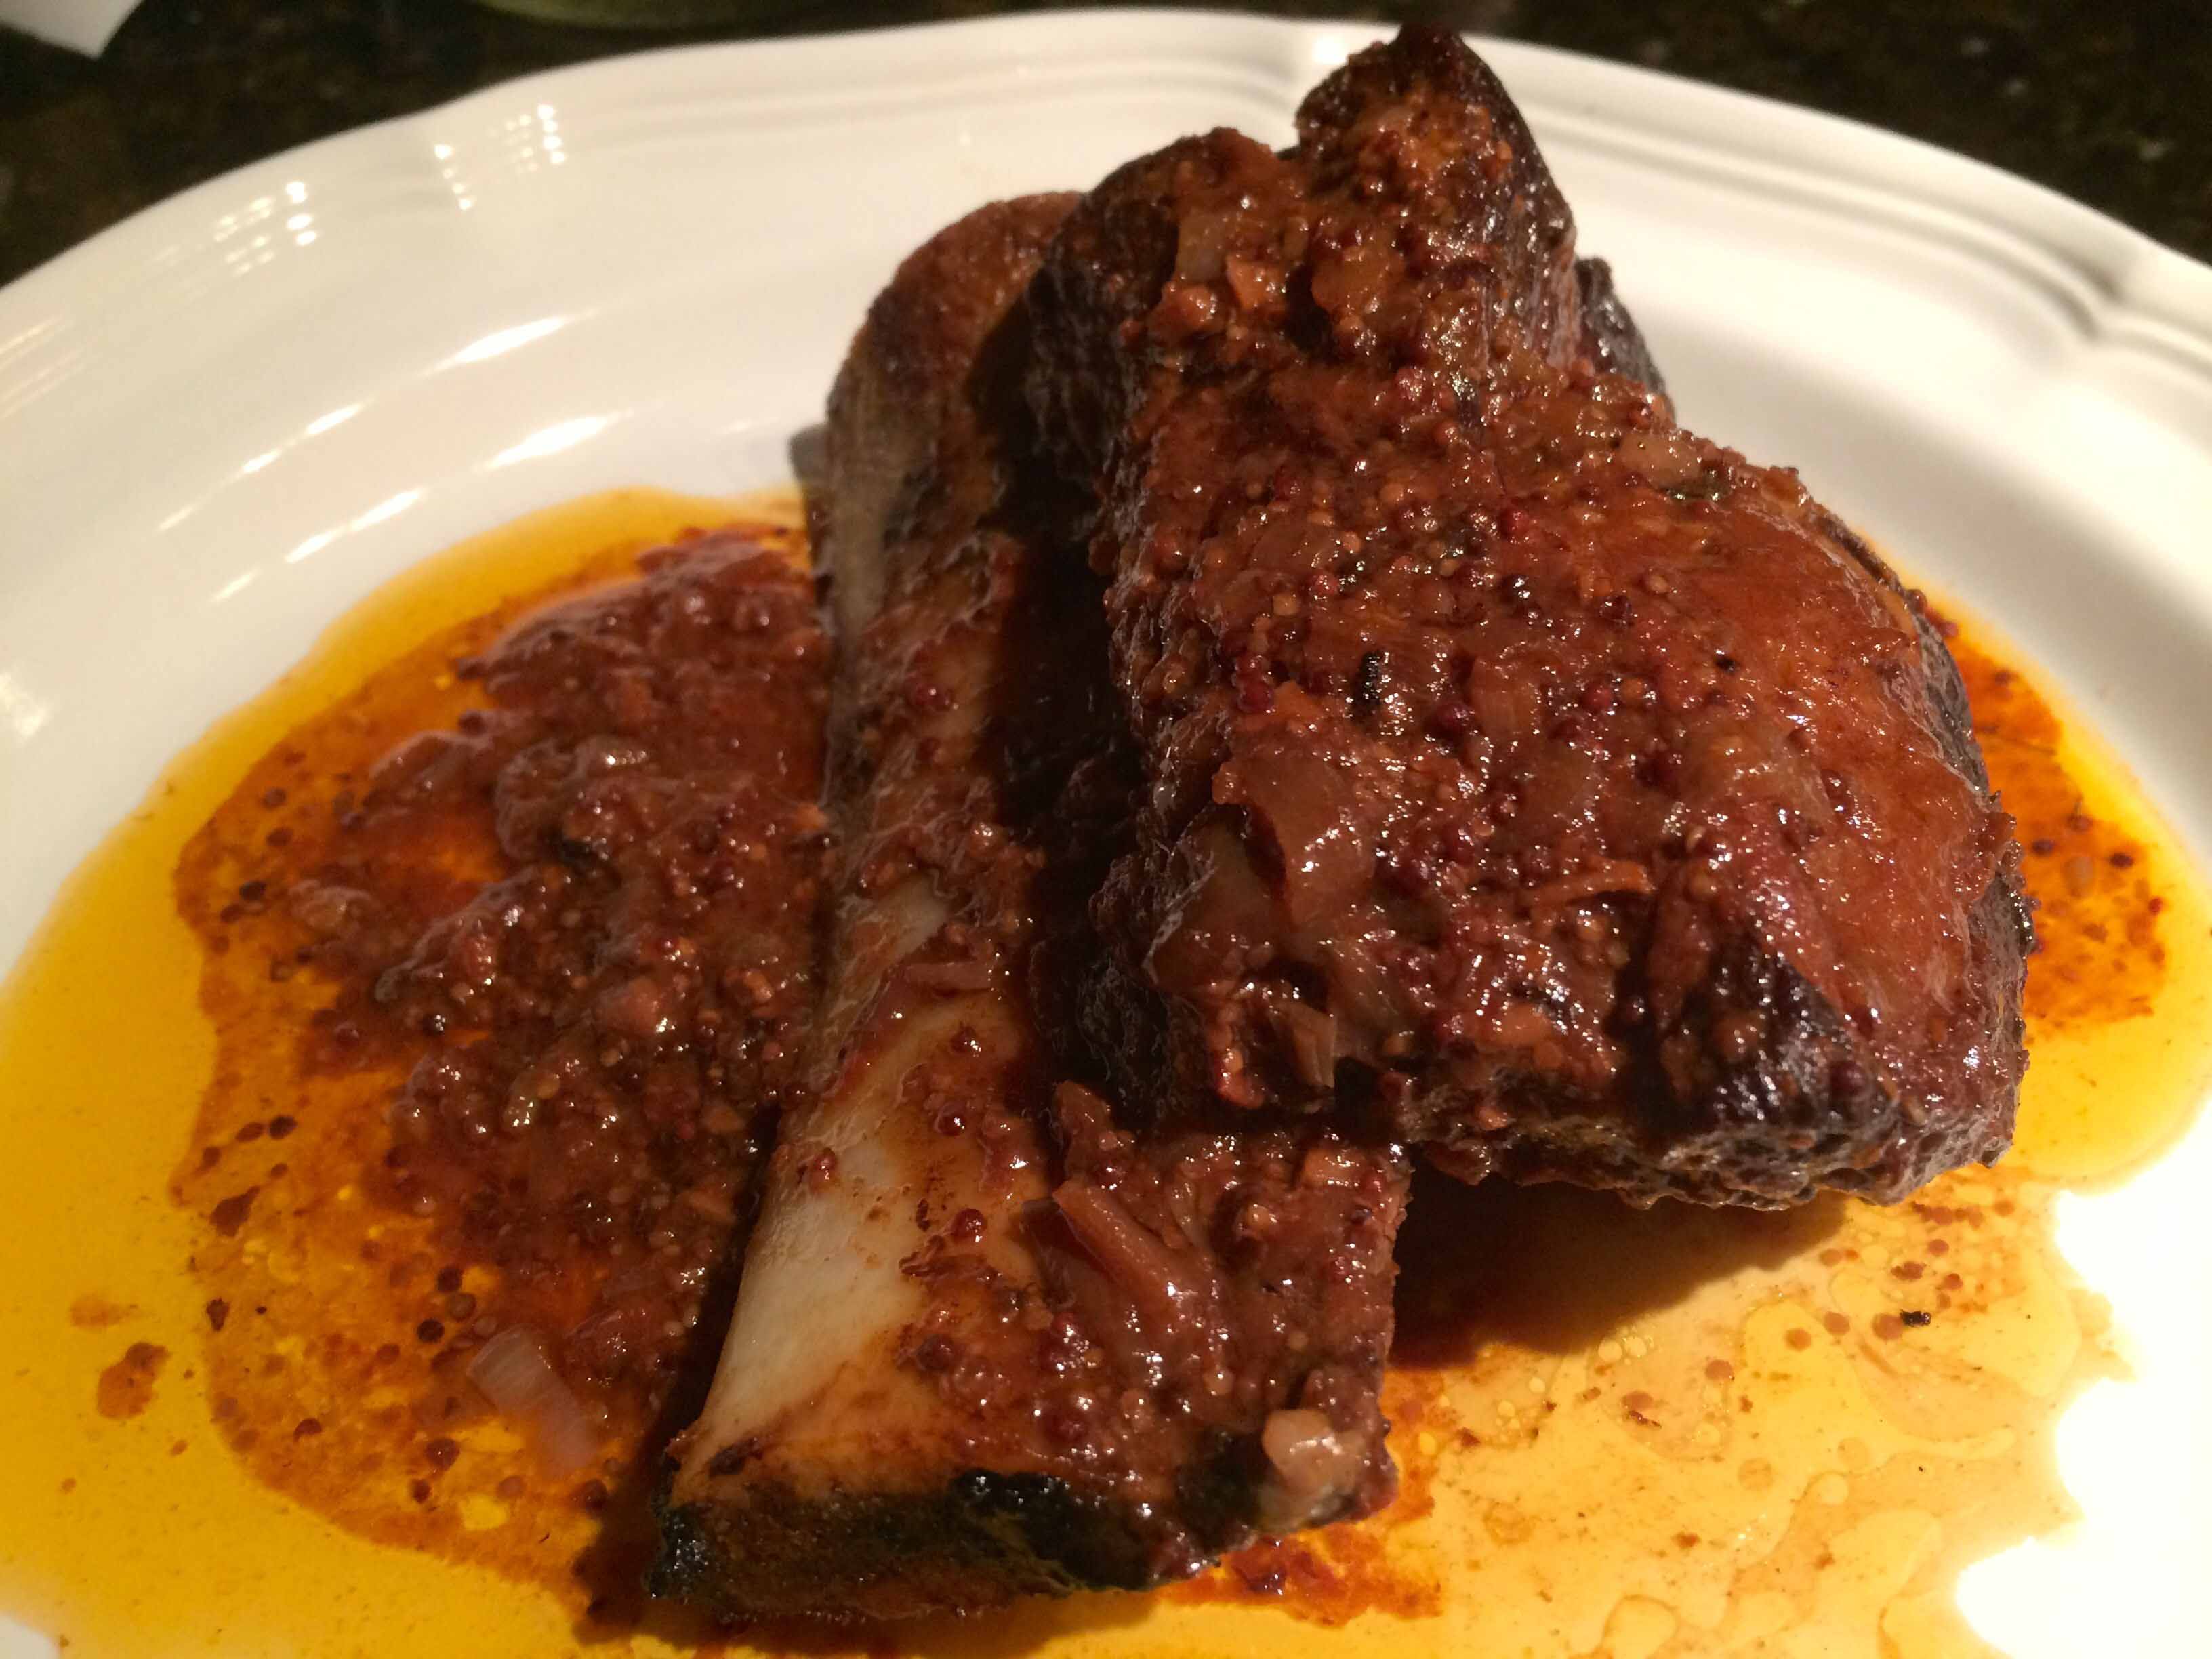
I deglazed the pan with some Côtes du Rhone along with several tablespoons of whole grain mustard. After bringing the contents of the pan to a simmer, I poured them over the ribs, tossed in a few sprigs of fresh thyme, and cooked the ribs on low for 8 hours. The recipe does call for skimming the fat from the sauce after removing the ribs from the pot. But, as you may have noticed in the first photo, I did a cursory job of this as we were so hungry.

Just after cooking
Just after cooking

I must admit that browning the ribs can make an oily mess on the stove, but it makes a big difference in the finished dish. The whole grain mustard adds a luscious complexity to the sauce.

A Google search will yield other versions of this dish by chefs like Thomas Keller and Daniel Boulud. Scicolone’s recipe, however, delivers both a richness and a purity of flavor with a minimum of work.

Does this say how good they were?

I must admit that waiting for the ribs, as their aroma permeated the apartment, was torture, but the wait was worth it. Next time, I’ll just be sure to schedule my slow cooking for when I’m not at home for most of the day.

Wine Pairing: Côtes du Rhone, Zinfandel

Pasta Ceci

ceciplatedsmall

Having survived the Great Depression, my Sicilian mother often spoke of those days when her family didn’t have much and had to make the most of what they could afford. Pasta Ceci, a simple mix of pasta and chick peas, was one of those dishes from my mother’s past that she continued to make frequently, even after her fortune improved.

Because it was so inexpensive and easy to prepare, I too made it many times when I was in grad school. I still remember when I first called my mother up for the recipe and how surprised and happy she was to share it with me. Although I have tried and enjoyed other recipes for this dish, it’s the one my mother shared with me that remains my favorite.

Pasta Ceci
For the chick peas:
1/4 cup water
3 tablespoons olive oil
1 garlic clove smashed and peeled
1 bay leaf
1 can (15.5 oz) chick peas, rinsed and drained
Salt, to taste.

For the topping:
1 tablespoon olive oil
1/2 cup fine breadcrumbs

For the finishing oil:
3 tablespoons olive oil
1/2 garlic clove minced fine
1/8 teaspoon crushed red-pepper flakes

8oz farfalle, bow-tie, pasta

To prepare the beans, place the water, olive oil, garlic, and bay leaf in a small sauce pan and cook covered, over medium-low heat for 5 to 7 minutes.

Add the chick peas, cover, and cook over low heat for about 10 minutes. When finished, remove the bay leaf and taste for salt. Keep warm.

Chick peas cooked
Chick peas cooked

While the chick peas are cooking, prepare the the topping. In a small skillet, heat the olive oil over low heat for one or two minutes. Add the breadcrumbs and toast until light brown. Stir often, to avoid burning the crumbs. When toasted, place aside.

Breadcrumbs toasted
Breadcrumbs toasted

At the same time, prepare the finishing oil. In a small skillet, heat the oil, minced garlic, and pepper flakes over low heat for about 10 minutes. The garlic should become fragrant and take on only a minimum of color. When finished, place aside.

Finishing oil
Finishing oil

Meanwhile, in plenty of boiling, well-salted water, cook the pasta, according to package directions, until al dente. Before draining, reserve a cup of the pasta water.

After draining, place the pasta in a warmed serving bowl, add the chick peas and their cooking liquid. Toss lightly; if too dry, add a tablespoon or two of the pasta water. Add the finishing oil, followed by half of the bread crumbs. Toss lightly and serve. Sprinkle the remaining breadcrumbs on the individual portions of the pasta.

Wine Pairing: Grillo, Falanghina, Torrontes

Pizza Crust

sunpizzasmall

Recently a friend on Facebook asked me for a simple pizza dough recipe. Over the years, I’ve accumulated quite a few of them, each with its own tip or trick to achieve the ideal crust. But since easy execution was the determining factor, I opted to send him the one below. (Unfortunately, I do not know the source of this recipe.)

In addition to being simple, it yields a very crisp, crunchy pizza and it’s the one I’ll typically turn to for a last-minute pie.

I use half of the recipe’s dough at a time to make a 12-inch pizza. I bake it on a pizza stone on the lowest shelf of a 500° F oven for about 15 minutes or just until the crust turns a light brown. (I store the other half of the dough in the fridge and bring it to room temperature before rolling it out.)

While we enjoy this pizza a lot, I am still looking for a way to increase its “chew factor.” Any suggestions would be appreciated.

Pizza Crust
Ingredients
3 scant cups of 00 flour
½ T salt
¾ cup warm water
½ tsp sugar
1 package yeast

Mix with paddle of a stand mixer. When it forms a ball change to dough hook and knead for 3 minutes.

Allow to rise for 2+ hours in a greased bowl, covered with plastic wrap. It should double in size.

Punch it down with your fist and divide into two equal parts.

Roll out each half into 12” or 13” pizzas. You will need some extra flour on your board or table and on your rolling pin.

More often than not, I use this crust for a Pizza Margherita and sometimes top it with either arugula and prosciutto or a fried egg. The sauce for the pizza is made from uncooked, canned crushed San Marzano style tomatoes, a little olive oil, salt, pepper, and oregano. For cheese, fresh mozzarella and some grated pecorino Romano. I finish it with some torn fresh basil and a drizzle of extra-virgin olive oil.

Wine Pairing: Chilled Gragnano or Lambrusco

Pork Chops with Sweet Vinegar Peppers

pchopsplatedsmall

Recently it seems that dishes from my childhood are finding their way to our dinner table. Whether it’s nostalgia or appetite that’s to blame, I’m not sure. But, as with last night’s pork chops with vinegar peppers, one of my mother’s favorites, reliving my past through food is always a pleasure.

For quite some time now, I’ve been trying to recreate this dish with varying degrees of success. Most of my attempts have yielded good results, but last night’s was the closest I’ve come to duplicating my mother’s. Most of the recipes I’ve read, and there are many for this Italian-American favorite, call for hot cherry peppers or pickled pepperoncini. However, my mother never used them and opted for pickled bell peppers, whose sweetness she tempered with cider vinegar.

Despite being cooked for a longer time than is fashionable these days, my mother’s chops were always moist and succulent. But back then, hogs were bred more for flavor than leanness. In order to recapture this quality, I use heritage pork when available that’s sourced locally.

The only hurdle left in trying to duplicate this dish perfectly is finding the brand of peppers she used, namely B and G Sweet Vinegar Peppers. Although last night’s Roland brand’s were good, they somehow were not just the same.

Pork Chops with Sweet Vinegar Peppers
Ingredients
2 1-inch thick, bone-in pork chops
Kosher salt
Fresh ground pepper
Sugar
1/4 cup extra virgin olive oil
1 garlic clove, peeled and lightly smashed
1/4 cup dry white wine
1/4 cup cider vinegar
2 whole red long peppers, sliced 1-inch thick

Dry the chops well with paper towels and season one side with salt, pepper, and a small pinch of sugar

Heat the oil and garlic clove in a sauté pan large enough to hold the chops comfortably.

When the oil is hot, add the chops seasoned side down and brown for about 5 minutes. Season the top side with salt and pepper, and then turn and brown on the second side for about another 5 minutes. Be sure to remove the garlic when it starts to brown.

Pork chops browned
Pork chops browned

When the chops are browned, place them on a plate and discard most of the fat from the pan, retaining a tablespoon.

Add the wine and the vinegar, scraping up any of the browned bit on the bottom of the pan. Return the chops, along with any juices from the plate, to the pan turning once to coat with sauce. Add the sliced peppers, cover, and cook over low heat for about 5 to 8 minutes or until the chops are cooked.

Chops and peppers in the pan

I served the chops last night with some of the sweetest summer corn I’ve had this season. Thought not a traditional accompaniment, it provided a perfect counterpoint to the savory chops.

Wine Pairing: Syrah, Chardonnay

Slow-Roasted Salmon

salmroasmall

Sometimes when entertaining you need to adjust your menu to a guest’s needs. For a recent dinner party, I was planning a menu around grilled baby lamb chops, when one of my friends called and announced that she just had gone through oral surgery. “Chewing may be a problem,” she said.

Although a meatloaf was the first dish that came to mind as a replacement, I opted for a more elegant alternative: slow-roasted salmon with cherry tomatoes and couscous that I haven’t made in quite a while. The center-cut piece of salmon slowly roasted over a bed of herbs would pose no problem and the tomato and parsley studded couscous would be an easy-to-chew side.

Slow-Roasted Salmon with Cherry Tomatoes and Couscous from Bon Appetit. (Click here for the original recipe.)

INGREDIENTS
YOGURT SAUCE
1 cup plain Greek yogurt (I used full fat.)
1/2 cup plain yogurt
3 tablespoons chopped fresh dill
2 tablespoons chopped fresh chives
1 tablespoon finely grated lemon zest
Kosher salt

SALMON
6 tablespoons olive oil, divided (I didn’t measure, but used considerably more, especially in the pan.)
1/2 bunch dill fronds
1/2 bunch thyme sprigs
1 3-pound piece center-cut skin-on salmon fillet, preferably wild king, pin bones removed (I opted for farmed salmon, which almost eliminates hunting for pin bones.)
Kosher salt
8 ounces small cherry tomatoes on the vine (optional)

TOMATOES AND COUSCOUS
2 cups cherry tomatoes, halved
4 tablespoons olive oil, divided
2 tablespoons chopped flat-leaf parsley
2 tablespoons za’atar (optional)
Kosher salt
2 cups Israeli couscous (I went for quick cook, regular couscous.)
1 tablespoon unsalted butter (I omitted the butter.)

PREPARATION

YOGURT SAUCE
Mix first 5 ingredients in a medium bowl until well combined. Season with salt. DO AHEAD: Can be made 3 days ahead. Cover and chill.

SALMON
Preheat oven to 325°. Pour 4 Tbsp. oil in a roasting pan just large enough to fit the salmon. Make a bed of herbs in bottom of pan; top with salmon, skin side down. Drizzle salmon with remaining 2 Tbsp. oil and season with salt. Top with tomatoes, if using. Bake until salmon is just cooked through in the center (a small knife will slide easily through flesh), 25–30 minutes.

TOMATOES AND COUSCOUS
Toss tomatoes with 3 Tbsp. oil, parsley, and za’atar, if using, in a medium bowl. Season to taste with salt. Set aside.

Bring a medium pot of lightly salted water to a boil. Add couscous and cook until tender, about 7 minutes. Drain couscous; transfer to a large bowl. Stir in butter and remaining 1 Tbsp. oil. Season to taste with salt. Gently fold tomatoes into couscous.

Use a large spoon or fork to serve salmon, leaving skin in pan. Serve with yogurt sauce and couscous.

Wine Pairing: Pinot Noir, Sancerre, Sauvignon Blanc

Frittata: A Memory of Things Past

frittataplatedsmall

One of my favorite kitchen memories from growing up is of my aunt Carlotta making frittatas. They would vary in size from small to large, depending on how many of us they were meant to serve. What they were made with, other than eggs, was determined, more often than not, by what needed to be used up in the fridge. Sometimes it would be pasta; other times, potatoes or peppers that were about to turn; still others, by an overabundance of produce like zucchini or tomatoes. The amount of these items also played a role in determining the frittata’s size.

Way before the age of non-stick, my aunt used black-and-white speckled enamelware fry pans, heated with sufficient oil to sauté or sometimes even fry, as with potatoes, the frittata’s filling. As the ingredients cooked, she would beat-up the eggs with a little milk or even water, grated cheese, almost always pecorino-Romano, parsley, salt and pepper.

When the filling was ready, she lowered the flame and slowly poured the beaten eggs into the pan. Then she would watch until the eggs started to set around the edge. With her wooden spoon, she gently pushed the set portion toward the center and let the unset eggs run into the sides of the pan. She continued this process until the top of the frittata was no longer runny yet still moist.

Eggs almost set, just before flipping

Then the tricky moment. She would go to the cupboard and get out a plate large enough to cover the fry pan. If I tried to talk at that moment, she would shush me. She placed the plate on top of the pan, and then holding the plate in place with one hand and the pan with other, she would swiftly invert the pan to release the frittata. With a confident smile (and maybe a sigh of relief), she would slide the frittata back into the pan to finish cooking.

After inverting, cooked side up

The top of the frittata was always golden brown, with bits of the filling peeking out, intimating its flavors. My favorite, however, was her spaghetti frittata with its crusty fried pasta coating each side.

Memories like these always come back to me vividly whenever I make a frittata. I feel aunt Carlotta by my side and even seem to hear her “Shush” when I flip mine. Recalling the past is one of the reasons I cook today; as the food does my body, these memories sustain my soul.

On the cutting board, ready to be served.

For last night’s frittata, I used the leftover pasta alla checca from Sunday night and a leftover sausage from Monday’s cannellini bean and sausages. I roughly chopped the sausage and fried it with the pasta just until the ditali started to crust. I then added ten eggs beaten with about a cup of pecorino Romano and a tablespoon of milk, and seasoned with salt and pepper. And then I cooked it as described above.

Looking the pictures in this post, I think my aunt would have been proud of me and happy to know that she’s still a part of my life.

Wine Pairing: Sauvignon Blanc, Gavi, Dry Rose

Beans and Sausage

sausagesplatedsmall

Earlier this month, I posted a Tuscan recipe from the Food Network for sausages and cannellini all’uccelletta that has always been one of our favorite weeknight dishes. However, I recently came across a variation on this recipe in Giuliano Hazan’s Every Night Italian.

The ingredients are almost identical, except for fresh sage leaves replacing fresh bay; however, in preparing this dish, Hazan skips the browning of the sausages and opts to braise them slowly along with the beans and tomatoes. (This also makes for a less messy stove top.)

This small variation makes for a big difference in taste. I found that both the sauce and the beans take on more flavor from the sausage and the sausages themselves are moister and richer in texture.

Of course, the southern Italian in me added just a pinch of Calabrian red-pepper flakes to spice things up a bit.

Beans and Sausage (Salsicce e Fagioli) adapted from Giuliano Hazan’s Every Night Italian.

2 tablespoons extra-virgin olive oil, plus more for serving
3 large garlic cloves, lightly crushed and peeled
1 tablespoon fresh sage leaves, coarsely chopped
1 can (15 oz) cannellini beans drained and rinsed
1 can (16 ounce) crushed Italian tomatoes
Salt
Freshly ground black pepper
1 pinch dried red-pepper flakes
1 pound sweet Italian pork sausages (without fennel seeds)

Put the olive oil and garlic in a heavy bottomed sauté pan large enough to hold the sausages in a single layer. Place it over medium-high heat and sauté the garlic cloves until lightly browned on all sides.

When the garlic has browned, discard it and add the chopped sage to the pan and cook stirring for about 1 minute. Add the tomatoes and beans. Season with salt and black pepper, keeping in mind that the sausages are already fairly salty. Add a pinch of dried red pepper flakes.

After adding the sausage to the pan

Add the sausage. When the tomatoes begin to bubble, turn the heat down to medium-low. Cover the pan and cook at a gentle simmer until the sausages feel tender when pricked with a fork, about 20 minutes. Check the pan occasionally and add a little water if all the liquid in the pan evaporates before the sausages are done. Also turn the sausages once with tongs, being careful not to pierce them.

Serve hot, drizzled with additional extra virgin olive oil and accompanied by crusty bread.

Wine Pairing: Barbera d’Asti, Rosso di Montalcino

Pasta alla Checca

chplatedsmall

Returning from a weekend of wedding revelry and, needless to say, over indulgence, we chose to make one of our favorite summertime pastas for dinner last night. It is also one of the simplest to prepare, Pasta alla Checca. It requires a minimum of preparation and, except for the pasta itself, no cooking. It’s also quintessentially seasonal, using summer tomatoes and fresh basil.

If you decide to make this dish, I suggest that you only do so when you can find the best tomatoes of the season and that they are perfectly ripe as they constitute the soul of this pasta. The extra-virgin olive oil should also be the finest and the mozzarella the creamiest you can find.

There are many variations on this dish. My recipe is for the Roman version of Pasta alla Checca from 1,000 Italian Recipesby Italian-food authority Michelle Scicolone. Her recipes are always authentic and, I might add, never-fail.

Pasta alla Checca Adapted from 1,000 Italian Recipes

3 medium size ripe tomatoes
1/3 cup extra-virgin olive oil
1 small garlic clove, minced (I used a large clove, grated on a Microplane rasp.)
Salt and freshly ground pepper
20 basil leaves
1 pound tubetti or ditalini (I used the slightly larger ditali pasta.)
8 ounces fresh mozzarella, cut into small dice (Be sure to us “fresh” as opposed to “low-moisture” mozzarella.)

1. Cut the tomatoes in half and remove the cores, Squeeze out the tomato seeds. Chop the tomatoes and place them in a bowl large enough to hold all of the ingredients. (Rather than squeezing our the seeds, I used a small spoon to remove most of them to avoid loosing too much of the juice.)

2. Stir in the oil, garlic, and salt and pepper to taste. Stack the basil leaves and cut them crosswise into thin ribbons. Stir the basil into the tomatoes. Cover and leave at room temperature up to 1 hour. (Be sure to taste carefully for adequate salt.)

The chopped tomatoes, basil, and olive oil

3. Bring at least 4 quarts of salted water to a boil in a large pot. Add the pasta and stir well. Cook over high heat, stirring frequently, until the pasta is al dente, tender yet still firm to the bite. Drain the pasta and add it to the bowl with the pasta. Add the mozzarella and toss again. Serve immediately. (Be sure to toss the pasta until the mozzarella just begins to melt.)

With the pasta and mozzarella

Wine Pairing: Cerasuola d’Abruzzo, Dry Rose

Looking at Leftovers

leftoverrcsmall

Having grown up when microwave ovens looked more at home in the Jetsons’ kitchen than in those of most Americans, I still remember when at least one of our weekday meals comprised leftovers, carefully and even lovingly heated up either on the stove or in the oven. Sometimes the remains of a meal were metamorphosed into an entirely new dish, a pasta, a frittata, even a hash. Other times, especially with stews and casseroles, they were simply brought back up to serving temperature over a low flame or in a warm oven.

The few times I’ve knowingly had microwaved food (I can’t account for every restaurant meal I’ve had), it’s had a strange characterless flavor and even more unnatural texture. The extreme heat of the first bite was quickly followed by cooler and sometimes even frosted morsels. I haven’t even mentioned that weird smell that comes as the food is reheated in one of these modern wonders. When I worked in an office, I recall going into the lunchroom when co-workers were “cooking” their microwave gourmet meals in plastic plates. I wasn’t sure which was responsible for the aroma, the food or the plastic.

Today our microwave is used to soften a stick of butter that we may need for a recipe or to jumpstart the baking of a potato. I can’t think of anything else.

For leftovers, I go back to my roots and, like my mother and aunt, use either my stove or my oven to do the restoration work.  The food is always as good and sometimes even better than it was on its debut. Such was the case last night, when I reheated our roasted chicken thighs from Monday night with our ratatouille from Tuesday. I placed both in a heavy bottomed pan, added a small amount of water, and cooked them covered for about 20 minutes starting with a medium flame followed by a low one. As they reheated, I prepared some fresh Basmati rice as a side. When finished, the chicken thighs were infused with the flavors of the ratatouille and the ratatouille was even more delicious than on the first night.

The old way of reheating may indeed take longer than the modern, but the 20 or 30 minutes difference is, in my opinion, well worth it.

Wine Pairing: Dry Rose

Spaghetti with Zucchini and ‘Nduja

ndujaplatedsmall

Despite the noise, crowds, traffic, costs and other negatives of living in New York City, there are plenty of positives and, for me, one of the best is the ready availability of almost any culinary ingredient for most ethnic cuisines.

I was reminded of this yesterday when, paging through an old copy of the now sadly defunct American edition of La Cucina Italiana, I came across a recipe for spaghetti prepared with ‘nduja, a spreadable spicy salume from Calabria. Not at all familiar with this ingredient, a Google search provided me with plenty of background and within minutes I found a source for it a few blocks from home.

This highly spiced, fiery red Calabrian sausage is packed with plenty of flavor and so much red pepper that it’s thought by some to be an aphrodisiac. And given yesterday’s sweltering 90° F temperatures, I thought spicy spaghetti with zucchini and ‘nduja was the perfect dish. The delicately flavored zucchini provide a moderating counterpoint to the raw heat of the sausage.

Spaghetti with Zucchini and ‘Nduja
Fine sea salt (I used Kosher salt.)
1/4 cup extra-virgin olive oil
1 1/2 pounds zucchini, grated using the larger holes of a box grater
3 1/2 ounces ’nduja, removed from casing (scant 1/2 cup packed)
1 pound spaghetti

Bring a large pot of salted water to a boil.

Meanwhile, in a large nonstick skillet, heat the oil over medium-high heat until shimmering. Add zucchini, 1/4 teaspoon salt, and 1 tablespoon water. Reduce heat to medium; cook, stirring occasionally, until tender, about 10 minutes. (Rather than a non-stick, I used a stainless-steel skillet.)

ndujazucchinismall
Sauteing the zucchini

Add half of the ’nduja; stir with a wooden spoon, breaking up the meat, until it has melted into the sauce. Remove from heat.

After adding the 'nduja
After adding the ‘nduja

Boil pasta until al dente. Reserving 1/4 cup of the pasta cooking liquid, drain pasta, and then transfer to a large serving bowl. Add zucchini mixture and pasta cooking liquid; toss to combine. Divide pasta among serving bowls. Serve immediately, topped with the remaining ’nduja. (Add the pasta cooking liquid judiciously; you may not need the full amount.)

'Nduja out of casing
‘Nduja out of casing

Note: An internet search for ’nduja should provide sources for purchasing it. In New York City, it is available at Buon Italia in Chelsea Market and I believe at Murray’s Cheese and possibly at Eataly.

Wine Pairing: Copertino, Zinfandel