Calamari in Cassuola

IMG_5942sm

For some reason, I really don’t know why, I’ve always been afraid to cook calamari. As I was growing up, it was always one of my favorite meals on a Friday, when meatless meals were still mandatory for Catholics. More often than not, my aunt would prepare them stewed in a simple marinara sauce. They were either whole, stuffed with softened white bread that she combined with the chopped tentacles, eggs, and parsley, or cut up into rings. The stuffed version were usually served with pasta; the rings, with friselle, which might best be described as thick, rectangular, twice-baked bread biscuits, which were used to sop up the sauce. Once in a while, my aunt would also serve them cut into rings, lightly battered, and deep-fried, accompanied only by lemon wedges—but never with tomato sauce.

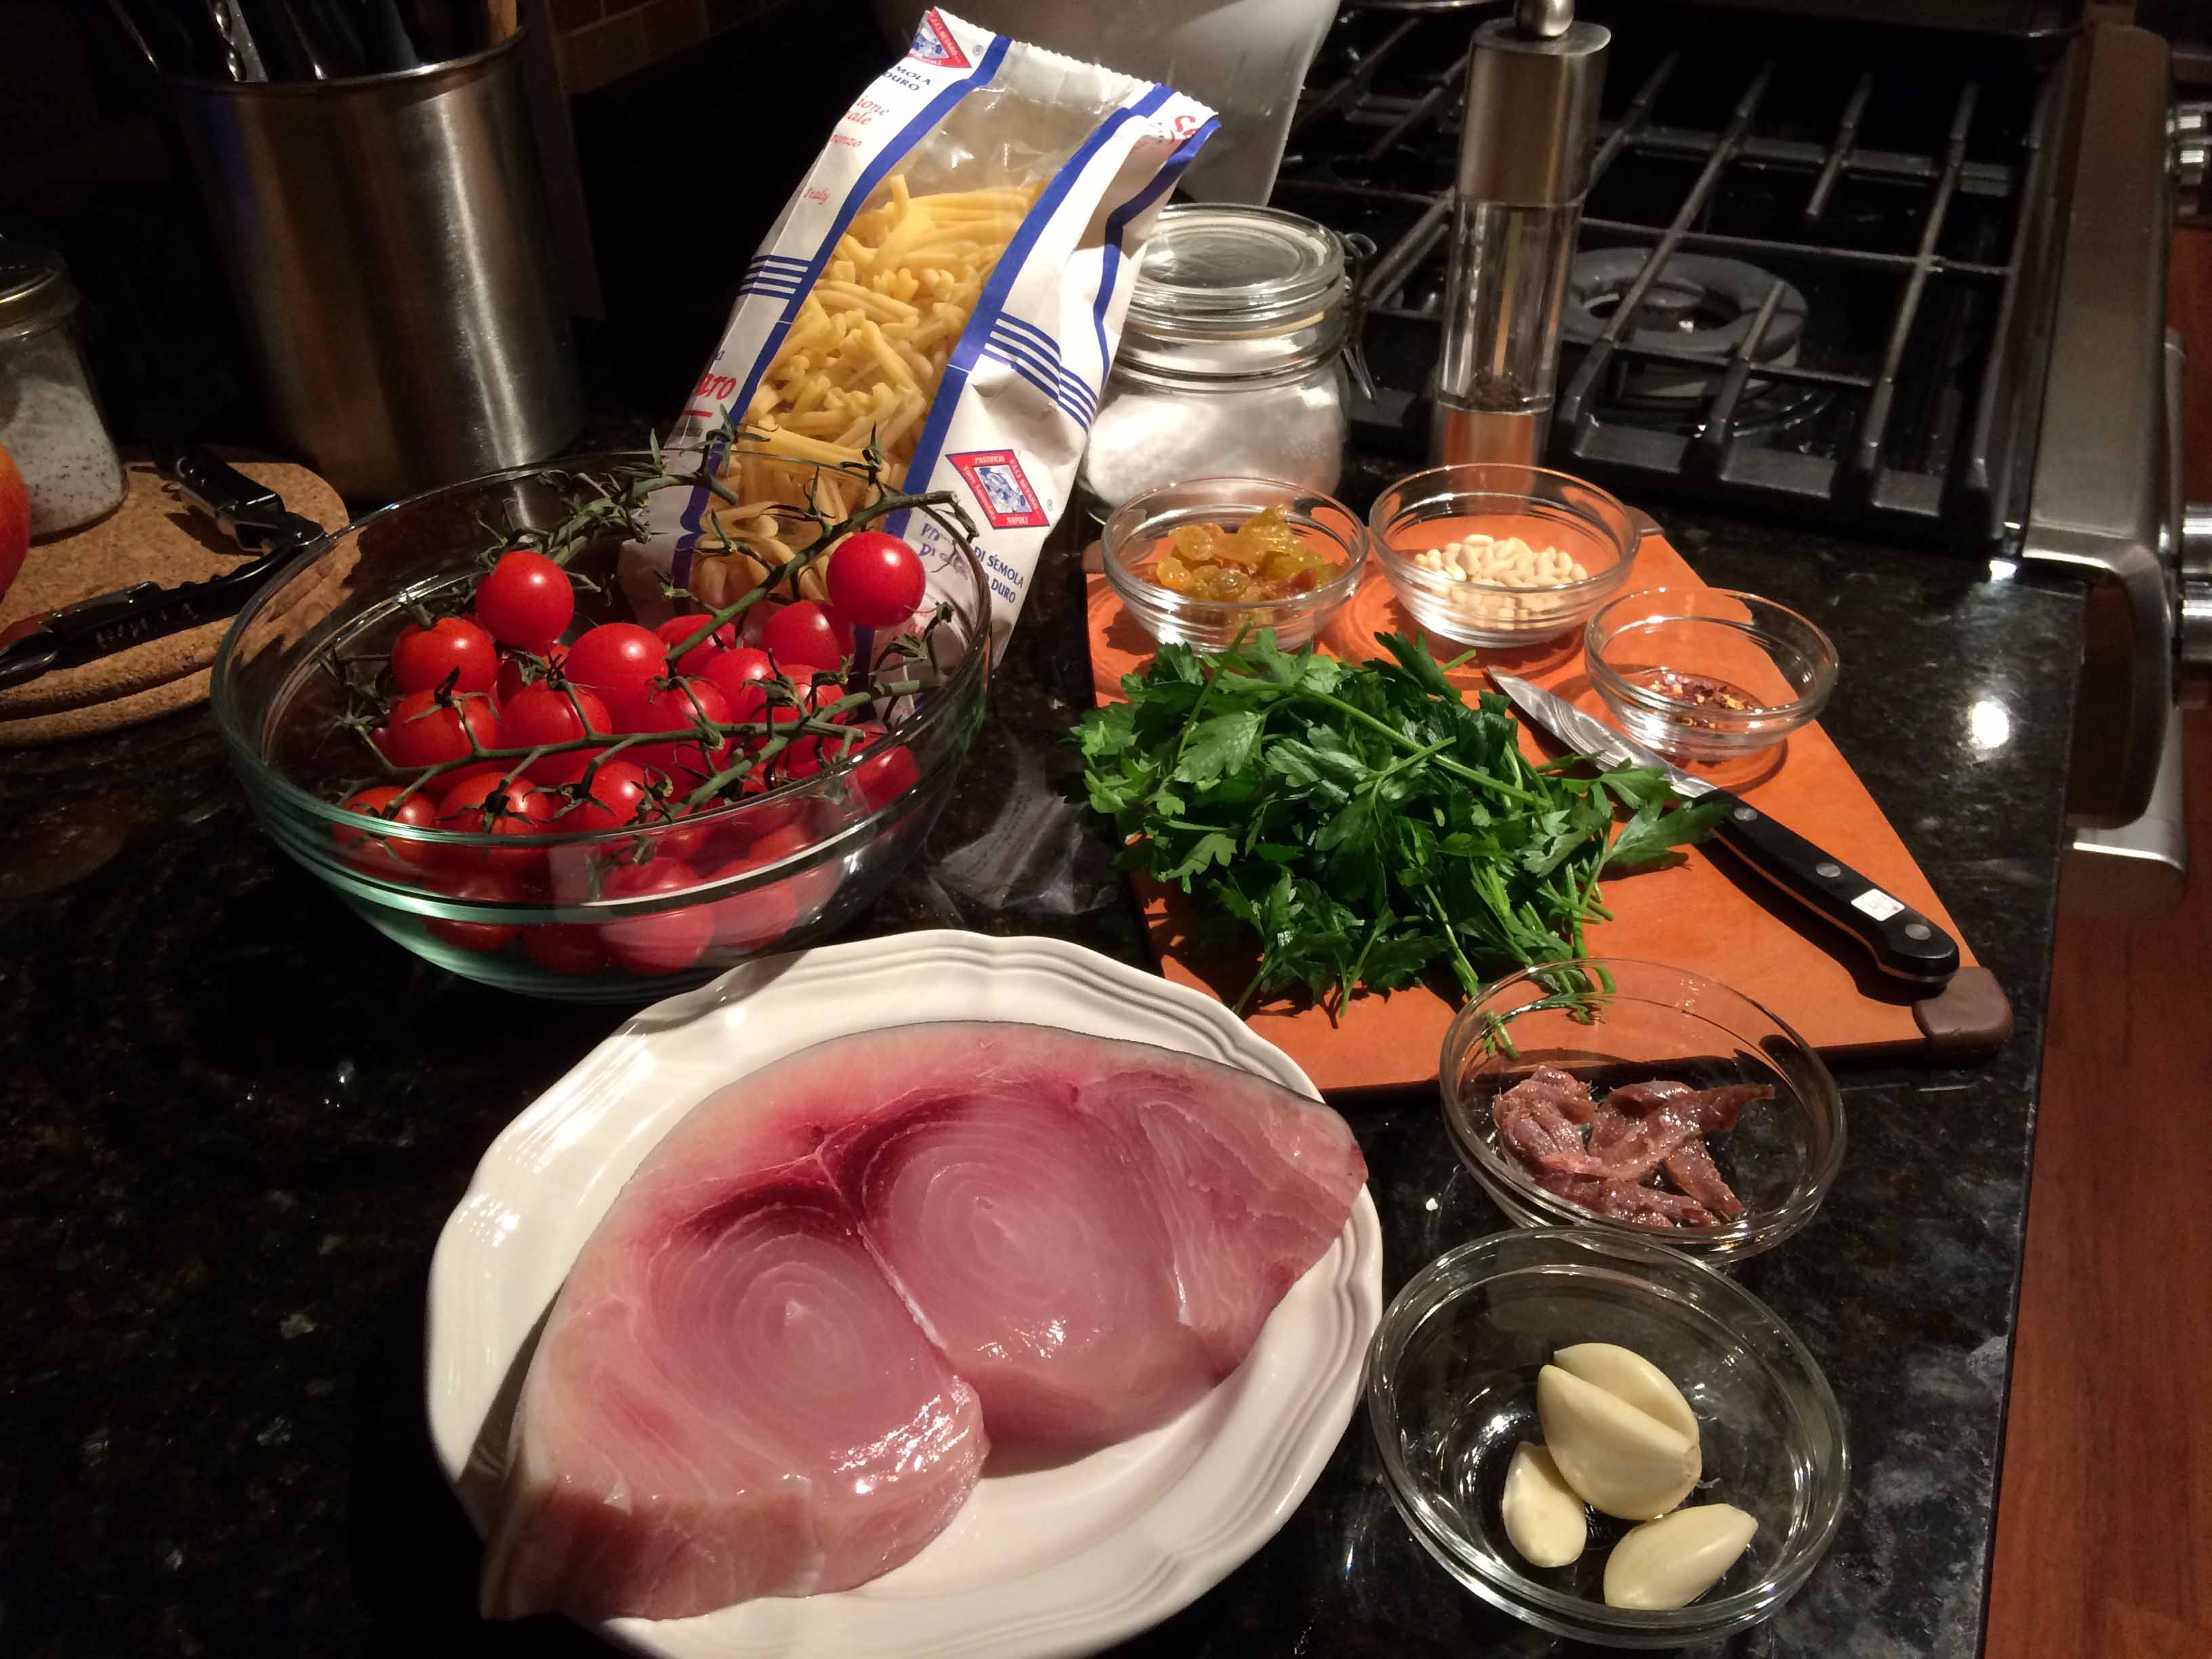
Wanting to recreate these dishes at home, I eventually confronted my fear of cooking these delectable creatures and started to deep fry calamari with, I might add, considerable success. Cooking them in sauce, however, continued to remain a challenge—until last Friday. That morning, I had intended to buy some Manila clams, which I intended to cook with Sardinian fregola. But when I got to the fish market, I spotted some beautiful calamari, glistening a lustrous white interlaced with light purple from the tentacles. I decided that it was time to take the plunge and stew them in tomato sauce.

Although I was confident about the sauce, I wasn’t quite sure how long I needed to cook the calamari. Almost every source I consulted warned against overcooking them, which would make them rubbery. Indeed, I knew this from my experience with frying. In fact, the majority of recipes I read suggested preparing the sauce separately and then adding the squid and cooking them for two minutes. Somehow, I wasn’t comfortable with this method, as I really wanted my sauce to be deeply flavored with the calamari and vice versa. I was certain that my aunt simmered her calamari slowly, but I wasn’t sure for how long.

Finally, I turned to one of my go-to books on Neapolitan cooking, Naples at Tableby Arthur Schwartz. It was here that I found a recipe that resembled closely my aunt’s preparation. It called for preparing a classic marinara and adding the calamari to the sauce after the first five minutes of cooking. The fish and the sauce are then gently simmered uncovered for about 30 minutes or until the sauce has thickened and the calamari are tender.

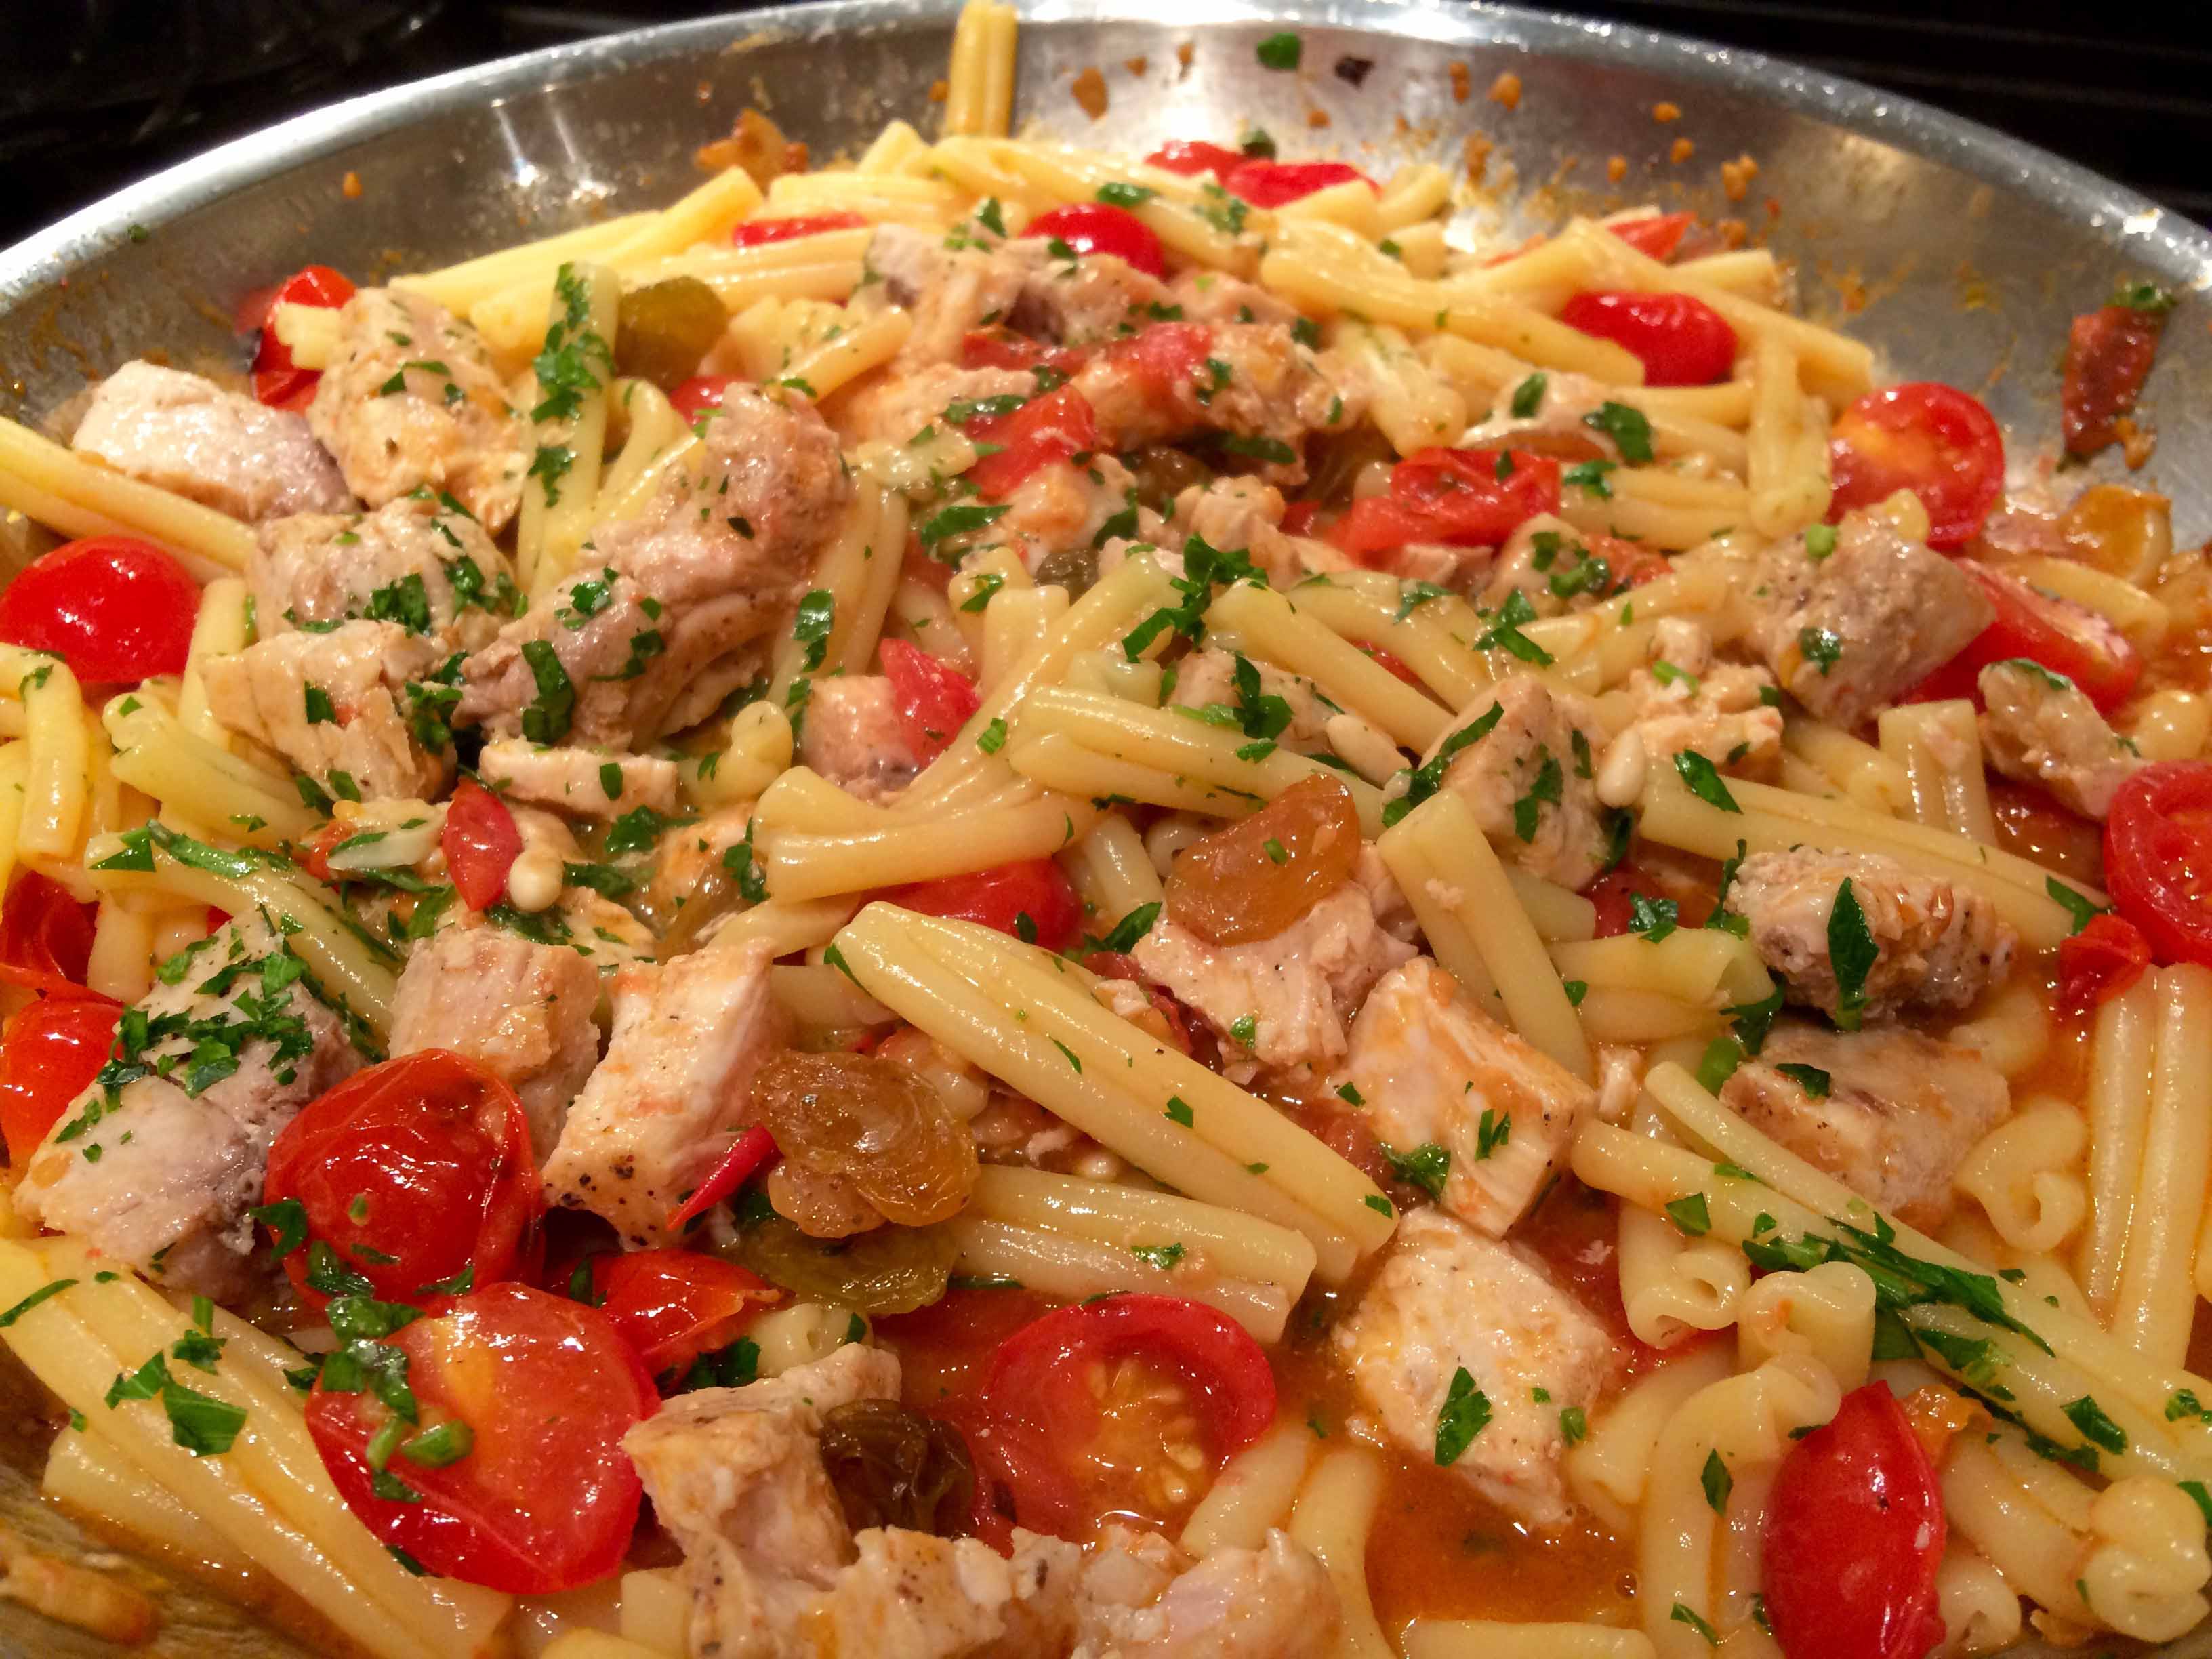
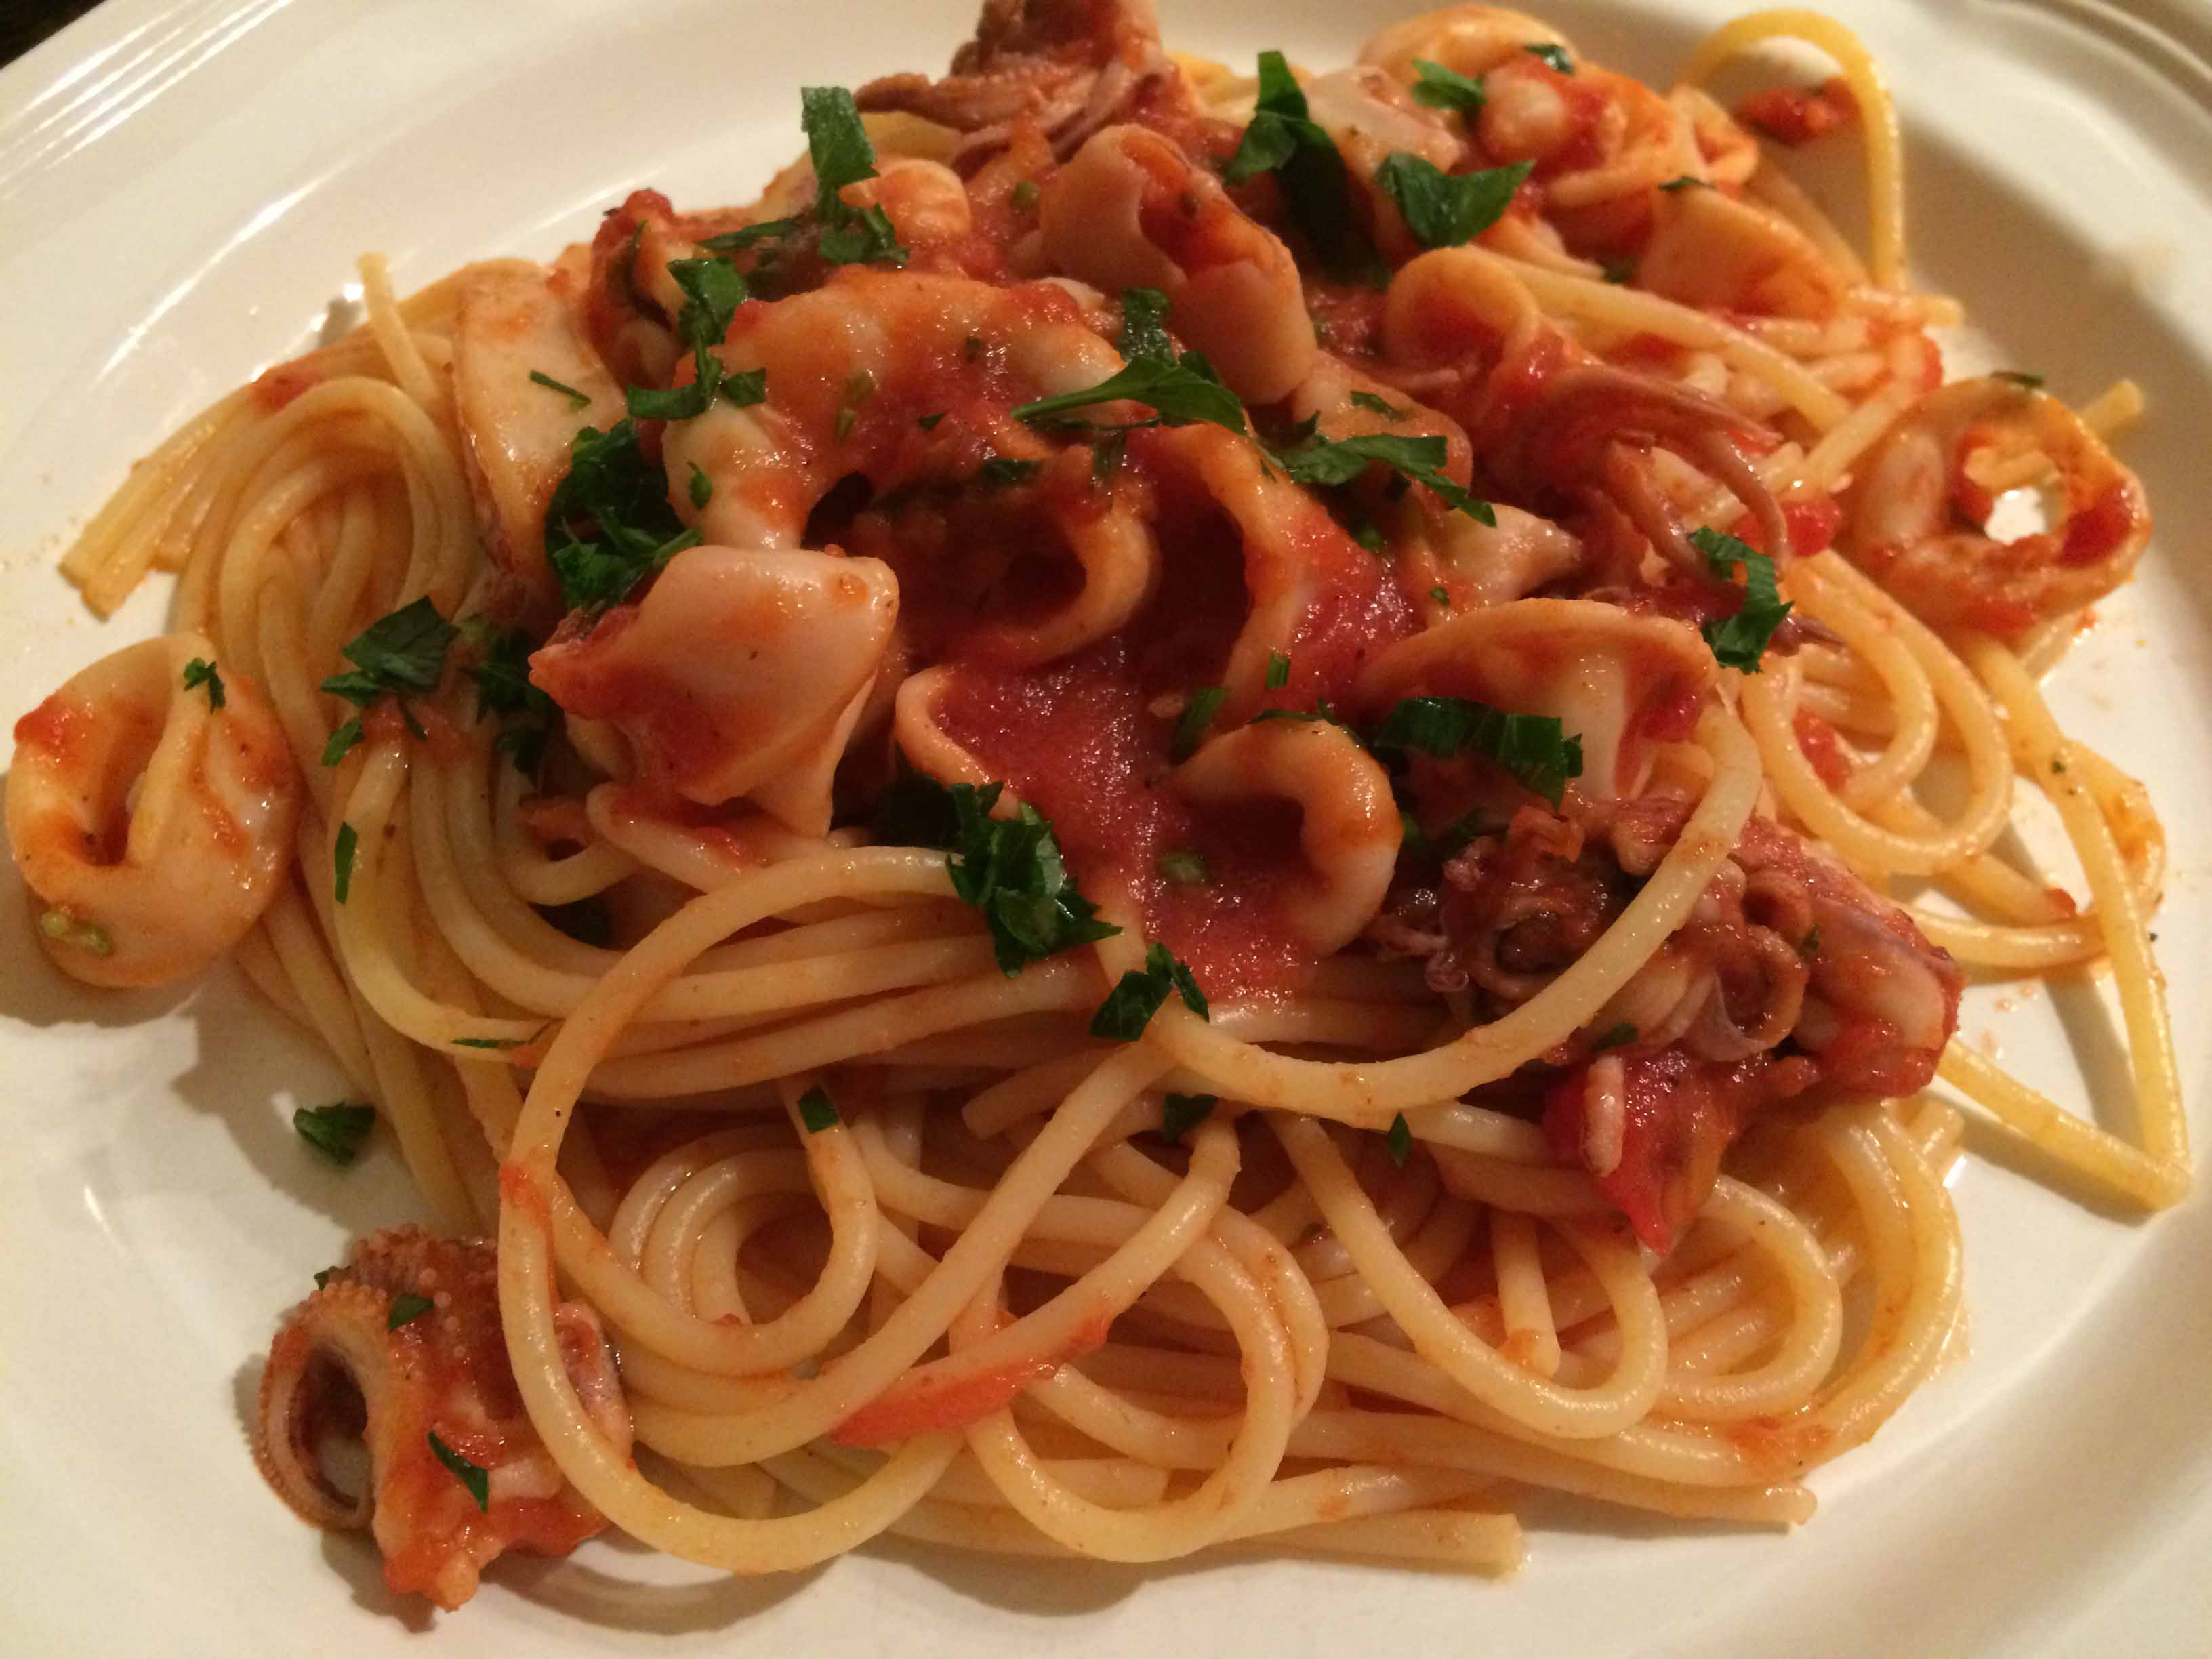
This was the recipe I used, and with some only minor variations (adding some salt and increasing the amount of tomatoes), I came very close to replicating my aunt’s stewed calamari. I served them over pasta. Next time, however, I’ll stuff them.

Calamari In Cassuola (Squid Stewed with Tomatoes) adapted from Naples at Table by Arthur Schwartz

The ingredients
The ingredients

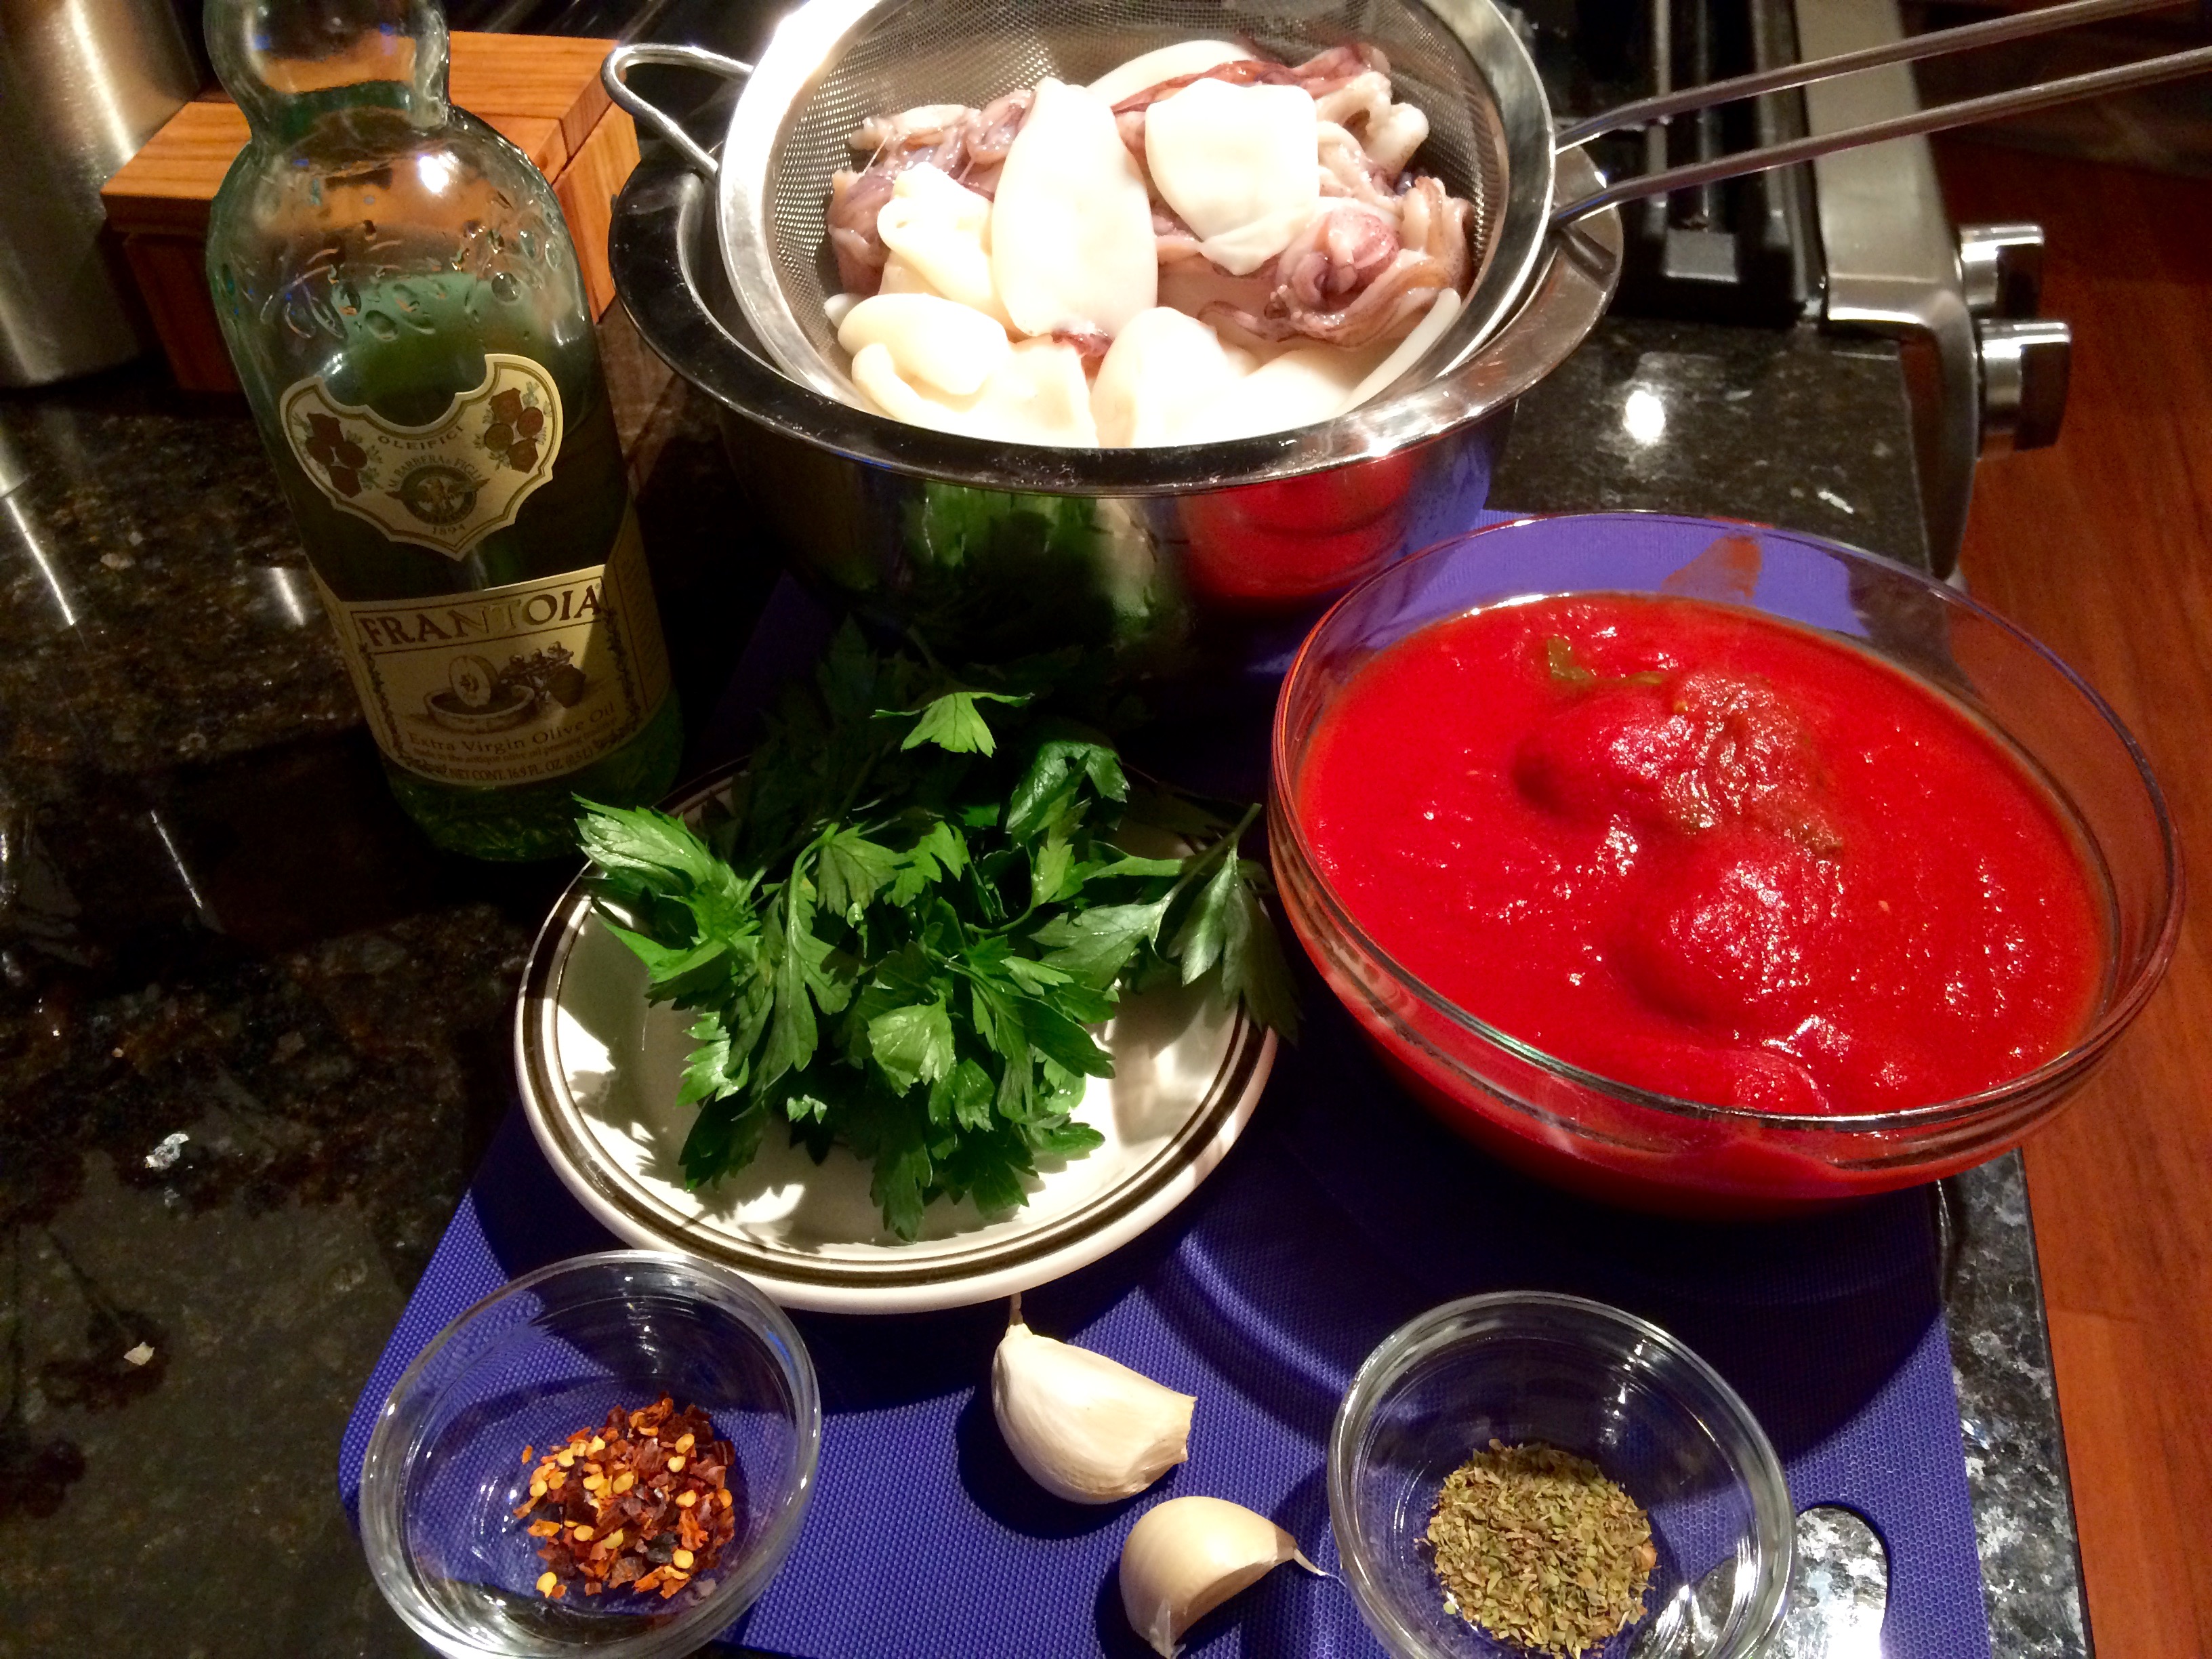
3 tablespoons extra-virgin olive oil
2 large cloves garlic, lightly smashed
¼ teaspoon or more hot red pepper flakes
1 28-ounce can imported whole peeled tomatoes, preferably San Marzano, with their juices
¼ teaspoon dried oregano
Salt to taste
1½ fresh, cleaned calamari cut into ¼-inch rings, tentacles cut in half
¼ cup finely cut flat-leaf parsley

The cut calamari
The cut calamari

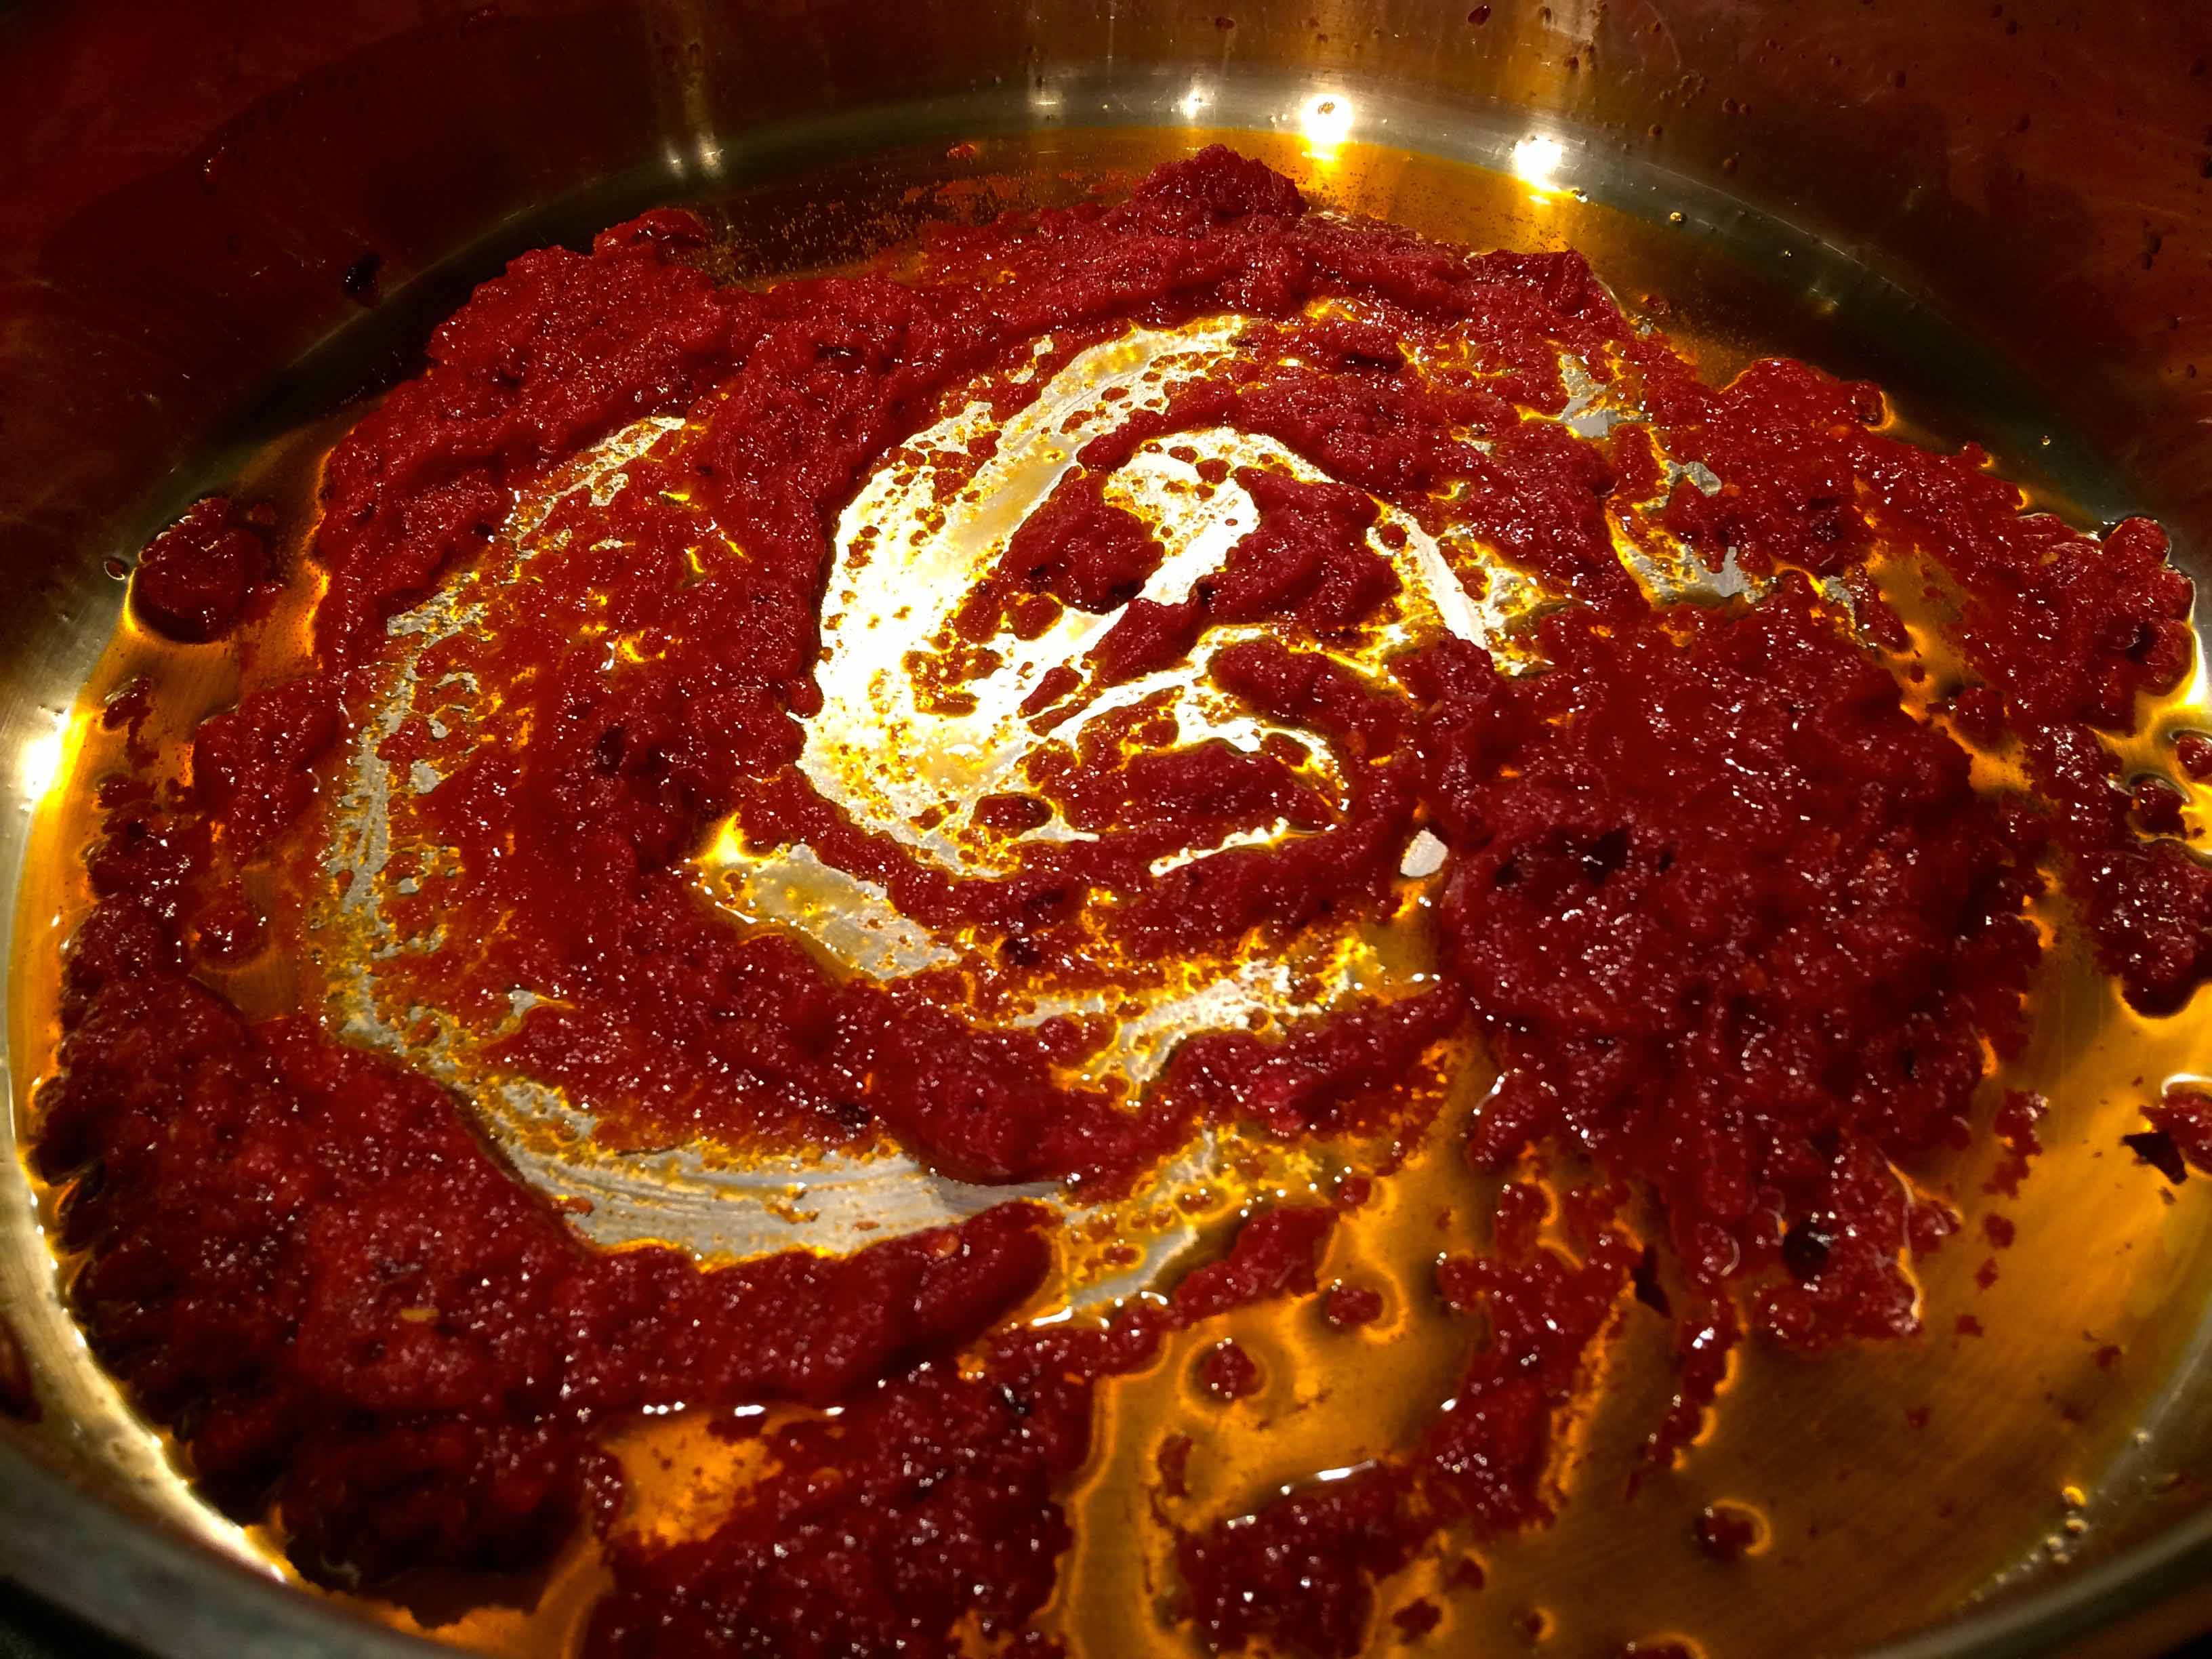
1. In a 2½ – to 3-quart saucepan or stovetop casserole, over low heat, combine the olive oil, the garlic, and the hot pepper. Cook until the garlic is soft and beginning to color on all sides, pressing the garlic into the oil a few times to release its flavor. Remove the garlic.

The cooked garlic
The cooked garlic

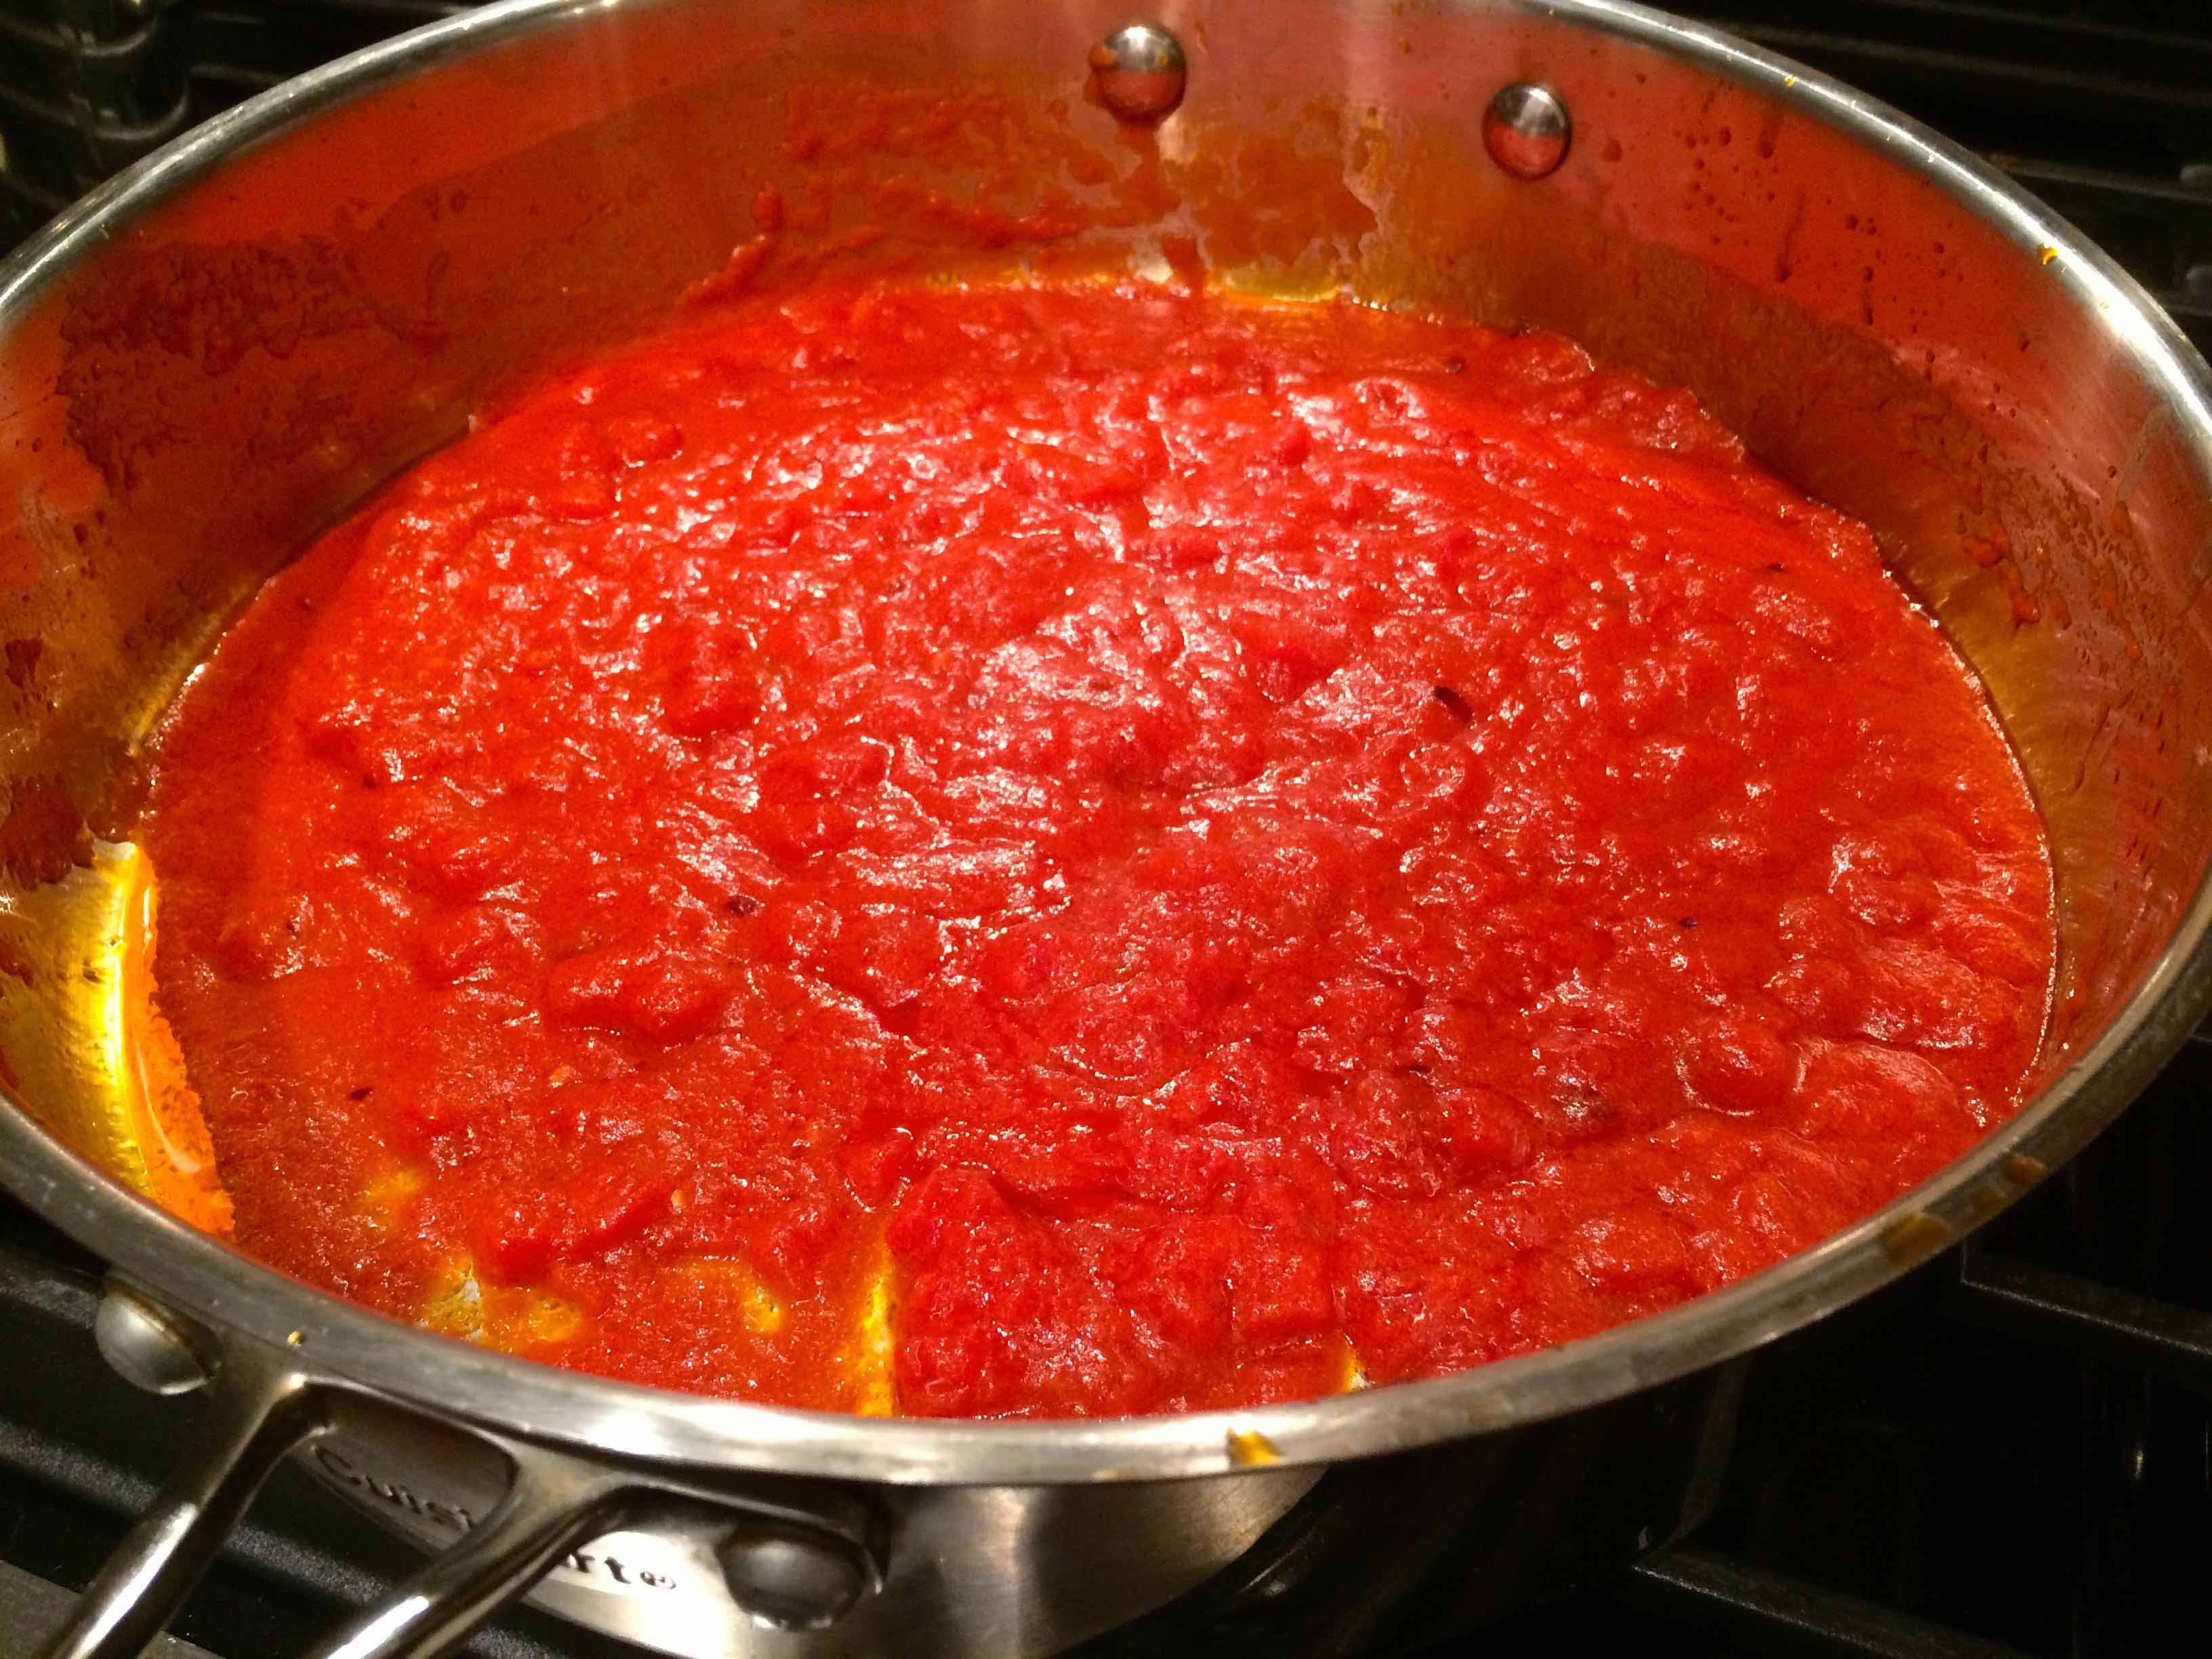
2. Add the tomatoes, the oregano, and the salt to taste and, with a wooden spoon, break up and coarsely crush the tomatoes. Increase the heat to medium high and simmer briskly, uncovered, for 5 minutes.

The sauce after 5 minutes

3. Reduce the heat to low, stir the calamari into the sauce and continue to simmer steadily, uncovered for about 30 minutes, or until the sauce has thickened and the calamari are tender. Some calamari may take longer to cook, in which case you may need to add a tablespoon or as many as a few tablespoons of water so the sauce doesn’t become too reduced.

The cooked calamari
The cooked calamari

4. Add the parsley and cook for another 15 seconds.

Cooked calamari with the parsley

Note: I added the parsley after transferring the calamari to a skillet for tossing with the pasta.

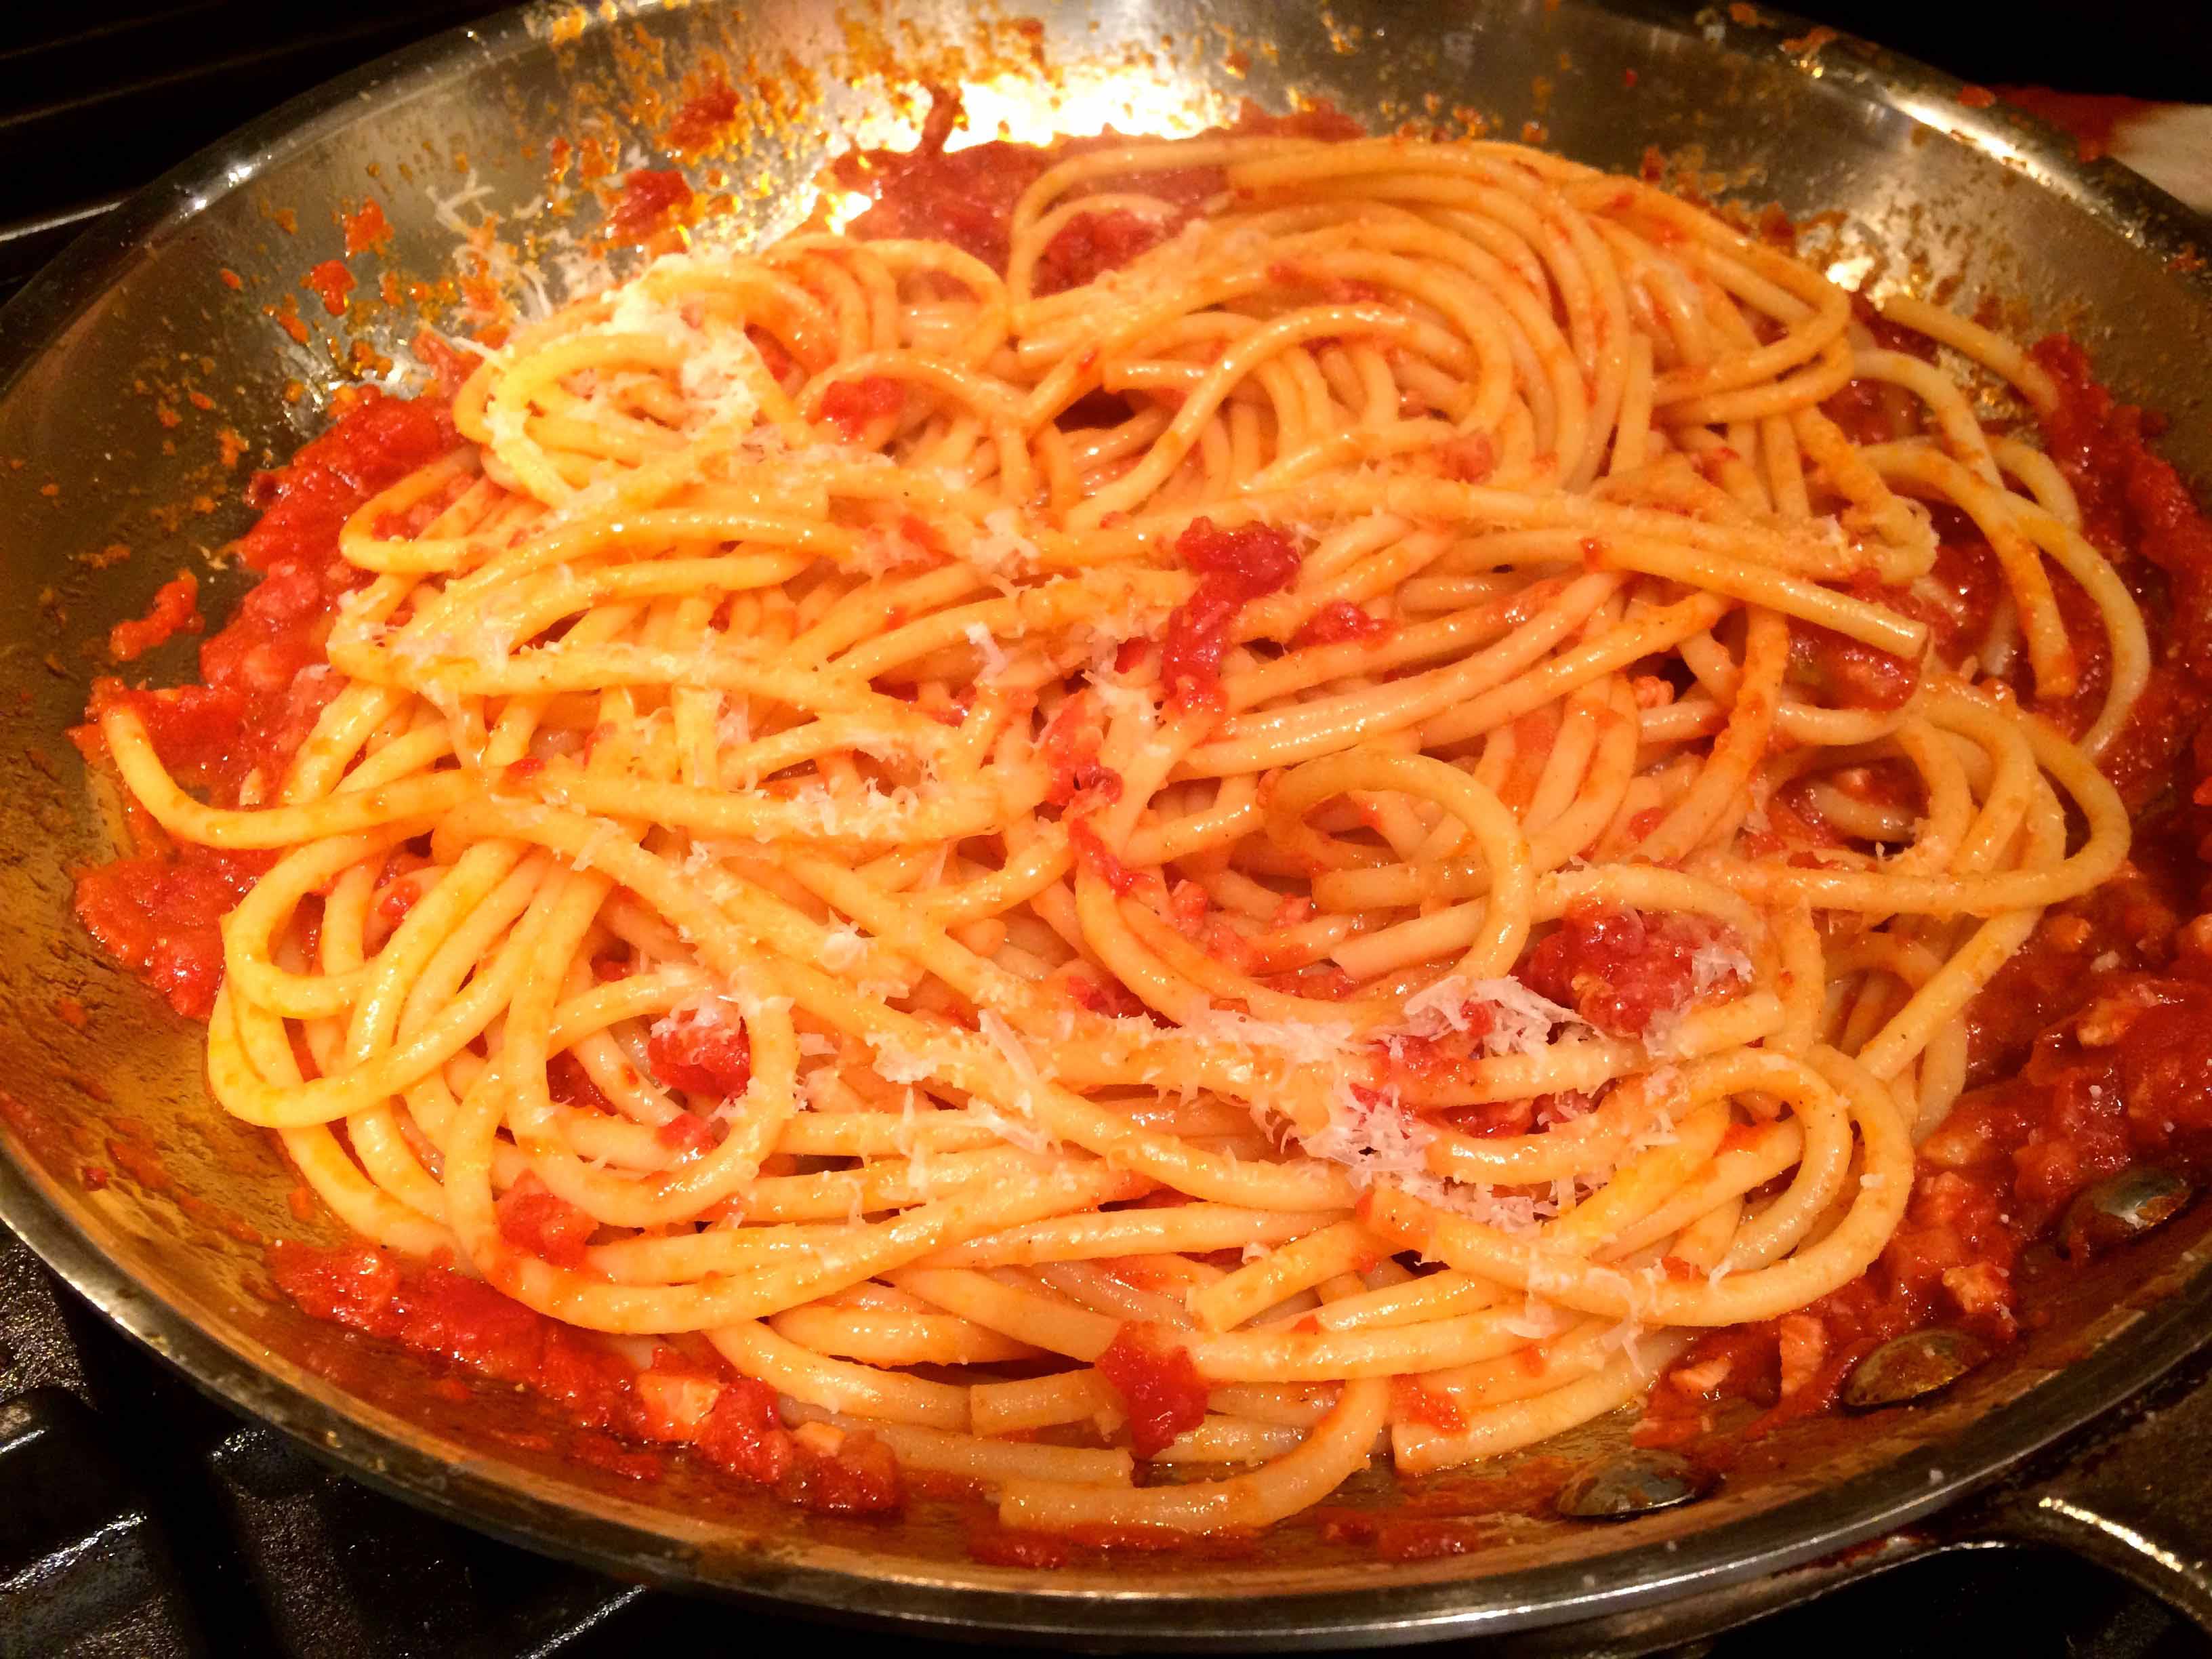
5. Serve very hot, as is, with bread, or over freselle, or, as I did, tossed with pasta.

Wine Pairing: Lacryma Christi del Vesuvio Rosso

Pasta with Swordfish and Cherry-Tomato Sauce

IMG_5635sm

When I saw this recipe in last month’s Bon Appetit magazine, I knew it wouldn’t be long until I’d make it. What most attracted me to it were the golden raisins and pine nuts, ingredients that, when paired with swordfish, whispered my mother’s native Sicily.

Finding a great piece of swordfish and some beautiful hot-house cherry tomatoes at the market yesterday reminded me of the recipe and so here it is. I followed all of the instructions but toasted the pine nuts ahead of time. I also decided to add some of the raisins and pine nuts to the sauce rather than sprinkling all of them on at the end. My only cautionary note would be to hold off on adding the 1/2 cup of pasta water at the end. Wait until you’ve almost finished tossing the pasta with the sauce. A tablespoon or two might be enough.

Pasta with Swordfish and Cherry Tomato Sauce from Bon Appetit August 2015

The ingredients
The ingredients

Ingredients (Serves 4)

3 tablespoons olive oil, divided (2 for the sauce; 1 for the swordfish)
4 oil-packed anchovy fillets
4 garlic cloves, sliced
½ teaspoon crushed red pepper flakes
2 pints cherry tomatoes, halved
Kosher salt and freshly ground black pepper
1 pound 1-inch-thick swordfish steaks
2 tablespoons pine nuts
12 ounces casarecce or other short pasta (I used strozzapreti)
½ cup chopped fresh parsley, divided
2 tablespoons golden raisins

Preparation

Heat 2 Tbsp. oil in a large skillet over medium. Cook anchovies, garlic, and red
pepper flakes, stirring occasionally, until anchovies disintegrate, about 3 minutes.

The garlic and anchovies

Add half of tomatoes; season with salt and pepper.

Cooking the tomatoes

Cook, stirring occasionally, until sauce thickens, 12–15 minutes. Add remaining tomatoes; remove from heat.

Thickening the sauce

Meanwhile, heat remaining 1 Tbsp. oil in a large skillet over medium-high. Season fish
with salt and pepper and cook until golden brown and just cooked through, about 4
minutes per side. Let cool slightly. Coarsely flake flesh; discard skin. (You may also want to remove the dark blood lines.)

Browning the swordfish

Toast nuts in a dry small skillet over medium-low heat, tossing often, until golden
brown, about 4 minutes. Let cool.

Cook pasta in a large pot of boiling salted water, stirring occasionally, until al dente.
Drain, reserving 1 cup pasta cooking liquid.

Add pasta and ½ cup pasta cooking liquid to tomato sauce and cook over low heat,
tossing often and adding more cooking liquid as needed, until sauce is thickened
and coats pasta. Add fish to pasta along with half of parsley and toss once to
combine.

Tossing the pasta
Tossing the pasta

Serve pasta topped with raisins, pine nuts, and remaining parsley.

Here’s a link to the recipe on Bon Appetit.

Wine Pairing: Grillo, Sauvignon Blanc, Torrontes

Timballo di Orzo or Cacciatore Redux

IMG_5344sm

Because I cook at home almost every night, our refrigerator is often at its max capacity. As I triage the remainders of meals gone by, tossing out wilted parsley, a shriveled zucchini, and sundry unidentifiable objects, I often find some salvageable items. Such was the case yesterday, when I discovered a couple of chicken thighs from Thursday’s cacciatore, a half a bottle of tomato passata from a pasta dish, a half of a smoked mozzarella along with some basil from Friday’s pizza night, and a small chunk of ricotta salata.

After I put these discoveries aside, I rummaged through my pantry to see if there was anything there I could use with them. When I saw a box of orzo and a canister of bread crumbs , I thought why not make a small timballo, in other words, bake the orzo along with the other ingredients.

I removed the skin and bones from the two leftover chicken thighs, pulled the meat apart, and placed it together with the sauce from the cacciatore into a 2.5 quart saucepan. To supplement the scant sauce, I added the half bottle of passata and some chopped basil to the pan, which I covered and placed on a low flame for about 20 minutes.

While the chicken and sauce were reheating, I cooked 8 ounces of the orzo until just a few minutes before it would reach al dente and then drained it well. Meanwhile, I cut the smoked mozzarella into chunks, grated the ricotta and some Parmigiano-Reggiano, and finally buttered an 8” x 8” baking dish, which I dusted with a couple of tablespoons of dried breadcrumbs.

After the chicken and sauce were fully reheated, I stirred in the orzo and let it cook for a few minutes so that it would be infused with the sauce. I then tasted it and adjusted for seasoning, with some salt and freshly ground black pepper.

I transferred half the chicken and orzo mixture to the baking dish and spread it into an even layer, which I then covered with half of the mozzarella, ricotta salata, and Parmigiano. I subsequently made a second layer with the remaining chicken and orzo, which I then topped with the remainder of the three cheeses.

I placed the baking dish into a preheated 375° F oven and baked it for about twenty minutes. When it was finished cooking, I removed the dish, tented it with some foil, and let it rest for about 10 minutes so that it would firm up a bit.

Finished timballo
Finished timballo

I must admit this dish was delicious and turned out far better than I had thought it would. (In fact, that’s one of the reasons I have no photos, as I usually do, of its preparation.) The pasta was richly flavored, the chicken succulent, and the melted cheese, creamy and piquant, tied everything together. Yet what was even more satisfying was being able to create this dish from what could have easily found its way into the trash. My frugal mother would have been proud.

Wine Pairing: Chianti, Merlot

Pesto

IMG_5202sm

Pesto.  I vividly remember my introduction to this unctuous blend of basil, garlic, pine-nuts and cheese. It was in the fall of 1959 and my aunt had returned home from a two-month vacation in Italy. Among the many things she brought back with her were two small green-and-gold cans of something called “pesto.” They looked so plain compared to the cases of wine, boxes of candy, and a plethora of colorful souvenirs.

When I asked her about the cans, she told me that they contained “pesto,” a sauce for pasta. Now mind you, in our home, any sauce for pasta was made from scratch. And my aunt, a talented cook, had quite a repertoire of them. “Sauce from a can?” I said. “Yes,” she replied, “you’ll be surprised how good it is.”

Back in the late ’50s and even through the ‘60s, pesto did not enjoy the popularity it has today. As a result, I had no idea what to expect when a few days later she decided to prepare the dish for our family. When she opened the can and I saw the dark green gunk, all I could say was “Yuck!” She emptied it into a bowl, tasted it, and said it needed some help. She pureed some fresh garlic, grated some pecorino cheese, and stirred them into the sauce with a little olive oil. She re-tasted the sauce and judged it acceptable. “Aren’t you going to cook it?” “No, she said, pesto is never cooked.”

I went back to my homework and when called to the dinner table, I saw this platter of spaghetti laced with a vibrant green sauce.The other members of my family shared my skepticism about this pasta. My aunt, refusing to acknowledge any of us, proceeded to portion out the pasta and distribute the plates.

I watched my family slowly twirling the green strands of pasta onto their forks. No one wanted to be the first to taste it. “Mmmm, delizioso,” said my aunt. I had to admit the aroma of basil, garlic, and cheese made it easier for me to take my first mouthful. “Delizioso!” I said and my aunt just smiled. Most of my family agreed, except for my father, who insisted it would be better with some tomato. Thereafter, whenever we had pesto, my father’s was dressed with a few thin slices of a peeled San Marzano tomato.

After her two cans of pesto were gone, my aunt decided to turn to her copy of Ada Boni’s Talismano della Felicita for the traditional recipe. Back then, before the pesto craze in the ‘70s, it was the only way we could enjoy it.

Over the weekend, I had purchased some basil and forgot about until the other night. It was too hot to cook, so I thought it would be perfect night for pesto. For years, I’ve been following my own recipe based on my aunt’s, but wanting to try something new, I turned to Mario Batali’s Italian Grill. His recipe uses a food processor as opposed to the traditional mortar and pestle, and I have to admit that I prefer the texture I was able to achieve with it. But when using a food processor, you must be careful not to over process. Stirring in the cheeses after processing the basil also makes for an optimal texture.

Pesto Adapted from Mario Batali’s Italian Grill (makes about 1 cup)

3 garlic cloves
2 cups lightly packed fresh basil leaves, washed and dried
3 tablespoons pine nuts
Generous pinch of Kosher salt
1/2 cup extra-virgin olive oil
1/4 cup freshly grated Parmigiano-Reggiano
4 tablespoons freshly grated Percorino Romano

With the motor running, drop garlic into a food processor to chop it.  Pulse until the garlic is finely chopped. Add the basil, pine nuts, and salt and pulse until the the basil and nuts are coarsely chopped and then process until finely chopped. Be careful not to over process.

With motor running, drizzle in the oil. If the mixture is too thick, you may need to add a little more olive oil.

Transfer to a small bowl and stir in both Parmigiano and pecorino.

The finished pesto
The finished pesto

(The pesto can be stored in a tightly sealed jar, topped with a thin layer of extra-virgin olive oil, for several weeks in the refrigerator.)

This recipe makes enough sauce for a pound of pasta.

Wine Pairing: Vermentino

Ricotta Gnocchi

ricotgn3sm

Whenever I approach my pasta board to make gnocchi, the Apollo 13 quote “Failure is not an option” comes to mind. But all too often, when faced with a dough that just won’t come together or with gnocchi as heavy as rocks, I tell myself “If at first you don’t succeed…” In my quest for perfect gnocchi, I’ve read endless recipes, watched numerous videos, and most recently attended a cooking class (a recent Valentine’s gift—was my better half hinting?)

I must admit that I have had some successful attempts, a few with potato gnocchi and some with those made with flour and water. And perhaps these successes were what motivated me to attempt ricotta gnocchi once again last night.

From my failures, I’ve learned that the key to pillow light gnocchi of any variety is using the minimum amount of flour. Too much flour will weigh down the gnocchi. For this reason, any recipe you use must yield to how the dough feels to your hand as you add the flour to the wet or moist ingredients. In the case of ricotta gnocchi, these are ricotta and egg.

The recipe I used called for 1 1/4 cups of flour for two cups of whole-milk ricotta and 2 large eggs.  The instructions suggested using a rubber spatula to blend in the flour in three parts. After adding the first third of the flour, however, I started to use my hands and bench scraper to work in the flour.

After the second third of the flour, the dough started to come together, so I went slowly with the last third, being careful to use a light touch and not overwork the dough. When i added the final third the dough was still a little moist. But rather than adding any more flour directly to the dough, I dusted my board with some bench flour and lightly rolled my ball of dough over it until the dough no longer felt sticky but was still soft and light.

Next comes cutting the ball of dough into quarters and rolling each quarter into a dowel or log that’s 5/8 inch in diameter. Here it’s important that your board  is scraped clean and dusted only  lightly with bench flour. Your hands also need to be clean—free of any dough. Also use the palms of your hands as opposed to your fingertips to roll out even logs of dough.

Cut raw gnocchi
Cut raw gnocchi

I like my gnocchi on the smaller side so I cut each log into 1/2 to 5/8-inch pieces.

I line a sheet pan with parchment paper and dust it with semolina flour to hold the cut gnocchi. The semolina keeps the cut pieces from sticking to each other.

Cooking is fast and simple. I use a squat 8-quart pot with heavily salted boiling water. Gently slide the gnocchi into the boiling water and cook for about 2 minutes, by which time they should have risen to the top. Using a spider or slotted spoon, I transfer the cooked gnocchi to a skillet with the heated sauce and gently toss.

ricotgn2sm
Cooked gnocchi waiting to be tossed

For the sauce, I used a variation on that included with the recipe, substituting a passata for the whole plum tomatoes and omitting the garlic.

To sum up, when it comes to making gnocchi, you need to rely on your hands to feel the dough to judge the optimum ratio of dry to wet, when you’ve used no more flour than is necessary to form the perfect dough. I guess ending on one more adage won’t hurt: practice makes perfect.

Meatballs

meatballssm

One of my fondest childhood memories is how my Neapolitan aunt Carlotta used to sneak me a meatball before I went to Sunday mass. She would start her sauce early in the day and the aroma would always wake me up—always earlier than I wanted. I would go downstairs to the kitchen, where she would be enjoying her morning espresso while her sauce simmered away. While I had breakfast, she’d let me taste the sauce on a crust of Italian bread and I would start longing for our Sunday afternoon dinner, which wouldn’t be served for at least another 7 hours.

After breakfast, I’d watch some television or read the Sunday comics and then return upstairs to get dressed for church. During this time, my aunt would still be in the kitchen cooking, often joined by mother, and they would work on the dinner until they would leave for a later mass than mine. Children’s mass was always at 9.

When I got back downstairs with only minutes to spare before I had to go—no run—to church, my aunt would whisper: “Roland, have a meatball.”

“But I can’t, I’m taking communion this morning.” (Church law had us fasting for at least an hour before the sacrament.)

“Nonsense,” she would say. “How could God mind just a taste? It’s our secret.”

And so I tasted and enjoyed. (Eve’s apple couldn’t have been more tempting.) And with my aunt’s wink of absolution, I’d run off to mass.

It was this remembrance that inspired me to make my aunt’s meatballs for supper yesterday. As she never used or wrote a recipe for them, I have to rely on my memory of watching her make them. There were just a few ingredients, but they were always so flavorful and so unlike those “spicy meatballs” made famous by the Alka-Seltzer commercial.

Zia Carlotta’s Meatballs
Ingredients
2 slices high-quality white bread, crusts removed
1/2 cup milk
1 pound ground chuck beef (20% fat)
1 large egg, lightly beaten
1/2 cup Pecorino Romano cheese
1/4 cup raisins
1/2 clove garlic, minced fine
1/4 cup Italian parsley, chopped fine
1/4 tsp fresh ground nutmeg
Salt and ground black pepper to taste
Olive oil for frying
Homemade tomato sauce (I use Marcella Hazan’s Tomato Sauce with Onion and Butter)

Directions
Soak the bread in milk for 10 to 15 minutes.

Using you hands, thoroughly squeeze the milk out of the bread. Discard the milk and reserve the bread.

In a large bowl, gently combine the beef, egg, cheese, raisins, garlic, parsley, nutmeg, salt and pepper. Add the bread and, using your hands, combine with the other ingredients until evenly distributed. Be gentle and do not overwork the mixture. Overworking the mixture will make your meatballs heavy.

Using wet hands, shape the mixture using your palms to create balls that are approximately 1.5 inches in size. You should have about 12 meatballs from this recipe.

In a skillet large enough to accommodate all of the meatballs in a single layer, add olive oil to approximately a 1/4 inch depth. Heat over medium heat. Carefully add the meatballs and fry turning occasionally until browned all over. About 10 to 15 minutes.

Using a slotted spoon, transfer the meatballs to a platter layered with paper towels to drain excess fat.

In a pot large enough to accommodate the meatballs, bring your sauce to a gentle simmer. Transfer the drained meatballs to the sauce and cook over low heat for another 10 minutes or so until cooked through.

Serve with spaghetti tossed with the sauce from the meatballs and sprinkled with grated Romano.

Wine Pairing: Chianti Classico

Pasta dal Frigorifero

amatplatedsm

Cold snowy nights and long-delayed trains after a challenging work day may provide a sufficient excuse to forego food shopping and go directly home. As for dinner, however, this choice leaves one to rely solely on what’s on hand in the pantry and fridge.

Such was the case earlier this week when I prepared what I’ve chosen to call “pasta dal frigorifero.”   After looking through our fridge, I came up with a cup and half of Marcella Hazan’s tomato, onion, and butter sauce, a package of diced pancetta that was about to expire, and a close-to-empty tube of tomato paste. Our pantry serendipitously provided box of bucatini, along with staples like olive oil and crushed red-pepper flakes, for which I decided to prepare a sauce from what I had found in the fridge.

While purists may frown on my likening this dish to the classic Roman all’ Amatriciana, I have to say it at least made me think of it. 

Pasta dal Frigorifero

2 tablespoons extra-virgin olive oil

4 ounces diced pancetta

crushed red-pepper flakes to taste

freshly ground black pepper

1 tablespoon concentrated tomato paste

1.5 cups leftover tomato sauce (a plain sauce with good onion flavor like Hazan’s is perfect)

8 ounces bucatini or spaghetti

Pecorino Romano

In a large heavy-bottomed skillet, heat the oil. Add the pancetta, red-pepper flakes, and black pepper. Cook over medium-low heat until the pancetta has rendered most of its fat. About 10 minutes.

Rendering the pancetta

Add the tomato paste and cook stirring for about 2 minutes, stirring to lightly toast the paste.

"Toasting" the tomato paste
“Toasting” the tomato paste

Add the leftover tomato sauce, reduce the heat to low, and cook for 5 to 10 minutes, until the sauce comes to steady simmer.

Simmering the tomato sauce

Meanwhile cook the pasta in well salted water.  About a minute before the pasta reaches the al dente stage, transfer it with tongs to the skillet with the sauce. Still over low heat, toss the pasta in the sauce until it is nicely coated for about a minute more, letting the pasta reach al dente. If the sauce is too thick you can use a tablespoon or two of the pasta water to thin it.

Tossing the pasta with the sauce

Off the heat, sprinkle with grated Pecorino Romano.

Wine Pairing: Montepulciano d’Abruzzo

Reflections on Fresh Pasta

fettucine1
Every time I make home-made pasta, I ask myself why I don’t make it more often. Nothing comes close to the flavor and texture of these fettuccine, made from just two ingredients: flour and eggs.

Granted, it may take a few attempts before you master making the dough, but even if you fail miserably and your dough simply won’t come together, your loss is minimal: a cup of flour and two large eggs (the proportion I typically use following Marcella Hazan’s instructions in her Essentials of Classic Italian Cooking)

But the first time you’re successful, you’ll feel it in your hands after about 8 minutes when the dough is, according to Hazan, as “smooth as baby skin.”

Rolling out and cutting the dough has been made easier with the hand-cranked pasta machine and, if you’re lucky enough to have a KitchenAid stand mixer, their pasta roller/cutter attachment frees up both hands for the process.

My favorite sauce for fresh pasta also comes from Hazan and, like the pasta, it calls for just a few ingredients: tomatoes, butter, onion, and salt. Cook everything over low but steady heat for 45 minutes, taste for salt, and discard the onion.

But fresh pasta is so good, it can be enjoyed simply just with butter and Parmigiano Reggiano.

If you’ve always wanted to make fresh pasta at home but have been afraid to try, my advice to you is: just do it.

Pressure Cooker Meat Sauce with Rigatoni

pcpasta2sm

As some of you may know, I’m a fan of the pressure cooker for weeknight suppers—especially when getting home after 7. It allows me to prepare comfort food quickly and with minimal effort. Nevertheless, I have shied away from using it for pasta dishes, until I came across a recipe titled “Weeknight Meat Sauce with Rigatoni” in America’s Test Kitchen’s Pressure Cooker Perfection with a cooking-under-pressure time of 5 minutes.

What appealed to me most about the recipe was that, unlike so many that abound for pressure cooker pasta, it wasn’t loaded with cheese and seemed to allow for an al dente pasta by finishing its cooking without the lid after the steam was released.

I’m sure that my purist friends will balk at this recipe and may question my loyalty to authentic Italian cooking.To them, I must concede that the end product of the recipe has far too much sauce for my liking. Indeed, it calls for 28 ounces of crushed tomatoes, a 14.5 ounce of can diced tomatoes drained, and 1 tablespoon of tomato paste.  Moreover, I was disappointed that it uses oregano and red-pepper flakes while its introduction claims its goal was a “sauce with the flavors of a Bolognese” is misleading.

pcpasta1sm
The ingredients

Despite these weak points, I was pleased with how this dish turned out. Cremini  mushrooms, which were browned along with chopped onion, were a nice complement to the ground beef, adding to the meatiness of the sauce. I also added some ground nutmeg to the browned meat as I do when preparing a traditional ragù Bolognese.

Although I know I will never achieve the heights of a true ragù, I plan to experiment with this recipe after the holidays, using more traditional ingredients and definitely far less tomato.

An  adaptation of the original recipe can be found here: http://www.comfycook.com/2014/05/weeknight-meat-sauce-with-rigatoni.html

Wine Pairing: Vino Nobile di Montepulciano

Penne all’Arrabbiata

penarabplatedsmall

At least once a week, especially on those nights that time is limited, we enjoy pasta as a main course. Of course, we have our favorites, but once in a while, I like to try something new. Recently, I’ve started getting the Cooking Newsletter from New York Times and this is where I came across Mario Batali’s recipe for a Roman classic: Penne all’Arrabbiata, or “furious penne.” As its name might lead you to believe, this is a spicy dish and the spice, or “fury” comes from one source: dried red pepper flakes, or peperoncini.

Batali’s recipe calls for a tablespoon of hot-red pepper flakes, but as I use the Calabrian variety, which I believe are considerably hotter than most, I reduce this amount considerably. But let your own palate be the judge. It also calls for 1/2 cup of tomato paste, which is toasted briefly with the peperoncini in olive oil. This makes for an intense tomato flavor, especially if you use the concentrated Italian variety that comes in a tube.

Like many of Batali’s dishes, this pasta is finished with an additional 4 tablespoons of extra-virgin olive oil that contributes a silky texture to the sauce.

I urge you to make this recipe; it’s simple, quick, and well, just delicious.

1. Toast the tomato paste and peperoncini:

Toasting
Toasting

2. Add the chopped tomatoes and remove from heat:

With the chopped tomatoes

3: Add the cooked pasta, some reserved pasta water, and toss over medium heat. Finish with olive oil.

The finished pasta
The finished pasta

Wine Pairing: Frascati, Montepulciano d’Abruzzo